remember when i showed you this picture last week? i got this baby off Craigslist….
 and i just knew she had some potential!
 i went back and forth on whether or not to buy her, but the possibility of this extra storage was just too much to pass up!
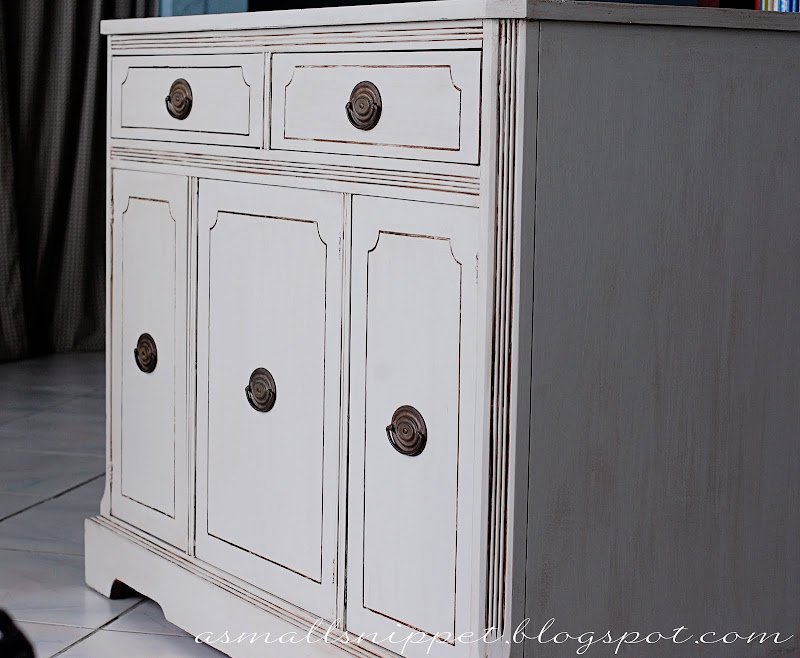
 she now holds all of our games:
 and cards:

i tried my hand at glazing for the very first time, and i am SO pleased with how it turned out, and how simple it really is to glaze furniture.
 so…in case you ever wondered how one might glaze a piece of furniture, i figured i’d give you a little tutorial!
i’m no expert…y’all know that! but i’ll show you what worked for me!
first things first…i needed to fill in all the deep scratches and dings with some wood filler, cause this piece had a rough life before i got to her, and had the scars to prove it!
 i then sanded the piece just enough to rough up the surface. in other words, i didn’t spend a lot of time sanding! always a plus!
i primed it using an oil based primer made by Kilz. a water based would work too. i just happend to have an oil based on hand. (don’t worry…i opened up our entire back wall of sliding glass doors to eliminate the fumes!)
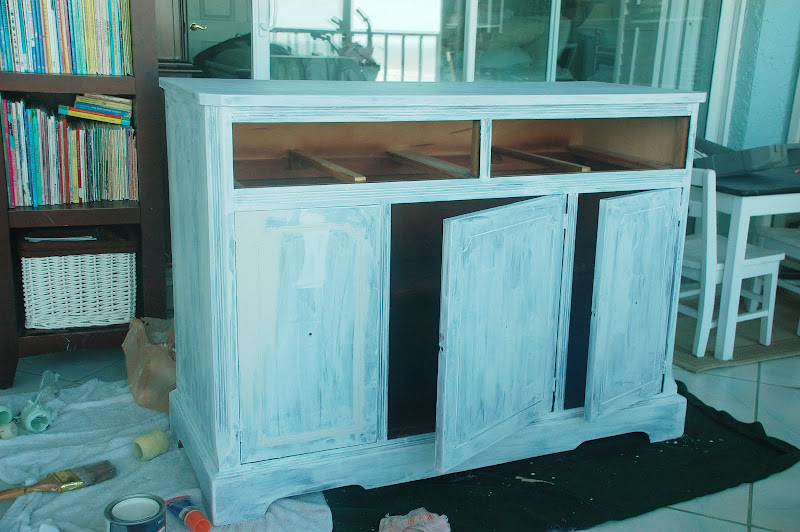 i then applied the first coat of paint. i left the inside untouched, cause in my opinion, painting the unexposed inside of furniture is a waste of time and supplies
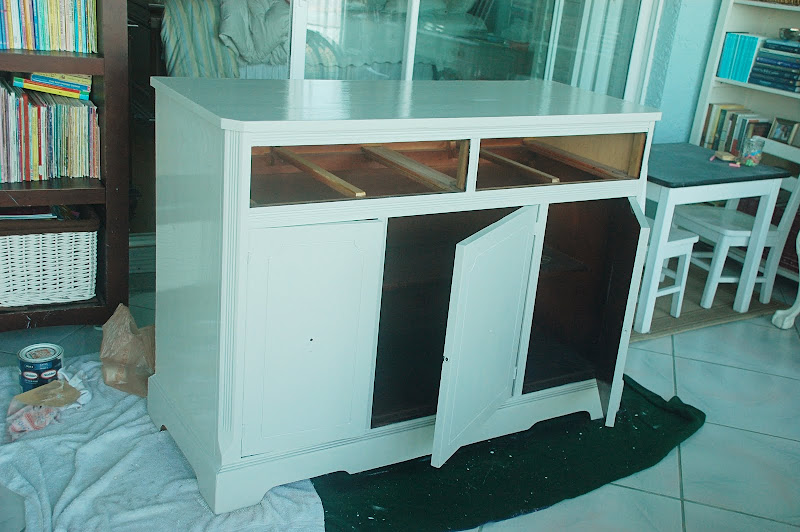 the paint color i used was Martha Stewart’s Bedford Gray, (you might remember that color from here). i did have the paint department lighten it by 50% though. i was going for a very light gray and was very happy with the final color.
 after the final coat of paint (i used two), and an overnight dry, i gathered my glazing supplies:
a bucket of water
a bunch (and i mean a bunch) of clean rags or old t-shirts or sheets
water based stain (i’ve also heard you can use paint)
glaze (untinted)
a disposable cup and spoon
 i used a walnut colored stain, and mixed it with some glaze.
 stir it up and keep adding stain until you get the color you want. i actually made it quite a bit darker after i took this next picture. i was going for a deep brown:
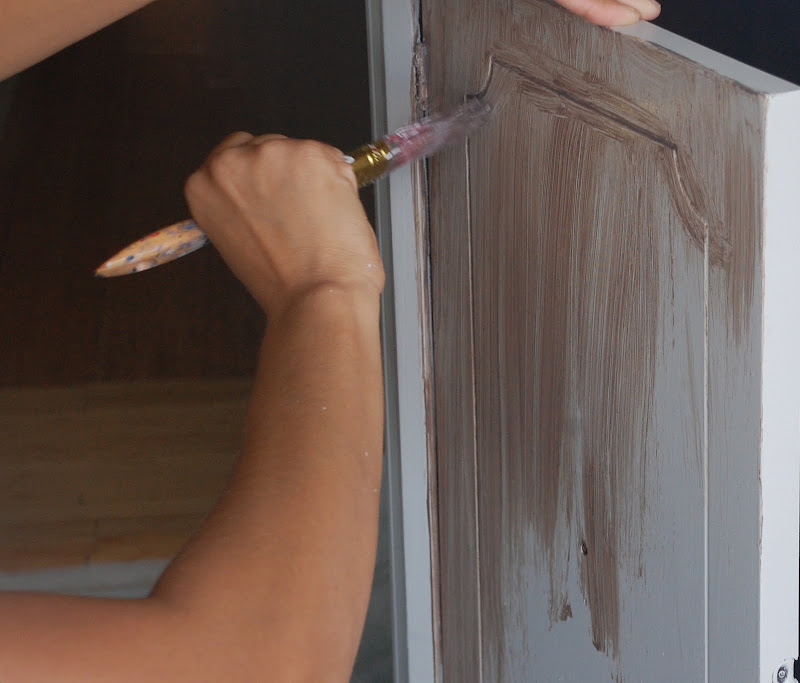
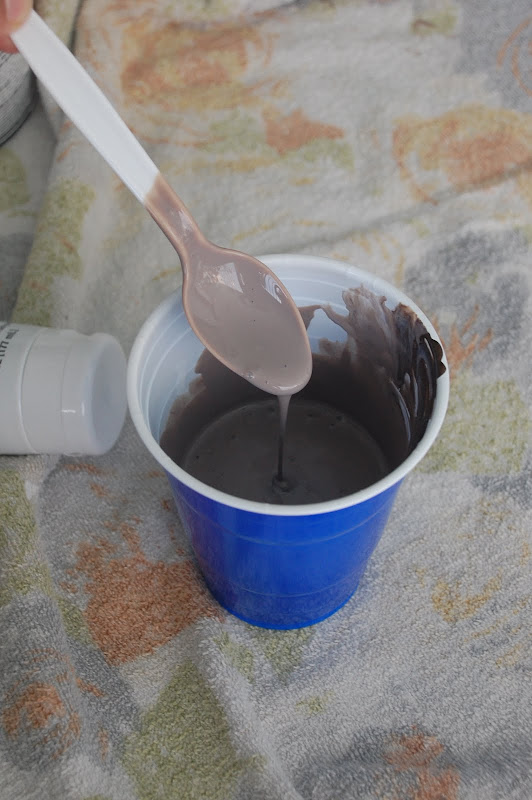 once your glaze is mixed, start brushing it on. i worked in sections:
 make sure to get a good amount of glaze in all the nooks and crannies, but brush glaze over the entire piece, not just the detailed parts:
 dampen a rag, making sure to squeeze out as much water as possible:
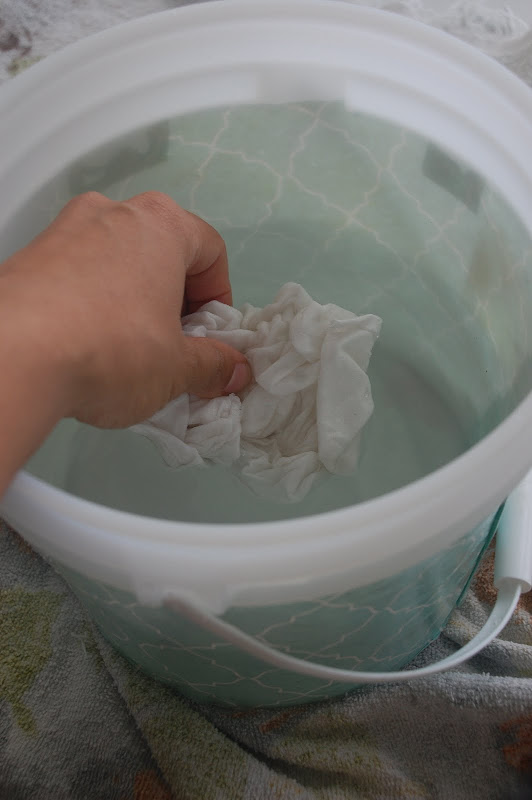 and start wiping off the glaze. you can wipe off as much or as little as you’d like. i wanted a lot of glaze in the detailed parts of the piece, but just enough glaze on the other flat parts to lightly show through. i found that if i went in long swoops along the grain, i liked the end result better. be gentle around the nooks and crannies, cause you want the glaze to stay in those parts. you’ll want to switch out rags and rinse them out often to avoid putting old glaze back onto places where you are trying to take glaze off! i used a combination of wet and dry rags to achieve my desired look.
 i kept repeating that process in that same area until i achieved the look i was going for. can you see the difference? its subtle, but once the whole piece is done, it really adds life and dimension!
 move onto other parts, and do the same thing.
 you have some time before the glaze dries to really play around with it to get the look you want. at times i moved on to another part, only to look back and wish that i had evened out the glaze more, so i just used a damp rag and some elbow grease and i was usually able to move around the glaze even after a little bit of time had passed.
see the difference when that glaze is in all those detailed parts of the furniture?
 it really makes the details pop:
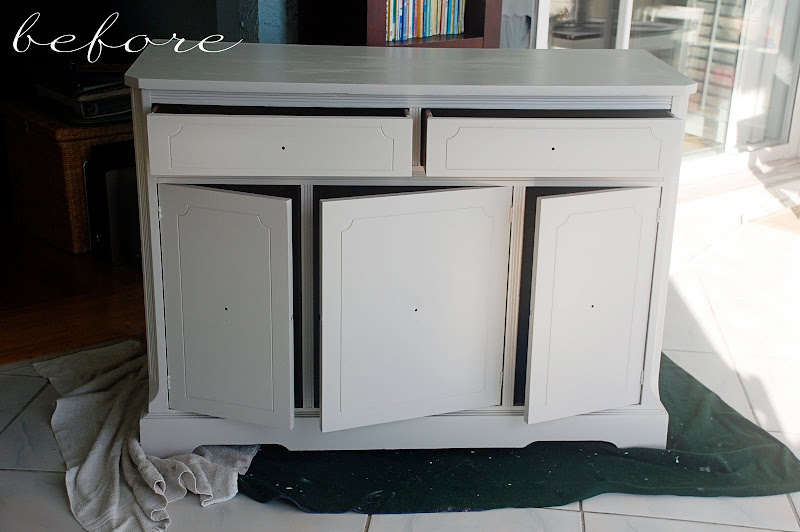
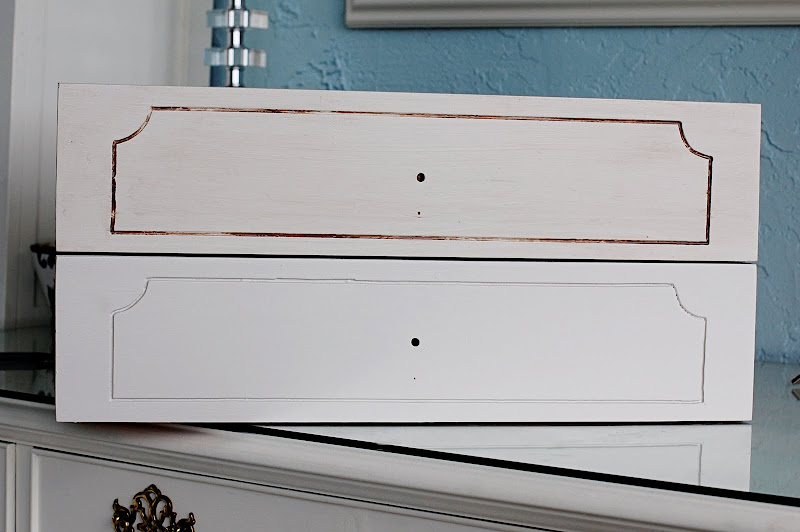 here’s a before picture of the painted piece, before glazing:
 and after glazing:
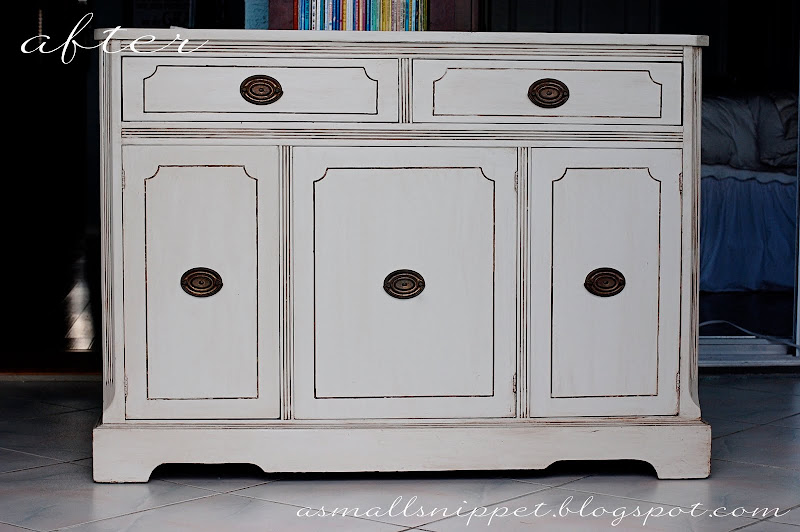
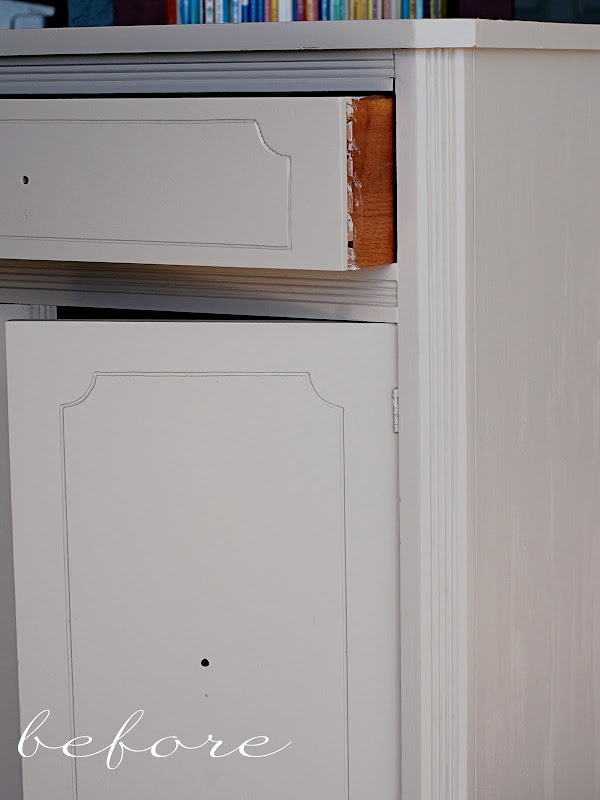
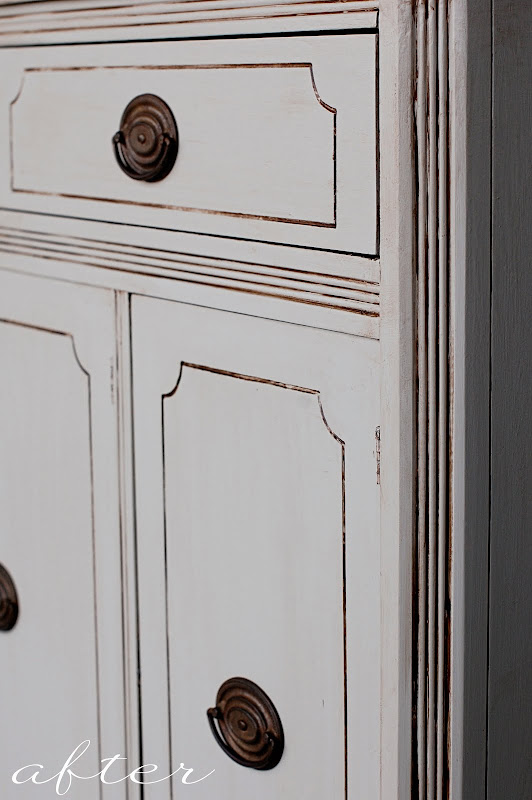 the perfectionist in me struggled at first, because i couldn’t get the glaze even or perfectly matched. but then i realized that this project is supposed to be imperfect! that’s what adds to the character of the piece. once i got over that, i really enjoyed the process!
 since i’m on a roll, and i have all the supplies already, i’m thinking about tackling this big boy next:
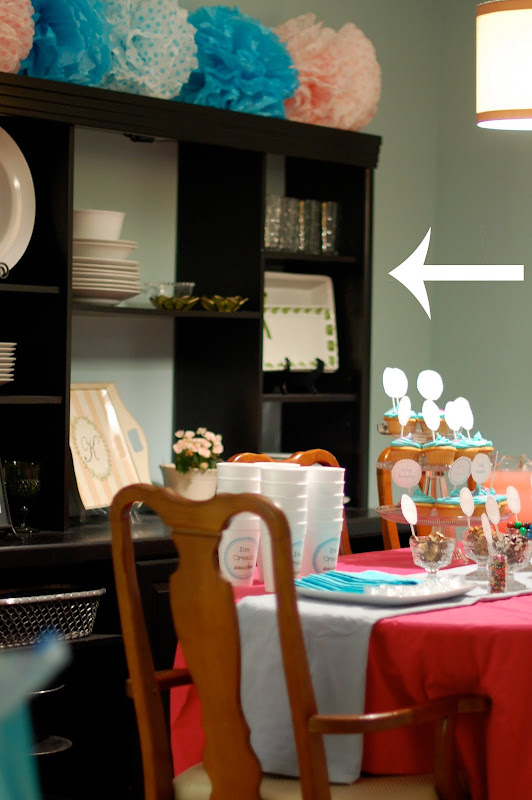 i’ll be sure to let you know how it goes!
i spent a lot of time researching how to glaze furniture, and there are alot of different techniques. i was so intimidated at first, but now i’m realizing that i should’ve jumped in long ago. so if you are like me, and thinking that this is something you could never attempt, please let me encourage you to go for it! its SO super easy, and it gives your pieces a unique, antiqued look.
now…GO GLAZE!  and then come back and tell me all about it!
 it might’ve been cute
  but at least it proves that i really was present! and with all that blur…i don’t have to do one bit of photoshopping! j/k
 in case you missed it or you are new around here, check back on this post to see the full how-to and the link where i originally found this fantastic idea!
 in case you missed it or you are new around here, check back on this post to see the full how-to and the link where i originally found this fantastic idea!
 the felt was actually still very sticky even after being stored for a year, but we did have to use some double sided tape on a few pieces to keep them in place:
 the crazies got right to work:
 the crazies got right to work:
 and this project went so quickly that they didn’t even have time to lose interest, which typically happens whenever i try to include them in a craft project, after say…oh…

 our pumpkin friends:

 our pumpkin friends:


 Follow


