Jul

29

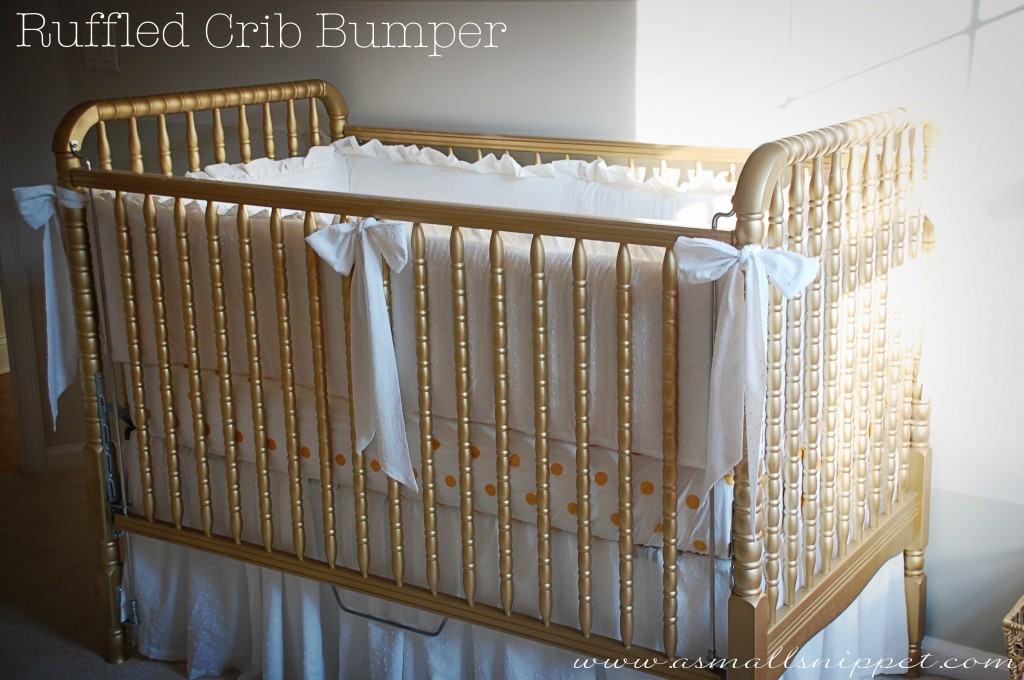
Ruffled Crib Bumper

if you know me at all, or have been around the blog for a while, then you know i have a thing for rufflesruffles…more ruffles.

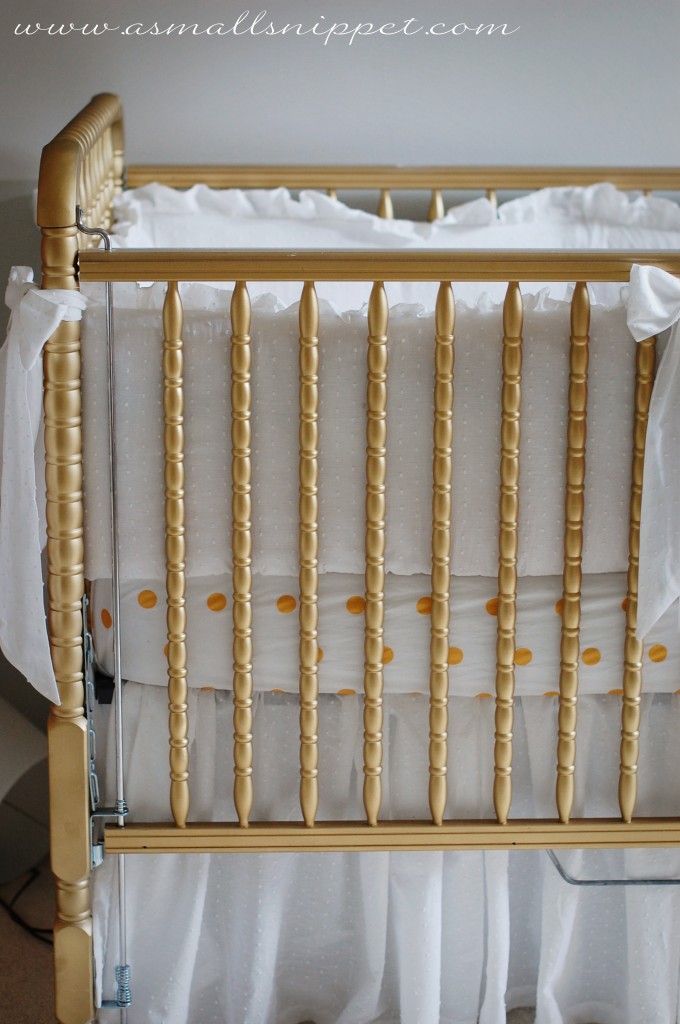
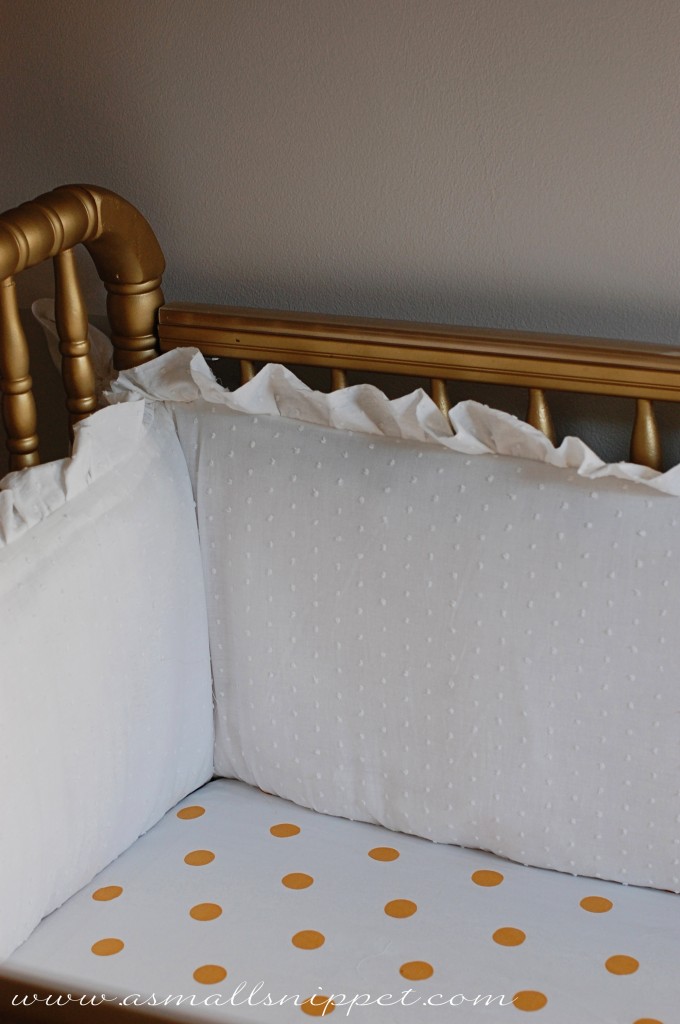
so when planning the bedding for this nursery, i knew i wanted it to be simple and white, but i knew that i wanted to add details like ruffles and big bows.  so i came up with this design, and thought some of you might want to see the tutorial to make your own.

what you’ll need:

(my finished bumper was 12 inches high, with a 2 inch ruffle)

– Fabric of your choice:  (pre-wash it after purchasing it)
i bought 12 yards of 54 inch fabric to make both the crib bumper with a ruffle and large bows, as well as a ruffled crib skirt.  i had only about 1 yard to spare after i was finished with both projects.

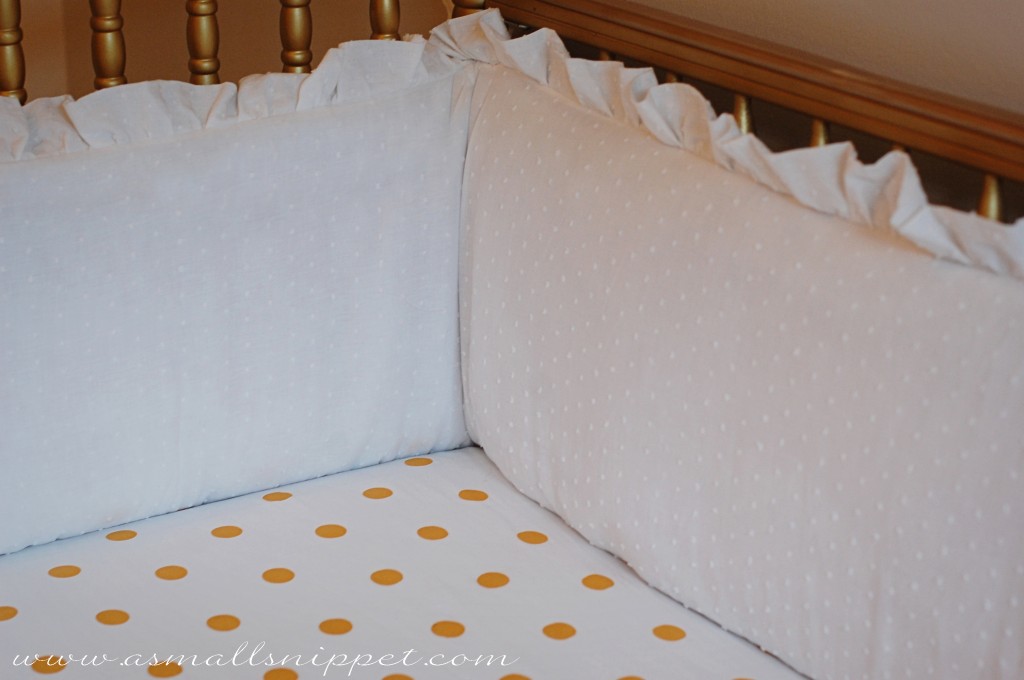
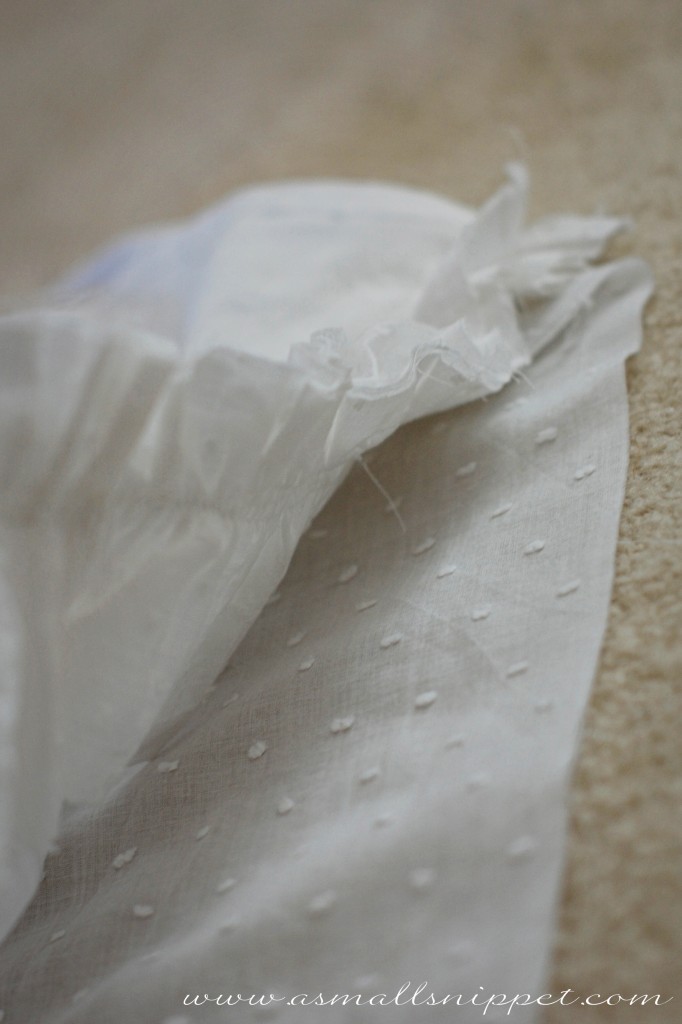
the fabric i used was this white swiss dotted cotton, and i bought it online from Hancock Fabrics.  even though it says to hand wash, i pre-washed it in the washing machine, and then hung it to dry.

– coordinating thread

– an existing bumper in the size and shape you like

– and/or enough batting to achieve the size and shape you like

i found this bumper at GoodWill for a few bucks, and it was about the size i wanted, so i bought it and recovered it, saving a lot of time and money.  if you can recover an existing bumper, it makes this project a lot easier.

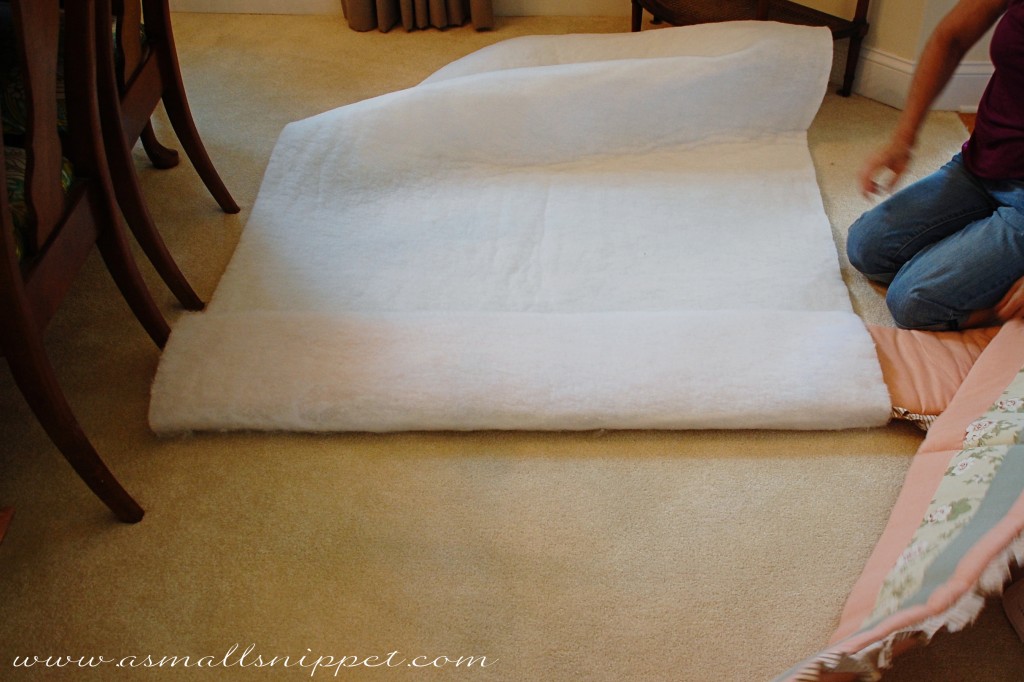
i wanted the bumper to be a bit fuller, and i also needed to cover over the pattern so it wouldn’t show through since i was using the thin white swiss dotted fabric, so i bought batting to cover the bumper.  i bought it off a roll by the yard at Joann’s, and it was about 1 inch thick.  the amount you need will depend on the size of your bumper and how wide the batting is.

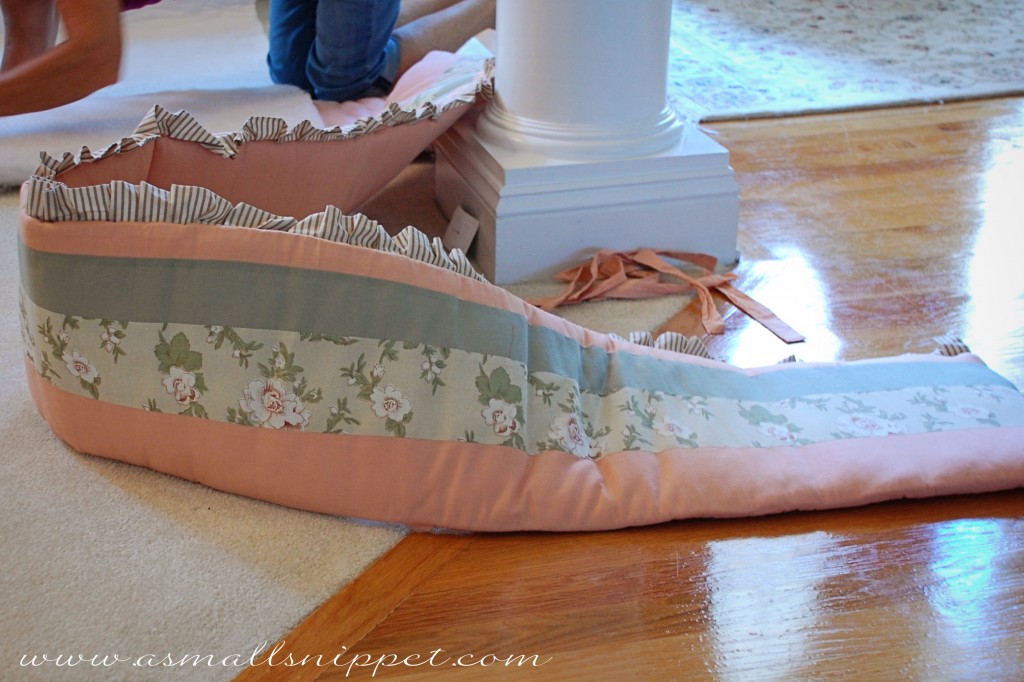
Wrap your batting around the bumper, and cut strips.  piece it all together until the entire bumper is covered.  i tightly hot glued the raw edges of the batting together on the underside of the bumper once wrapped to keep it all enclosed.

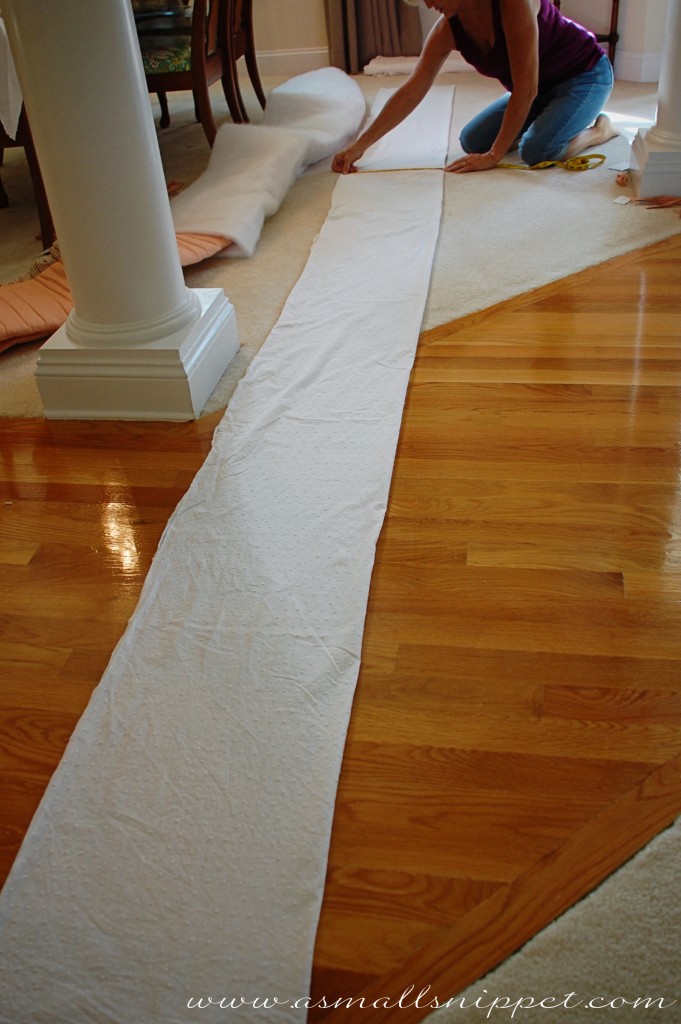
you want to cut your fabric to cover the bumper.  i cut the fabric into one long strip the same length as my bumper (plus seam allowances on the ends) because i didn’t want seams within the bumper itself.  since my bumper was about 4.5 yards long and i wanted it to be 12 inches high (without the ruffle), i cut one continuous piece of fabric to 4.5 yards, or around 162 inches.  i then cut that piece in half (from 54 inches wide to 27 inches wide) and then i cut one of those pieces in half again, leaving me with 2 final strips of fabric that were 4.5 yards long by 13.5 inches high.  that 13.5 inch measurement worked well for my math, and would give me enough room for a seam allowance.  (the leftover 27 x 162 inch piece can be used for the crib skirt…that tutorial is coming soon!)

at this point, i ironed my panels so they were nice and smooth.

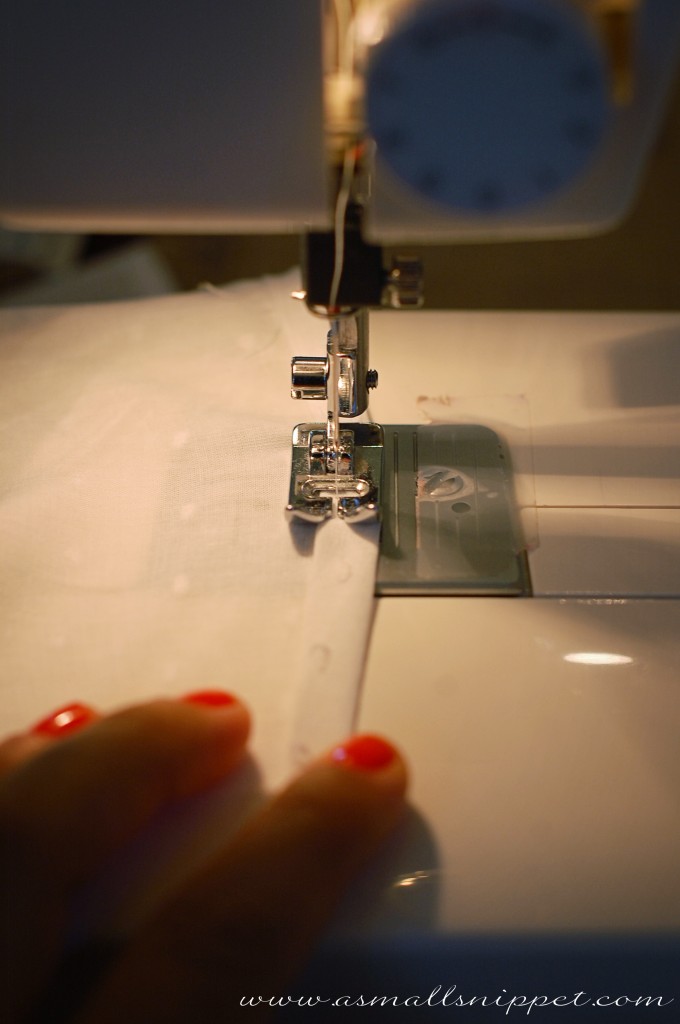
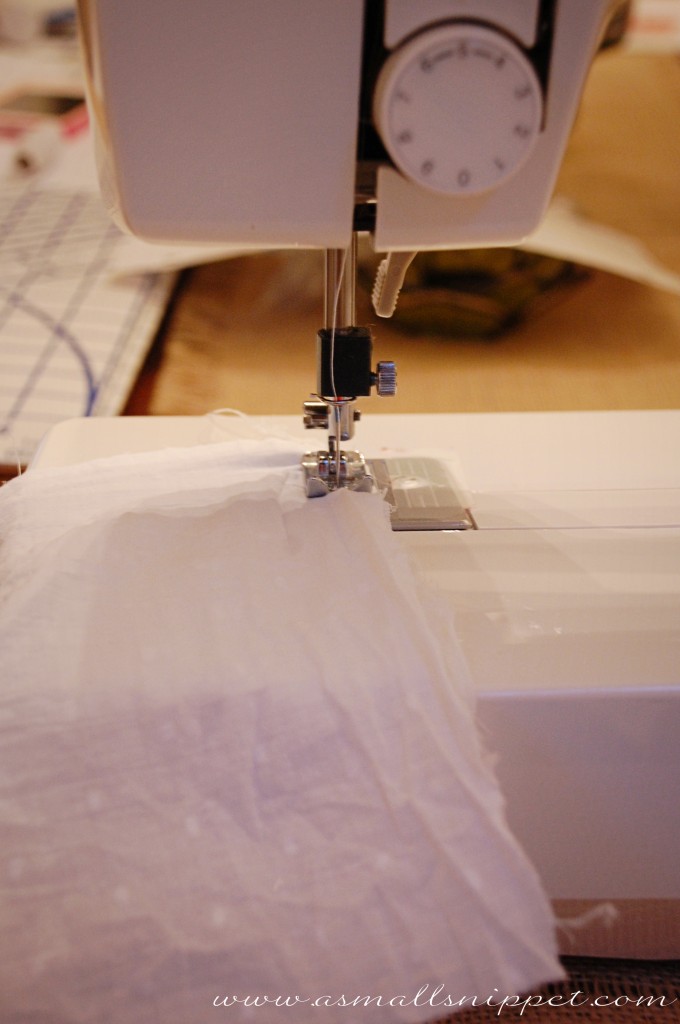
then take the 2 short ends of each 162 inch x 13.5 inch panel, and fold and iron down 1/4 inch, and then another 1/4 inch to seal in the raw edges.  do this on all 4 short ends, and sew:

next, you will need to cut your fabric for your ruffle.  i wanted my finished ruffle to be about 2 inches high.  so i cut my finished ruffle piece to 7 inches wide/high (that would allow me to fold the piece in half, giving me plenty of room to create the ruffle, and still have room to attach the ruffle to the bumper…you’ll see what i mean in a minute) and 11.25 yards long, because in order to ruffle, it needed to be 2.5 times the length of the bumper.

let me go over those measurements again so they make sense:
the bumper length is 4.5 yards, or 162 inches.  162 inches times 2.5 (so it would be a nice, full ruffle) is 405 inches, or 11.25 yards.  that is the final length i would need for my ruffle to be full.  to achieve that length and best utilize my fabric, i cut 6 (2yd) pieces.  (so i ended up with a little more than 11.25 yards, but it doesn’t need to be exact since its going to be ruffled, and those measurements made it easier to figure out and cut.)

i decided to cut it to 7 inches high because i envisioning a 2 inch high ruffle, but wanted to be sure to give myself some room in case i wanted to adjust that.  i was going to be folding the piece in half before ruffling, to 3.5 inches, and then i needed space to run a few lines of elastic thread, and then i needed to make sure i had a seam allowance to attach to the bumper later on.  7 inches was more than i needed (you could cut it to 5-6 inches for a 2 inch ruffle) but i wanted to be sure i gave myself enough room to adjust the ruffle size if needed.

so really my final ruffle piece, once sewn all together, was 12 yards long, by 7 inches high:

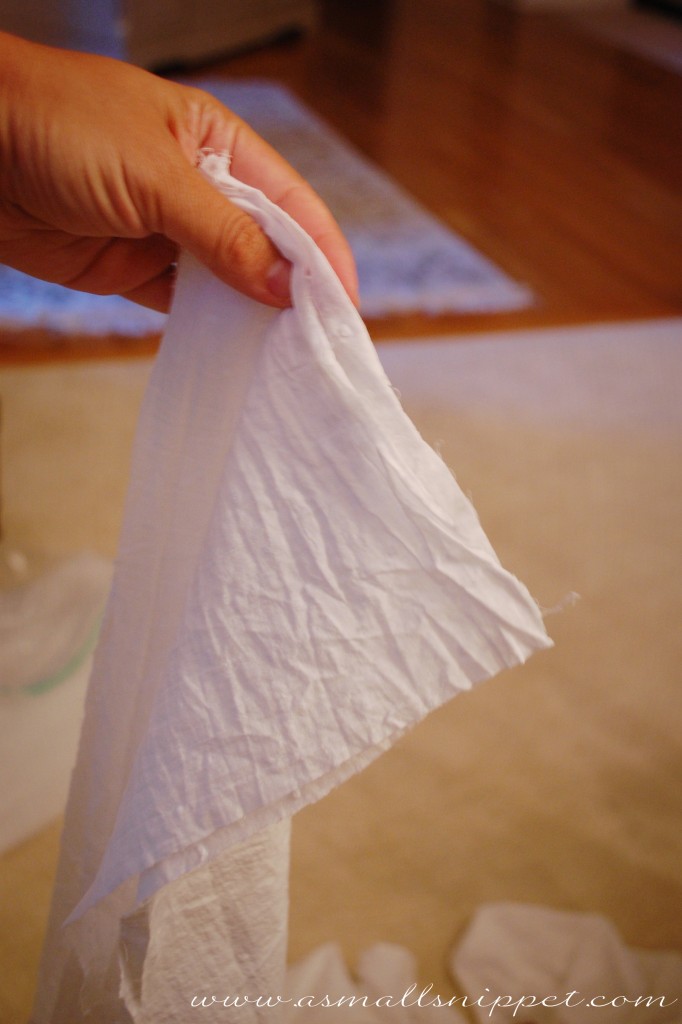
i took all 6 of my ruffle pieces, and placed the short ends right side together:

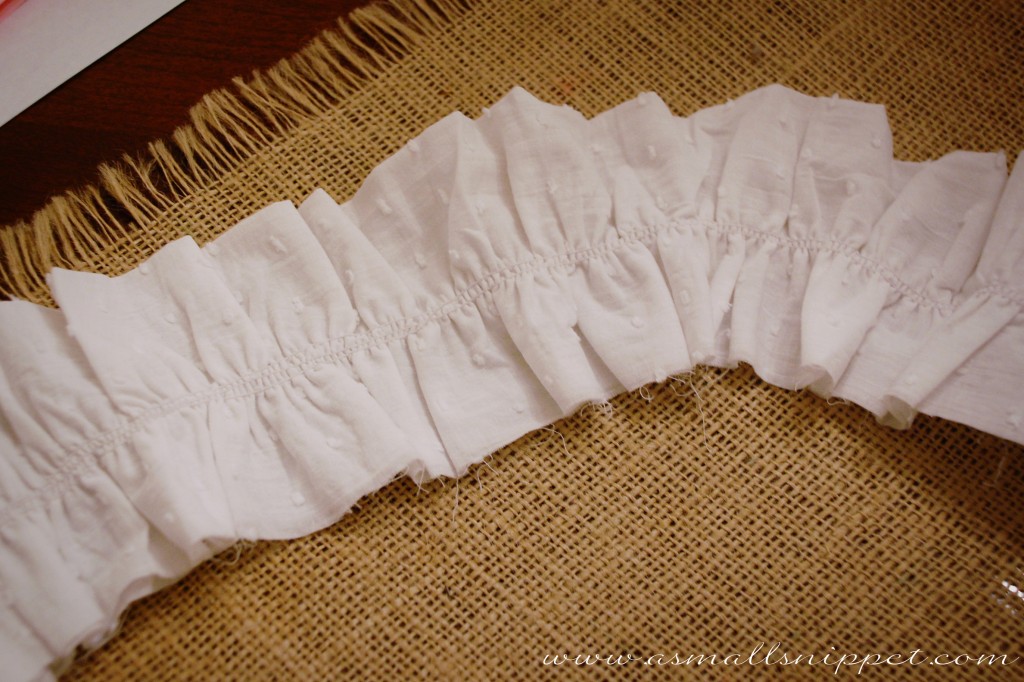
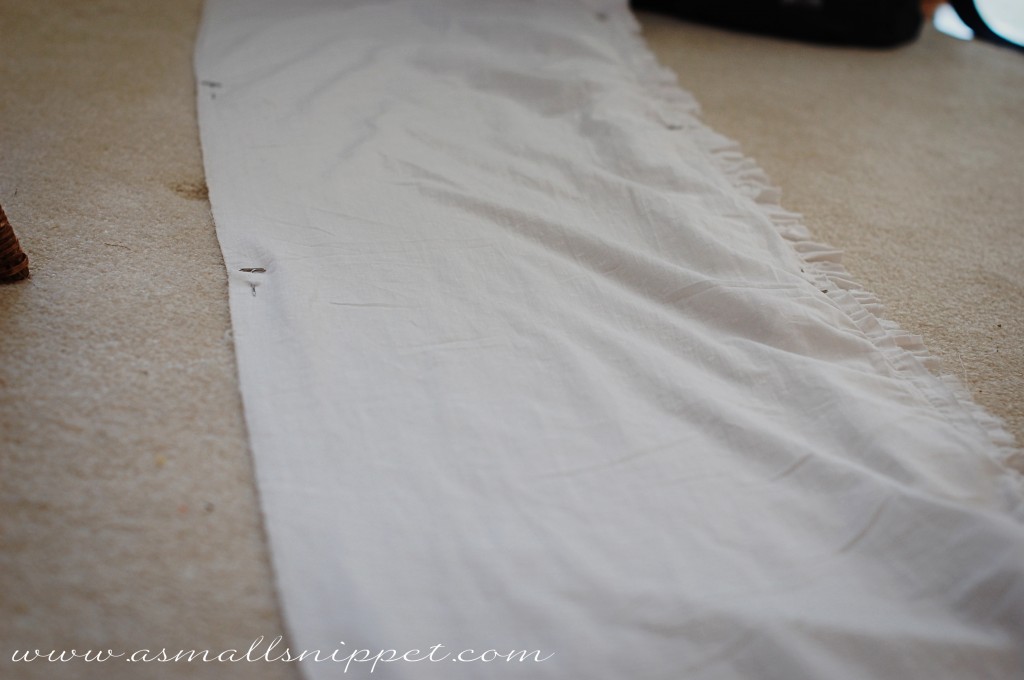
and sewed them all to end up with one long ruffle piece that was 12 yards long:

you then want to take the 2 short ends of your ruffle piece, and fold them down 1/4 inch, and then another 1/4 inch, and sew to enclose the raw edge and give you a nice, finished edge.

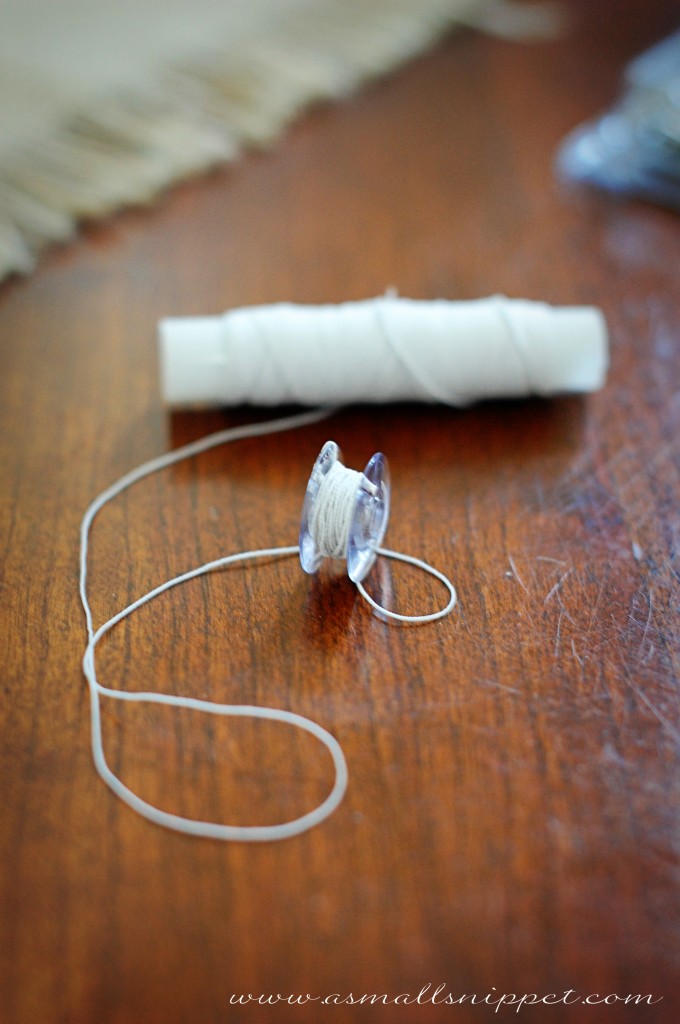
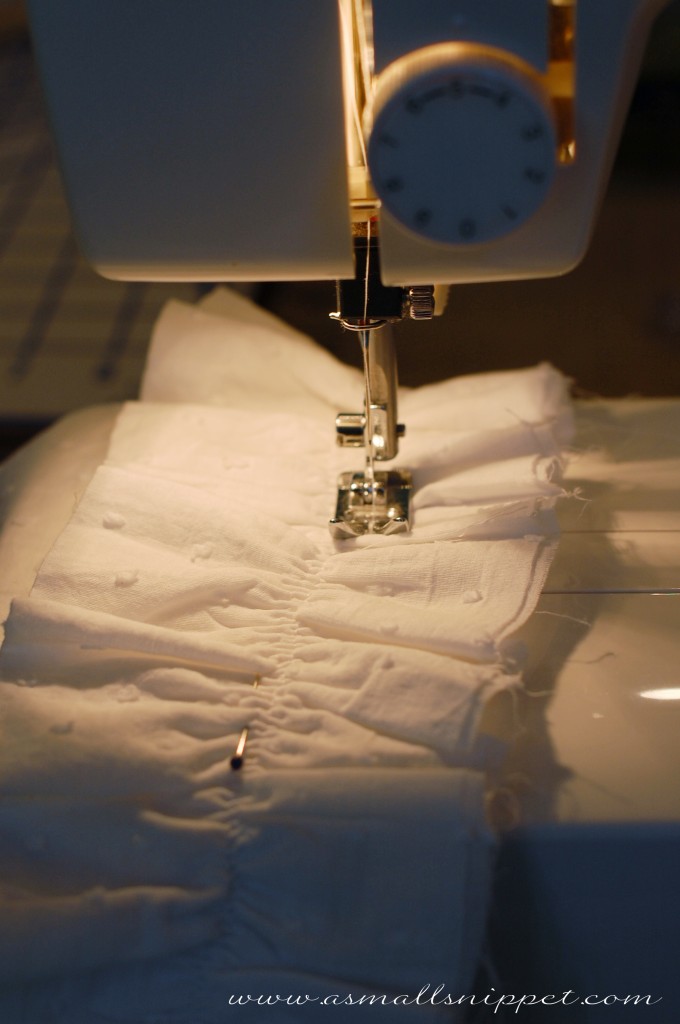
next, to create your ruffle, you will want to use elastic thread.  (you can read more specifics about working with elastic thread here.)  for my machine, i had to wind my elastic thread by hand onto my bobbin.  you want to use the elastic thread in your bobbin, and regular thread up top. (make sure you use actual elastic thread, like this one here: Elastic Sewing Thread).

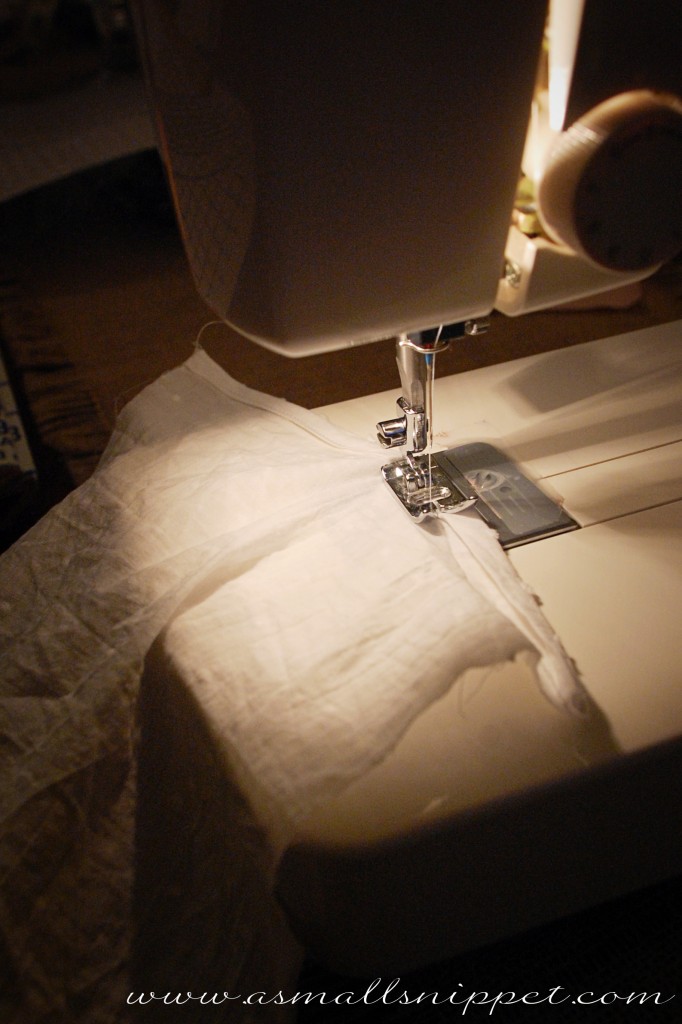
you want to fold your long ruffle piece in half, wrong sides together, so right sides facing out.  then you want to run a few lines of elastic thread (set at your longest stitch length) underneath where your seam allowance is to attach to the bumper.  so figure out the final length of your ruffle, and sew your elastic lines below that measurement,  below your seam allowance.  (you want to run your elastic lines just below where you will be attaching the ruffle to the bumper so that they are hidden once attached.)

so i decided that my final ruffle would be about 2 inches high, so i ran my elastic thread around 2.75 inches, so that when i sewed it to the bumper with a .5 seam, my elastic would be hidden.  (you can see that i had alot of leftover fabric on the bottom of my ruffle that i later cut off.  if you cut your piece between 5-6 inches for a 2 inch ruffle, you will not have that much left over.  i could’ve done that, but when cutting i just wasn’t sure yet of my final ruffle height.)

when i later attached the ruffle to the bumper, i sewed just above the highest elastic line.

a quick tip with getting it to ruffle:
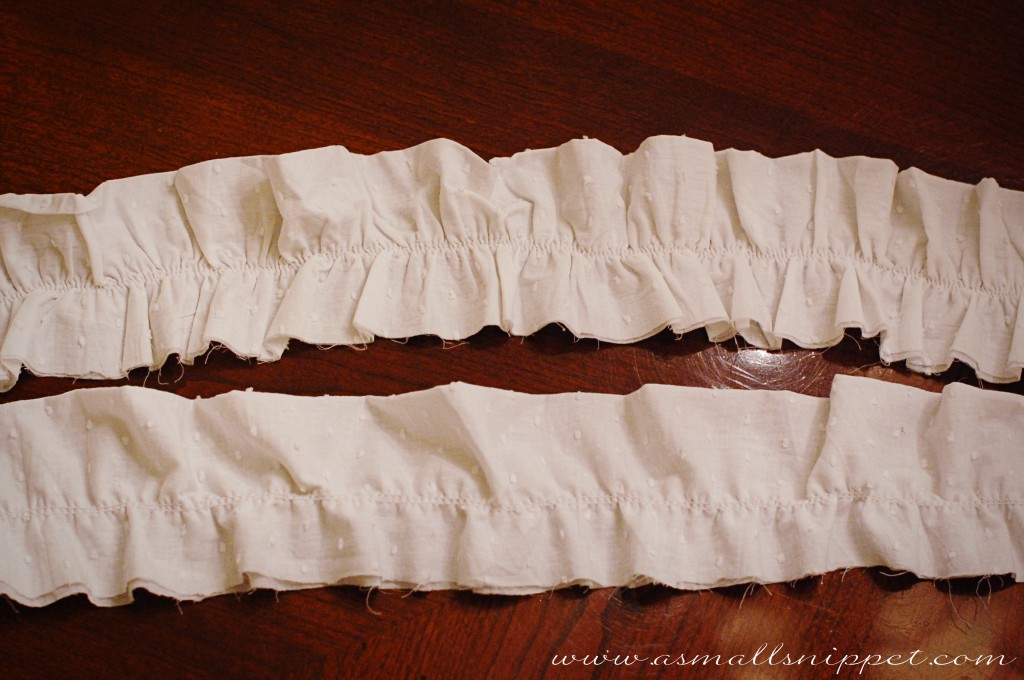
the more lines of elastic you sew, the more it will ruffle.  i sewed 3 lines.  but the real kicker is this:  spritz lightly with some water, and using your iron on the steam setting, gently iron over your elastic thread lines.  it really helps to initiate the elastic thread, and scrunch your fabric.  you can see in the next picture the difference between the top strip after ironing, and the bottom strip before ironing:

i worked in sections to ruffle the strip, so i would ruffle one panel, stopping at the seam, iron it to get it scrunched the way i wanted it, and then move onto the next panel.

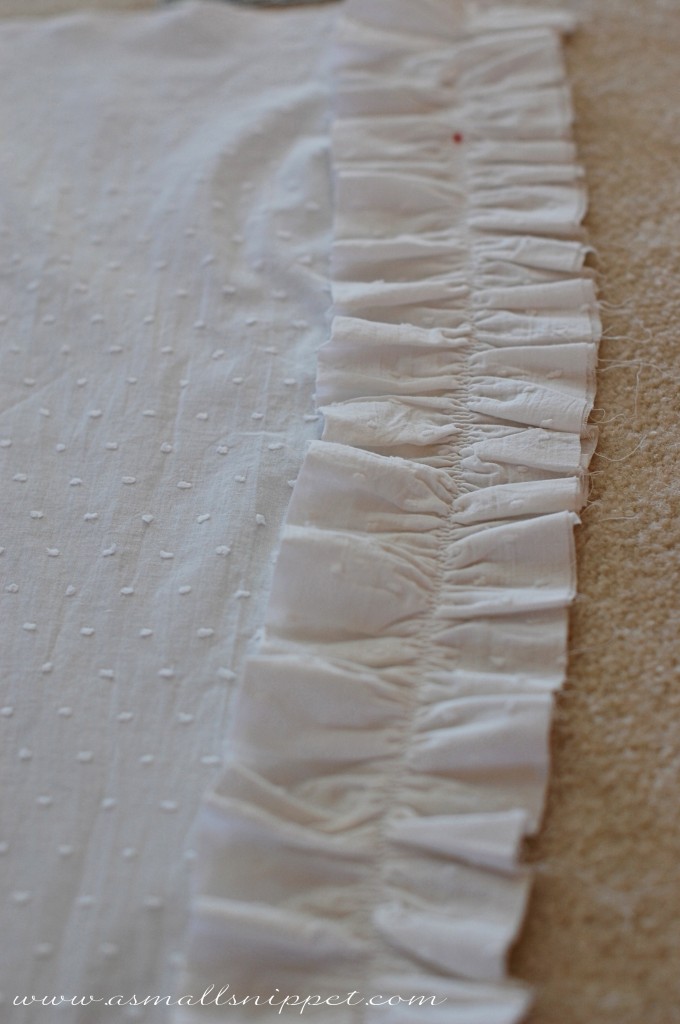
once you have the entire ruffle piece ruffled, pin it to the top of one of the bumper panels, folded ruffle side facing down the bumper panel, right sides facing.  (i had alot of leftover fabric from my ruffle piece.  your’s may not have that much.)  you will want to line up your elastic thread lines with the raw edge of your bumper panel, so that when you sew it together using a seam allowance, the elastic thread will be hidden.

at this point, you want to baste on the ruffle to the bumper panel so that when you sew all the pieces together, it will stay in place.  make sure that your basting stitch is also underneath where you will sew your final seam so that it too will be hidden:

next, you want to lay both bumper panels on top of each other, right sides together, with your ruffle in between:

pin on top and bottom.  (please note again that you will most likely not have the raw edge of your ruffle sticking out the way mine is…remember that i cut mine too wide b/c i wasn’t sure what my final ruffle measurement was going to be.)

sew both long sides together, using a 1/2 inch seam allowance.  once sewn together, flip right side out from your short edges.  you should be left with a bumper cover with the ruffle attached to the top with 2 short ends open.  then slide your bumper into the bumper cover that you just sewed by slipping it through the short ends (this was not difficult, but required 2 people…one to hold one end while the other pulled the bumper through.)  it should slide in easily.

i actually did not sew the short ends closed, because the raw edges were already sealed from sewing that earlier, and i wanted to be able to slide the cover off to wash it.  i can easily hide the open edges in the far corner of the crib, and you can’t see at all that its not sewn completely shut.

as for the bows:

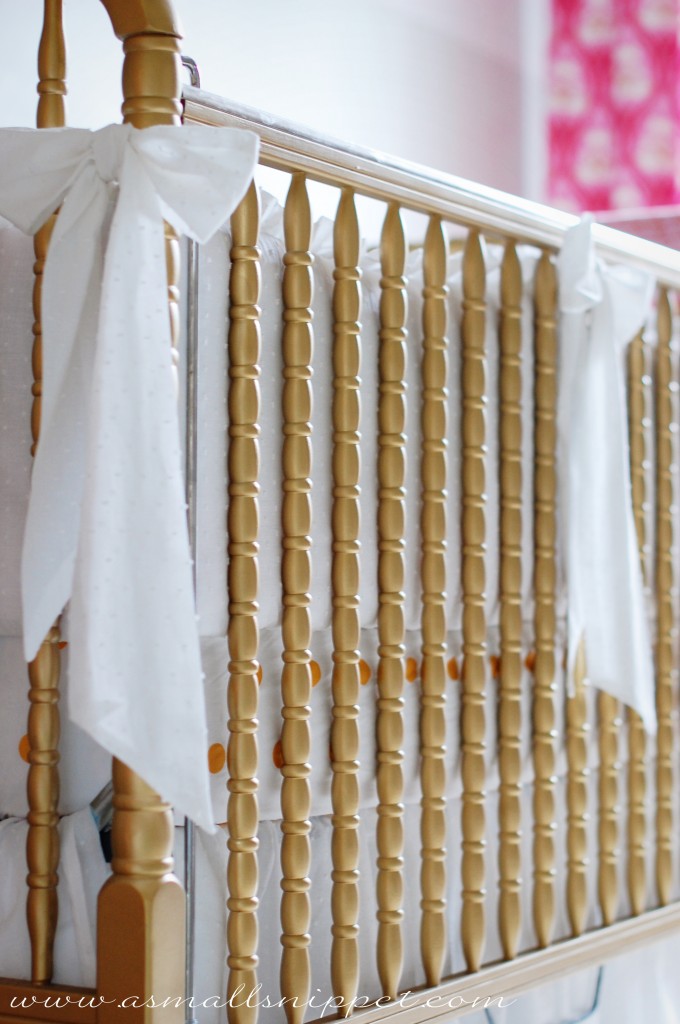
my mother in law sewed those for me while i worked on the bumper itself, so i don’t have step by step photos, but its pretty simple.  i wanted 6 big bows…one for each corner, and then one in the middle of each long side.

we cut 6 pieces of fabric, 60 inches long, and 8 inches wide.  she then folded each piece in half longways, right sides together, and angled the edges (make sure to angle the edges opposite each other.)  she sewed the length, as well as one short end at an angle.  she flipped them right side out, and angled the other end, and then sewed that closed.  she was left with one long 60-ish inch strip that was about 3.5 inches wide, with 2 angled edges.

to attach to the bumper, she simply folded the strip in half to find the exact middle, and sewed the strip in the middle in place along the ruffle seam to the outside of the bumper.  we then tied them in place:

and that’s it!  the bumper and crib skirt together probably cost me about $80 to make, which was a far cry from other bedding i was looking at!  and i was pleasantly surprised at how simple it was to make.

my next tutorial will be to show you how to create an adjustable, ruffled crib skirt, so check back in really soon, as i’m trying to get all these tutorials to you before this sweet baby arrives.  and the nursery is finally completed!!  so be looking very soon for a post with all the details!!

leave your questions in the comment section, and i’ll do my best to answer them.  i’m hoping this tutorial makes sense, but i can’t promise that anything coming from this preggo brain is making sense anymore!!   3 more weeks!!!  (although i’m hoping and praying for less!)

13 Comments

Jul

14

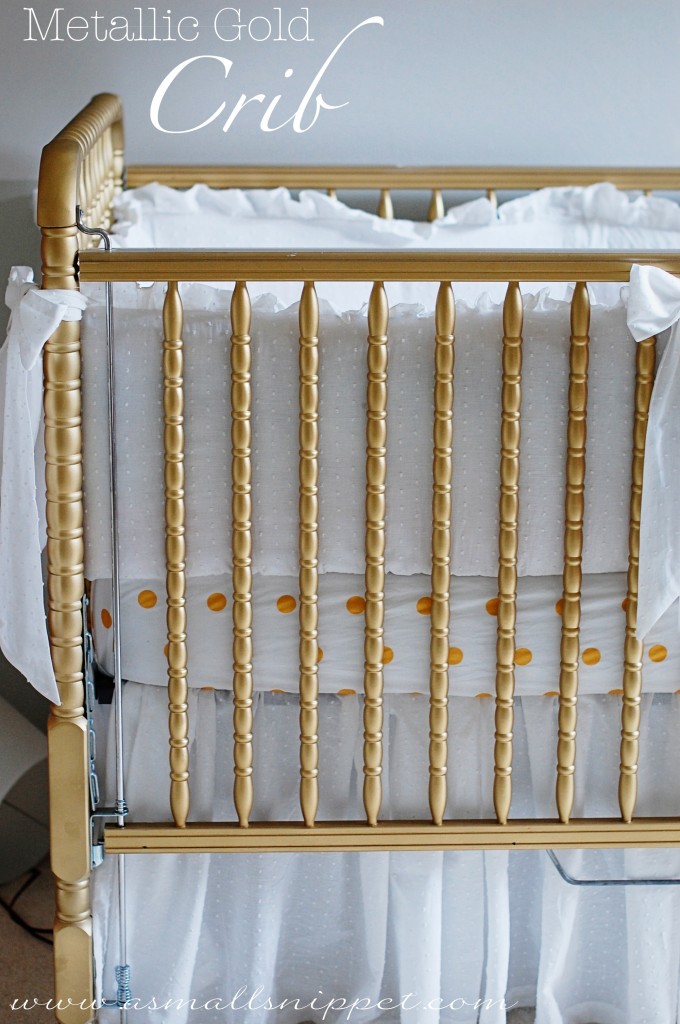
Metallic Gold Crib

consider this the first of a handful of nursery/baby tutorials coming your way :)

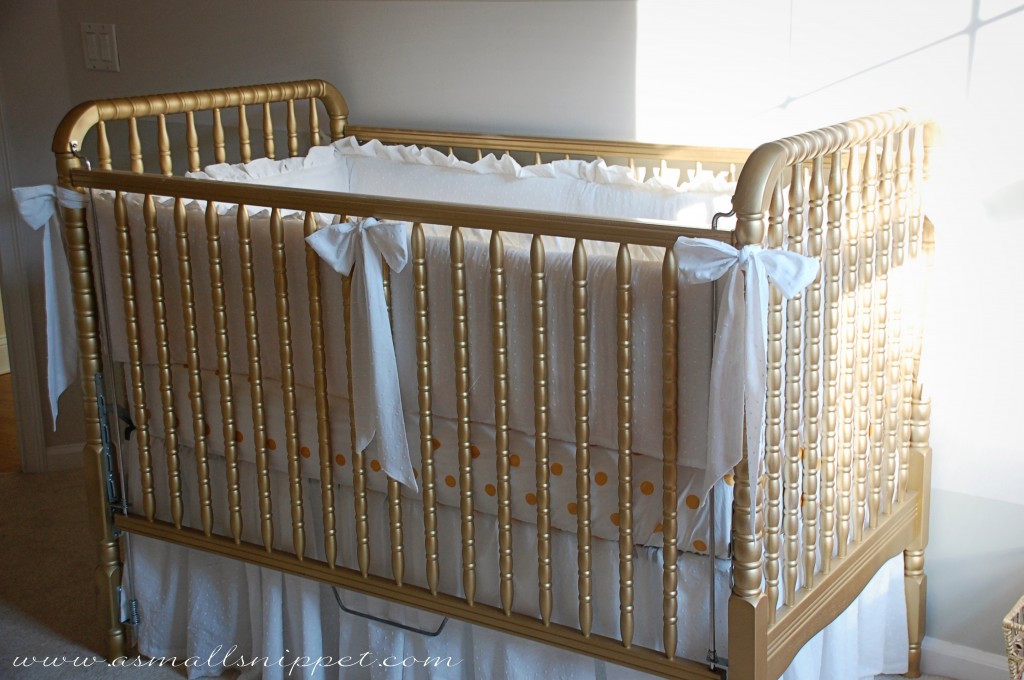
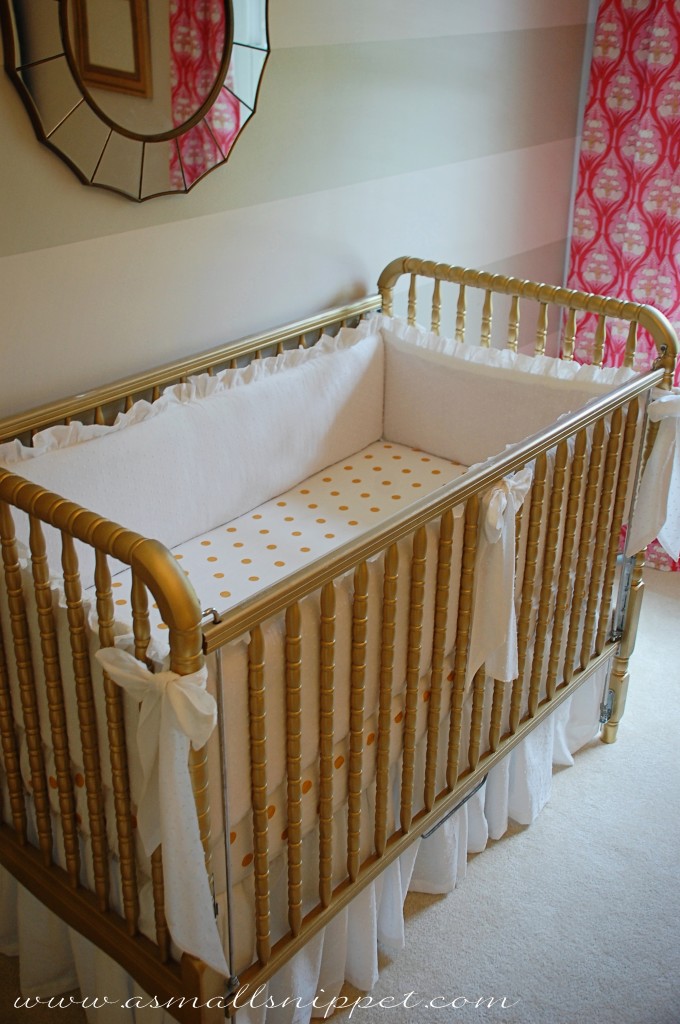
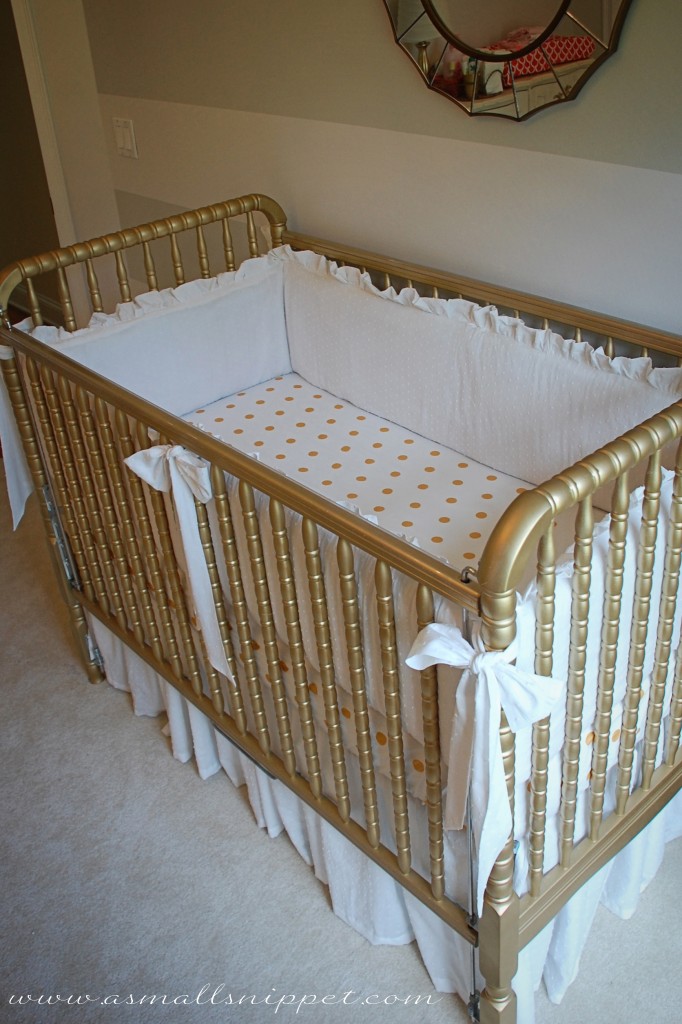
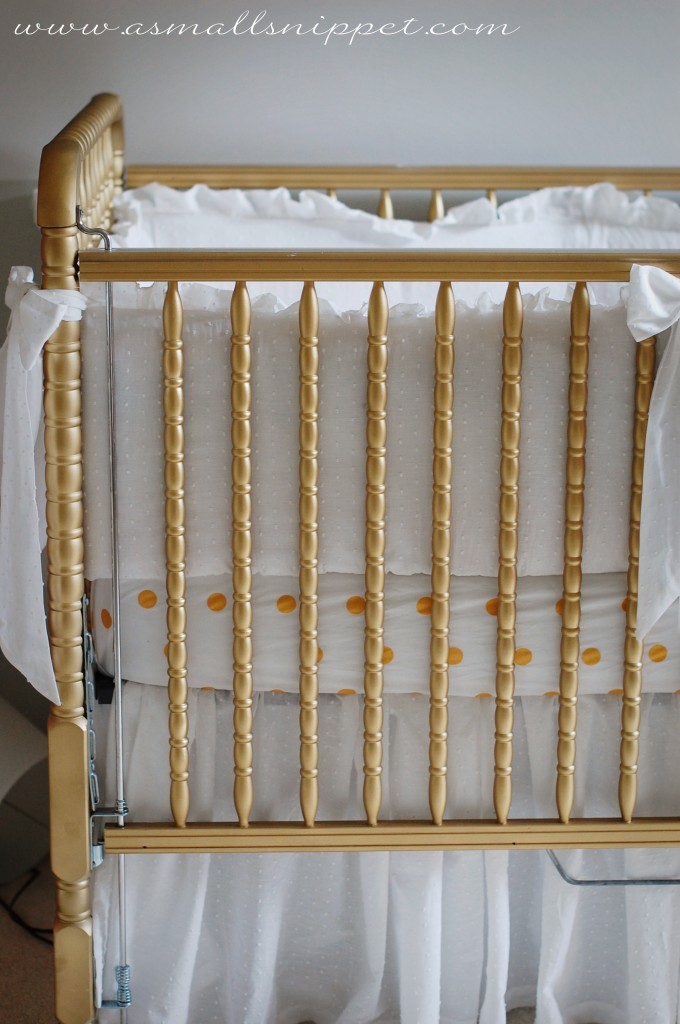
when we found out we were having a girl, and i started on some crazy Pinterest research for nursery ideas, it didn’t take me long to decide that i didn’t want to go with the standard white crib that i had used for my last 2 nurseries.  i instead wanted something striking and different and unique, and the idea to paint an old crib that my parents had metallic gold was born.

i did a bit of research, and decided that our best option was to use spray paint.  the crib is an old Jenny Lind crib. here is one very similar to the one we have:
Davinci Jenny Lind Crib, White.

you can see that it has lots of spindles and hard to reach/paint places, and since the hubs was tackling this job for me (i actually try to be really careful about paint fumes while preggo), i decided spray paint was the way to go.

i scooted over to Home Depot and picked up some cans of Rust-Oleum Pure Gold Metallic Spray Paint.  it seemed to be the best metallic gold, without being too shiny or too yellow.  however, as the hubs began painting, i began hating the color.  it just wasn’t right…too yellow, not enough gold, and definitely not enough metallic.  so off to HD we went again, and picked up a few others to try out.  the one we loved the most was actually the one that i didn’t even consider in the beginning because the cap of it scared me off completely.  however, it turned out to be the perfect perfect color:

Rust-Oleum Specialty Metallic Gold Spray Paint

the cap of this can does not do the final product justice.  it is the perfect shade of gold, with the perfect level of metallic and shine, without being too glossy or too fake looking as the cap led me to believe.

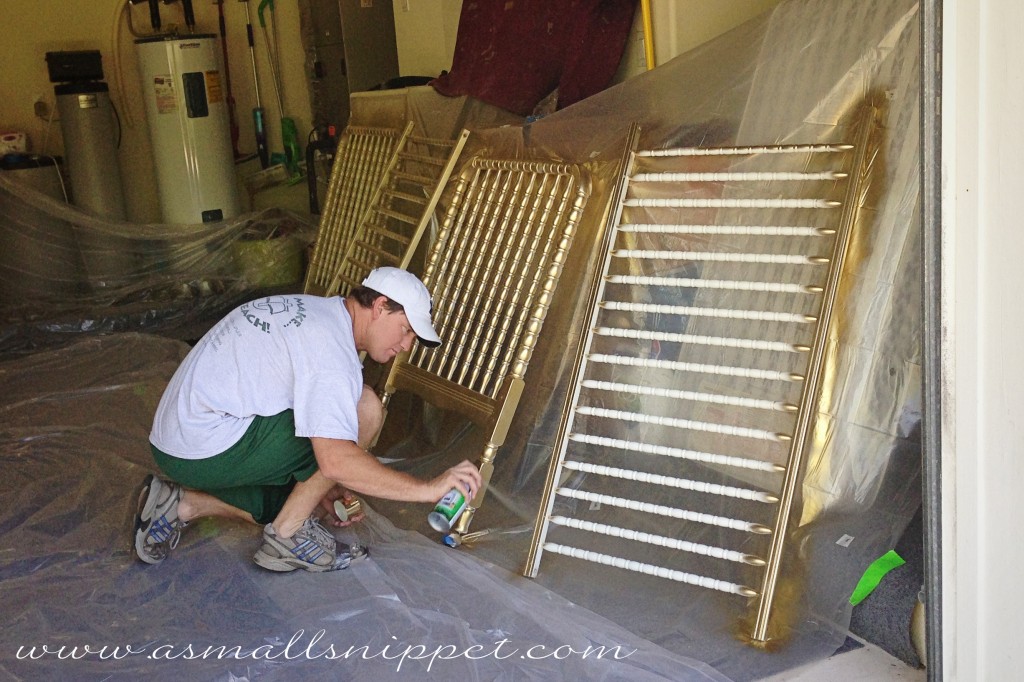
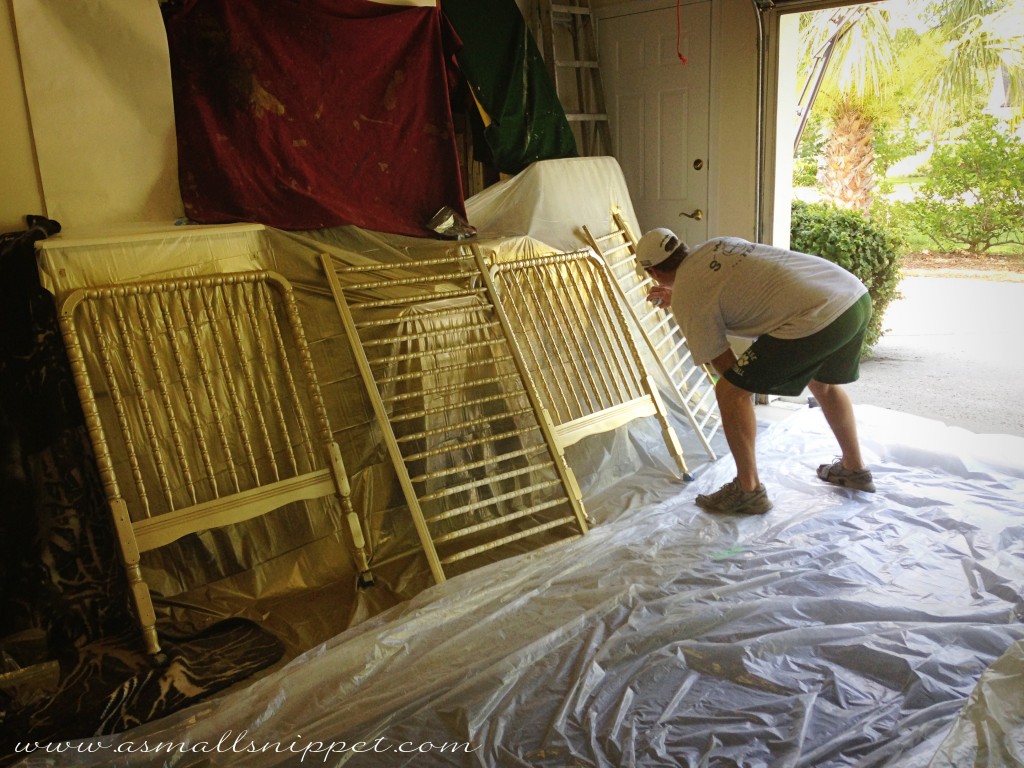
we disassembled the crib in order to spray it, so that we could get to the inner parts of the spindles more easily.  we taped off the hardware (you’ll see the silver hardware in the finished pictures) because we knew that once the crib side was lowered over and over again, the paint would rub off anyway, so leaving it silver was our best option.  we sprayed the crib in sections in the garage, after covering the surrounding area with drop cloths:

jake sprayed one side, waited for it to dry completely (it does not take long to dry) and then flipped each piece over and sprayed the other side:

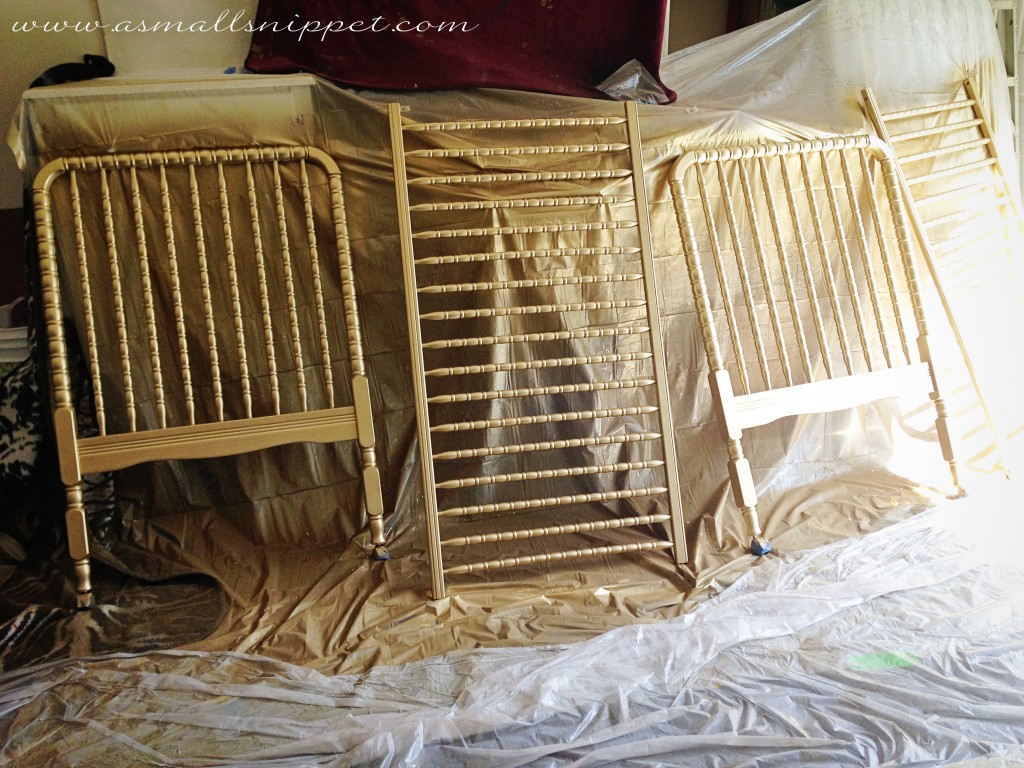
you have to make sure that you get in between the spindles, (if your crib is spindly or slatted) because the paint will not reach all the way to the inside by just spraying the outside.  we did 2 coats of paint, and that was all that was needed to cover all sides well.  if i remember correctly, we used about 6 cans of paint for the 2 coats.

because i know some of you will ask me and wonder if i am worried about the crib being spray painted and my baby sleeping there…i did tons of research, and i concluded that once the paint dries, and is not emitting fumes anymore, it really didn’t matter what kind of paint i used.  my crib also comes with clear plastic protectors on the railings (which we took off before painting, and put back on once it was dried) so if my baby decides she wants to gnaw on the crib one day, she’ll be gnawing on the protectors and her teeth won’t ever reach the paint.

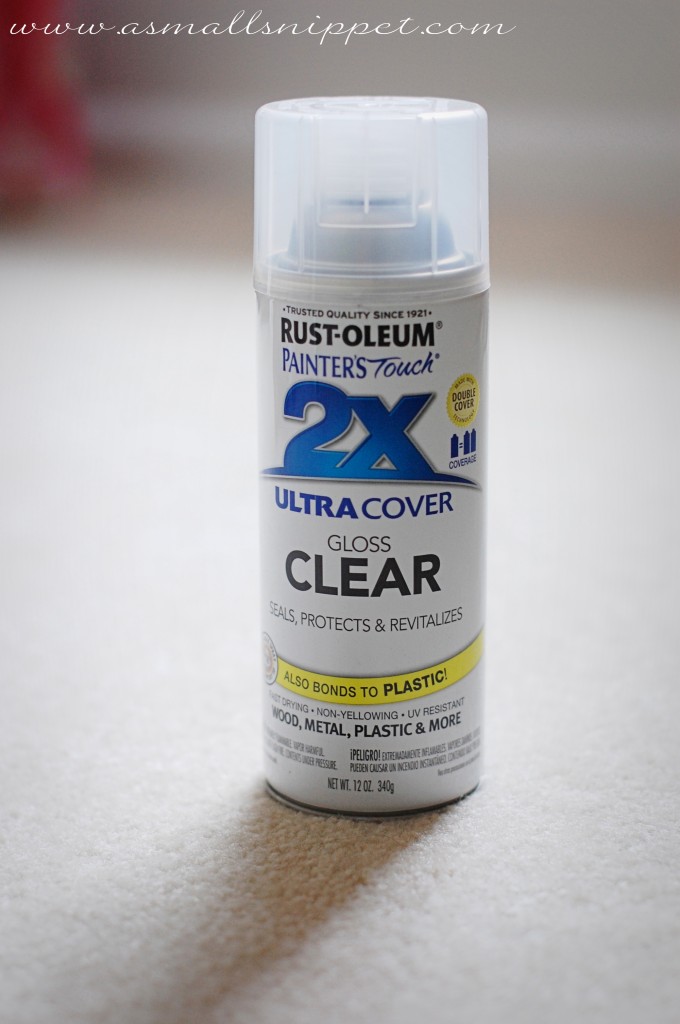
we also sprayed a clear protective layer over the paint, which seals in the spray paint.  this was an afterthought, but necessary.  after the paint had finished drying completely, we noticed that if you rubbed your hand along the crib, your fingers would be covered lightly in gold dust.  we didn’t see it having any effect on the paint job on the crib itself but we didn’t think having a crib spreading gold dust everywhere would be a good idea (especially considering that all of the bedding is pure white!)

so i found this:
Rust-Oleum Painter’s Touch Multi-Purpose Spray Paint, Gloss Clear

and although i had my doubts, it was the perfect clear coat.  it comes in matte as well, but the glossy was perfect for this job.  it didn’t change the look of the paint job on the crib one bit, but just added a nice finish, so now when we touch the crib, no more gold dust!  i was surprised that it worked so well, and i think we only used less than 2 cans to cover the crib, and only one coat was needed.  the finished product is not super glossy either, which i was worried about.  i wanted a little sheen to the crib, but not much, and the combo of the spray paint and the clear coat yielded the exact result that i was dreaming of:

  (you just got a little preview of the bedding there too :)  we finished sewing it all last weekend, and i can’t wait to show you the tutorials for the bumper and adjustable crib skirt.  i was so pleasantly surprised at how simple it was to create, and just how much money it saved us!)

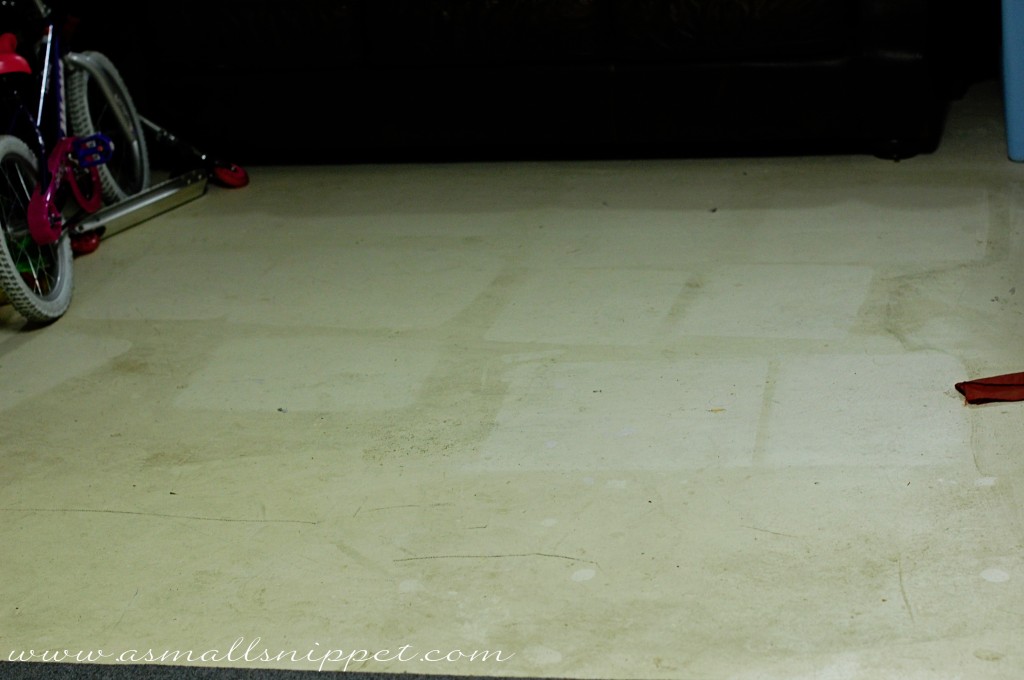
and i’ll leave you with this little warning…unless you want your garage covered in gold dust, i would suggest you spray paint outside.  this section of our garage was a ways from where the spray painting occurred, but when we moved some boxes up into the attic a few weeks later, we realized that the gold dust really does cover everything!

hope this is helpful to some of you.  i looked for tutorials on using gold spray paint, but didn’t find any that really helped, so it was trial and error for us.  maybe this post will eliminate some trial and error for you!

and…i know this is gonna sound crazy, but everytime i spend time on the computer (i.e.:  doing a blog post, editing photos, etc) it really makes me signficantly nauseous.  so please know that i really do have every intention of blogging regularly again, but its hard to be motivated when you know its gonna make you feel like you want to puke!  on that note, i hope to be back before too long!  :)  and with the nursery almost completed, i know i’ll be anxious to share all the details with you, so i simply can’t stay away for long!

5 more weeks, Crazies, of this pregnancy, and until we have our sweet baby with us!  we are counting the days….

47 Comments

Jul

01

:: July Sponsors ::

I’m really excited about my batch of sponsors this month.  especially with the summer months, and with my current obsession with all things baby, there are some great new ones for you to check out!  as well as some previous sponsors who are still offering great deals just for my readers!  make sure you read all the way down the post for my newest sponsors this month.

as always, you can click on their name or on their picture to be taken to their site or shop, and the red text are my own words.

enjoy browsing!

:: Hupernikao ::

Hupernikao® (hoop-er-nik-ah’-o) is a new fitness apparel brand with one purpose: to inspire people to get out of survival mode, take up their shield of faith, and conquer their battles. The word “hupernikao” (a Greek verb) literally means “defeat soundly, prevail mightily, more than conquer.” It comes straight from Romans 8:37: Yet in all these things we are more than conquerors through Him who loved us.

Your battle – whatever it may be – may feel like it’s crushing you. But the truth is, there’s a conqueror inside you…and that’s a promise from God :) .

Shipping charges are such a bummer, so for a limited time, get free shipping with orders over $30 with promo code “asmallsnippet”!

Where can you get more info on hupernikao® fitness apparel?
Browse the store: hupernikaoinc.com
Watch the story of hupernikao®: youtube.com/hupernikaoclothing
Get the latest on our clothing (and a little inspiration): facebook.com/hupernikaoinc

**still some of my favorite clothing to wear right now!  Hupernikao products are amazingly comfy (and that’s coming from a preggo, so that definitely says loads!) but at the same time they are adorably stylish.  i don’t know if you’ve checked out their new tanks, but head over to their site to see all that they are offering.**

:: Transformations ::

*Are you addicted to Pinterest or HGTV?
*Have friends and family told you that you have a flair for decorating?
*Do you walk into a room and know immediately what to do with it?
*Do you need a home-based business making significant income?

Maybe your dreams have been on the back burner and you are just hoping for the right opportunity to come along. Maybe you’ve been subconsciously waiting for something in your heart to say, “This is it!”

Home Staging and Redesign are easy to learn and the industries are here to stay. Retired teachers and nurses, stay-at-home moms, interior designers, real estate agents, etc. have all found true love in this amazing business.

Is your heart beating? Is your soul stirring? Maybe you are one of us!

I invite you to take a look. All online classes are 50% off with code “asmallsnippet”

**i don’t know about where you live, but in our area, the housing market is massively picking up speed, so now is the perfect time to become a Home Stager.  from what i hear, they are in high demand.  Becky offers classes that afford you the opportunity to learn how to uniquely put your skills, interests, and passions in the field of interior design to great use! and at 50% off online classes, you can’t pass up that deal! you honestly could not work with a more genuine individual. if this strikes a cord with you at all, please check her out. what she does is amazing!**

:: Camp Mommawatchi ::

Looking for a fun way to connect with your kids and spend some quality time together? Try hosting a camp this summer at home!

Camp Mommawatchi specializes in at-home camp curriculum. Choose from one of our four themes to host your own at-home camp. Themes available are: Sports, The Arts, Science, and Secret Agent.

Your camp purchase will include:

*A full-color booklet with complete curriculum to help you host an at-home camp. The booklet contains schedules, instructions for all the activities, decoration ideas, recipes and Momma Time activities.

*Free instant digital downloads, including booklet, schedules, door signs, Momma Owl mail, and supply lists.

Visit our website at www.campmommawatchi.com to order and use promo code “asmallsnippet” to receive a discount of $5 off any camp. Offer ends August 31st.

Questions? E-mail us at mommaowl@campmommawatchi.com.

**i’ve been waiting for the perfect time to try out my science themed camp with my kiddos, and July is the month!  i’ll be sure to come back to tell you about it, but in the meantime, go check out all the amazing themed camps that Camp Mommawatchi offers.  they are all easy, already-planned-for-you camps to do with your kids at home.  doesn’t get much better than that!**

:: Nana’s  Nuzzles ::

Nana’s Nuzzles specializes in home sewn items that keep people cozy.  Whimsical quilts (all sizes), discreet nursing covers for mommas, matching baby carrier covers, and creative notebook or journal covers are just some of the products available.  Quilts vary in size from baby quilts to lap quilts and larger quilts for beds.  All work is carried out with TLC and a lot of heart.  Shop from our small inventory or order a custom-made piece with or without your own fabric.  Custom orders are always welcome. Follow the link to see my store, and thank you for taking the time to look.

**as with lots of my sponsors, i feel like Bobbi at Nana’s Nuzzles has become an old friend!  she’s been great to work with!  Nana’s Nuzzles range of products makes her Etsy shop a one stop shopping place for great baby gifts.  i especially love the idea of these adorable personalized baby blocks:  http://www.etsy.com/listing/99015636/babys-personalized-soft-blocks?ref=listing-shop-header-4.  i’m a sucker for anything personalized!  stop by if you are looking for great baby items, or a sweet quilt!**

:: Albion Fit ::

Albion Fit offers beautiful, comfortable, and high-performance fitness and swimwear for the fashion and health-conscious female. A locally, family-owned company hailing from the Albion Basin at the top of Utah’s Little Cottonwood Canyon, Albion is committed to its environment and community by recycling plant waste and by using earth-friendly materials in all products. Within these commitments, Albion Fit recognizes the importance of balancing an active lifestyle with a flair for style, creating fitness and swimwear that is not only high-performance, but high-style as well. Fashion meets function to form clothing that both stands, and works, out.

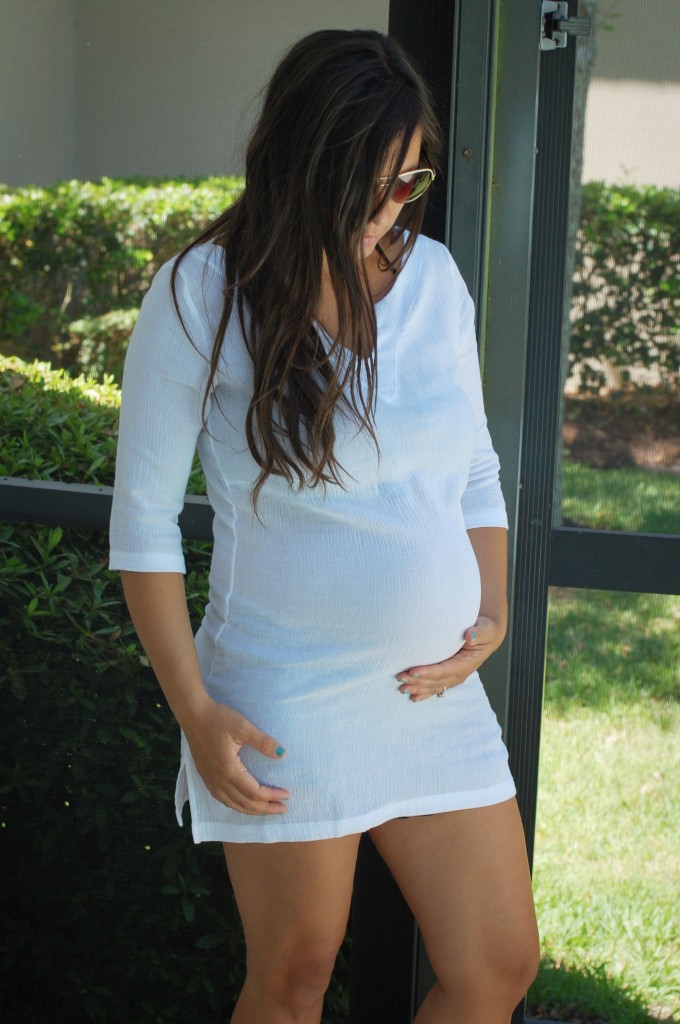
**I have this white tunic:  http://www.albionfit.com/tops/basic-tunic-dress-white and i absolutely love it.  its so soft, light, and comfy, and it really is the perfect swim suit cover up!  its not maternity, but i squeezed my belly into it to give you a peek:

if i weren’t preggo, i would totally order this bathing suit:  http://www.albionfit.com/swims/ebb-and-flow-bandeau-top-chevron-bandeau-aquamarine and i’m seriously thinking i want to order these bottoms:  http://www.albionfit.com/swims/swim-slim-skirt-chino.  (stylish but still covers a lot!).  in fact, i kinda want one of everything on their site!  so if you are looking for a super stylish, unique swimsuit, cover-up, or fitness wear…this is the place to look.**

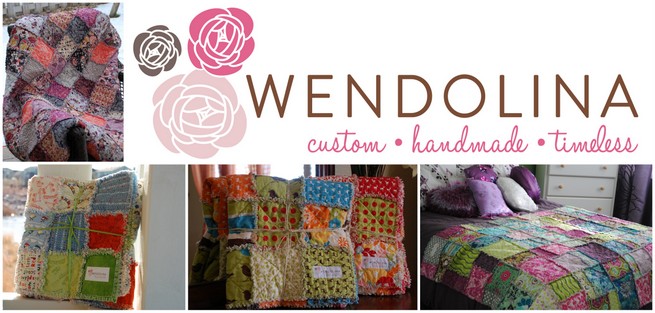
:: Wendolina ::

All “Wendolina” rag quilts are reversible.  One side is finished and the other side has exposed seams that are snipped and fray to create the shabby chic look.  Both sides are made using designer 100% cotton fabrics so they can be displayed on either side.  Each square is sewn with a lightweight, natural cotton batting in the middle.  Every quilt is washed once to start the ragging process.  They can be machine washed in cold water and machine dried. The more you wash and dry them, the raggier and softer they will become.  Use the code SNIPPET10 for a 10% discount, just for A Small Snippet readers.

**i’m excited to have Wendy as a new sponsor this month, and i think her products trump Pottery Barn and Target’s Shabby Chic quilts anyday!  i’m drooling over these precious quilts, especially this one:  http://www.wendolinashop.com/index2.php#!/5/featured/Ridin’_Hood_-_Ready_to_Ship/64.  it would be so sweet for a baby girl!  go check out Wendy at Wendolina for all of the amazing products that she hand-makes.  she even does custom orders, which is perfect if you were wanting to coordinate with specific room colors, etc!**


what a great batch this month!  as always, if you are interested in becoming one of my blog sponsors, and advertising your business or products, then contact me at asmallsnippet{at}gmail{dot}com for stats, rates, and specifics.  its been such a joy to get to work with so many amazing people!


i’m busily sewing up a storm for Berkeley’s nursery, so check back in for details and tutorials.


see you soon,

1 Comments