Aug

03

Nursery Reveal

maybe its wishful thinking, but my gut tells me that this little baby is coming soon…and early.  (my gut has been known to be dead wrong, and my wishful thinking has let me down before, but a girl can hope, can’t she?)  regardless, she feels as if she’s gonna fall out any second, i have contractions all day long, and big momma is dead tired, so it can’t be much longer, right?

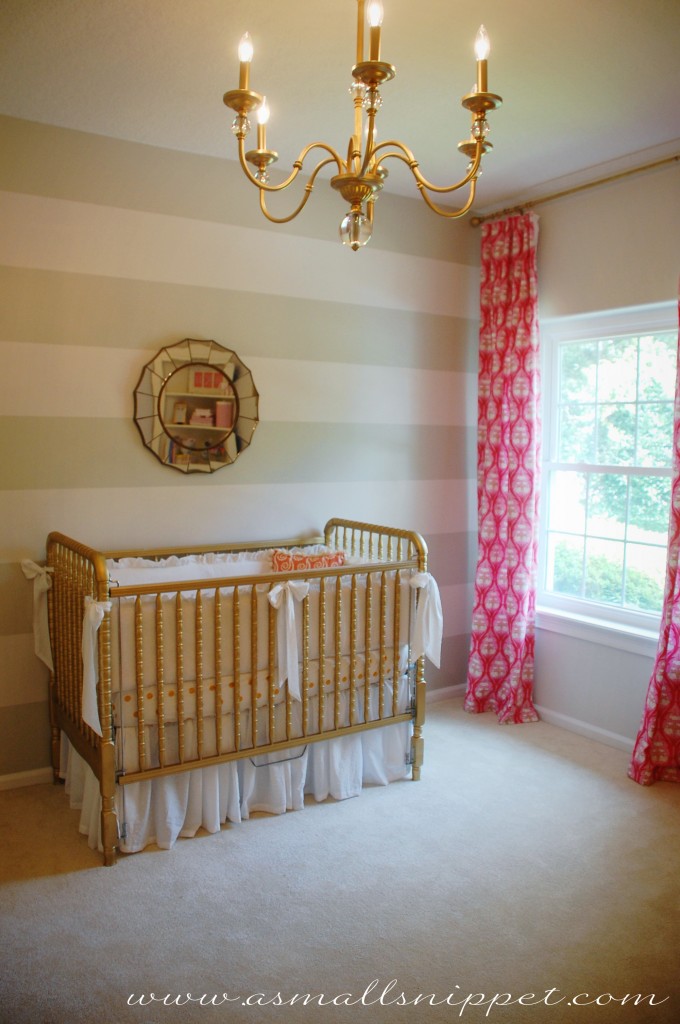
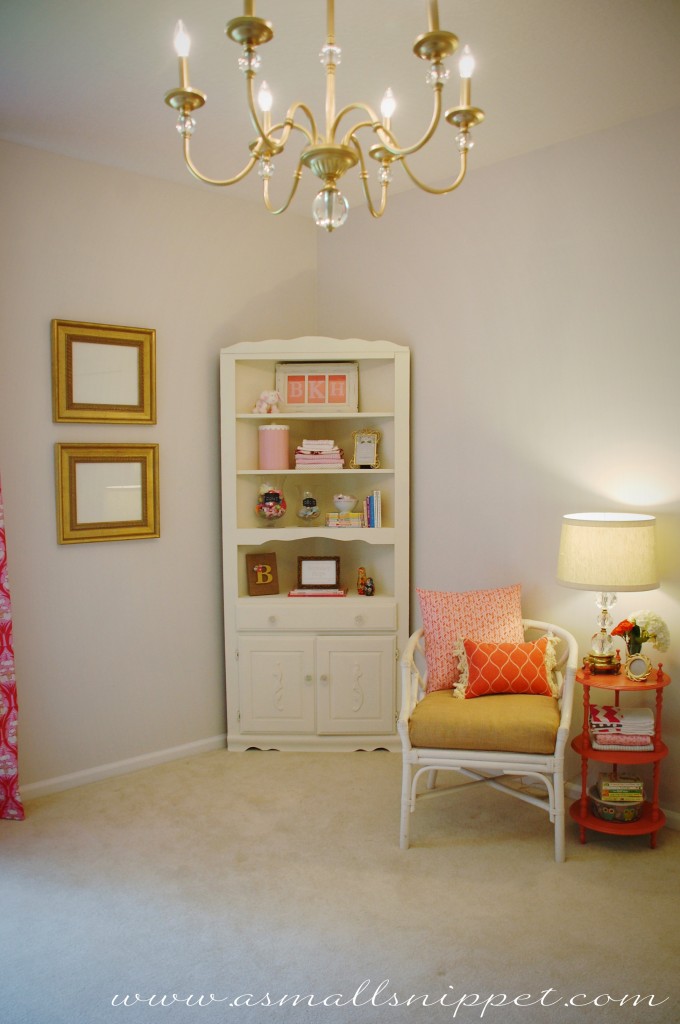
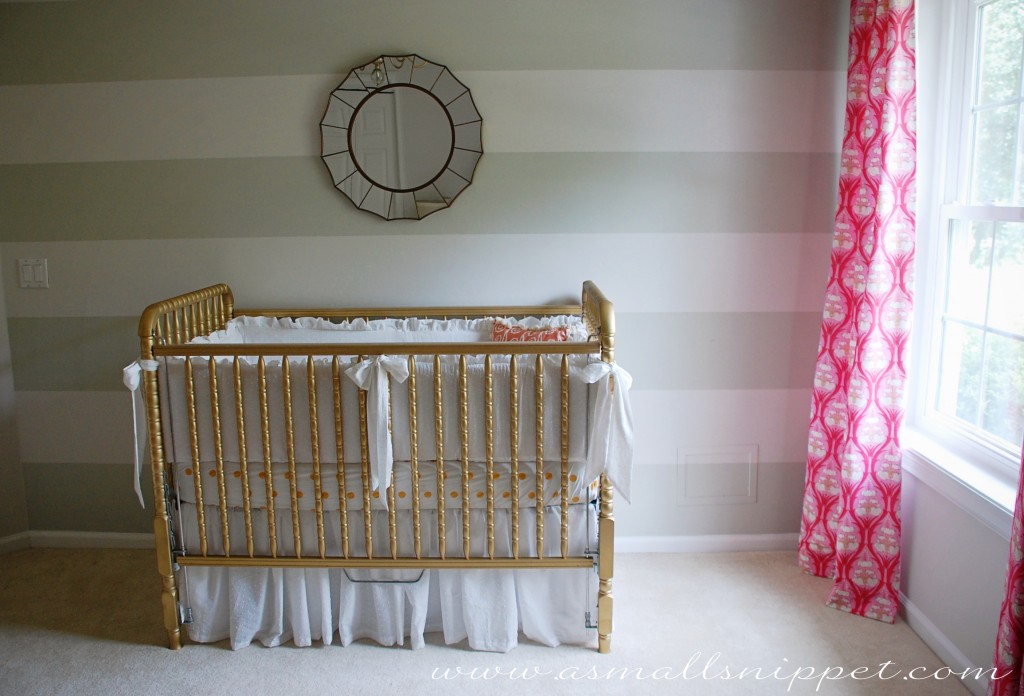
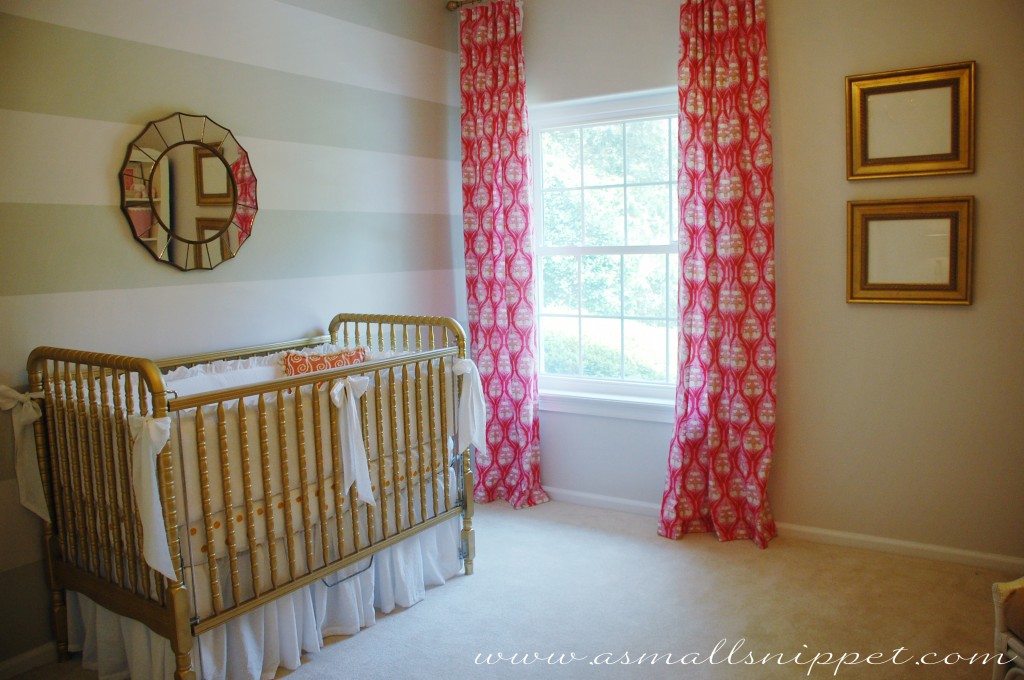
anyway…i just feel the need to post all the details of the nursery today, because its on my “things to-do before Miss Berkeley arrives” list, and there are just a couple more things to cross off, and i think i’ll rest better once that list is completed.  so here it is, Berkeley’s nursery in all its gold and coral-ish glory!  (i’ll give you specific details as the post progresses):

the empty frames will be filled with photos of a sweet babe once she gets here:

now for some details:
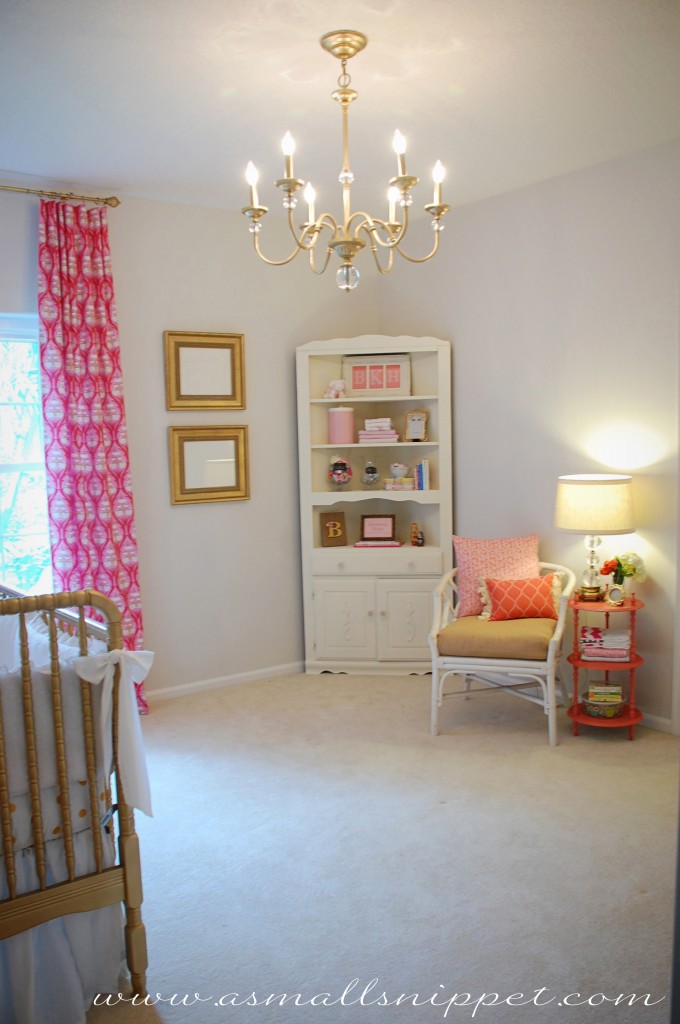
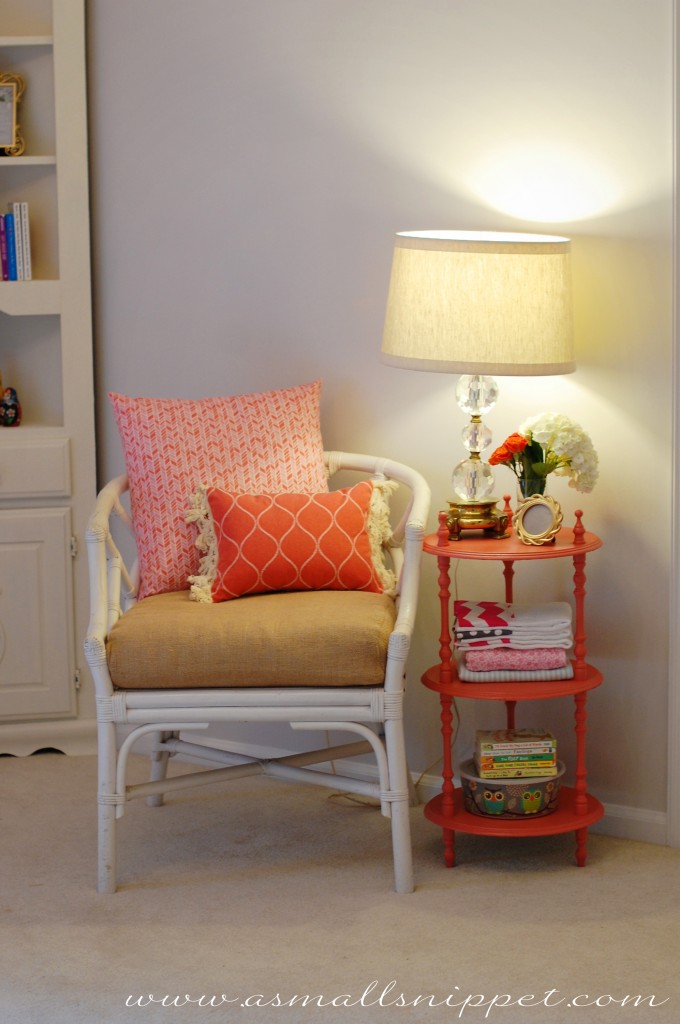
– the chair is a vintage Henry Link wicker chair that i found at a consignment store.  i recovered the seat cushion in simple burlap.

– the bigger pillow i made out of fabric that i found at Joann’s Fabrics.  its called Straw Hat Pink, made by Cloud 9 Fabrics.

– a friend of mine named Donna made me the smaller pillow :)

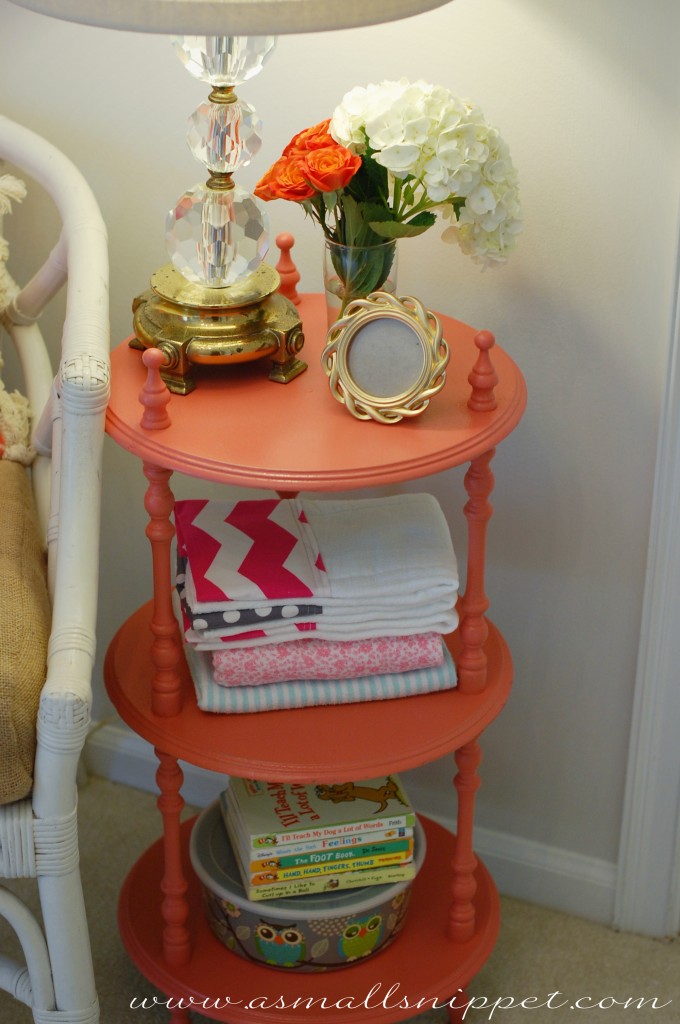
– i found the table at a thrift store.  it was an adorable mint green when i bought it, but Jake painted it coral for me using this spray paint:  Krylon Coral Isle .  i don’t know any details on the table, but a friend of mine said she saw a similar shaped one at Kirklands recently.

– the lamp was a complete steal.  i found it at a garage sale, and replaced the outdated pleated shade with a linen drum shade that i happened to find at GoodWill.  the whole thing cost me $7.00.  i’m kinda in love with it.

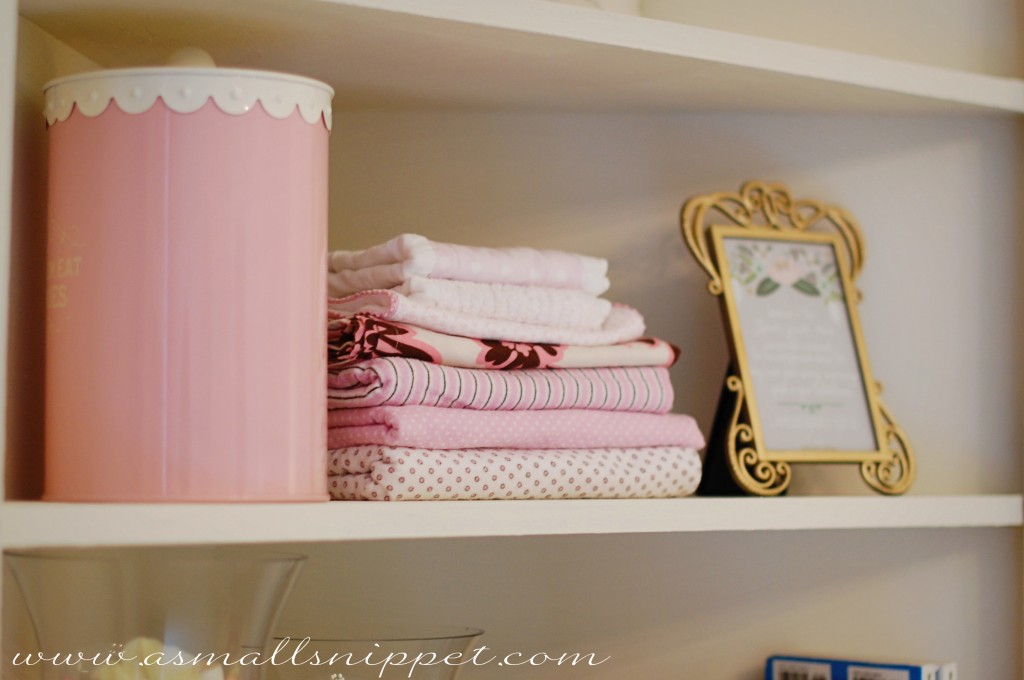
i filled the table with some fun odds and ends.  a friend of mine named Wendy made me the cute burp cloths.  i found the owl container at World Market and couldn’t pass it up.  i loved the vintage look of it, and i had to have some kind of something with owls on it, to represent my beloved Chi Omega Sorority!  (owls are our mascot.)

– a friend of mine recently moved, and was throwing out that corner shelf, so i snagged it out of her garage before it hit the dumpster.  i knew long ago that i wanted some type of corner shelf in the nursery, and this one was even more perfect than i was imagining.  i painted it with Annie Sloan Chalk Paint in Old White, and added glass knobs from Hobby Lobby.

– a neighbor replaced her dining room chandelier, and was getting rid of her old one.  so we snagged it and Jake spray painted it gold.  i think it was meant for this room :)

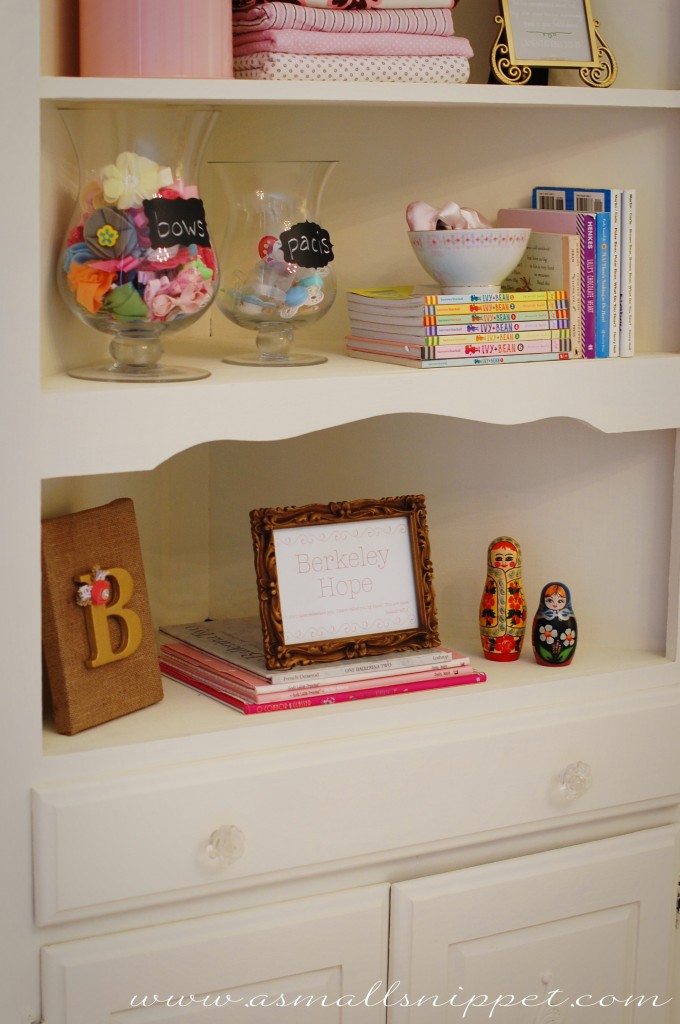
i wanted a place to display all kinds of girly and pretty things, and the fact that this piece of furniture had a cabinet and a drawer was an added bonus.

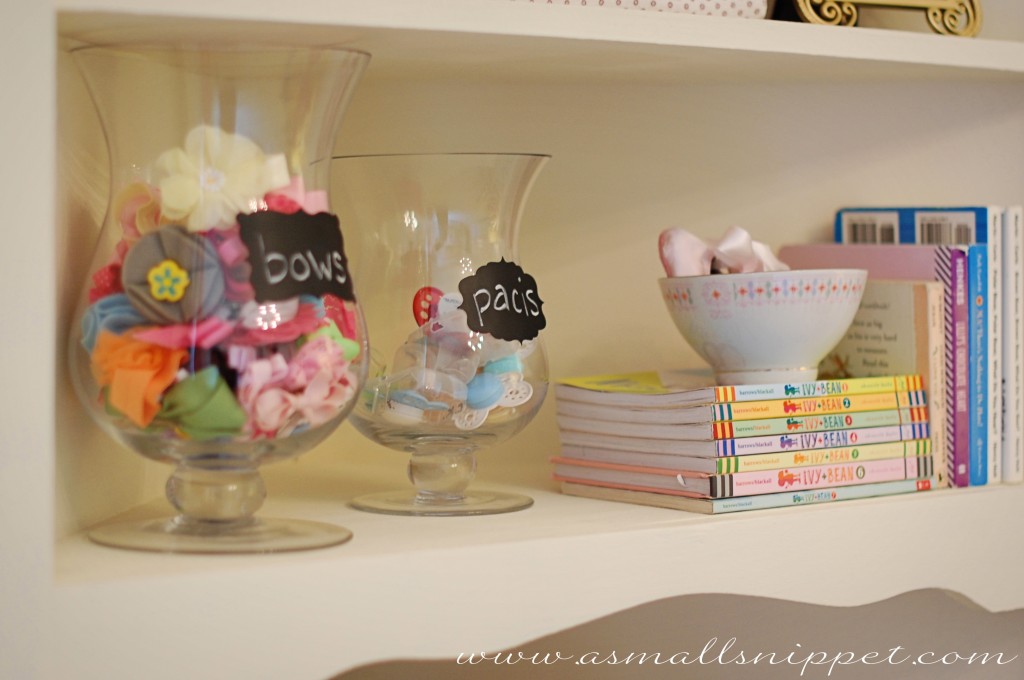
i wanted an easy place to store all of Berkeley’s bows and headbands, and a quick way to grab a paci when needed, so i found these glass jars on clearance at World Market, and bought some cute chalkboard stickers (also at World Market) to label them.

i found the pink vintage-y tin cookie jar at World Market, and couldn’t pass it up!

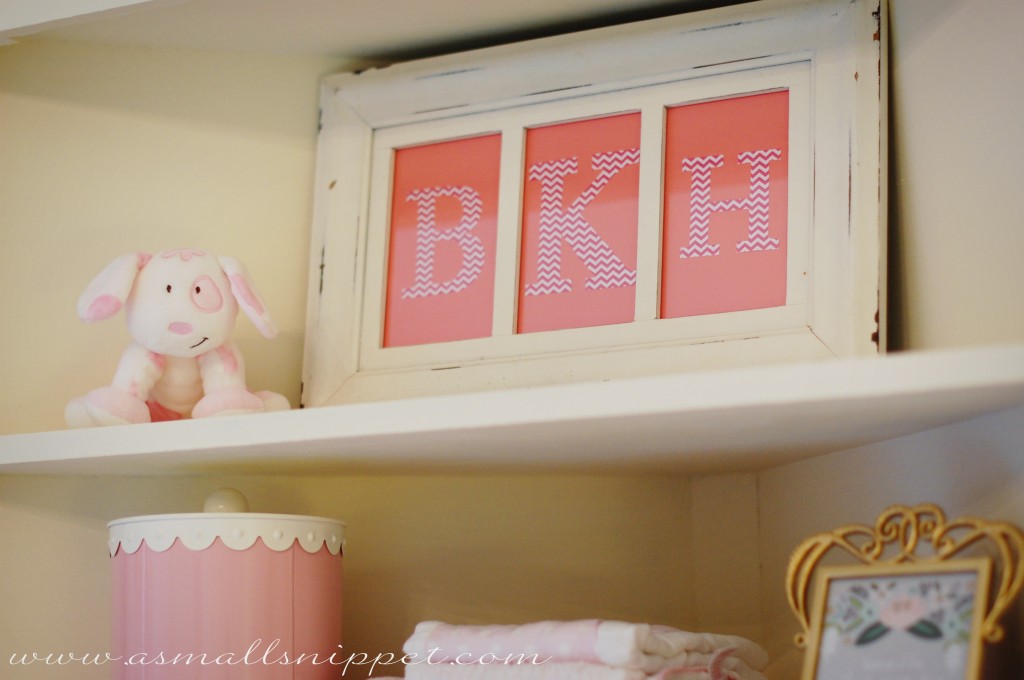
i had the white frame from long ago, and used scrapbook paper to cut out Berkeley’s monogram.  the little puppy dog was Bella’s, named Sprinkles, and the big sis is thrilled for her little sis to love it as much as she once did.

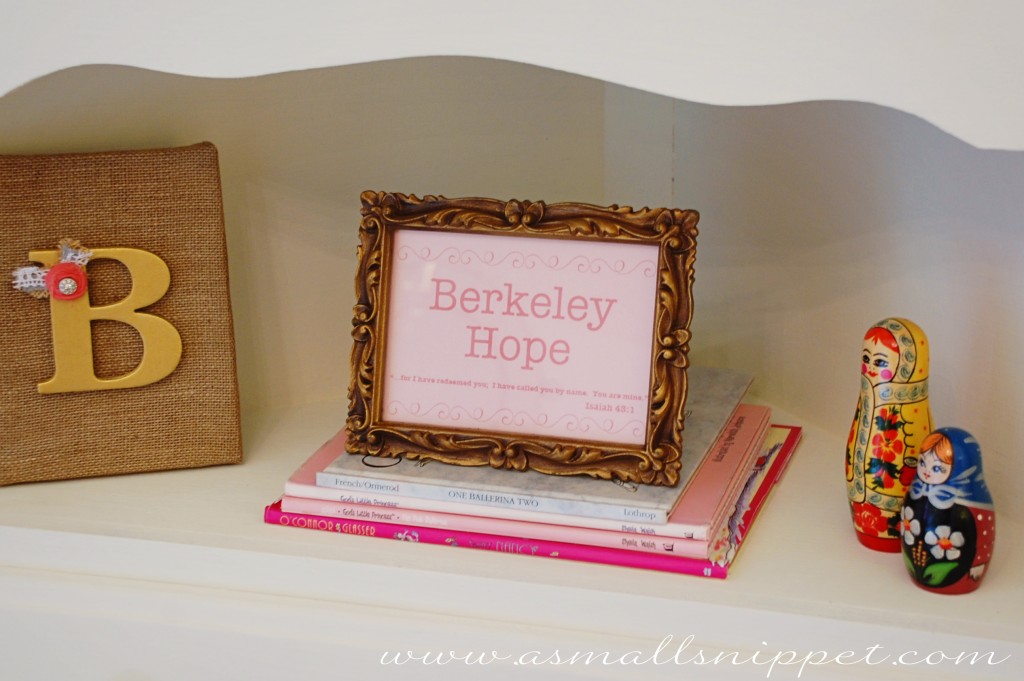
– the sweet wooden gold “B” on the burlap canvas was made by a friend of mine named Meredith

– i’ve always incorporated my kiddos life verses into their nurseries somehow, so i just printed up her name and verse and stuck it in a GoodWill frame.  i was waiting to see if God laid any particular verse on our hearts for her, and it wasn’t until my shower last weekend when a friend shared a devotion with us all, that was centered around this verse.  i knew right away that it was the verse we were to choose for Berkeley:

“…for I have redeemed you;  I have called you by name, you are mine.”  Isaiah 43:1
for so long, we thought that our little family was complete with just Canaan and Bella…until God changed our hearts not that long ago.  i love to think about how He chose Berkeley for our family, and called her by name, way before He even placed the desire for her on our hearts.   its like she’s been apart of our family all along, and God was just waiting for the perfect time to let us in on His special secret!

– Jake and my father in law painted the stripes on the wall behind the crib, and i think they did a fantastic job!  the wall color is by Sherwin Williams, called Eider White, and the darker grey stripes are the next step down on that same paint swatch, Sherwin Williams Repose Grey.

– the mirror is from Target

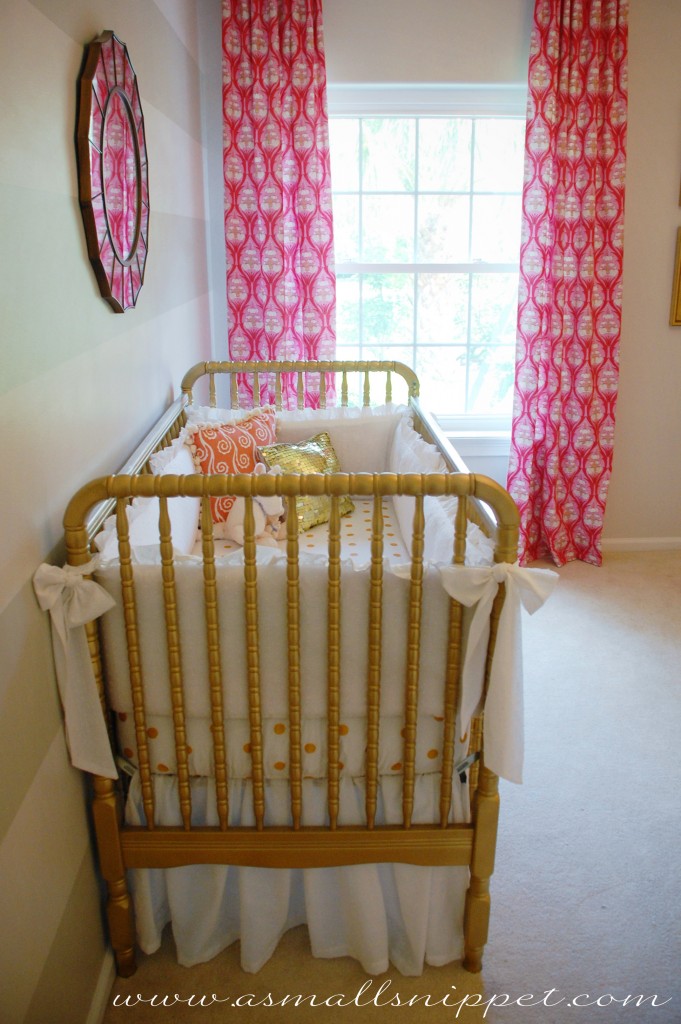
– i made the curtains from an Amy Butler fabric, called Soul Blossoms, Passion Lily.  i’ve got a very simple and easy tutorial coming soon if you are interested in how to make them.  i’m not kidding when i say its simple…you don’t even really need a tutorial, but i thought it would be helpful for beginning sewers!

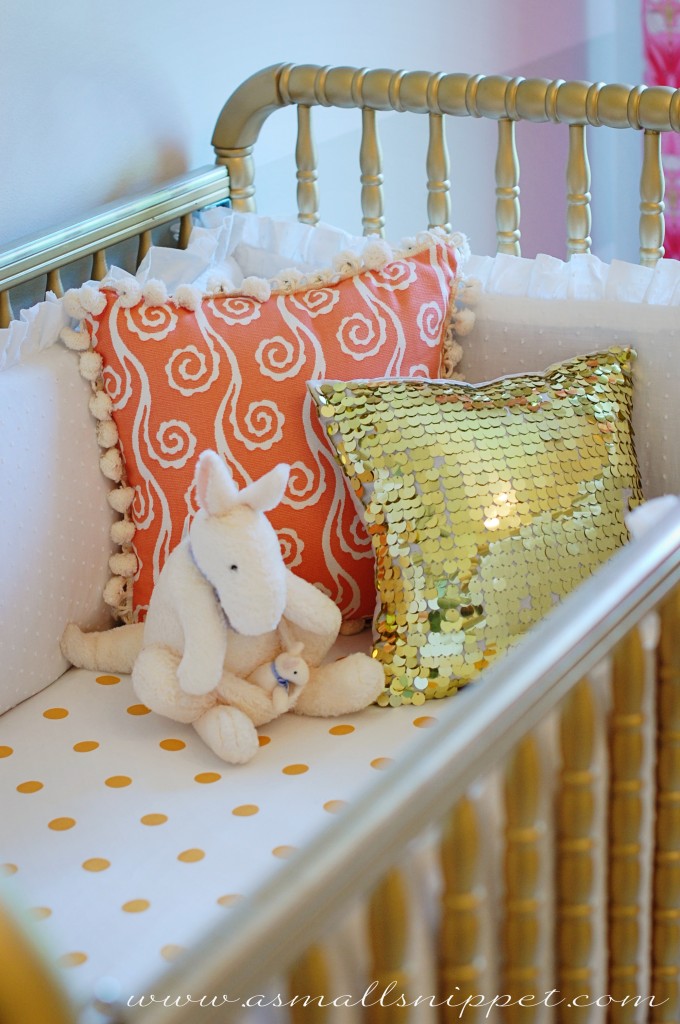
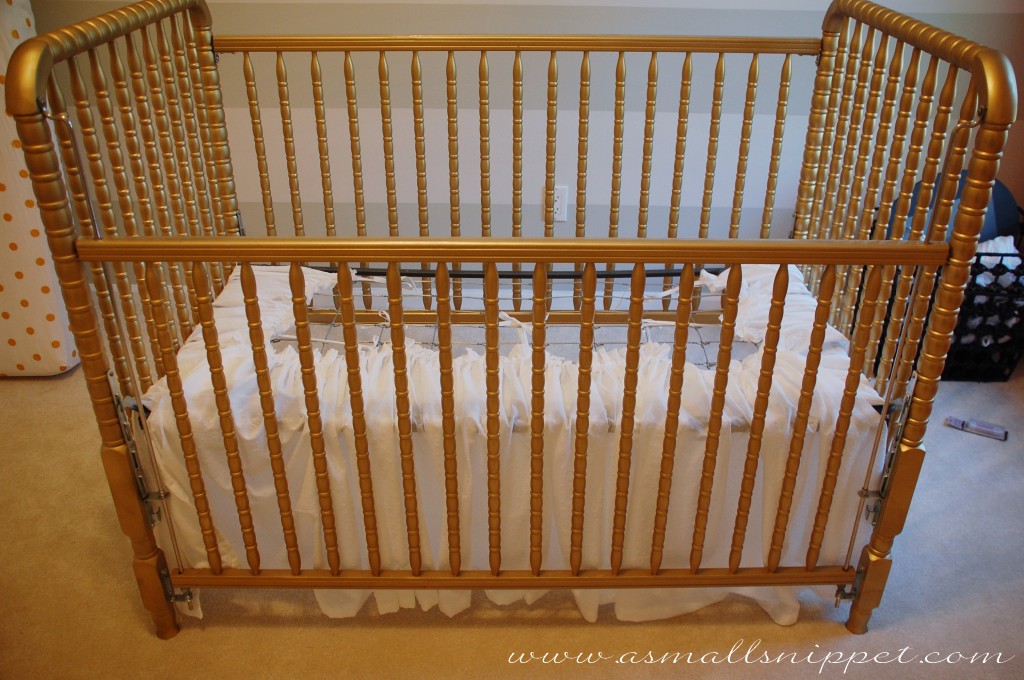
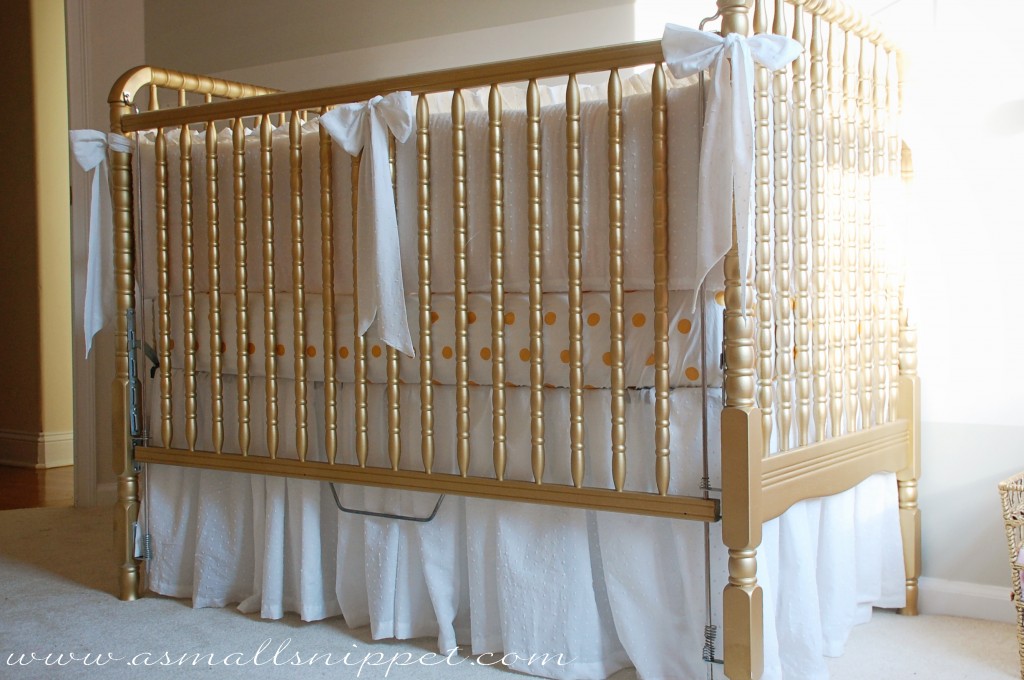
– i already told you all about the crib paint here, and the crib bedding here and here.

– the crib sheet is from Land of Nod

– my friend Donna also made the coral swirl pillow

– i found the gold sequined pillow on clearance at Home Goods.

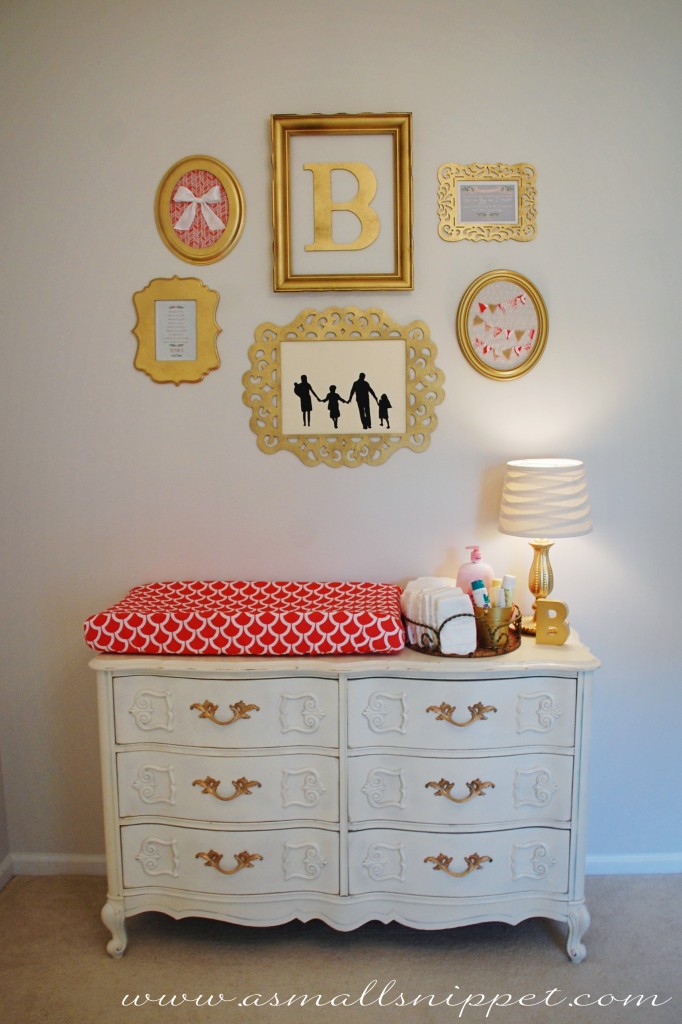
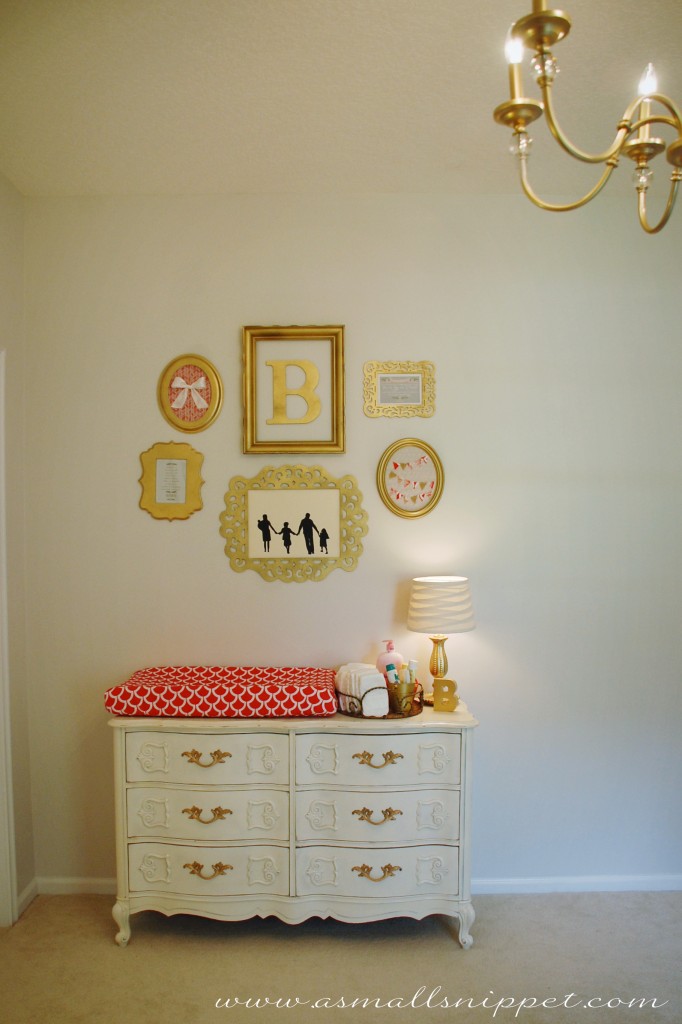
– the changing table was a Craigslist find, and i was thrilled that it was already the perfect color (saving me from having to paint it) and already had gold hardware.

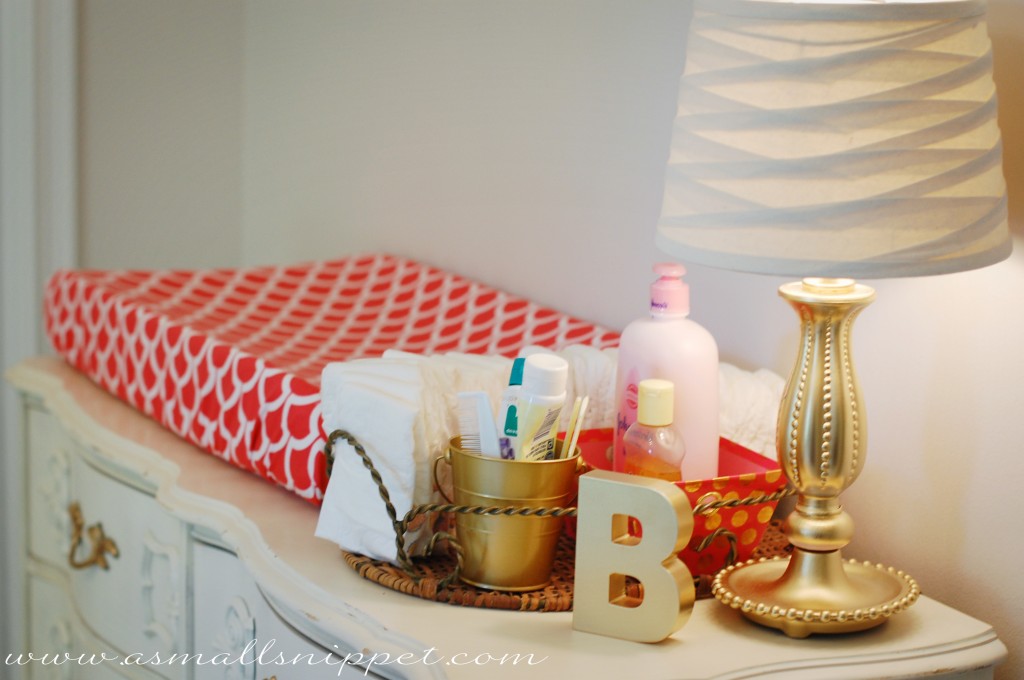
– i made the changing pad cover from a fabric by Michael Miller called Billow Coral.  (tutorial for that coming soon too.)

– the lamp was an old lamp that we had, that we spray painted gold.  i bought the lamp shade at Target.

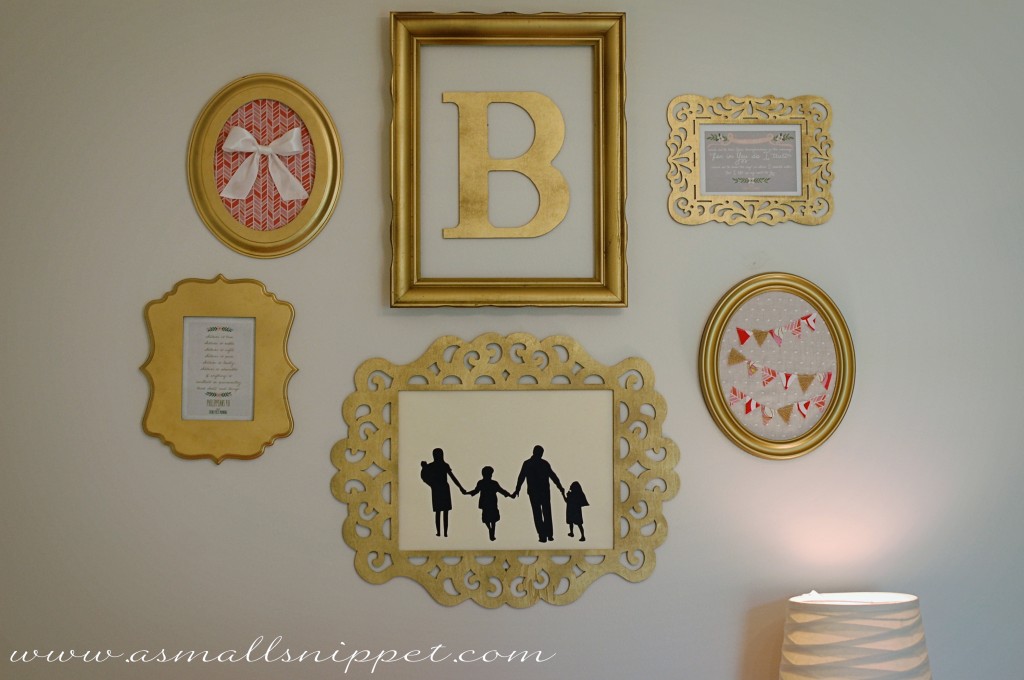
– i found the “B” at Michaels, and spray painted it gold.

– the gallery wall was a compilation of different frames that i had on hand and a few that i bought, all of which we spray painted gold.  the really decorative ones are just cardboard cut outs that i found at Michaels.

– the big “B” i bought at Joann’s Fabrics

i found some great ideas on Pinterest, and just revamped some that i had pinned.

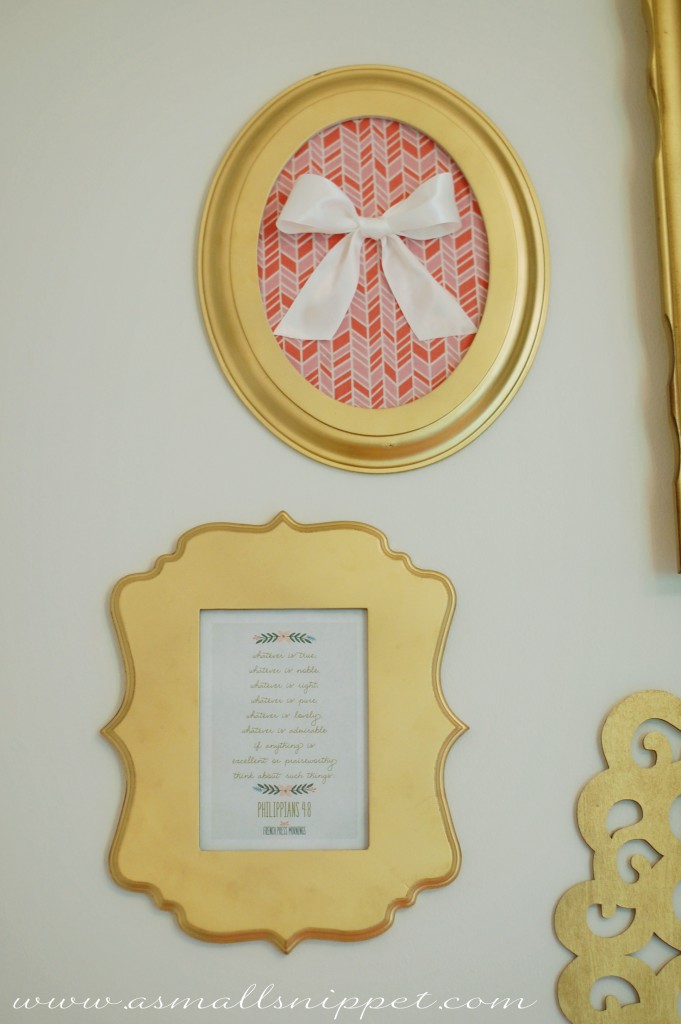
– i used the same fabric from the chair pillow as a background to a big satin bow.

– i printed some of my favorite verses from the free printables on this adorable site and framed a few around the room

using leftover fabric that i had used around the room, i cut out tiny triangles and sewed them into bunting:

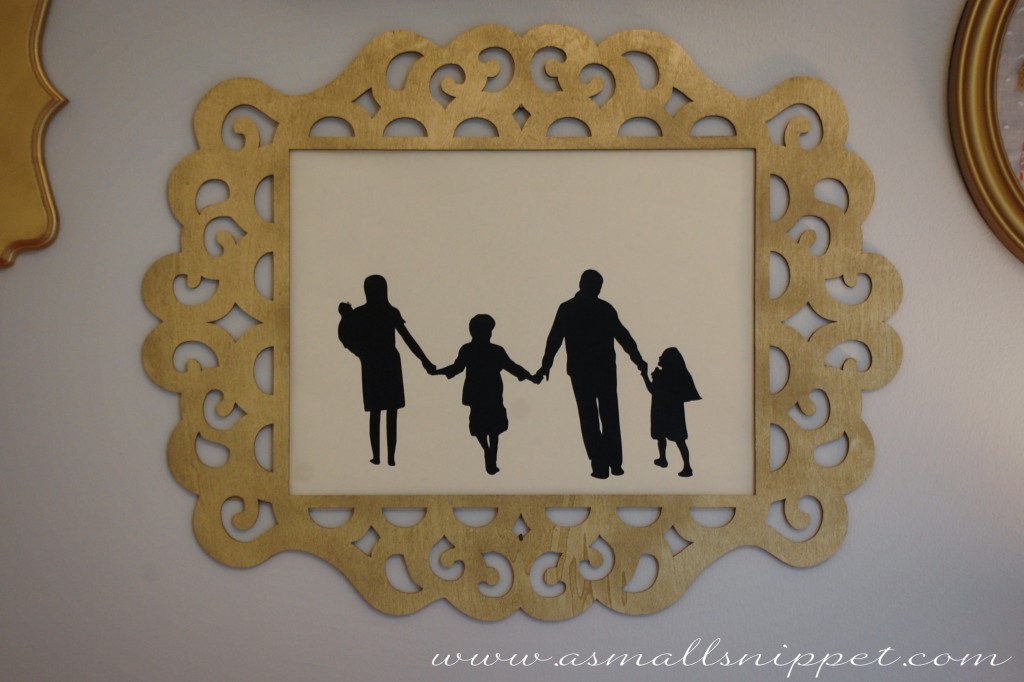
and this is one of my favorite parts of the room.  i knew that i wanted a silhouette of our family incorporated into the gallery wall.  so i enlisted the help of my dear sister/friend, May, and sent her over a picture of our family from our last photo shoot, and with her photoshopping skills, she turned it into a silhouette and added in a little baby on my hip.  if you look closely, she is even sporting a little hair bow!  she did an amazing job, and it really does look like my little family!!  i absolutely adore the way it turned out!  (i had it printed on cream paper at Fed Ex for only $1.50.)

i had a blast doing this room, knowing that it’ll be the last time i get to decorate a nursery :)  i think there is something so special about preparing for a new little one to join the family.  i love to think that one day our kiddos will know and understand just how excited we were as we waited for their arrival!

and that’s about it!  if there is a detail i missed that you want to know about, just ask :)

i promise to keep y’all posted on any news of Berkeley’s arrival, and if she doesn’t come in the next few days, then i’ll probably be back with more tutorials for you:  a changing pad cover, simple curtain panels, and a Boppy cover.

here’s to hoping that i’ll be posting pictures of Berkeley herself soon!

21 Comments

Aug

01

:: August Sponsors ::

where do the months go?  where has summer gone?  i’m having a baby sometime this month…that’s just simply crazy!

but wanted to pop in quickly before the month runs away with me to share with you my batch of August Sponsors.  have i told you before how much i love my sponsors?  they keep this tired, preggo momma going sometimes….

so please check them out!!

as always, you can click on their name or on their picture to be taken to their site or shop.

enjoy browsing!

:: Camp Mommawatchi ::

Looking for a fun way to connect with your kids and spend some quality time together? Try hosting a camp this summer at home!

Camp Mommawatchi specializes in at-home camp curriculum. Choose from one of our four themes to host your own at-home camp. Themes available are: Sports, The Arts, Science, and Secret Agent.

Your camp purchase will include:

*A full-color booklet with complete curriculum to help you host an at-home camp. The booklet contains schedules, instructions for all the activities, decoration ideas, recipes and Momma Time activities.

*Free instant digital downloads, including booklet, schedules, door signs, Momma Owl mail, and supply lists.

Visit our website at www.campmommawatchi.com to order and use promo code “asmallsnippet” to receive a discount of $5 off any camp. Offer ends August 31st.

Questions? E-mail us at mommaowl@campmommawatchi.com.

:: Nana’s  Nuzzles ::

Nana’s Nuzzles specializes in home sewn items that keep people cozy.  Whimsical quilts (all sizes), discreet nursing covers for mommas, matching baby carrier covers, and creative notebook or journal covers are just some of the products available.  Quilts vary in size from baby quilts to lap quilts and larger quilts for beds.  All work is carried out with TLC and a lot of heart.  Shop from our small inventory or order a custom-made piece with or without your own fabric.  Custom orders are always welcome. Follow the link to see my store, and thank you for taking the time to look.

:: Hupernikao ::

Hupernikao® (hoop-er-nik-ah’-o) is a new fitness apparel brand with one purpose: to inspire people to get out of survival mode, take up their shield of faith, and conquer their battles. The word “hupernikao” (a Greek verb) literally means “defeat soundly, prevail mightily, more than conquer.” It comes straight from Romans 8:37: Yet in all these things we are more than conquerors through Him who loved us.

Your battle – whatever it may be – may feel like it’s crushing you. But the truth is, there’s a conqueror inside you…and that’s a promise from God :) .

Shipping charges are such a bummer, so for a limited time, get free shipping with orders over $30 with promo code “asmallsnippet”!

Where can you get more info on hupernikao® fitness apparel?
Browse the store: hupernikaoinc.com
Watch the story of hupernikao®: youtube.com/hupernikaoclothing
Get the latest on our clothing (and a little inspiration): facebook.com/hupernikaoinc

:: Wendolina ::

All “Wendolina” rag quilts are reversible.  One side is finished and the other side has exposed seams that are snipped and fray to create the shabby chic look.  Both sides are made using designer 100% cotton fabrics so they can be displayed on either side.  Each square is sewn with a lightweight, natural cotton batting in the middle.  Every quilt is washed once to start the ragging process.  They can be machine washed in cold water and machine dried. The more you wash and dry them, the raggier and softer they will become.  Use the code SNIPPET10 for a 10% discount, just for A Small Snippet readers.

:: Transformations ::

*Are you addicted to Pinterest or HGTV?
*Have friends and family told you that you have a flair for decorating?
*Do you walk into a room and know immediately what to do with it?
*Do you need a home-based business making significant income?

Maybe your dreams have been on the back burner and you are just hoping for the right opportunity to come along. Maybe you’ve been subconsciously waiting for something in your heart to say, “This is it!”

Home Staging and Redesign are easy to learn and the industries are here to stay. Retired teachers and nurses, stay-at-home moms, interior designers, real estate agents, etc. have all found true love in this amazing business.

Is your heart beating? Is your soul stirring? Maybe you are one of us!

I invite you to take a look. All online classes are 50% off with code “asmallsnippet”


thanks for checking them out!

well…the nursery is completed, with the exception of one small detail i’m waiting on, but should be done this week.  (i’m coming back really soon with ALL the details!) Berkeley’s laundry is done, the car seat is in the car, our hospital bags are packed, and my belly can’t stretch another centimeter.  i’d say we are ready to go!!   Can’t wait to introduce y’all to our newest Crazy!!

0 Comments

Jul

31

Adjustable Ruffled Crib Skirt

can blogging be considered a part of nesting that momma’s experience at the very end?  cause i’ve had a spurt of energy to get you these tutorials…more so than i’ve had in months!

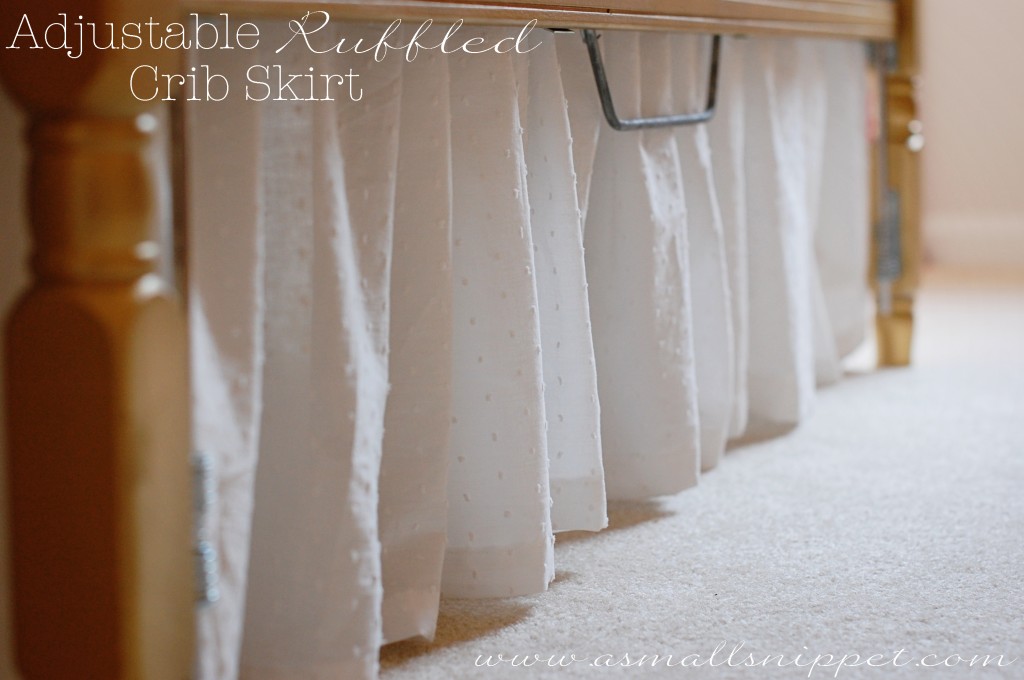
i wanted to finish out the bedding tutorials today, so as a follow-up to the Ruffled Crib Bumper tutorial i posted a few days ago, today i’m going to show you an easy way to create an Adjustable Ruffled Crib Skirt:

before attempting this project, i scoured the internet looking for tutorials for adjustable crib skirts, and there are tons out there, but none that were for adjustable ruffled, or gathered, skirts.  i knew that i wanted it to be a gathered crib skirt, as opposed to a straight skirt, and i knew that i wanted to be able to adjust it as i moved the crib mattress lower in the months to come.  i wanted the skirt to always just be touching the floor, versus being too short as the crib mattress is at its height, or too long once its at its lowest.

so i came up with this easy tutorial, that literally took no time at all, and achieved just the look i was hoping for.

the amount of fabric you will need will depend on the width of the fabric, as well as the measurements of your crib.  but for a standard crib, and a 54 inch wide fabric that you can cut in half width-wise, you will need 3 3/4 yards.

if your fabric is not 54 inches wide, then you will need 7 1/4 yards of fabric, unless the fabric you choose is wide enough to cut in half and still have your skirt touch the floor when your mattress is at its highest.

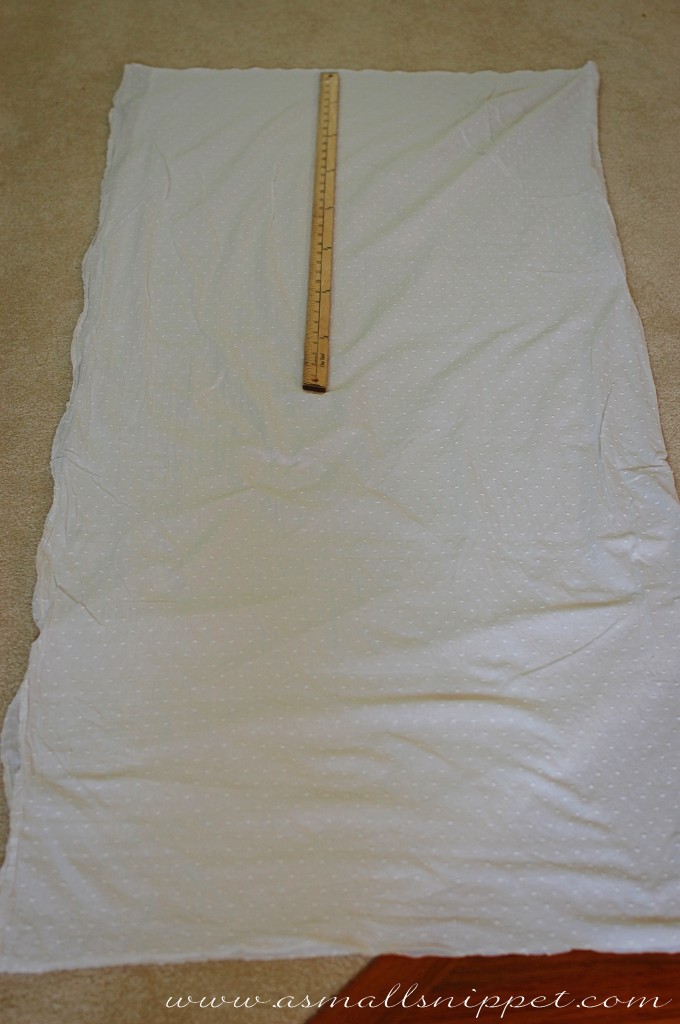
i started by cutting my fabric.  i made my crib skirt out of 3 separate panels, one for the front, and 2 for each side.  i did not need one for the back, as that is facing the wall, and you would never see back there anyway.

as i mentioned in my last post, i was using a white swiss dotted cotton, and my fabric was 54 inches wide.  i would again suggest pre-washing it.

the first thing you want to do is take your crib measurements.  my crib measurements were:
27 inches long for the short sides
and 50 inches long for the long side
(these measurements don’t have to be completely exact, as the skirt will be ruffled anyway, so you can take just a rough measurement of the length of your sides and front.)

i decided that since my fabric was 54 inches wide, i would just cut that in half to 27 inches, and that would be plenty of length to give me room to tie the skirt to the crib and still have it hang to the floor with the mattress at the highest place.

since i was wanting to ruffle the skirt panels, i needed to cut the panels 2.5 times the length of the crib in order to get a full ruffle.

so my final panel measurements were:
27 inches x 67.5 inches for my short panels (so cut 2 of those)
and 27 inches x 125 inches for the long panel

you might remember from my last post that as i was cutting out my fabric for my bumper, i was left with a piece that was 27 inches wide and 162 inches long.  i was able to utilize that piece for my long panel, so that i wasn’t wasting fabric.  so if you are sewing both the skirt and the bumper from the same fabric, you should be able to do the same if your fabric is 54 inches wide.

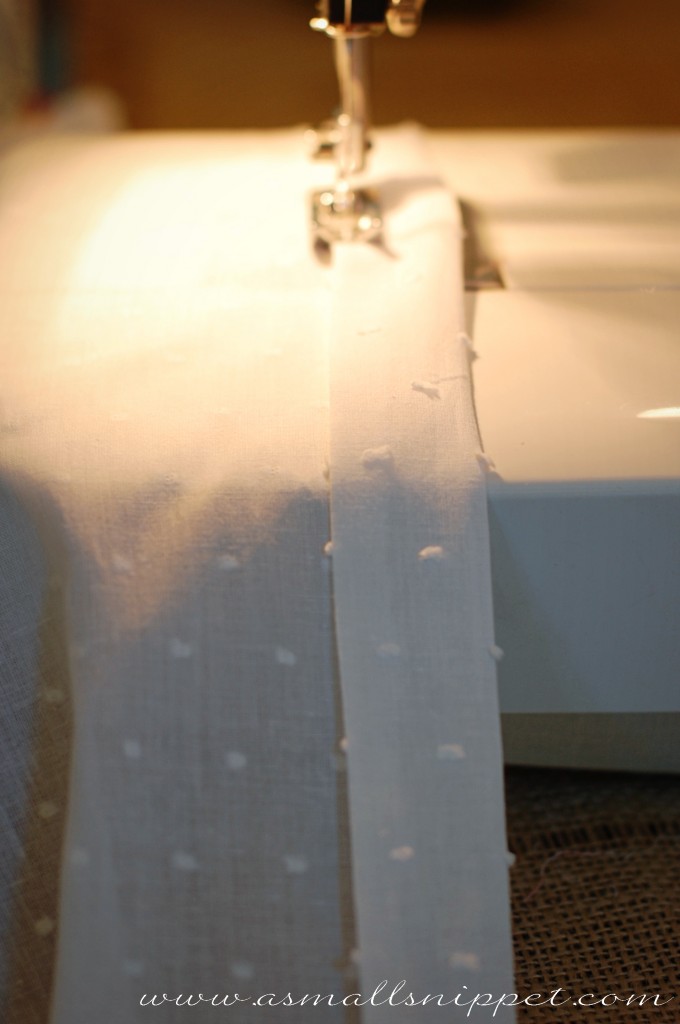
after cutting your panels, hem the long side of each of your 3 panels.  i folded over and ironed 1/2 inch and then another 1 inch, and then sewed to create a nice big hem.  this will be the bottom of your crib skirt panels:

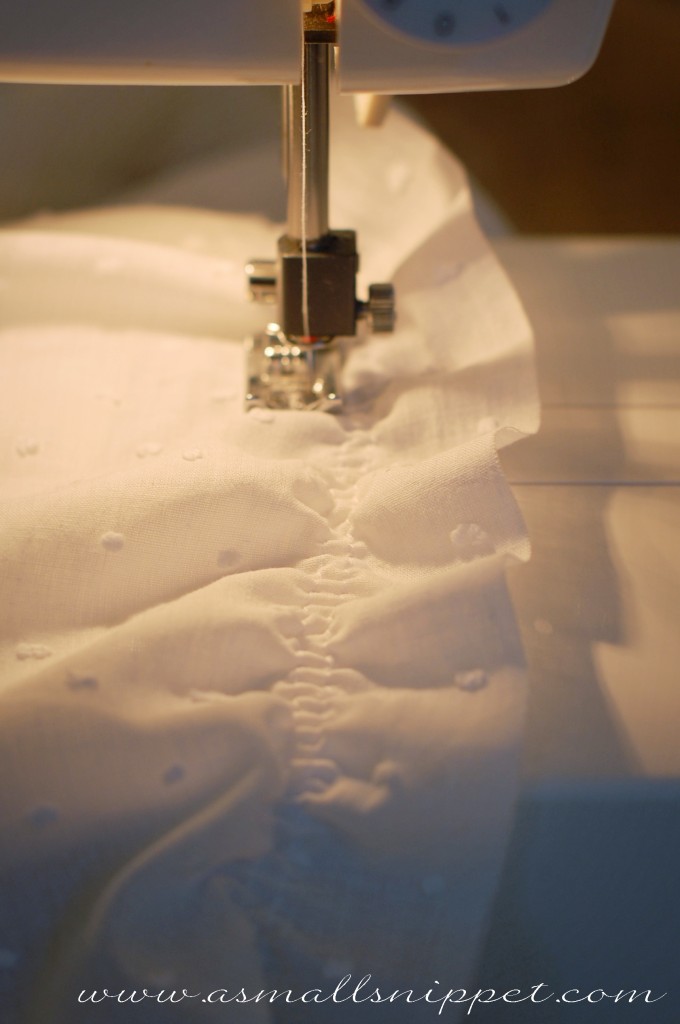
the next thing you need to do is ruffle your panels.  i ran a few lines of elastic thread on the top of each panel (opposite side from where you just hemmed), just like i did for the ruffle on the crib bumper.  you can check back here for more details on ruffling:

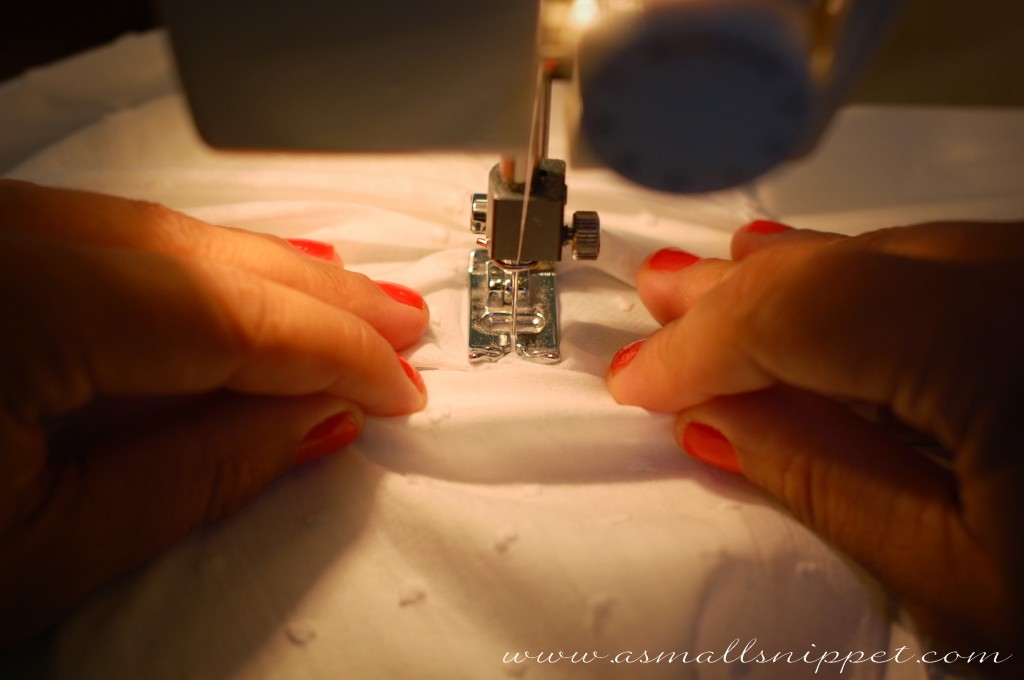
however, because this fabric was so long and therefore heavier than my small little ruffle on the bumper, i noticed that it was not ruffling as much as i needed it to.  so as i sewed my third line of elastic, i began scrunching the fabric by hand as it moved through the presser foot.  it ruffled beautifully that way!  and since that part of the skirt would be hidden underneath the crib mattress, it didn’t matter what the top looked like, as long as it created the ruffle down below:

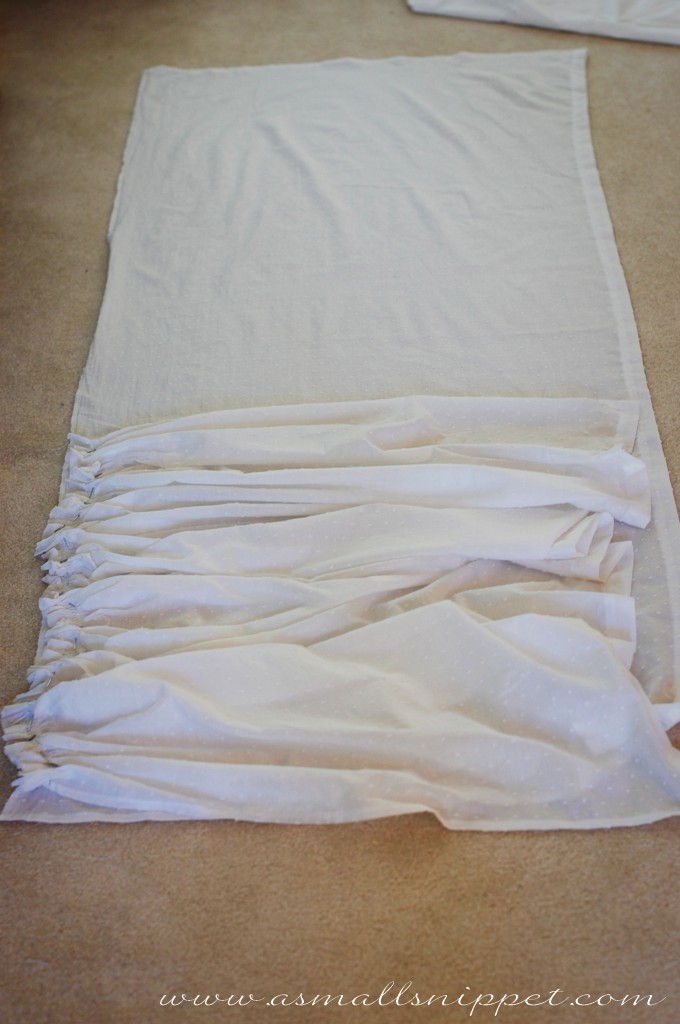
using my other short panel as a quick measurement, i continued to ruffle until my panel was a little less than half the length of the unruffled panel.  that way i knew that i had ruffled enough:

i ruffled the same way for the long panel.  you just want to make sure that as you are scrunching the fabric through the machine, that you end up with it being ruffled enough, but not too much.  if you scrunch evenly, creating a normal ruffle, you should be fine.  just hold it up to the crib to be sure you are in the right ballpark.  also, since you are sewing with elastic thread, you always have the option of stretching the fabric a bit as you tie it to the crib.  so you can’t really mess it up too much!

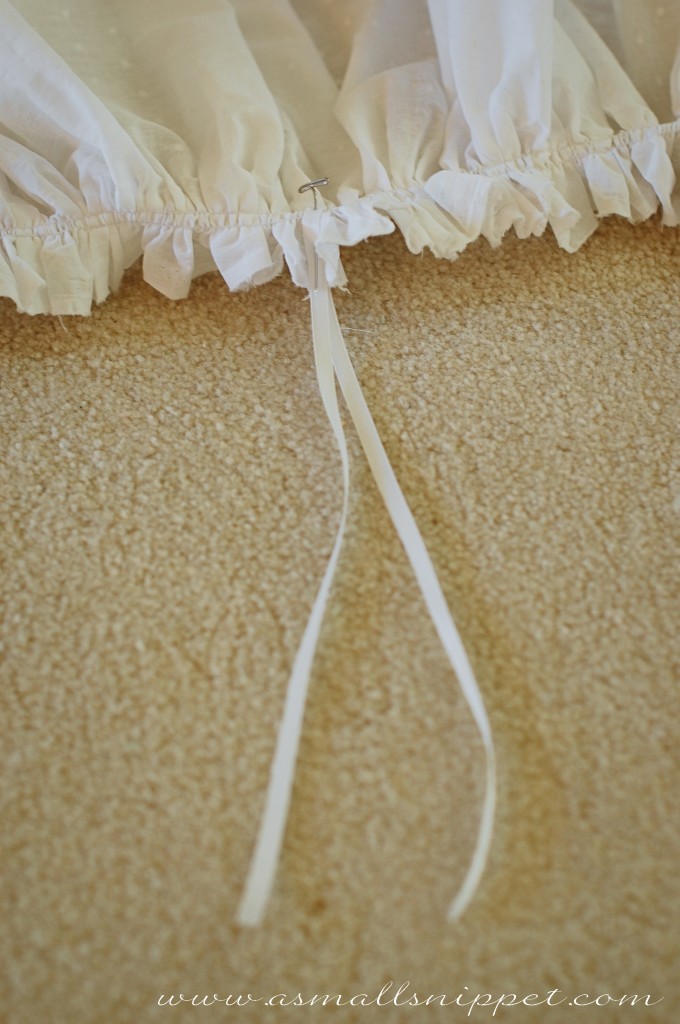
after ruffling each panel, i pinned on strips of thin ribbon, evenly across the top of each panel.  i folded the ribbon strip in half, and pinned at the fold line.  i used 3 strips for the short panels (one on each end, and one in the middle) and 5 strips for the long panel (one on each end, and then 3 more spaced evenly in the middle.)

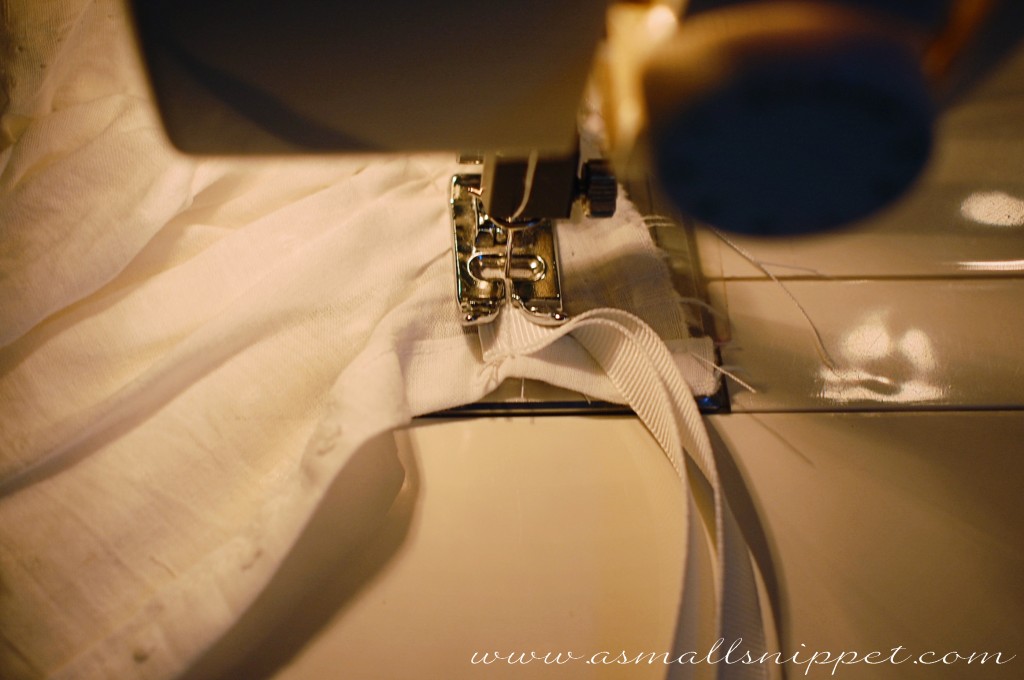
i sewed those on using my machine, and backstitched a few times to ensure that they would stay on tightly:

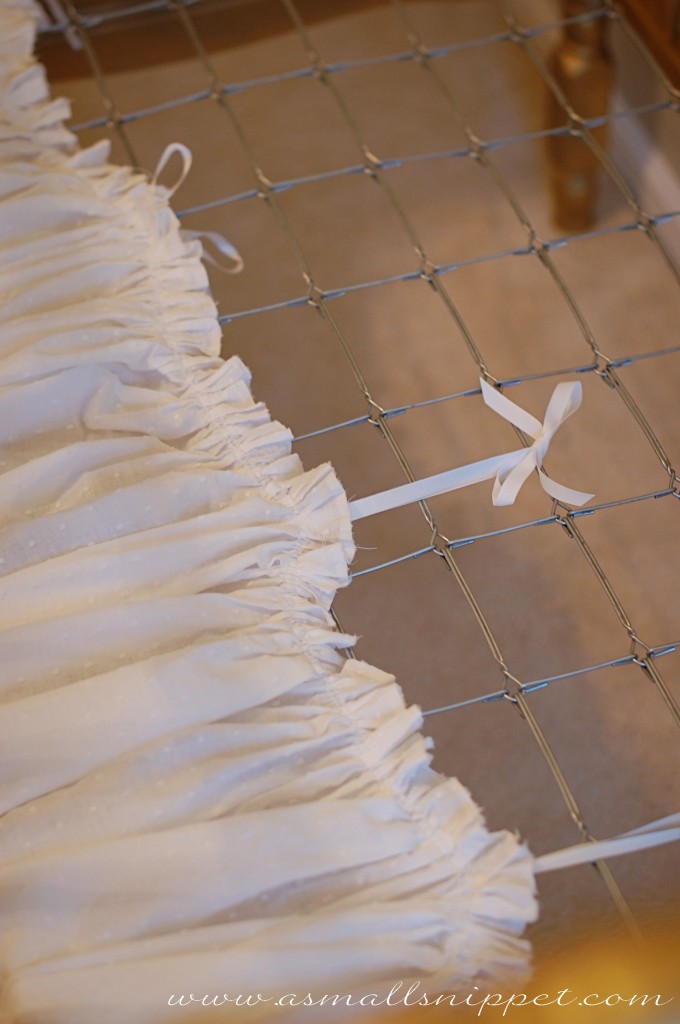
then you just tie each panel to your crib!

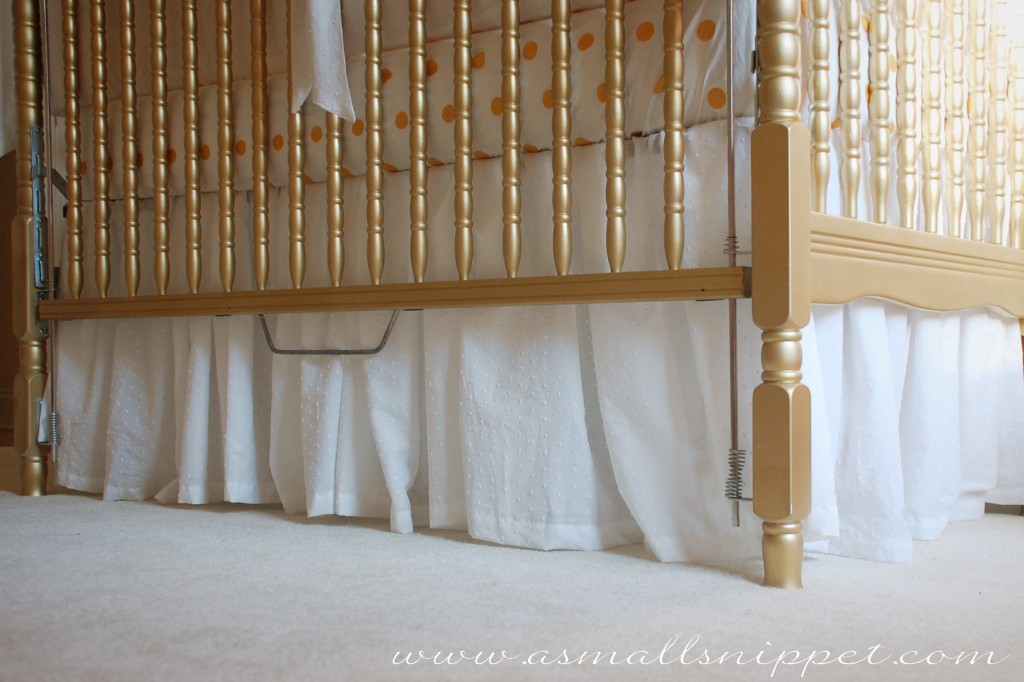
i didn’t use any kind of special technique to do this…just tied it where i thought it looked best, so that the panel just touched the floor once tied on:

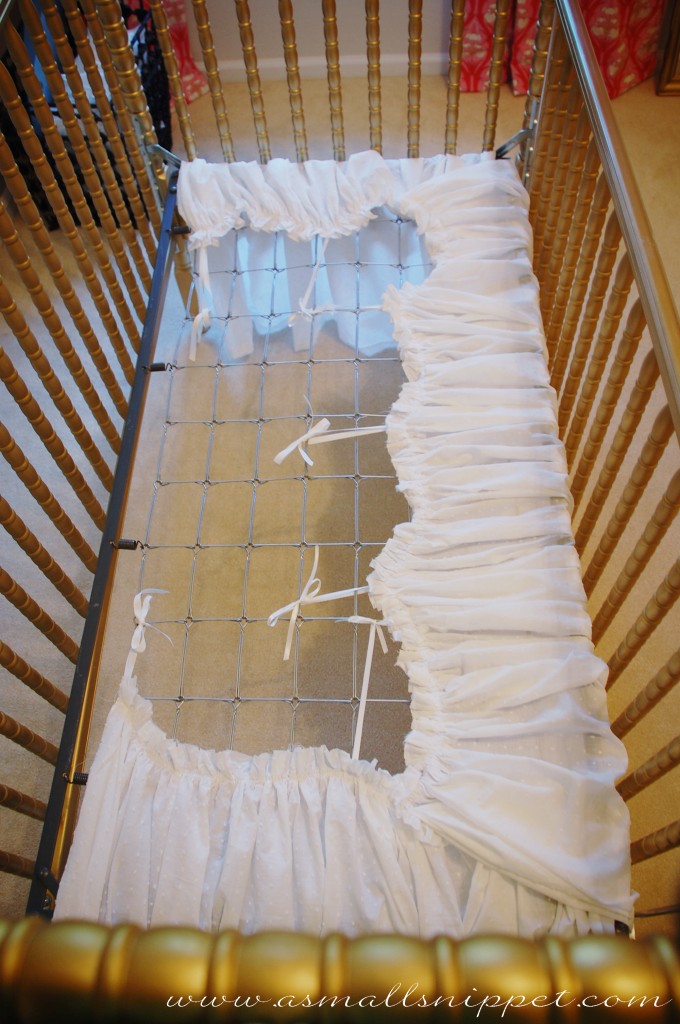
you can see that i have plenty of room to adjust the ties farther back once we lower the mattress as Baby Berkeley gets older, so that the skirt will always just be touching the floor:

once the mattress is back in place, you can tuck or adjust the ruffles as needed, which i definitely did.  the weight of the mattress will hold your adjustments in place:

that’s it!  it took no time at all, and i promise that if you can sew a somewhat straight line, then you can make this crib skirt.  as i mentioned before, its one of the reasons i love ruffles so much…they are SUPER forgiving, so your sewing and measuring skills do not need to be perfect! :)

i’ve got a few more tutorials for you coming up soon, and full pictures and details of the nursery too!

see you back here soon,

20 Comments