today i’ve got a tutorial that i think you’re going to love, and in the days to come, i’ll show you variations on how to use the basics of this tutorial for a few other skirt options too.
i set out to make a simple elastic waist skirt, but then decided on fabric that needed lining, so while i was at it, i figured, what the heck…i’ll throw in some pockets too

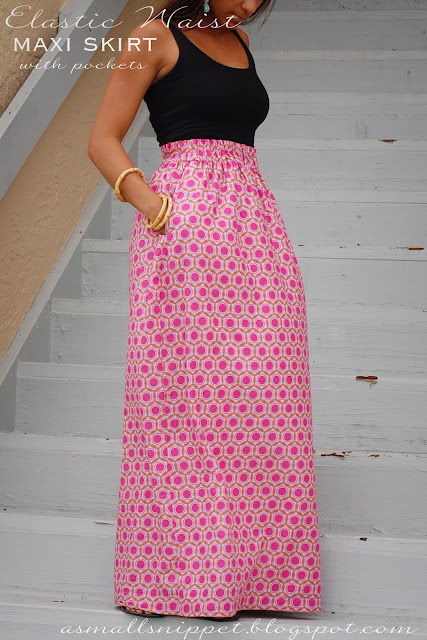
so that’s what i’ll show you today…a lined, elastic waisted skirt with pockets.
this is a pretty straightforward tutorial, and an easy project to attempt. in fact, i got on such a roll that i ended up making 4 skirts…with plans for more! so if you can sew a straight line, this is a good project to attempt, and you just might learn a few things along the way…like how to deal with lining (super easy) and how to create pockets.
here’s the long, maxi version:
and a short version:
this tutorial works the same for both the maxi and short versions of this skirt. i took the pictures while sewing the maxi skirt, so that’s what you’ll see here, but if you were wanting to make the short version, use the same steps and just adjust your measurements. i’ll show you below.
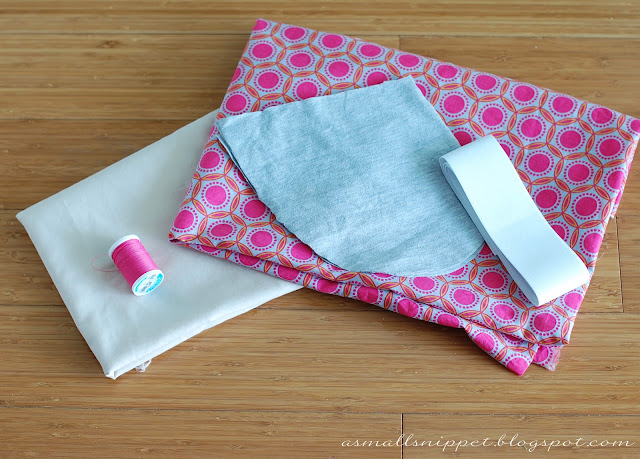
supplies needed:
fabric: you can really use any kind of apparel fabric or cotton for these skirts. my short skirt was made with a chiffon. the fabric for my maxi was a soft cotton remnant i found on sale at my favorite local fabric store, so i worked with the size it was. the starting piece was 53×55 inches.
to determine how much fabric you need, measure your waist, (in the place where you want the skirt to sit…i like mine at my high waist, so that’s the measurements i took).
for the maxi skirt, i would add a few inches to that measurement to ensure that you have enough fullness at the bottom of your skirt once completed in order to walk. because i was using a remnant, mine ended up only being slightly bigger than my waist measurement, but i would suggest adding a few more inches so it could be a little fuller on the bottom.
cut 2 pieces of fabric (these will be your skirt panels): your waist measurement plus 2-4 inches (or however much you need for fullness at the bottom), and then your desired length, adding about 6 inches to give you room for a casing for your waistband and a hem.
my final measurements on my 2 pieces were 27.5 x 45 inches. (again…if i had more fabric, i would’ve increased that width measurement by a few inches, but it ended up working out fine)
*** (if sewing the short version, cut 2 pieces of fabric the width of your waist measurement minus 3-4 inches…since you don’t have to worry about fullness like the maxi…and the length you desire plus 6 inches, to account for a hem and the casing for the elastic). my final pieces for my short version were 23 x 24 inches. (27 inches minus 4 for the width and 18 inches plus 6 for the length) ***
lining (only needed if your fabric is see-thru): cut 2 pieces from your lining that are the same measurements as your skirt panels, except 3-4 inches shorter in length. i chose lining that was similar in texture to my fabric and felt soft on my skin

fabric for pockets: cut 4 from pattern (see below) out of either the lining fabric or coordinating fabric.i created a pocket pattern for you by tracing a pocket from a skirt i already owned:
you should be able to download this PDF and print to use as your pattern:
Pocket Pattern
elastic: i used
2″ wide Elastic
, and my piece was 24 inches in length. (use your waist measurement minus 2-4 inches…whatever feels comfortable)
thread in a coordinating color
once you have both skirt panels and your pockets cut, pin your pockets 6 inches from the top of each of your skirt panels, right sides together, with pocket slanting down. do this on both skirt panels:
sew pockets to fabric with a 1/4 inch seam:
iron the seam so that pockets lay to the outside:
with pockets to the outside, pin skirt panels, right sides together, on only one side. make sure as you sew that you go around the pocket, following the curve of the pocket:
sew with a 1/2 inch seam on that one side only. once opened, you should see the one pocket completed, and now should have one long skirt panel:
lay your skirt panel right side down. now on the top of the skirt panel, fold fabric down 1/4 inch and iron (this will enclose your raw edge into your casing):
then fold over again, this time 2 1/2 inches, and iron. this will be your casing for your elastic.
(if using elastic that is not 2 inches in width, make sure you add 1/2 inch to the width of your elastic, and iron down at that measurement. my elastic was 2 inches wide, so 2 plus 1/2 inch = 2 1/2 inches)
once ironed down, unfold, and lay your lining fabric on top of your skirt panel. (the right side of the lining should lay on the wrong side of your skirt panel). line up the top of the lining with the line where you just ironed at 2 1/2 inches on the skirt panel: (see below)
fold top of skirt panel (casing) over again, back at the 2 1/2 inch line (making sure your 1/4 inch seam is still folded under. that just encloses your raw edge)
sew close to the bottom. this attaches your lining at the same time as creating your casing for the elastic:
next, fold skirt panel in half, right sides together, and flip the lining above the skirt panel, like this:
now…pin your skirt panels together on your last side, pinning pockets together, following the curve.
then pin your lining pieces together: (by flipping the lining above the fabric like this and pinning and sewing, you are ensuring that the seam of the lining falls to the inside of the skirt where you can’t see it, between the skirt fabric and the lining)
sew the skirt panels (following the curve of the pockets again like before) at a 1/2 inch seam. then sew the lining pieces together using a 1/2 inch seam. make sure you stop at the casing when sewing the skirt panels and the lining so there is a space left to insert the elastic.
flip skirt right side out, and tuck the lining inside of the skirt.
now you’ll insert the elastic into the casing.
it helps to pin a safety pin on the end to feed it through the casing:
feed through the casing, bunching fabric around elastic to fit it all the way in:
as you are pulling the elastic through and getting it situated, it helps to pin the other side to the edge of the casing so that you don’t loose that side in the casing:
once it is pulled through, stitch the ends of the elastic together. i stitch and backstitch a few times to make sure it stays together:
then tuck the raw edge of your opening in the casing under, and arrange, then sew closed:
hem up the bottom of your lining and skirt to your desired length.
i have an elastic waist skirt that has a seam down the middle of the elastic, creating almost a ruffle on the waistband, and ensuring that the elastic won’t roll or slide, so i decided to do the same with this skirt. to do that, i used elastic thread in my bobbin and my regular thread up top, and sewed a straight stitch down the middle of the waistband, but as i sewed, i pulled the elastic tight:
(i actually think you could do this without using elastic thread, but i’m not sure)
and you’re done!
oh if only you could see the way these photo shoots go down…with the hubs as the photographer and me as the subject…and the crazies giving us all kinds of directions…not my favorite thing in the world to do, but you’ve got to see the finished product on something other than a hanger to get the full affect!
the short version is done exactly the same way. you just use less fabric 
and here’s just a little troubleshooting in case this happens to you. i didn’t love the way my pockets fell once the skirt was completed. i felt like they puckered a little at the hips, and if you are like me, that’s not a great place to add any kind of puckering

so i sewed the top edge in a bit on the pocket, like this:
and then snipped the extra fabric and it seemed to take care of the issue. i didn’t have this problem on every skirt, so i don’t think it has anything to do with pocket pattern. maybe it was just the way the fabric fell once it was sewn. so just in case that happens to you, this was a good way to fix the issue!
i also topstitched both outer edges of the pocket, to ensure that they laid flat:
let me know if you attempt this tutorial and how it goes!
i’ll be back with 2 more skirt tutorials soon!

 so that’s what i’ll show you today…a lined, elastic waisted skirt with pockets.

 so i sewed the top edge in a bit on the pocket, like this:






 Follow

