it seems as if we are surrounded by cute preggos this summer! with all the little babes on the way, i figured i should find a good homemade gift to try for them.
so i searched through my “to-do” crafts folder, and found this project that i had seen a few months back. its a Clutch Changing Pad, and i REALLY wish i had had one of these when my little ones were much little-er!! it would have been so convenient to just throw this cute clutch in my purse or car for a quick trip instead of lugging around a diaper bag everywhere i went (cause it has a great pocket on the inside that holds your wipes and diapers! keep reading to see!)

i attempted one last week, and i really like how it turned out, so i thought i’d give you the run-down. you can go to this blog where i found the idea (i think she made it up and i’m so impressed by that!) to print the pattern and to see a great tutorial, but i’ll go ahead and post a tutorial of what i did too, with a few details that you might find helpful.
just to note…the pattern is for an infant size and a toddler size pad. i made the toddler size, since those infants grow pretty quickly into toddlers!
for the toddler size pad, you’ll need (2) 16×28″ pieces of fabric (one for the inside and one for the outside) and (1) 16×8″ piece of fabric for the pocket.
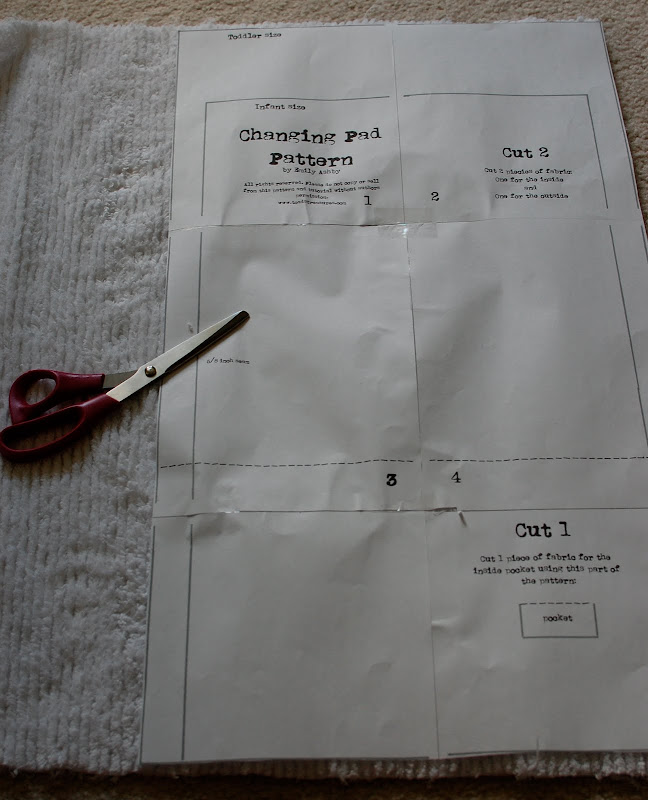
print out your pattern and tape together as shown. then cut to whatever size you want to make:
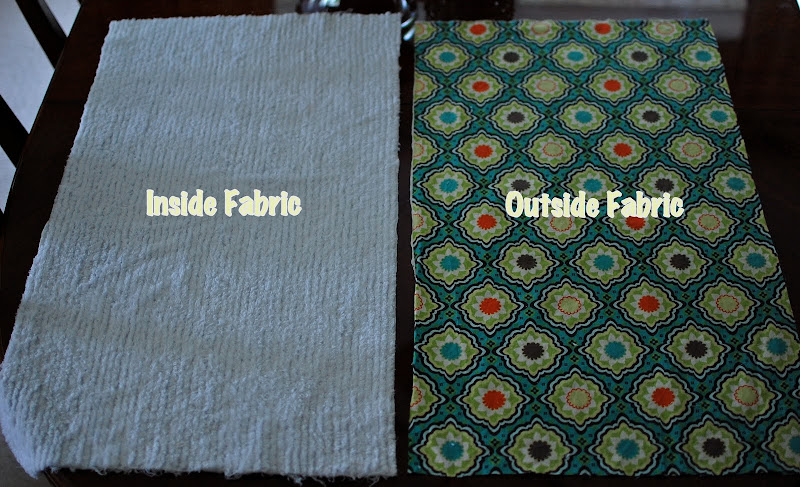
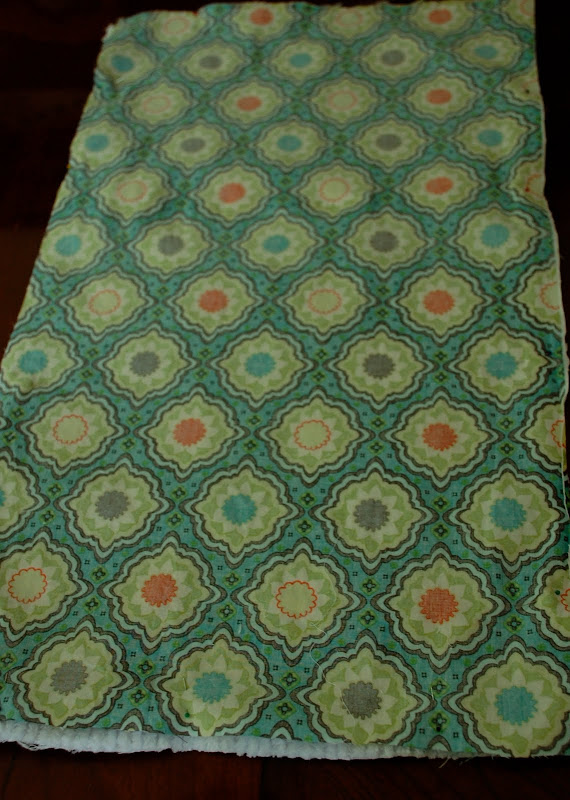
 using your pattern, cut one piece of fabric for your inside fabric and one for your outside fabric. i would suggest using a soft fabric for the inside, since that’s where the sweet baby will be laying. i used a white chenille, but a terry cloth or minky fabric would work too! you can use whatever cutey fabric you like for the outside!
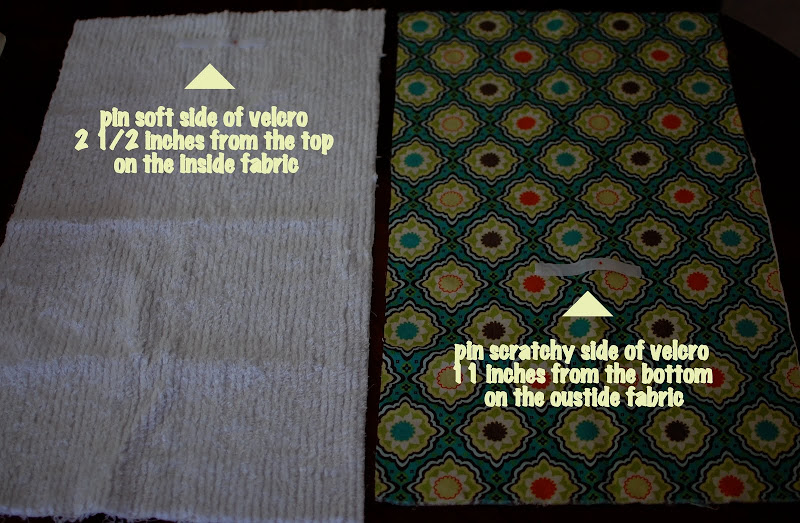
 cut a 4 inch piece of velcro. make sure you don’t use velcro with a sticky back. i initially made that mistake cause its all i had, and i ruined my needle and bobbin with all the glue on the sticky back when trying to sew it on.
 pin on velcro:
sew on velcro:
 cut out the pattern piece for the pocket, and using it as your guide, cut a piece of coordinating fabric, or you can use a leftover piece of outside fabric:
 with this piece, noting that the top of the pocket will be one of the long sides:
 on the inside piece of fabric, noting that the velcro marks the top of the fabric:
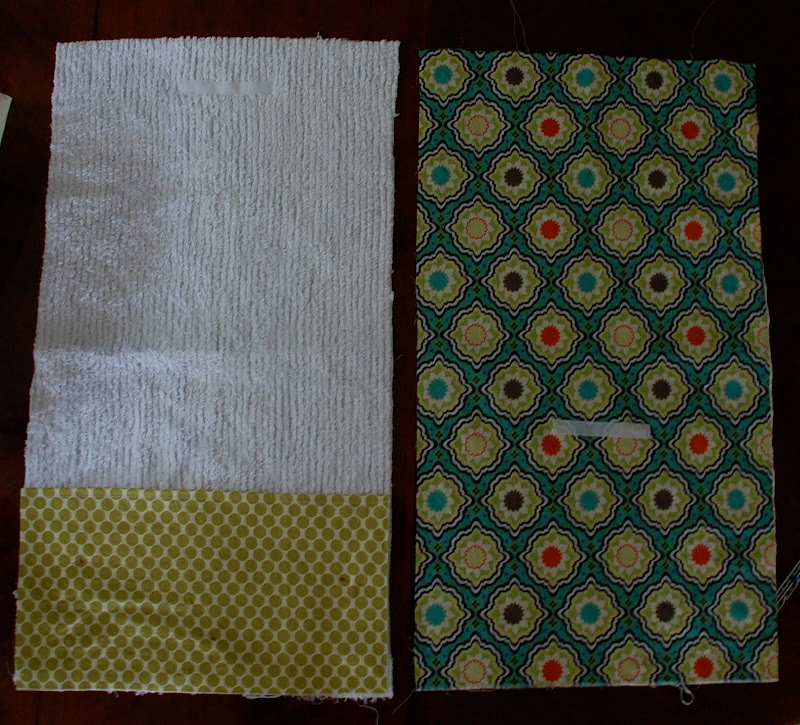
 lay the inside fabric piece with the pinned pocket next to the outside fabric piece, making sure that the velcro on the inside piece is at the top, the pocket is pinned at the bottom, and the velcro on the outside piece is near the bottom, like shown below:
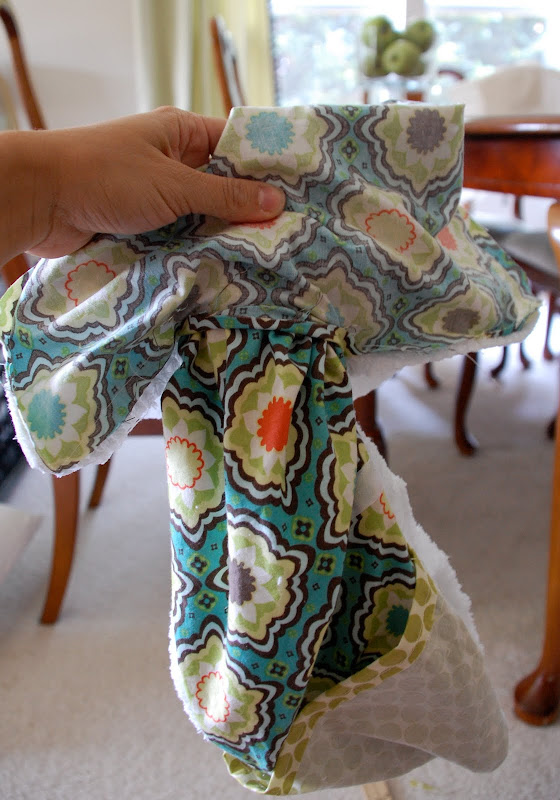
flip the outside fabric over and place on top of the inside fabric and pocket. basically, the two right sides of the fabric will be facing each other, sandwiched together, with the wrong sides on the top and bottom:
 pin together so the fabric doesn’t slip, and then sew around the entire outside, leaving a few inches open at the top in order to flip inside out once sewn:
 using that opening, pull the right sides of the fabric through. and don’t have a heart attack like i did when it looks like your pocket was sewn on the wrong side. just flip it over onto the inside fabric and you’ll see that you were right all along! (if this happens to you, you’ll know what i’m talking about. if not, then you saved yourself a little bit of brief breath-loss and heavy heart palpitations!!)
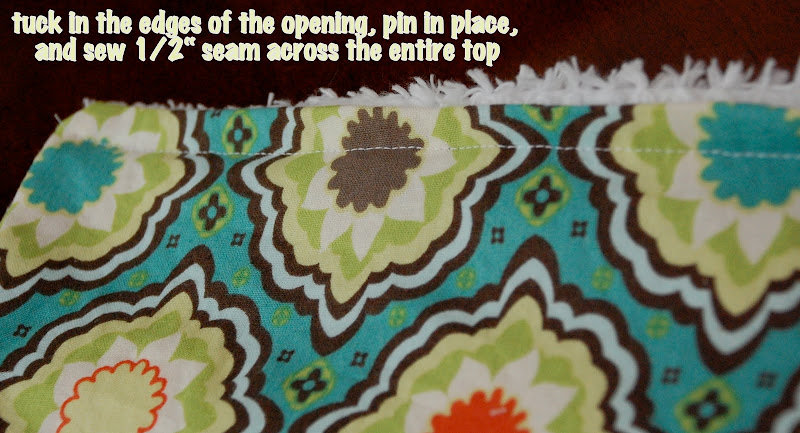 this next step is optional, but i think it makes it look better:


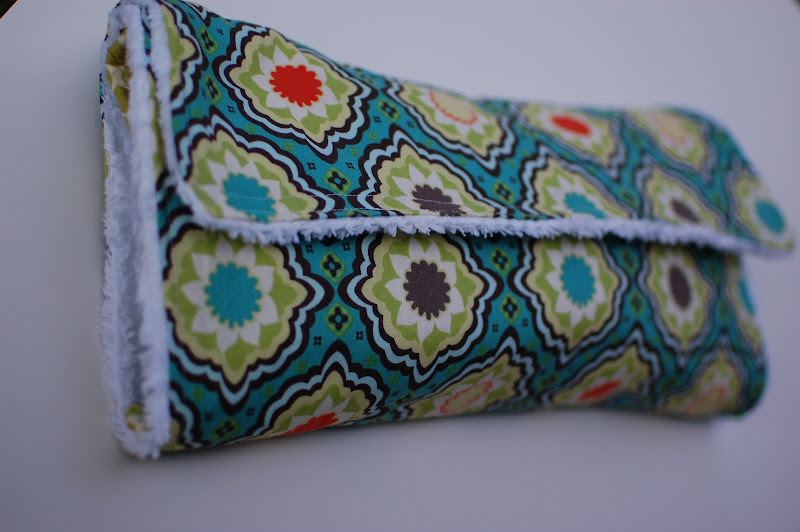
 and enjoy your new Clutch Changing Pad!
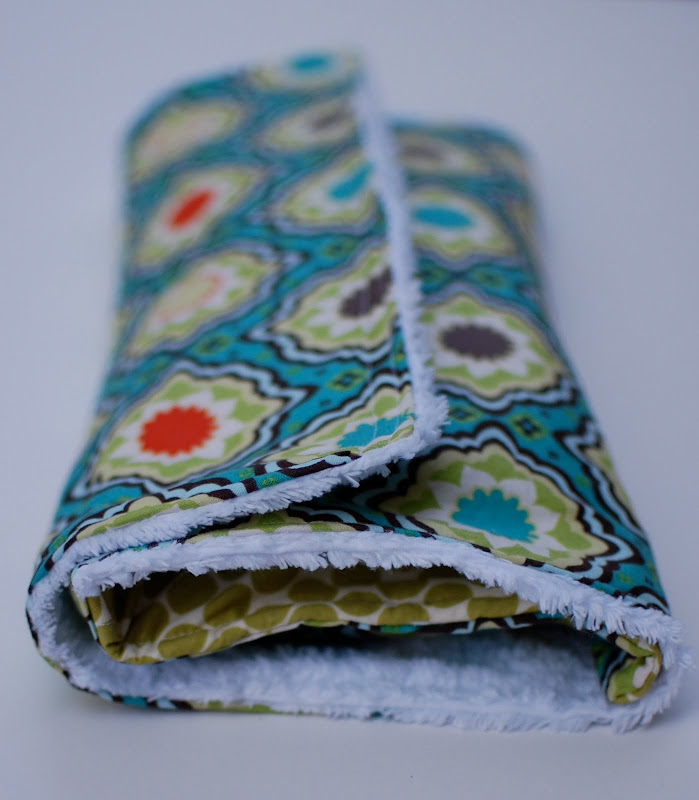 i made these little burpies with some coordinating fabric to go along with the changing pad, and i think it makes for a pretty cute gift!

now that i’ve pulled the old machine out, i need some more sewing projects!! any suggestions??

PS: today marks the 6 month anniversary of the disasterous Earthquake in Haiti. please pause for a second to pray for those people, specifically that the world would not forget about our beloved friends there! and today is the last day to vote for Lespwa, so click here to do so if you’d like. if you need further motivation to “Vote your Socks Off” just watch this video that our Lespwa missionaries made, and just see if this joy is not contagious!!

 But like many 3 year old Princesses, she can throw a tantrum in a split second like no other, especially when she realizes that the Queen/Paparazzi is trying to capture a picture of her:
 Exasperated, she takes a quick break in order to figure out what can possibly be wrong with her shoes:
 and the Princess is happy once more, as she receives a hug from her Frog Prince!
 because she’s attempting to pack for a trip to a Third World Country!
 Follow