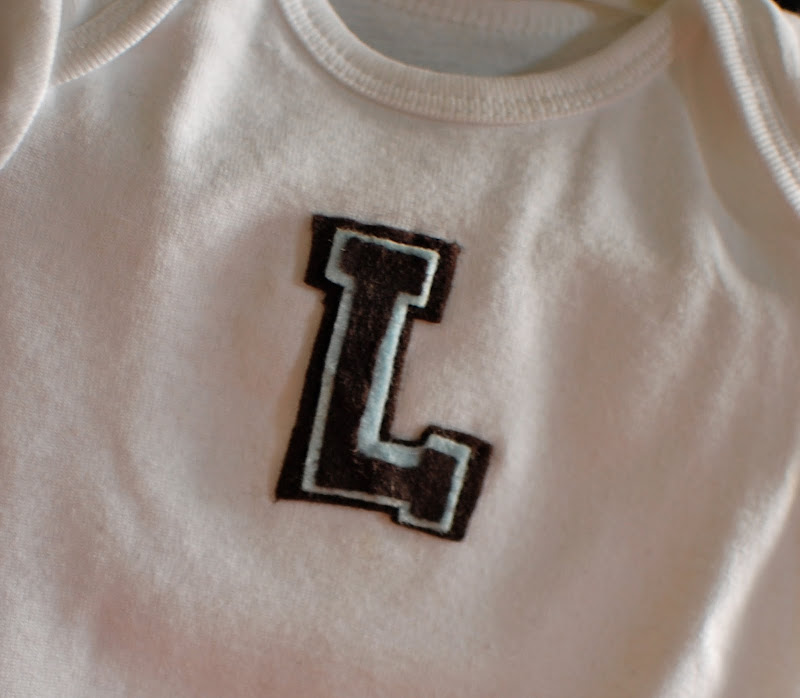
so basically, today, i’m going to show you how to monogram without spending mega money!!


i LOVE LOVE LOVE anything personalized. but the price tag for monogramming is too much for this little fam of our’s to afford on a regular basis. i even have dreamed of and priced out monogramming machines, but for now, that will remain a distant dream! 
but a few years ago, i was dying for some monogrammed Christmas stockings. so i came up with the idea to use felt:

and it worked!! however, i didn’t really think it would hold up very well on clothing. that is, until my friend, Gretchen’s sister in law, Erica, who is super talented, made a onesie for Gretchen’s baby using the felt technique, and it looked so stupendous, that i knew my monogramming problems were solved! (i wish Erica had a blog with all her cool stuff, cause i’d link ya’ll to it!)
anyway, i took the idea and ran, and have been making gifts for all my preggo friends, as well as a few shirts for my own kiddos. i have more in the works, but i thought i’d give you the run down in case you want to jump on the cheap monograming train with me!!
basically, all you need is a shirt/onesie of some kind, some felt and iron-on stitch witchery (aka: no sew iron-on seam tape) as well as a print off of what you want to monogram. and depending on where your creativity takes you, possible embroidery thread.
 cut out individual letters into rectangles. cut felt to the same size.

 remembering that its taped, because felt can stretch and rip easily:
 (sorry to change up the lettering on you…i’m using pics from multiple projects!)


 check to be sure that the letters have attached. (basically, stitch witchery melts into an adhesive substance when heat is applied…and holds like crazy!!) you might need to check each letter and press iron on certain parts to make sure its all attached. don’t run iron back and forth though, as the letters can shift. just lift and place.
here are some finished products!
 for these, i created layers of felt, and used embroidery thread and sewed a simple stitch all around the outside of the top layer. (the stitching idea is compliments of Erica…i think it gives it just a little added oommpphh, especially when using just one letter!)
 here is another example of creating layers, without the stitching. i used stitch witchery to attach the layers to each other, as well as to the onesie:
 on the ones where i used a decorative stitch, i sewed the layers together with the embroidery thread stitch and then ironed the whole piece on with the stitch witchery.
 a few things to note:
i have found that stitch witchery holds up really well on its own. but for a few of these, i did hand stitch the letters on the onesie after ironing them down, just to give it extra hold. you could even stitch them on with your sewing machine too.
also, when washing, i would suggest turning inside out, and hanging to dry, instead of putting them in the dryer!
if you attempt, send me photos! in fact, if you’ve attempted any of the projects i’ve posted before, send me pics! i’d love to see and share what ya’ll have done!!
check back…cause i have another craft coming up in the near future using this cool pink fabric and more felt monogramming!


 and some small flour tortillas, a few tablespoons of butter, and some cinnamon and sugar.
bake tortilla chips at 375 degrees for 8-10 minutes.


 Follow


