Photography 101 {Part 2: The Photographic Triangle}
i’m back to talk about Part 2 of my series:
so today i’m going to be talking about the Photographic Triangle, what this is and what it means, and how having a basic understanding of it can move you from shooting in automatic mode to manual mode, giving you more control over the types of photos you get. this is the most technical of all the posts in this series that i’ll do, but i’ll try to break it down for you so that it’s simple and easy to understand…which is the only way i know it anyway!
so, you might ask, what the heck is the Photographic Triangle?
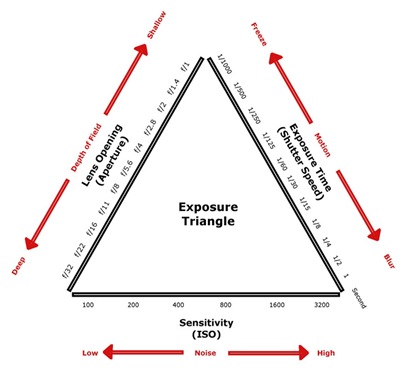
(source)
Basically, the Photographic Triangle is made up of 3 things that work in conjunction with each other, each time you take a picture, to give you the proper exposure (or, the amount of light you are using when taking a photo.) In order to understand how this works, you have to know that all three of these are connected, so if you adjust one, it affects the others.
The 3 parts of the Photographic Triangle are aperture, shutter speed, and ISO. They all 3 have to do with controlling the amount of light that comes into the camera as you are taking a picture. why is that important? because if you don’t have the appropriate amount of light, you don’t get a good picture.
When set in automatic setting, which is most likely how most people shoot, the camera adjusts these three things to allow the right amount of light in for the picture to be exposed properly.
“okay great!” you might say. “i’ll just keep my camera in automatic setting and let it do all the work!” you can certainly do that, and i do that on occasion too. but we have to remember that our cameras are computers, and although sometimes they do a good job, i still like to believe that humans are smarter, and as an artist, you may just want to have more control over your camera to take your photography from good to really great. so by having a very basic understanding of how these 3 things work, you can move out of automatic setting and into manual settings to give you more control over the final outcome of your photograph.
so it’s good to have a very basic understanding, especially if you want to venture out and try to get a little more artistic with your photography.
i’m going to try to keep this simple, basic, and easy to understand…so this will not sound professional, but more of just one mom trying to use everyday language to explain hard concepts simply. so fair warning for all you professionals out there…i’m not trying to sound professional, and even if i did try, i’m not sure i could!
so let’s break down the three components of the Photographic Triangle:
Aperture – how wide open the lens is. The wider the opening, the more light you get into the camera. Some lenses are able to open wider than others, allowing for more light to enter. (like the Nikon 50mm f/1.4 prime lens I was telling you about in Part 1.) the smaller the number or f-stop on the lens, the wider the lens opens.
(source)
Aperture also determines the portion of your photo that is in focus. (bokeh, or depth of field). The wider the lens is open, the more blurred your background will be (shallow depth of field), so less portions of your photo will be in focus. if i had to choose my favorite part of the photographic triangle, it would be aperture, because i LOVE shallow depth of field, and i love not having to use a flash. I really love photographs where the image pops out, is super crisp and sharp, and the background is blurred. i feel like that style of photography looks the most professional and artistic.
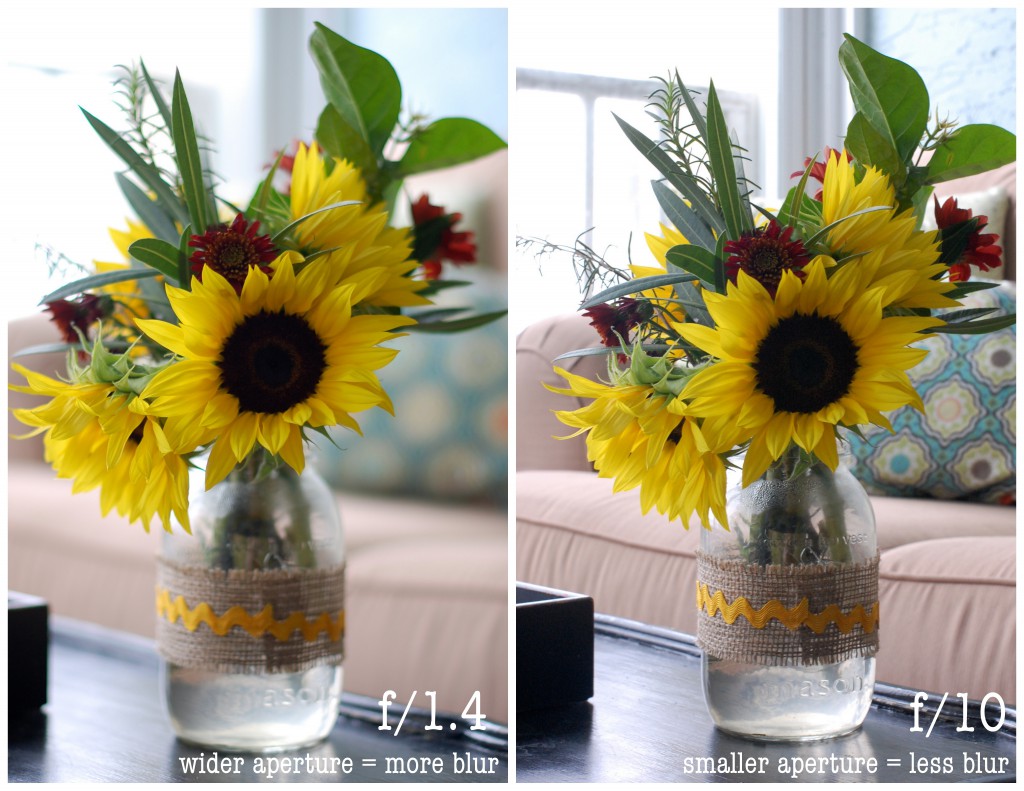
here’s an example of the same shot taken at f/1.4 and at f/10. you can see the difference in background blur (depth of field) when set at a wide aperture:
you can see in the photo shot at a wider aperture, only the direct focal point is in focus (the front sunflowers), and the vase and background are blurred. with a smaller aperture (bigger f number…i know…confusing!), the majority of the photo is in focus.
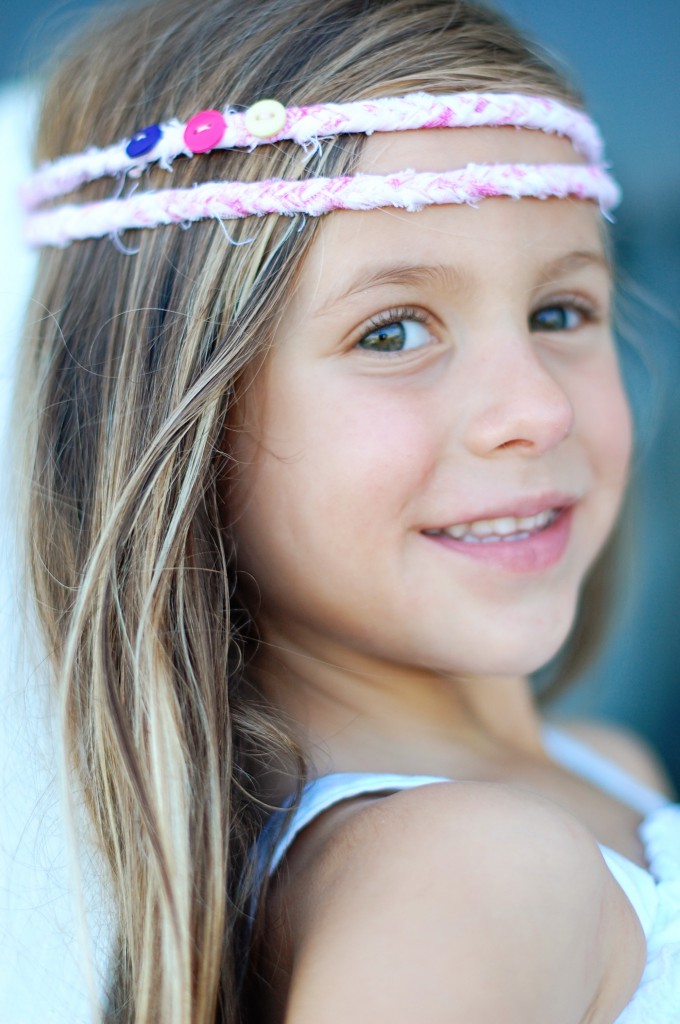
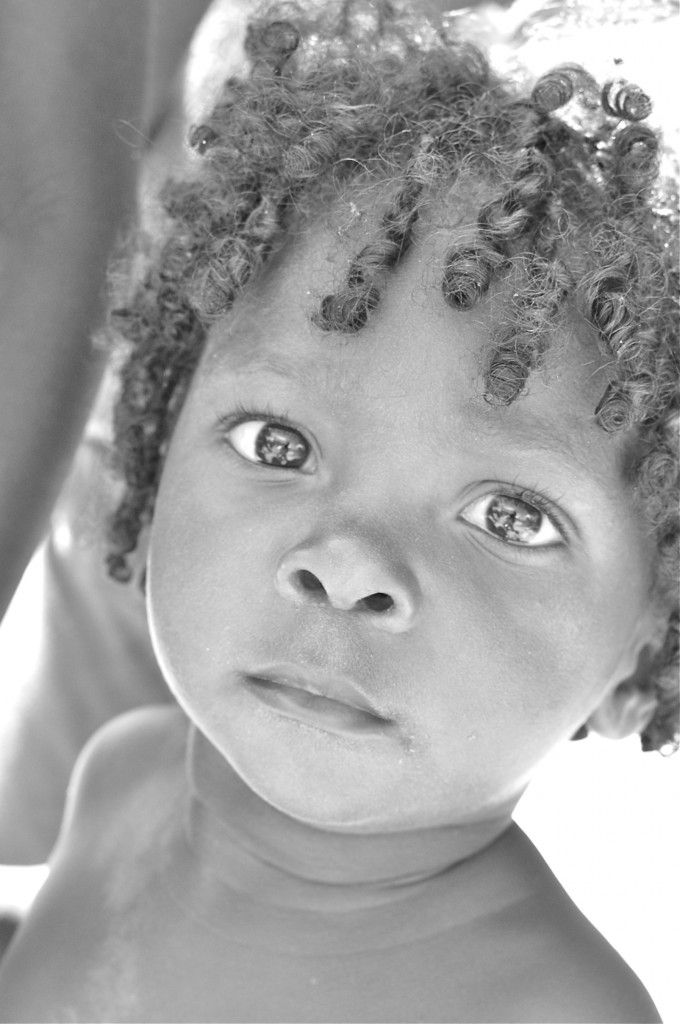
you have to keep in mind that the wider the lens is open, the more blur you are getting, so the parts of your photo that will be in focus are those in the direct foreground. for example, if i have my lens open as wide as it will go, and i focus on my child’s nose, those features that are set back (say her eyes) may not be as sharp, because the wider the lens is open, the more blur you get in the background. make sense? here’s an example:
(f/1.8, 1/800 of a second, ISO: 200)
i shot this picture at f/1.8, and you can see that her foreground features are in focus, but there is lots of blur, so therefore all of her features are not sharp or in focus. because there was plenty of available light, it would’ve been better to shoot this at, say, 4.0 and adjust the other components of the Triangle.
however, here are a few examples of where lots of blur can still make for an artistic photo, even if all the features aren’t in focus:
(f/1.6, 1/4000 of a second, ISO: 200)
(f/1.8, 1/320 of a second, ISO: 800)
so although i like to have as much blur as possible in my background, because i think it makes the image pop out, i need to be careful to not necessarily shoot in my widest aperture all the time, because i may not get all the portions of my image that i want in sharp focus.
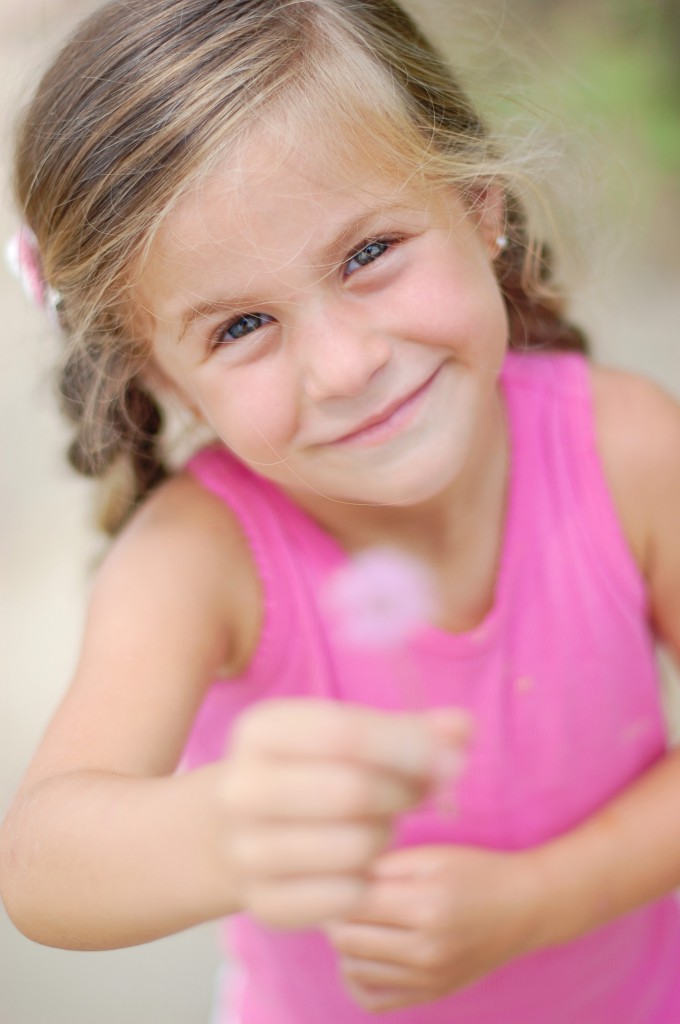
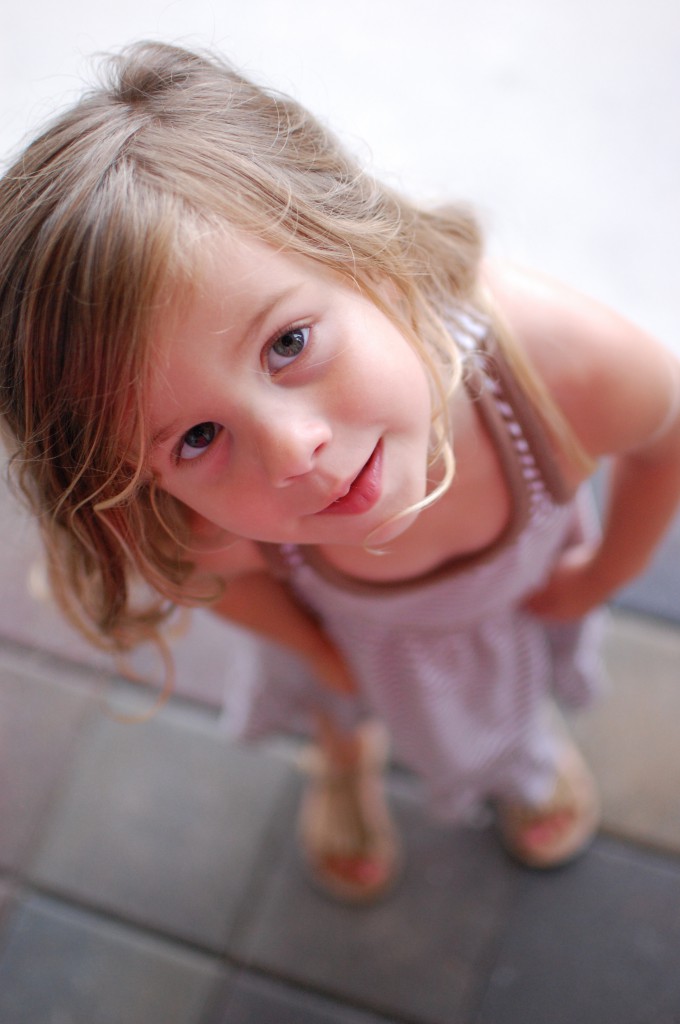
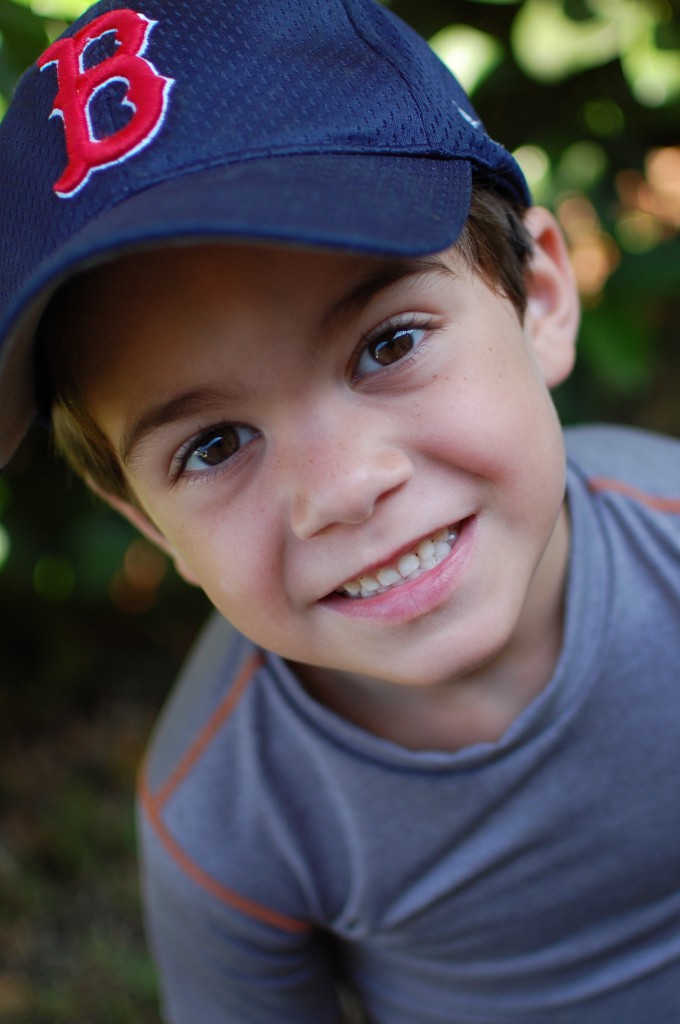
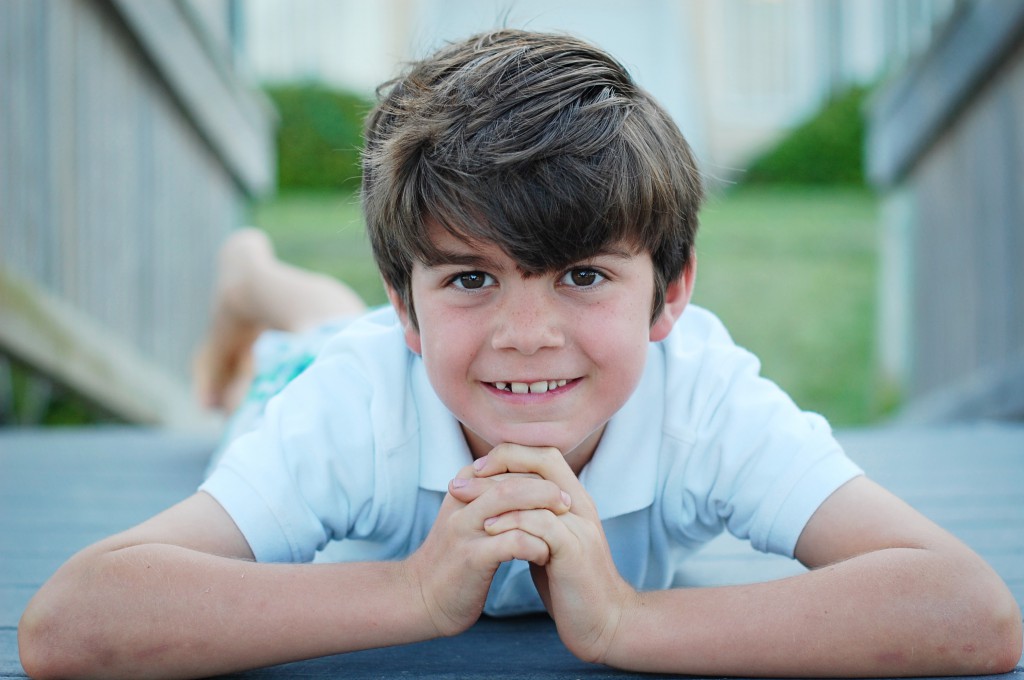
the great thing about using a wide aperture is that it’s great for portraits. not only can you make the image pop against a blurred background, but using a wide aperture gives you a sharp photo without having to use a flash:
(f/1.8, 1/640 of a second, ISO: 200)
(f: 2.0, 1/40, ISO: 400)
(f/5.6, 1/125 of a second, ISO: 320)
(f/ 2.8, 1/125 of a second, ISO: 200)
(f/2.2, 1/200 of a second, ISO: 400)
there is more that goes into all that, like the relationship between aperture and zoom, and all the mathematics involved with f-stops, but that’s too much for my tired brain to handle, much less explain, so i think i’ve told you what you need to know to have a basic understanding 
however, I can’t adjust my aperture without understanding how to set the other two.
so the next part of the Photographic Triangle is Shutter speed. Shutter Speed is how quickly the camera’s shutter closes. The higher the shutter speed, the faster it closes. The faster it closes, the less light comes into the camera. The slower it closes, the more light you get in. A faster shutter speed also freezes action, while a slow shutter speed blurs action.
so for example, if your aperture is set to a low f-stop number, so that your lens is open wide, then the shutter speed can be faster, because you don’t need as much light to enter in. however, say you were shooting at your child’s soccer game…it may not be best to shoot in your widest aperture, because you may blur out parts of your photo that you want in focus, but you need to adjust your shutter speed to still freeze the motion, without having to open your aperture all the way. that is an example of how those work together, and why it’s good to have a basic understanding of how they operate together. confused yet?
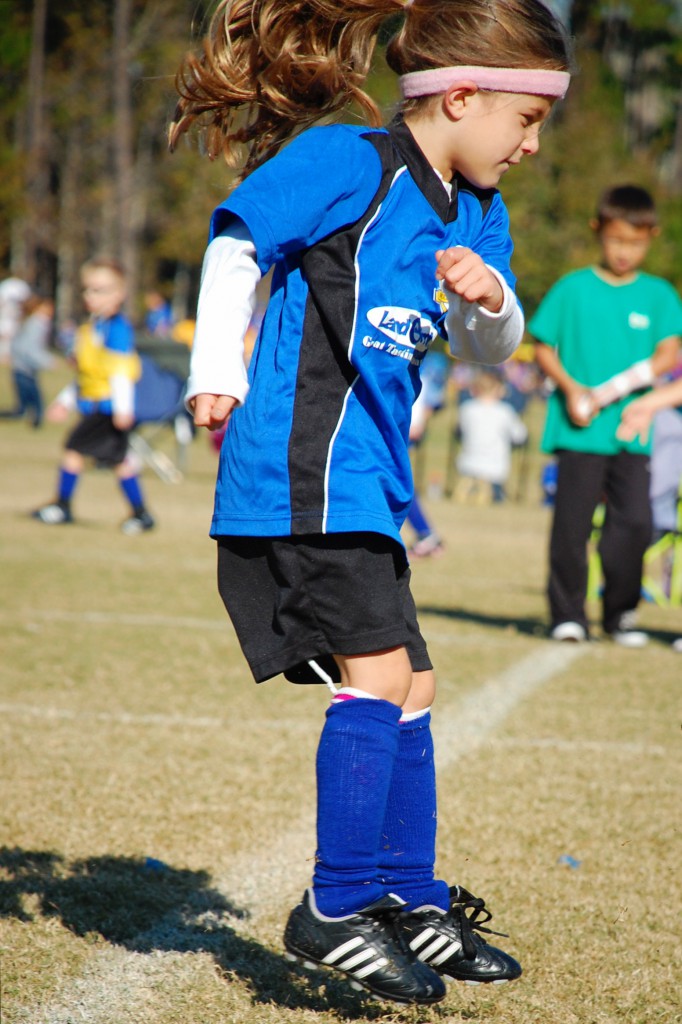
this picture was taken with my shutter speed set at 1/1000 of a second, at f/5.6. you can see that a high shutter speed froze the action:
(f/ 5.6, 1/1000 of a second, ISO: 400)
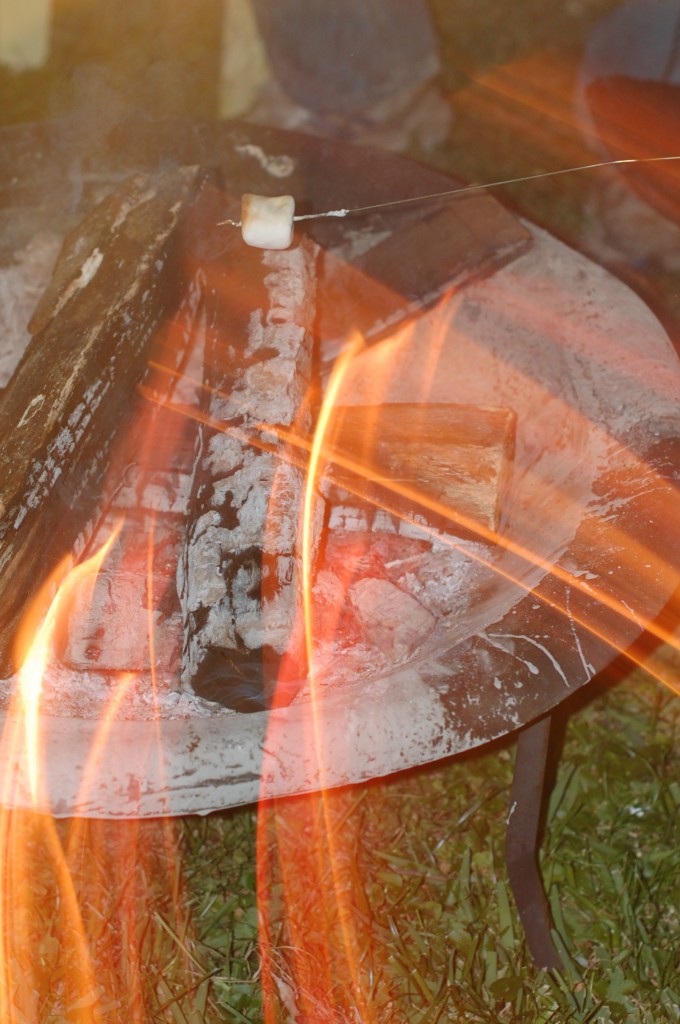
here’s an example of a slow shutter speed. i shot this picture of a campfire at a 1/2 second shutter speed. you can see how slow shutter speed blurs the motion of the fire, instead of freezing the motion:
(f/2.8, 1/2 of a second, ISO: 400)
so just think of it this way: a high shutter speed freezes motion and a low shutter speed blurs motion.
the third component of the Photographic Triangle is ISO.
ISO — the level of sensitivity of your camera to available light. Most camera’s ISO range is from 100-3600. Think of this as the little worker bees in your camera, working to gather the light for your photo. The more worker bees (higher number), the harder the camera works to use the light coming in. the less worker bees (lower number), the less effort by the camera to use the light. So, when set at 100, there are less worker bees working to get light in, so depending on what kind of lighting you are shooting in, you will need to adjust the aperture (open your camera lens wider) or your shutter speed (make it slower to allow more light in). You increase ISO when there is not enough light available to capture your image. think back to the example above of shooting at the soccer game. depending on your available light, you would need to find the proper balance between aperture…set at the right f-stop to allow lots of light in but still have the portions of your photo that you want in focus, shutter speed…quick enough to freeze the motion, and ISO…enough worker bees to gather the right amount of light to balance out the other 2.
a good rule of thumb with ISO is this: use a lower number on a sunny day or in lots of available light, and use a higher number in darker settings.
I typically increase my ISO when i’m shooting indoors, or at night. Keep in mind that the higher the ISO, the more grain, or noise, in your photo. what that means is…the higher the ISO, the less tack sharp your image will be.
i took this picture at night, so there was zero natural light available. i had a small lamp on, and set my ISO at 1600. you can see what i mean by grain:
(f/1.6, 1/60 of a second, ISO: 1600)
so i typically try not to set my ISO above 800, unless i’m in a setting where there is no natural light available, and i’d rather have grain in my photo than use a flash.
here’s an example of how you can utilize ISO, along with the other components of the Photographic Triangle, in a tricky lighting situation:
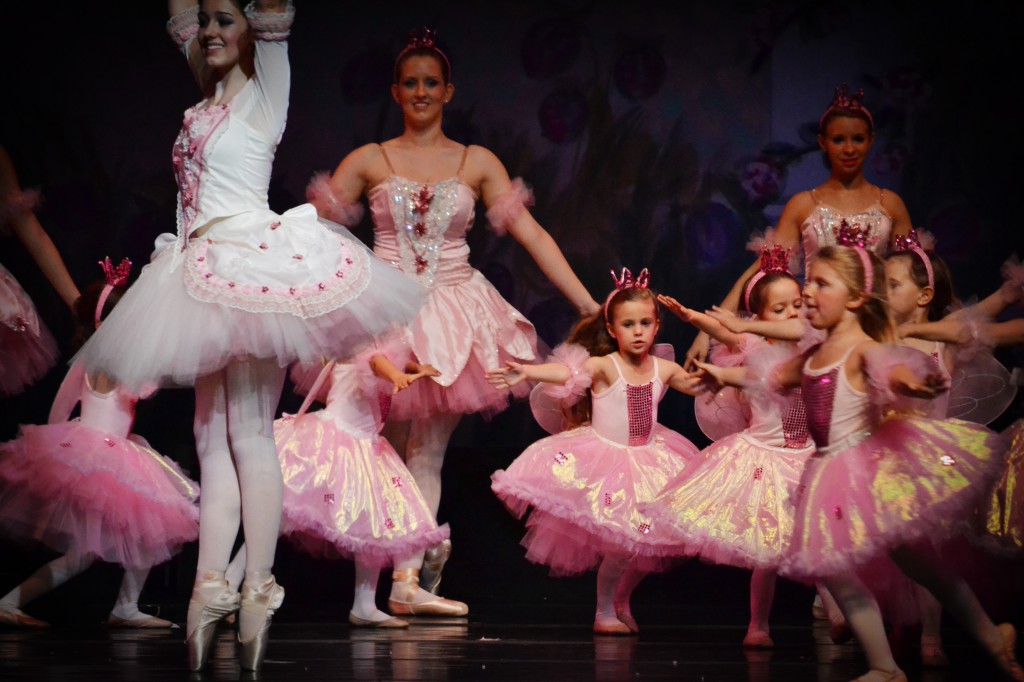
my dad took this picture at Bella’s nutcracker last year. he was not allowed to use a flash, and we were sitting pretty far from the stage, so he needed to be creative with his settings to allow the proper amount of light into the camera. he shot it with the highest ISO setting his camera offered (3200), the widest aperture he could based on the lens he was using (f/5.6) so that the shutter speed could be quick to freeze the motion.
(f/5.6, 1/250 of a second, ISO: 3200)
the high ISO makes it a bit grainy, but we still ended up with a great shot! had he not set the ISO so high, he wouldn’t have been able to freeze the motion, because he would’ve had to use a slow shutter speed, and we would’ve ended up with a dark blur of motion. this picture makes me really grateful for high ISO settings 
okay….now that you have a very basic understanding of the Photographic Triangle, the question is: so now what do you do with it?
when taking a photo, you want a proper exposure. exposure basically means the total amount of light reaching your camera’s sensor when taking a photo. you can either have too much light, resulting in an overexposed photo, or too little light, resulting in an underexposed photo. your goal as the photographer is to allow just the right amount of light into your camera to get a properly exposed photo. the way you do that is to utilize the components of the Photographic Triangle.
so…there are many different ways to increase or decrease the light coming into your camera to get a properly exposed picture. You could increase the time the shutter stays open, you could increase the aperture, or how wide the lens is opened, or you could adjust the camera’s sensitivity to the light through your ISO.
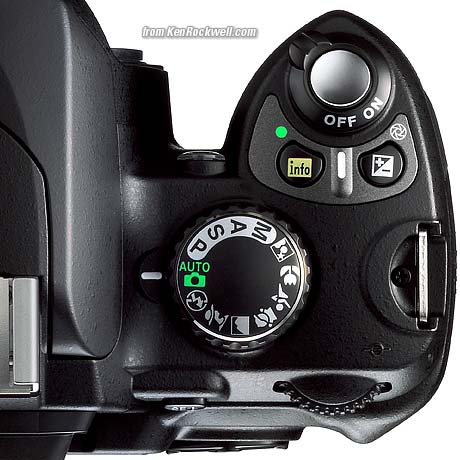
so lets talk about ways to do that through your camera settings. you know that dial on your DSLR? that is where you find the different modes you can shoot in:
i typically shoot in Manuel mode (the “M” on the dial). (not to be confused with manuel focus…i almost always shoot in automatic focus.) when in Manuel mode, you as the photographer are setting each part of the photographic triangle…the aperture, the shutter speed, and the ISO. i like shooting in this mode, because i have total control over my picture and my settings.
when shooting in Manuel mode, i typically set my aperture first, then my ISO (adjusting as necessary, depending on the available light), and then meter to set my shutter speed correctly. what do i mean by metering? well…you will see a little bar like this when you look through your viewfinder:
(source)
when your exposure is metered, the bars will line up in the middle at the zero. (keep in mind your particular camera, however. i typically have to move my bars a little to the positive side as opposed to just at the zero to get the kinds of photos i like, but each camera is different, so learn how your particular camera meters, and you’ll see where exactly to land your bars.) i move my bars on my meter by turning the dial on the back of my camera.
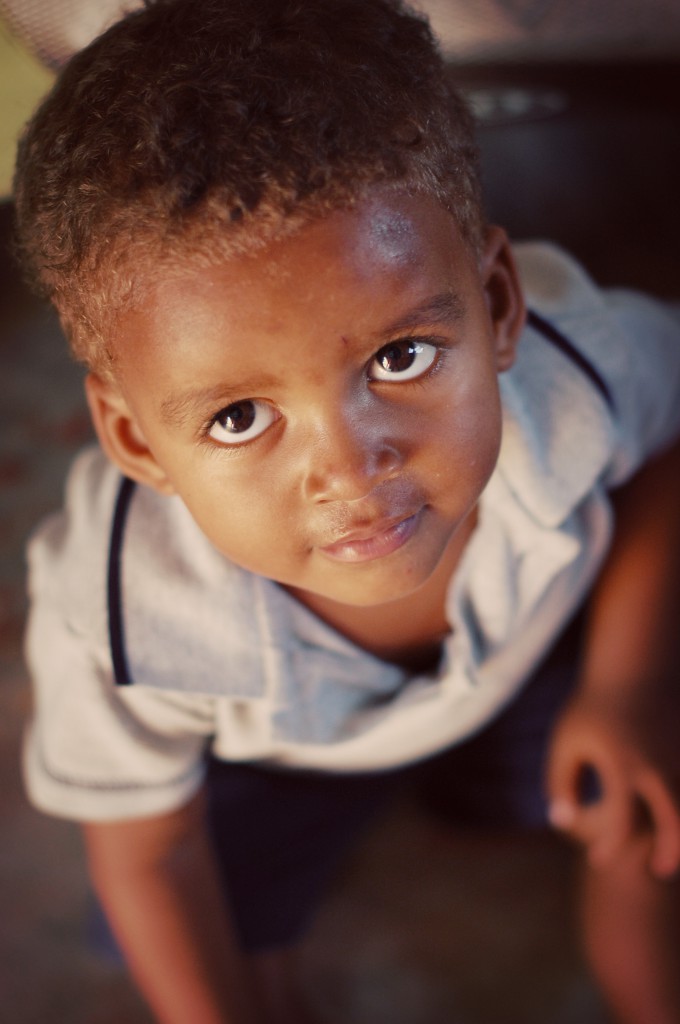
so…for example, say i want to shoot a picture of Canaan, outside, with a wide aperture so i can get a crisp shot and a blurred background. so in my Manuel mode, i set the aperture to f/2.8 to ensure a shallow depth of field (blurred background) but still have most of his features in focus. once i set the aperture, i check the available light by seeing what shutter speed i would need in order to have the meter set correctly. if the shutter speed is high enough to not create motion blur, then i shoot. if not, then i bump up the ISO a bit to allow more light into the camera, so i can set the shutter speed higher.
this picture was metered correctly in Manuel mode with my aperture set at f/2.8, my shutter speed at 1/400 of a second, and my ISO set at 200.
(f/2.8, 1/400 of a second, ISO: 200)
what about those other settings on your dial? well…they are a great place to start learning how the Photographic Triangle works together.
you can set your camera to Aperture Priority mode (the “A” or “AV”), which means you set the aperture, and the camera sets the shutter speed. once you set the aperture to what you’d like, check your ISO to see if you need to adjust it, and then you just shoot away. the camera will not adjust the aperture at all, but will adjust the shutter speed to give you a properly exposed picture. if you are just moving out of Automatic mode for the first time, Aperture Priority might be a good place to start. think about how much depth of field you want in your photo, set the aperture accordingly, and shoot away. take note of how your camera sets the shutter speed depending on what aperture you are using.
you can also shoot in Shutter Speed Priority (the “S” or “Tv”), which means you set the shutter speed, and your camera sets the aperture for you.
P mode, or Priority mode, means that your camera sets both the aperture and shutter speed for you. you can set the ISO, white balance, and flash, if you wanted.
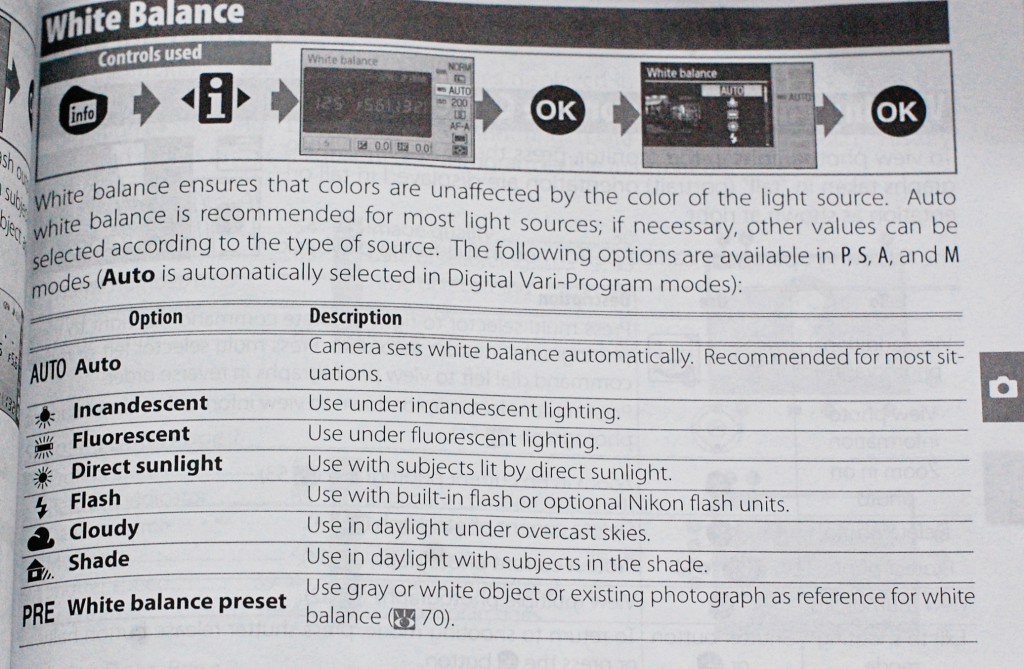
white balance is one more setting that you can adjust yourself in all of these modes. you have the option of keeping white balance in “Auto” (which is what i often do.) however, i will adjust the white balance if needed, depending on if my photo is being affected by the color of the light source. this is a good chart to keep in mind when setting white balance (it comes straight from my camera’s manuel…my BFF!):
play around with white balance to see which settings work in different lighting situations.
If you are serious about taking your photography to a new level, play around with these modes. Check your manuel to see how to use them on your particular camera, and start to get comfortable with using the different settings.
i really hope that gives you a very simple and basic understanding of some of the technical aspects of photography. you can certainly see that i’m not a professional, but i’m hopeful that these explanations and examples have helped you learn a little something! 
this is the BEST book i’ve found that has been so helpful for me in understanding the technical aspects of photography: Understanding Exposure: How to Shoot Great Photographs with Any Camera. you won’t be disappointed to add this to your library

phew…i’m glad to have the hard, technical part finished!! the rest is all fun and games, peeps! so come back for very practical tips for composition in part 3.
leave me your questions or comments! i’d love to know if i’ve just the confused the heck out of you  or if it makes sense!




 Follow
