Oct
28

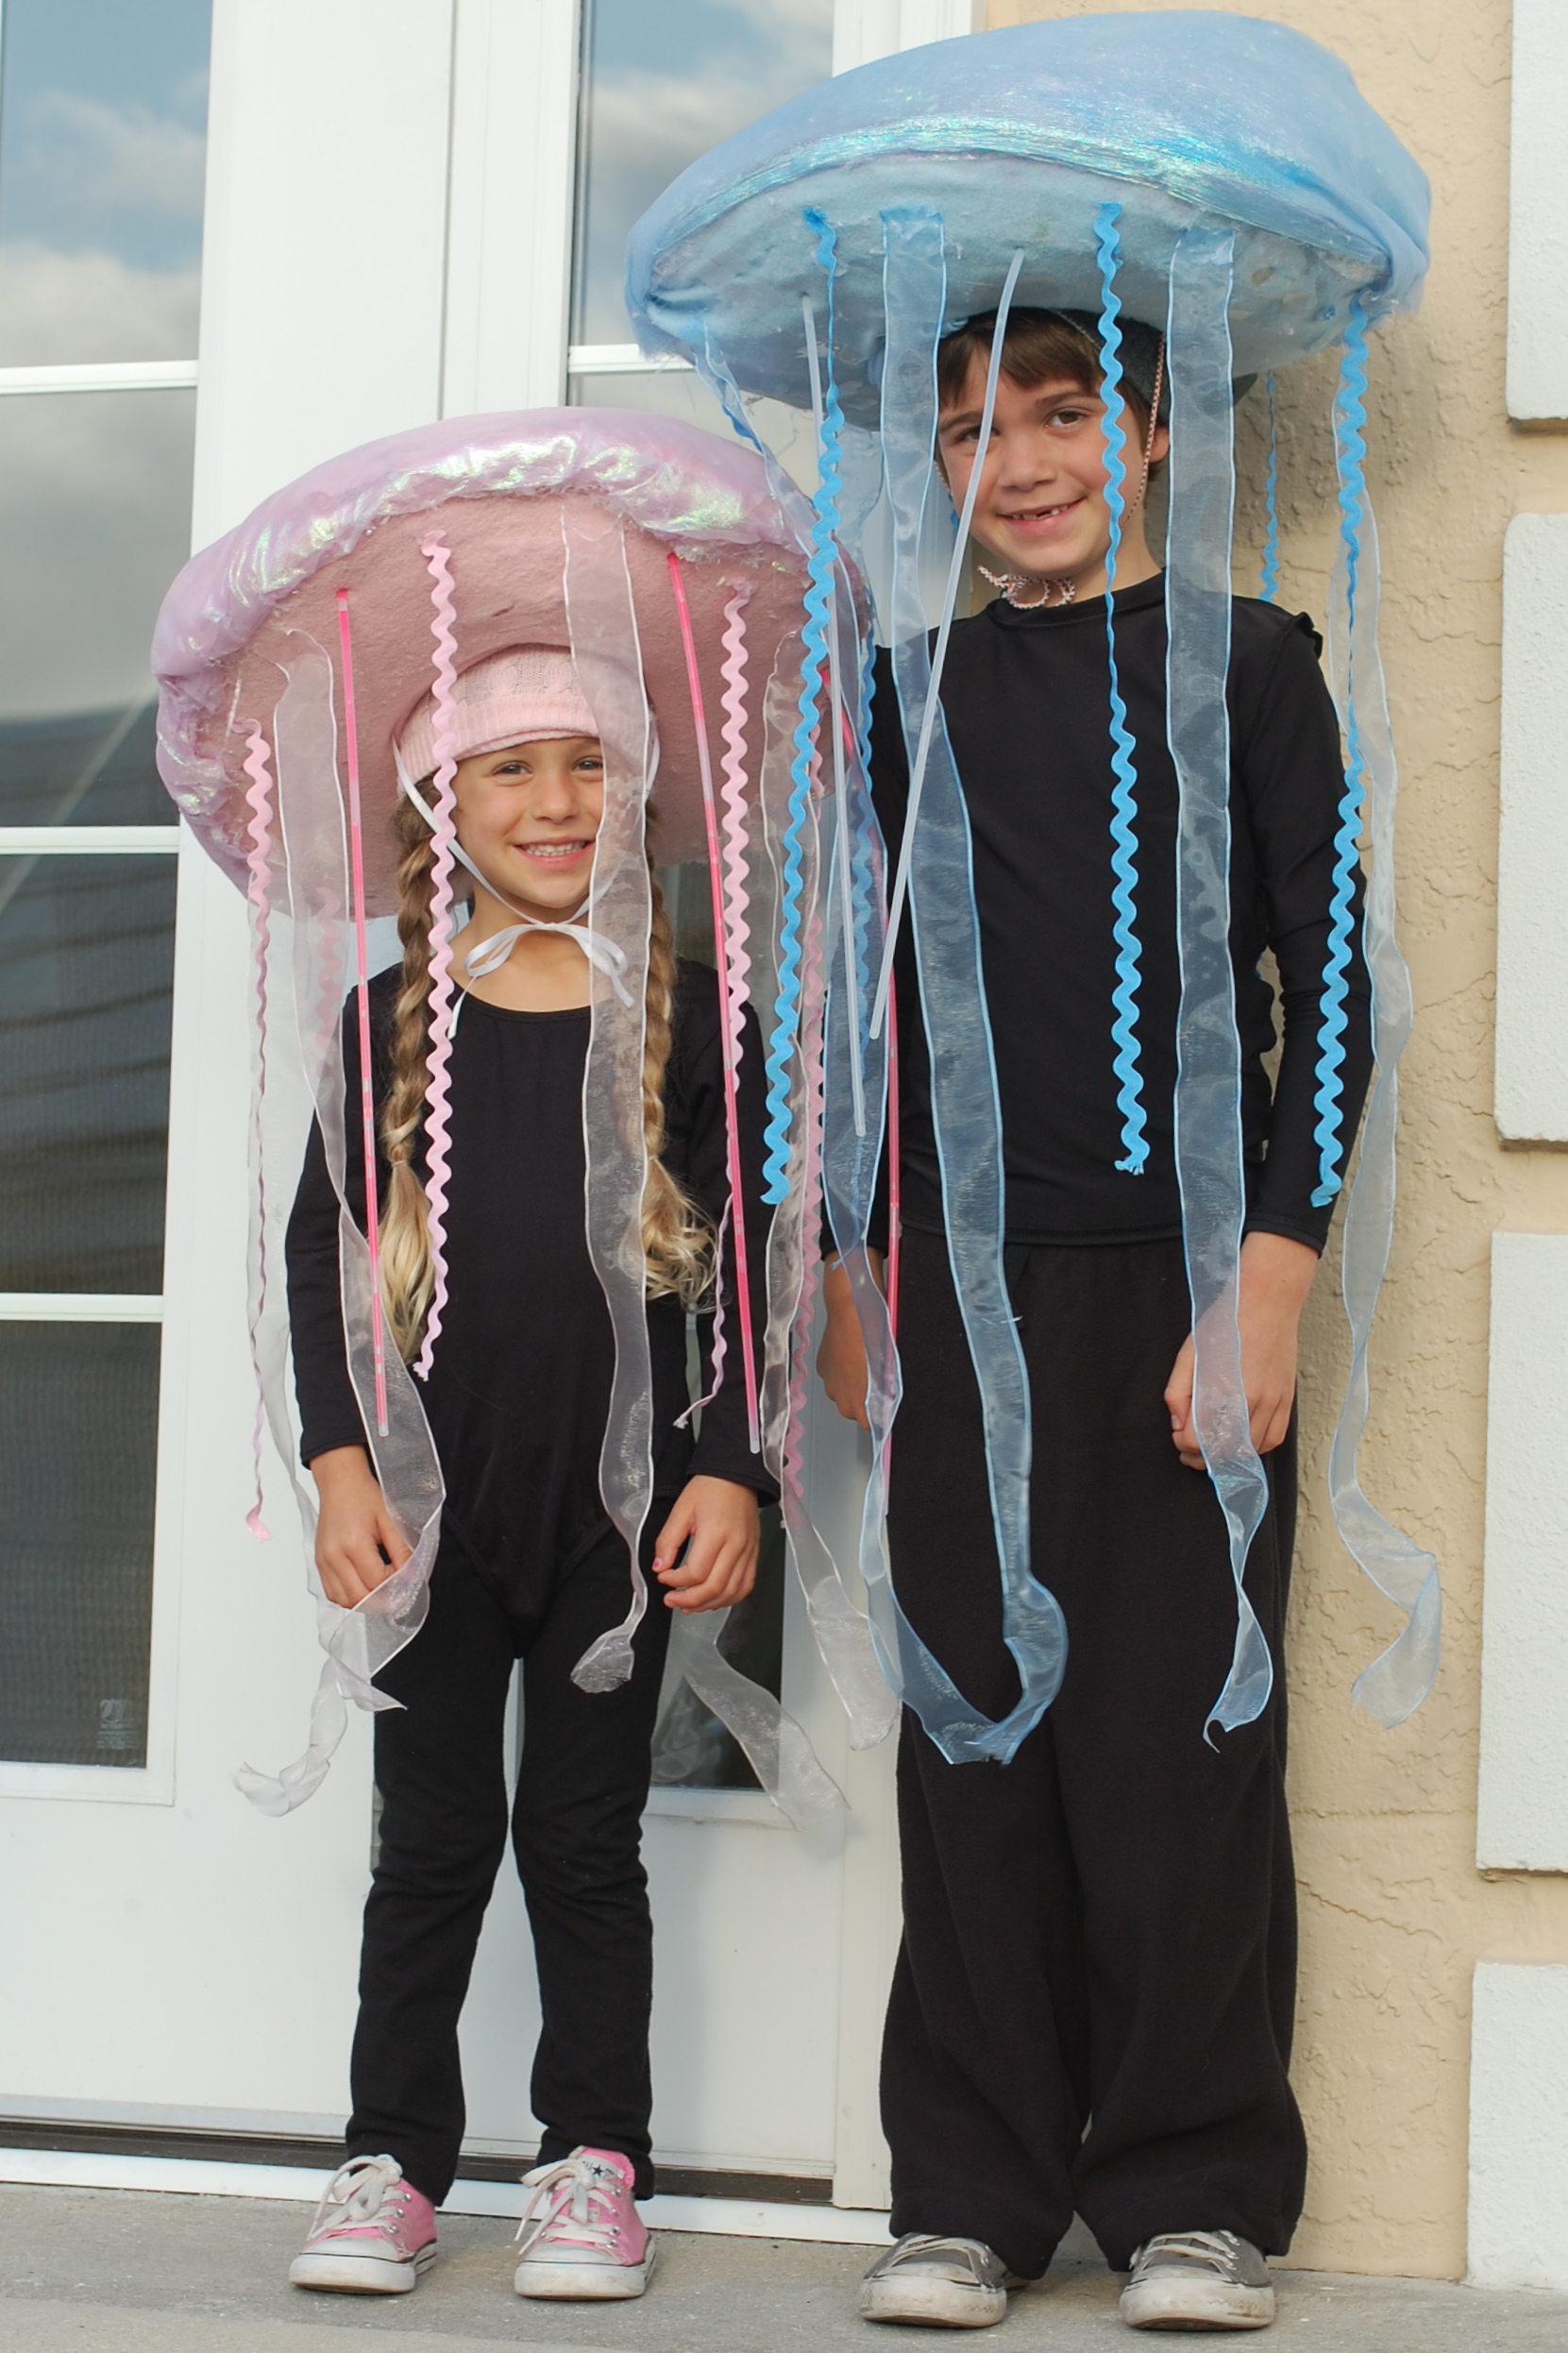
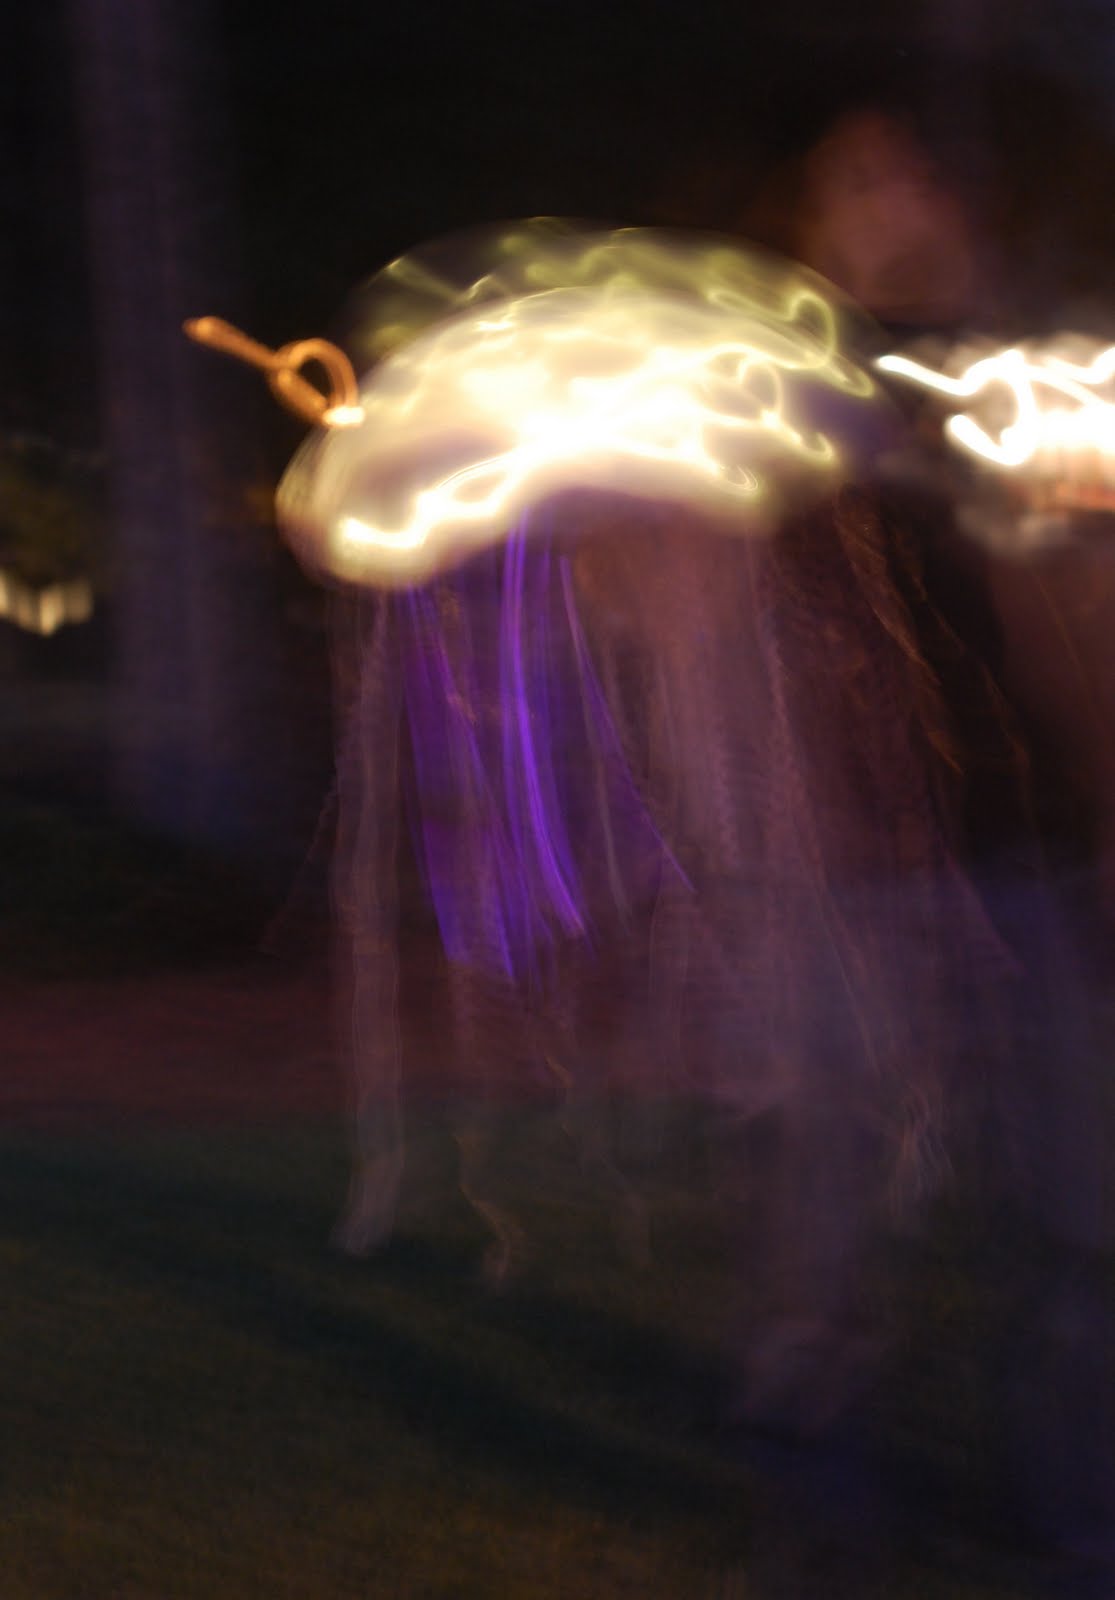
Glow in the Dark Jellyfish Costume Tutorial
i probably should’ve posted this a few weeks ago, but tis the life of a momma to three. i feel like i’m late to everything…and blogging about holidays is no exception!
here’s a step-by-step tutorial for a DIY, no-sew costume idea that you can make for your kiddos or for yourself….Glow in the Dark Jellyfish!!
i’ve had lots of requests for the details about the jellyfish costumes from a few years back, so i figured i’d go ahead and put it all in one post. maybe for next year…or maybe for those of you still trying to pull together a costume for this year…it happens, peeps. trust me. i know! this one is not too difficult, nor is it that expensive.

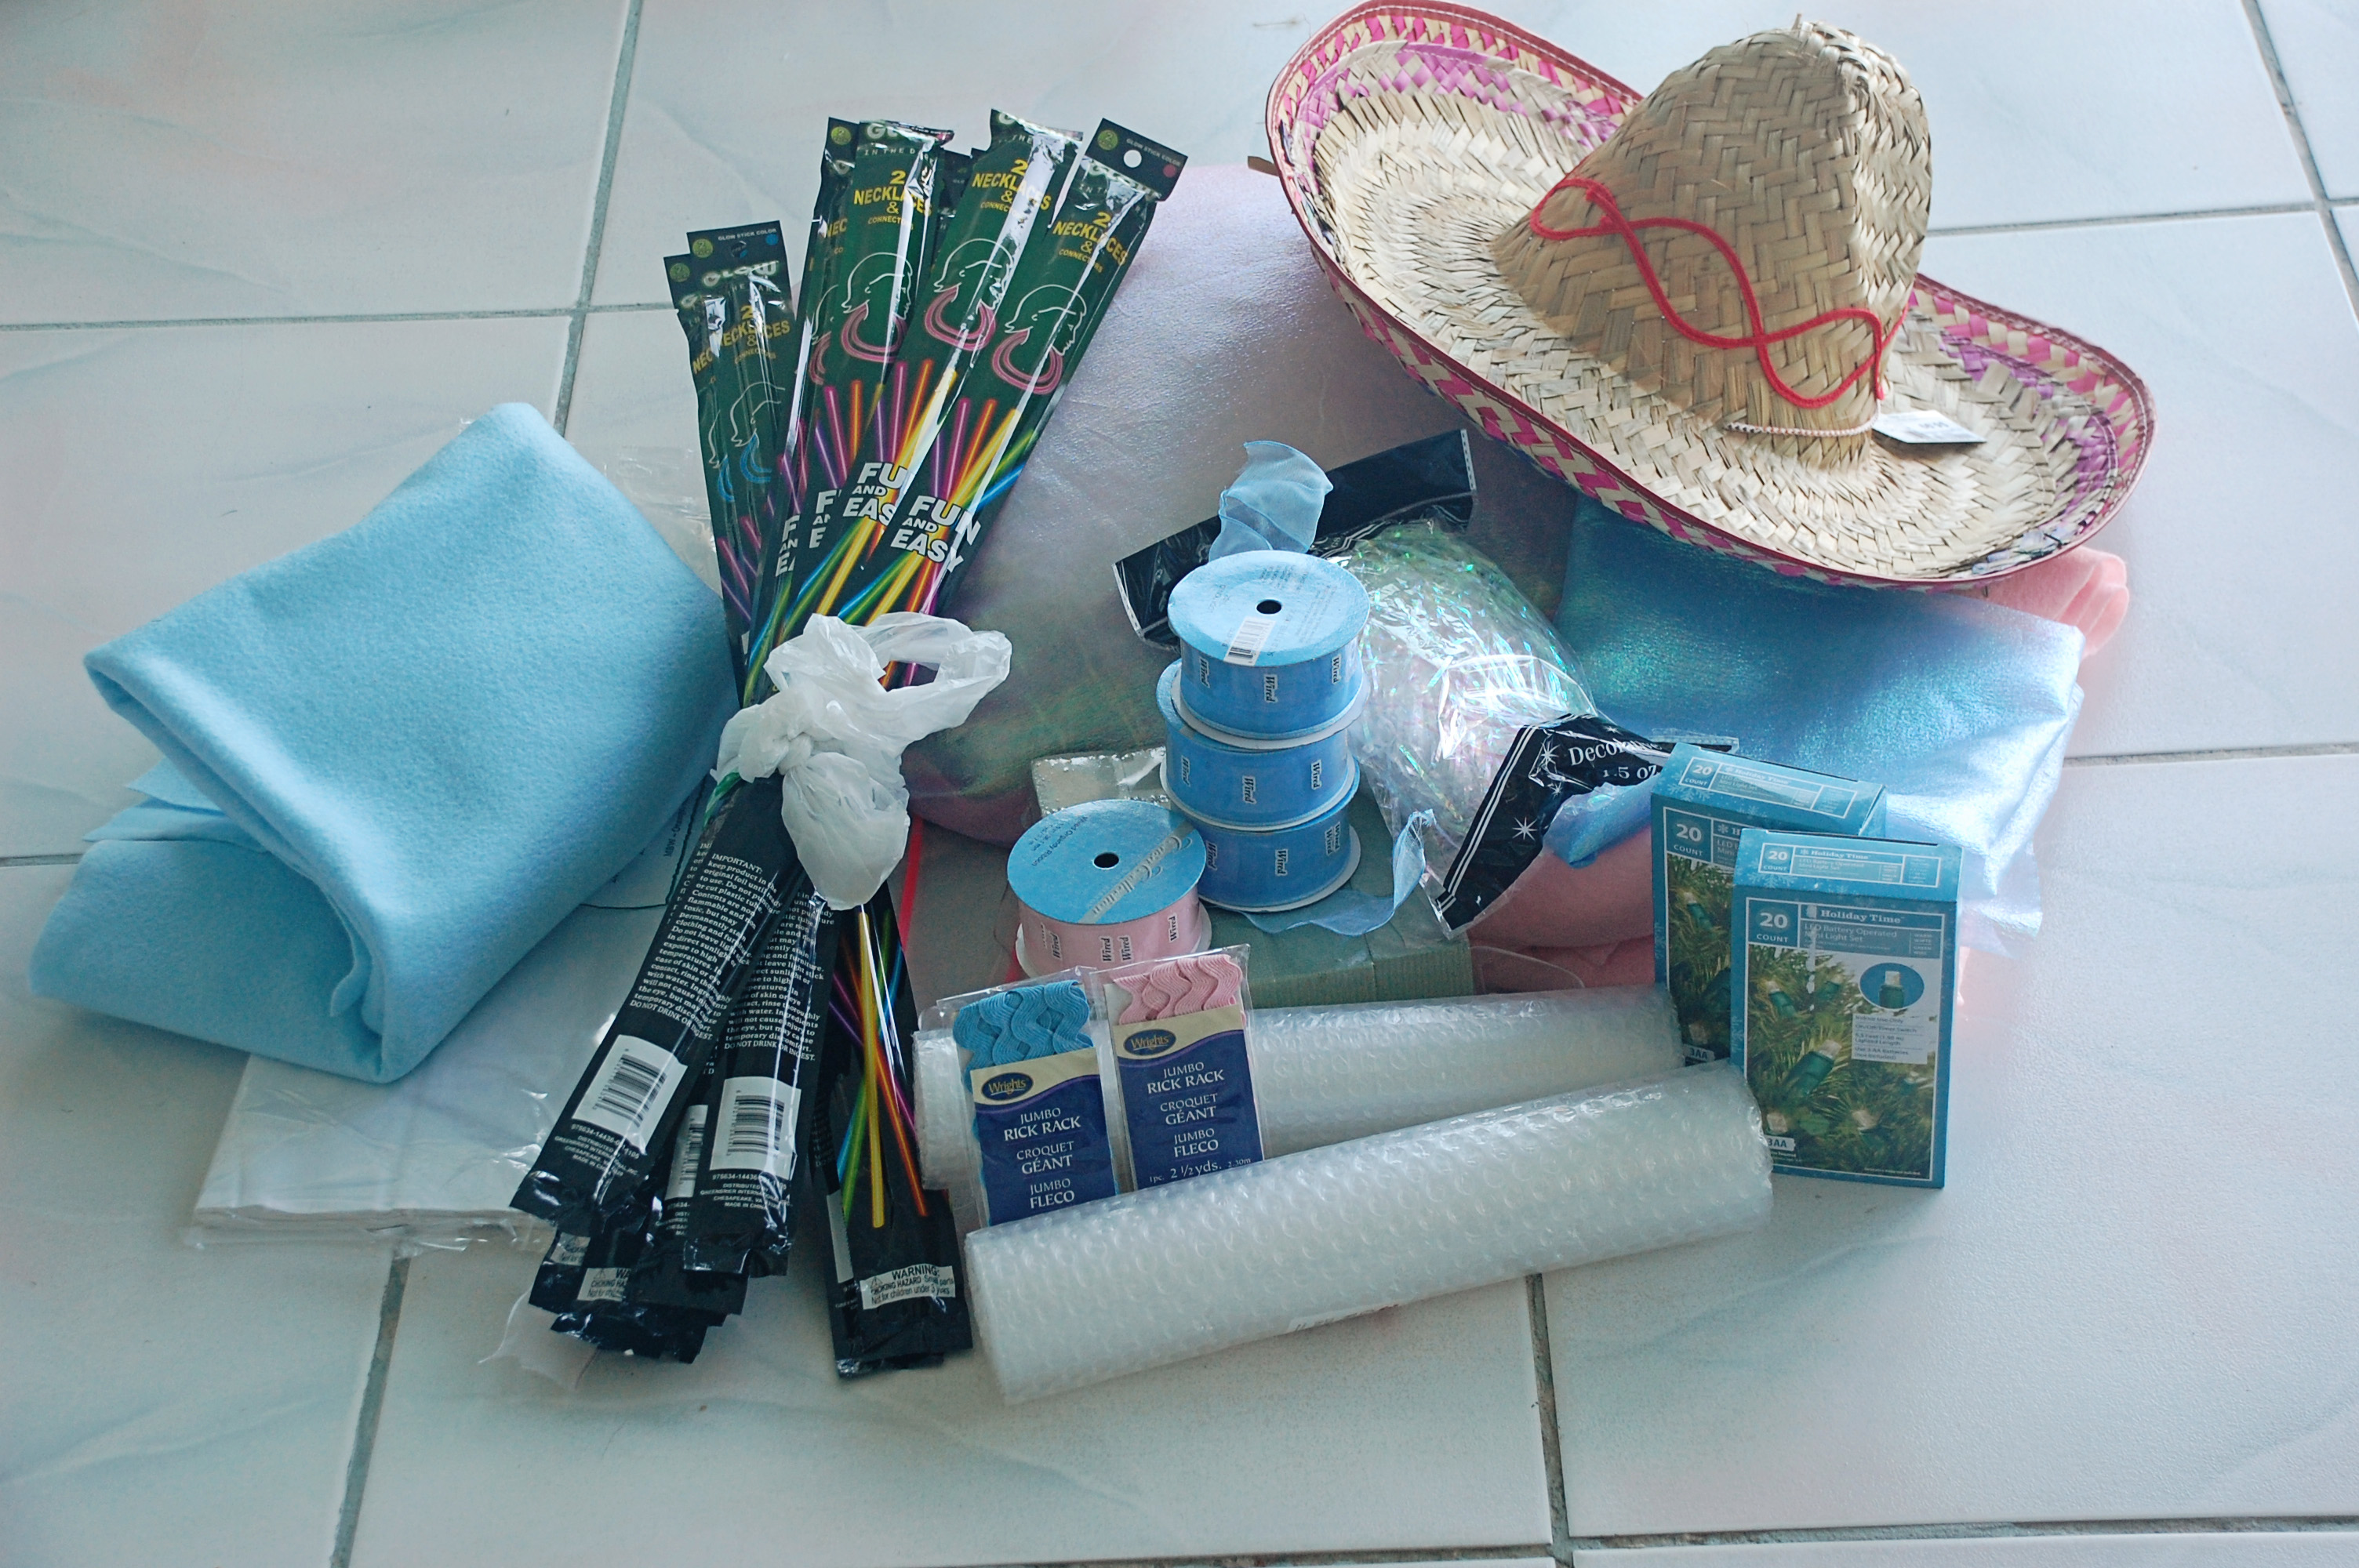
i was able to find all of the supplies at the dollar store, with the exception of the fabric, rick rack, and ribbon, which i purchased from Joann’s.
so…what you’ll need:
a sombrero or similar kind of hat with a large brim (i found one at Good Will and the other at a party store, but sometimes the dollar store has them)
long glow sticks (5-6 of the same color that matches your costume, so you might need to buy multiple packages to get the same color)
bubble wrap
iridescent gift bag filler
white tissue paper
battery operated white or clear Christmas lights (strand of 20 lights)
foam floral bricks (the lightweight, green, soft foam ones. look at the ones i purchased in the pic below underneath the spools of ribbon)
1 yard felt in your color choice
1 yard iridescent fabric in a similar color as your felt
2-3 spools of wired ribbon, same or coordinating color
1-2 packages of rick rack, same or coordinating color
(if on hand, you can also use some batting, plastic bags, and newspaper to make the hat more dome-ish)
 the sombrero will be the base of the costume, but there are a few things you’ve got to do to make it look like a jellyfish! (just a note…it works best if you can find a sombrero or hat where the brim doesn’t turn up too much on the edges. one of my hats had a flatter brim, and the costume looked better in the end. so if you can find a hat with a flatter brim vs a turned up brim, that is best. but if not, it’ll still work!)
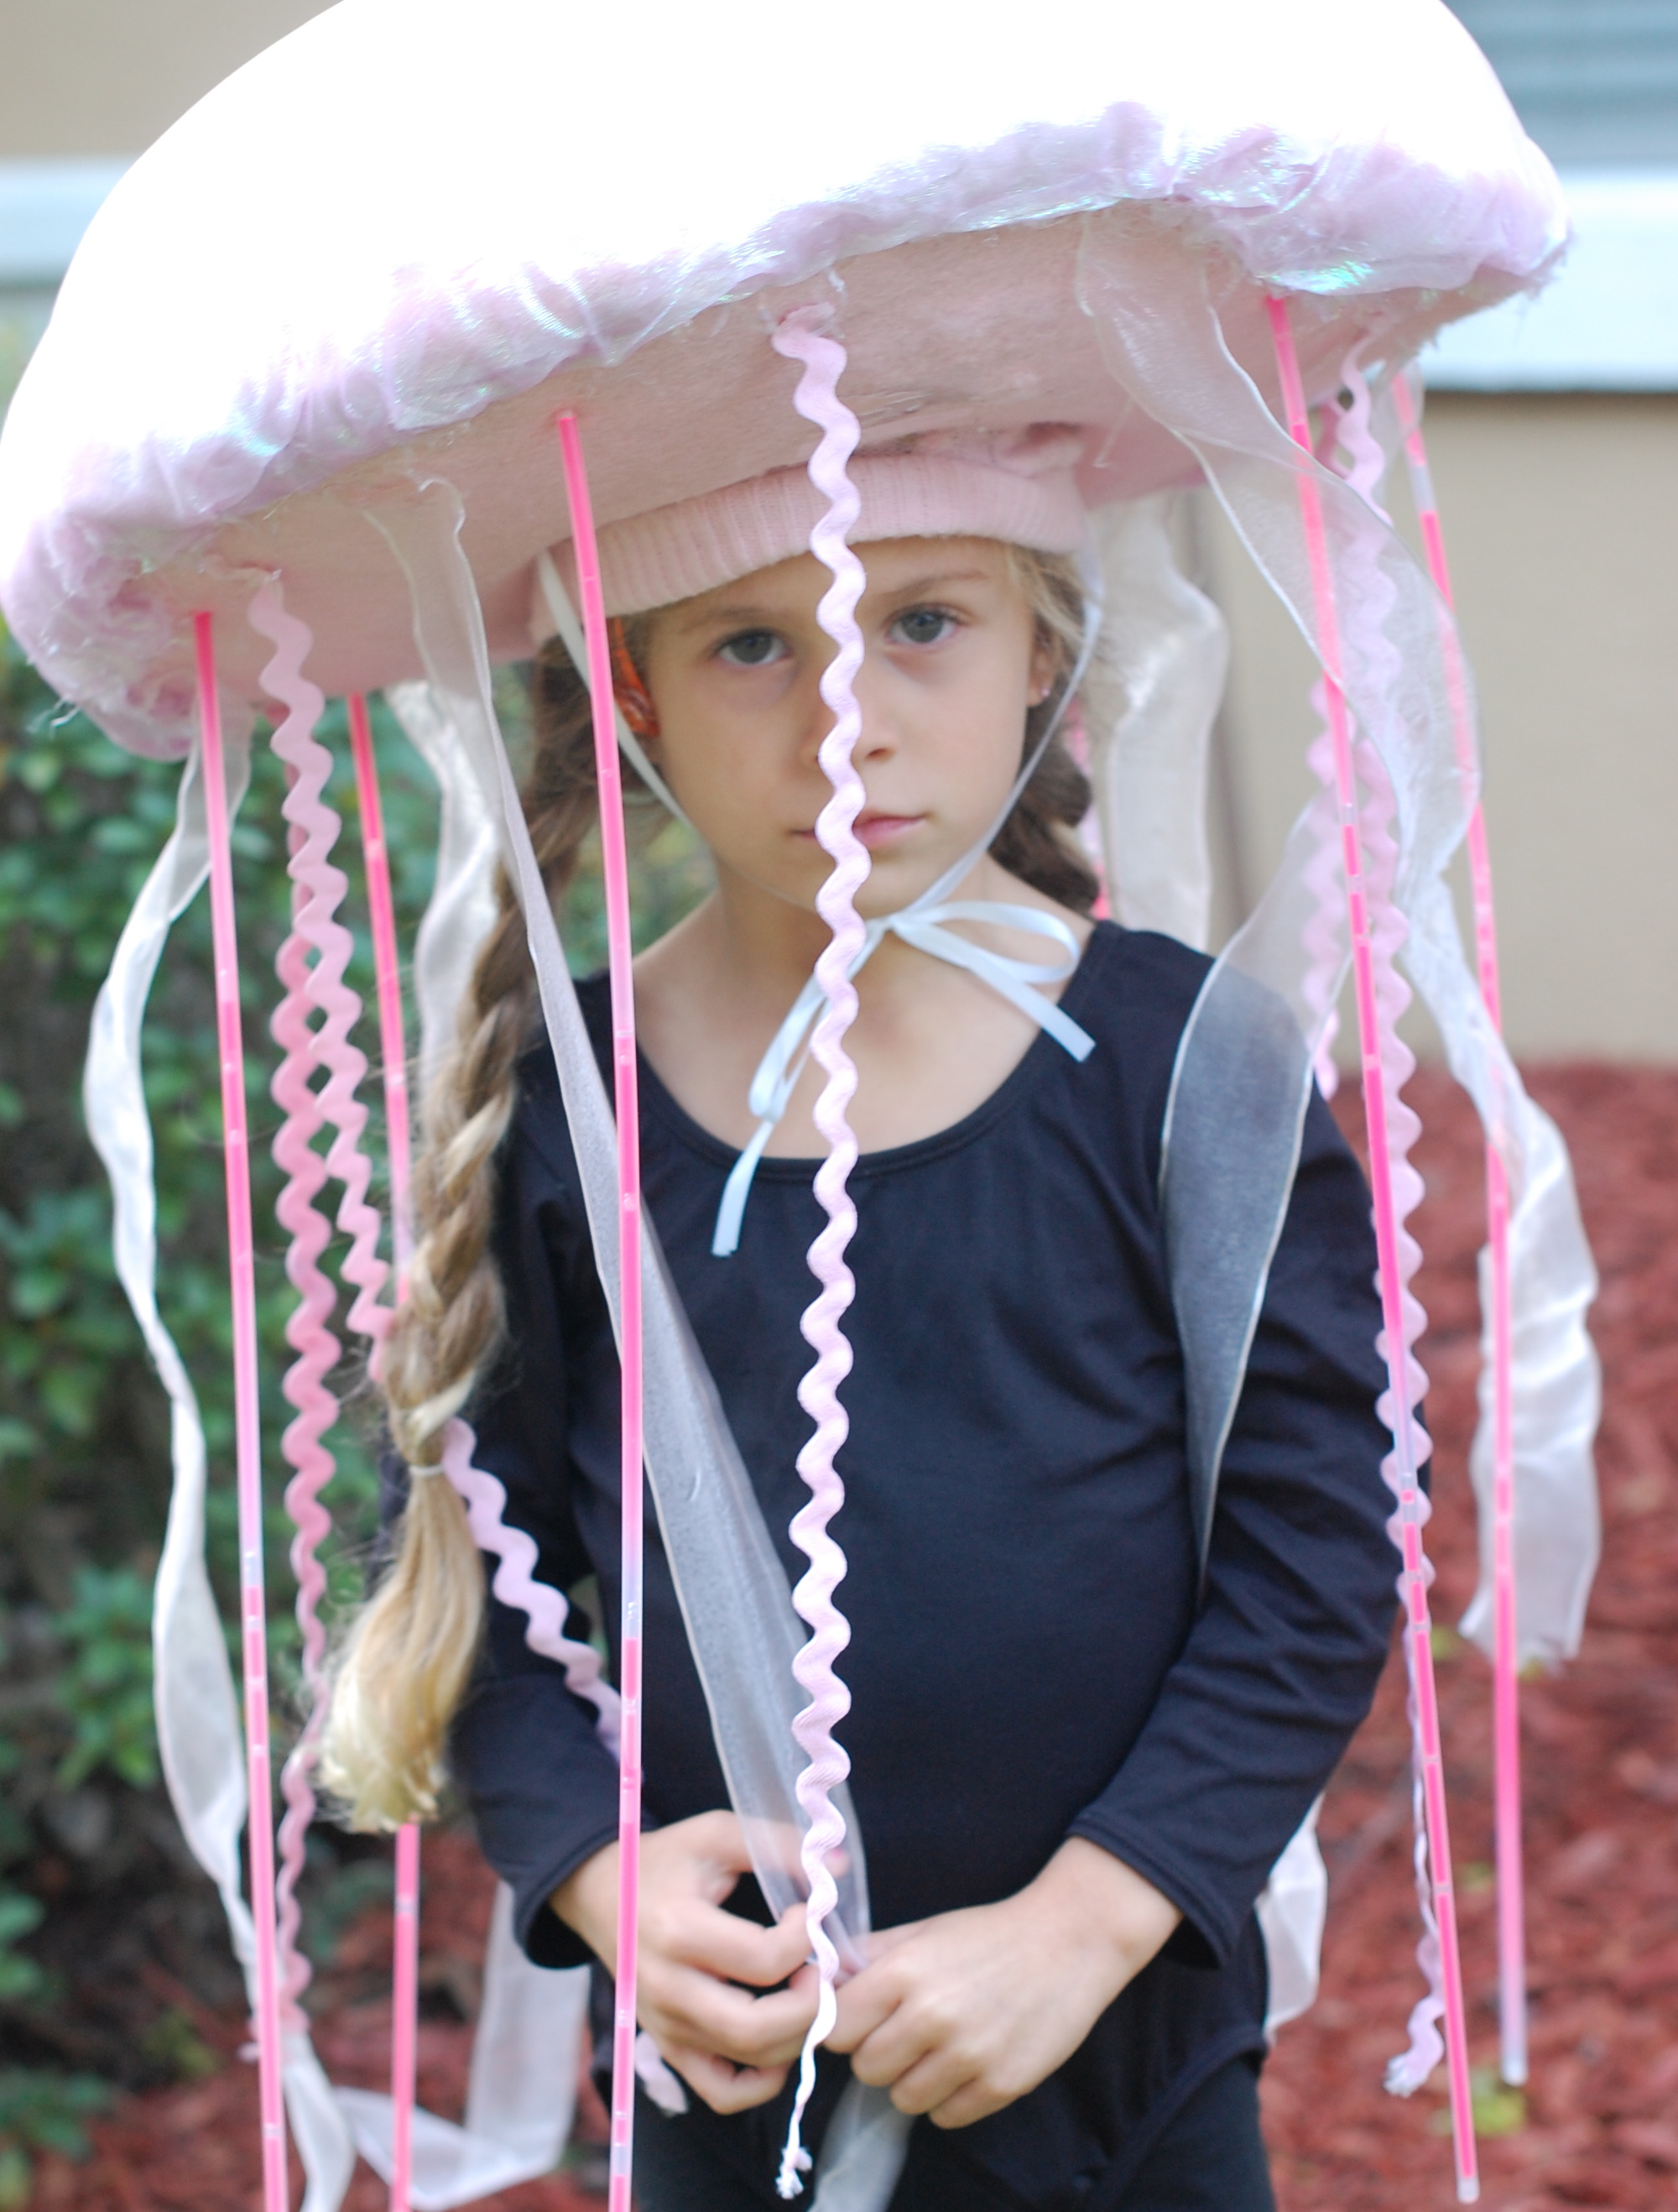
first, cut your foam floral bricks in half lengthwise, unless they are already pretty flat, like mine. on the top brim of the sombrero, hot glue a few of the foam bricks all the way around. this is what the glow sticks (tentacles) will slide into later on. i discovered that the glow sticks stayed best if they were pushed through the foam from the bottom of the hat (but more on that in a minute). don’t use heavy or super thick foam. you just need a small layer for the glow stick edge to stick into.
next, for the bottom of the sombrero, lay out your felt and cut it to the size of the bottom of your sombrero, leaving enough on the edges to glue over the brim a bit. cut a hole in the center of the felt that is the size of your child’s head. lay the felt out, place the hat on top of the felt, then wrap the felt over the brim of the hat, and hot glue the felt on. i did have to stuff the hole later on with a little bit of extra felt to make sure it fit snugly on my kiddos’ heads. that is also why i had them wear beanies…it helped the hat to stay on their heads. the hats get pretty heavy once everything is attached, and our’s tended to slide to the back of their heads. i hot glued some ribbon on to tie under their chins, but if i were to do it again, i would use elastic to ensure that it will stay put.
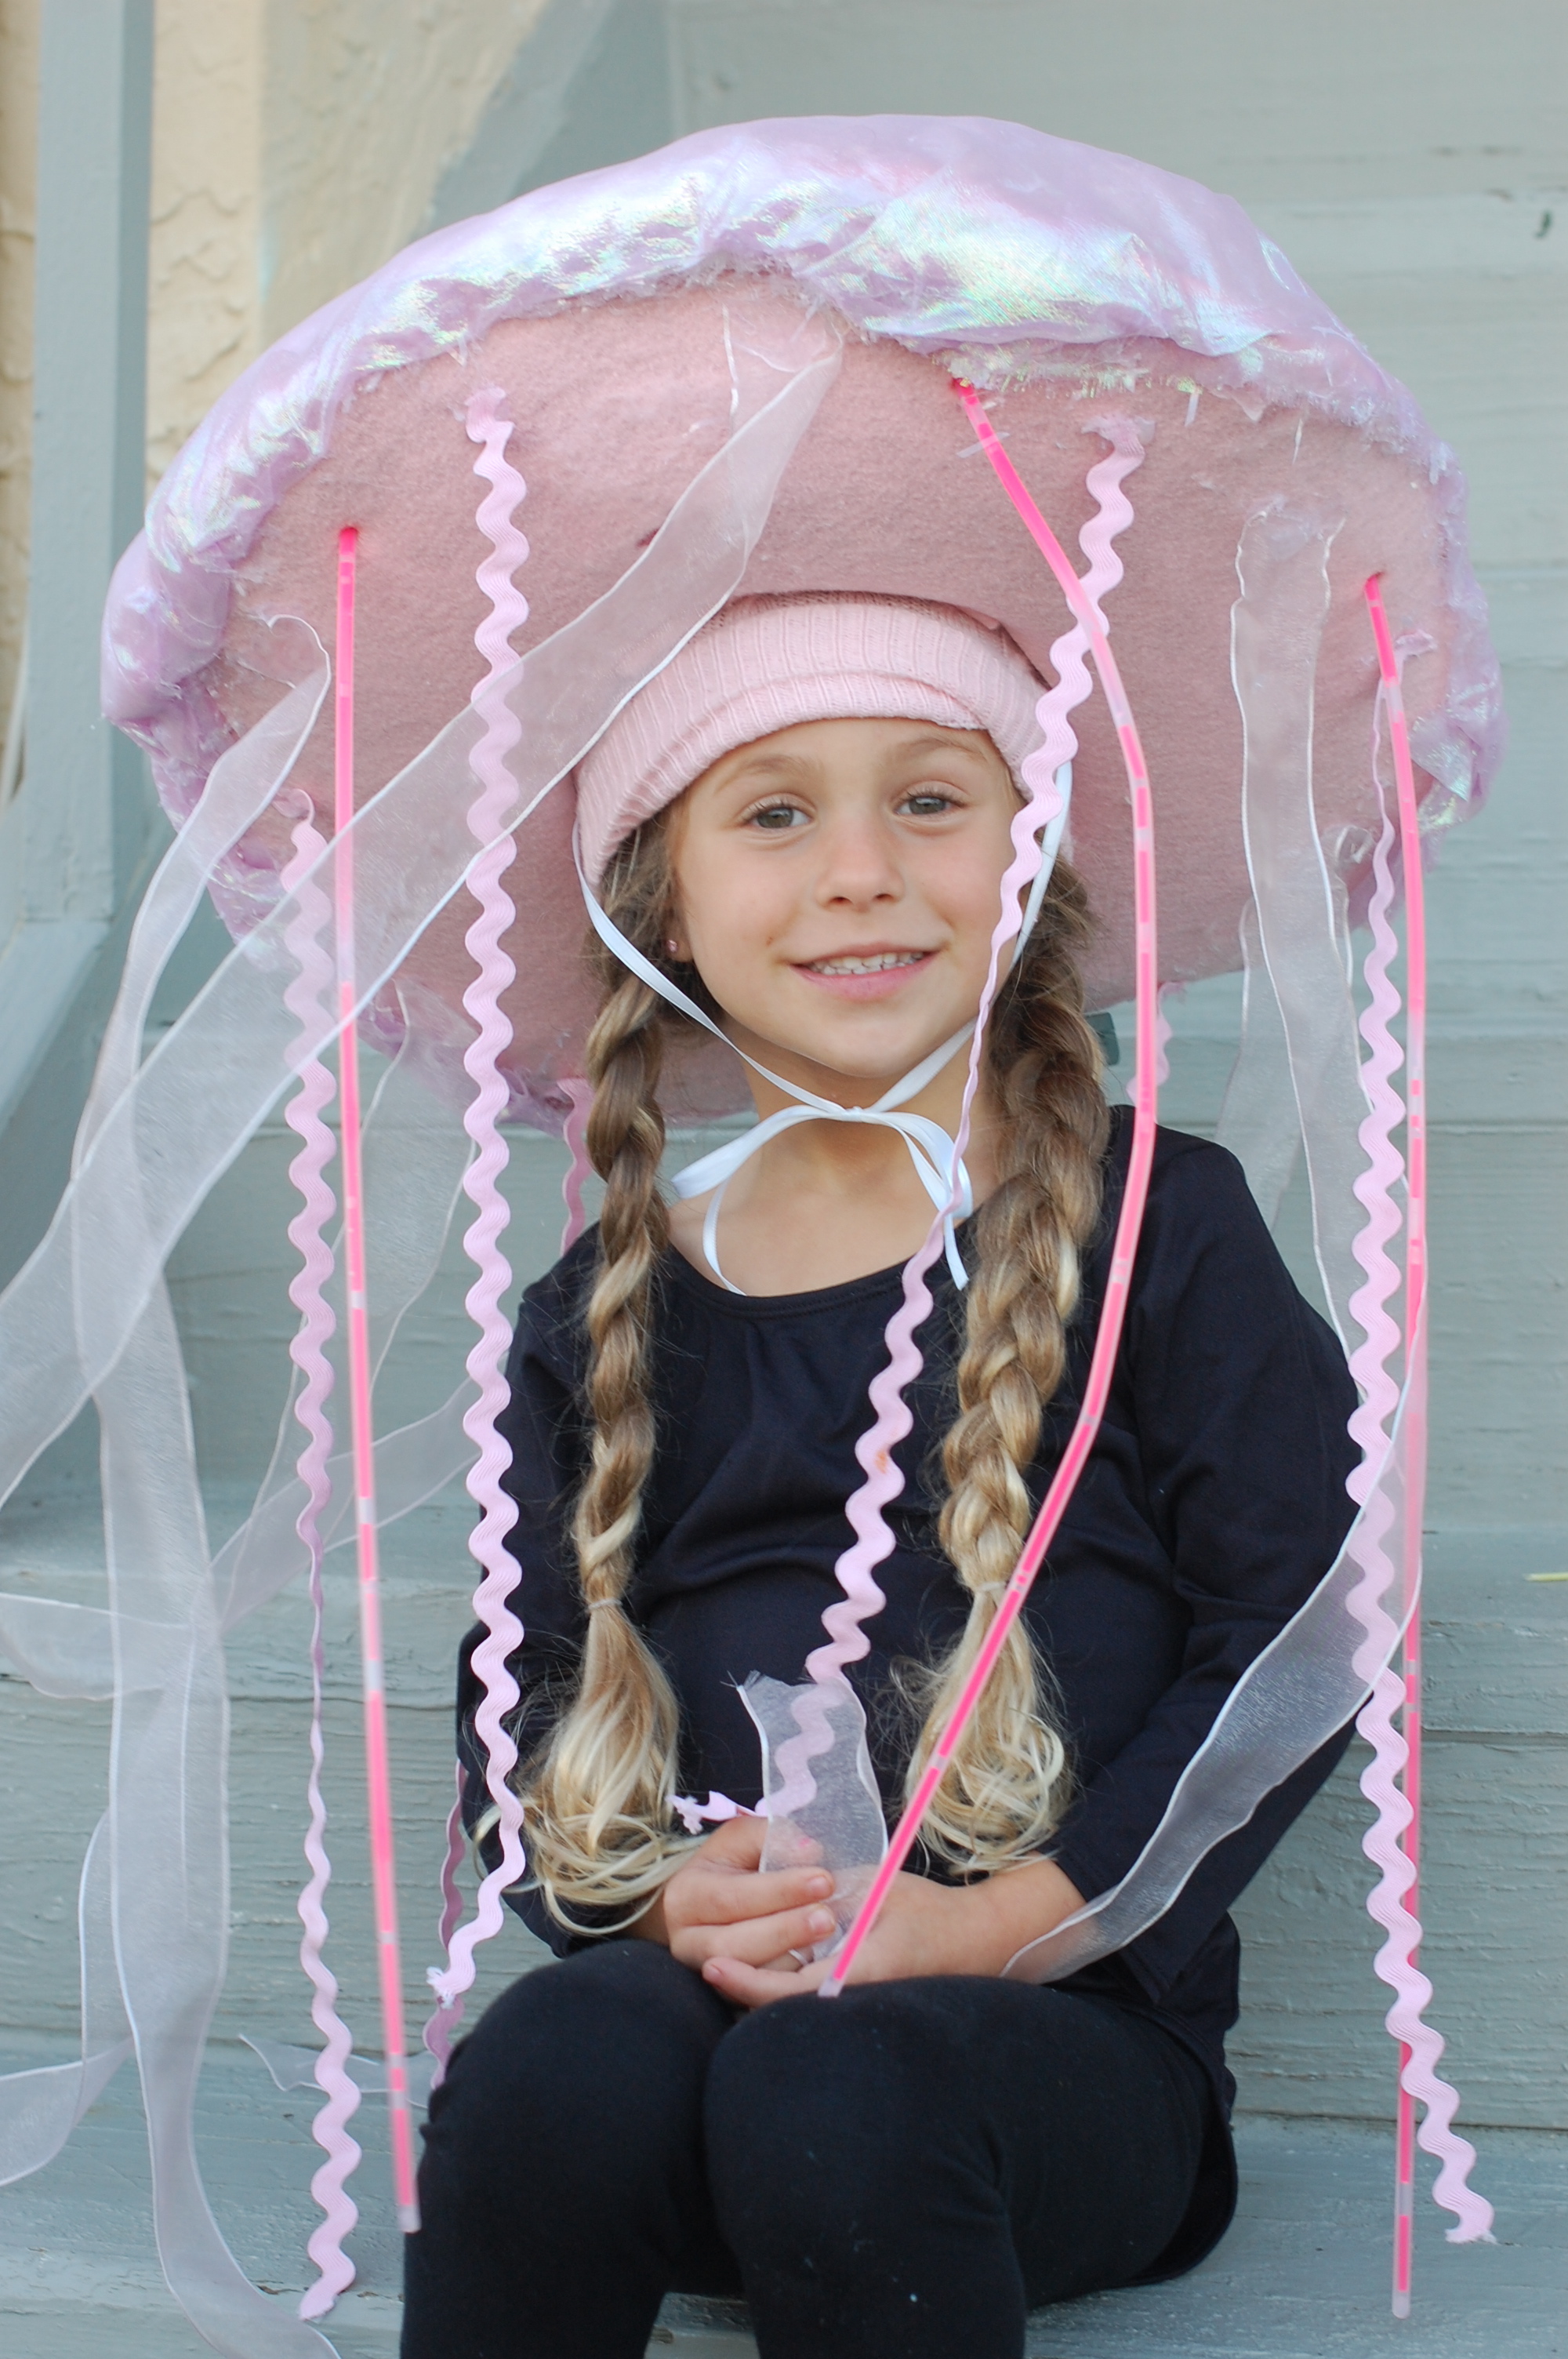

before you cover the top in fabric, you want to add in some battery operated christmas lights (the dollar store and target sold them at the time). i spread out the lights over the newspaper, batting, tissue paper, bubble wrap, etc. that i used to round out the top, and hot glued the lights in place all over the top. make sure to space each individual light out over the top so they that light up the entire top. keep the battery pack outside of the top of the jellyfish, because once its all completed, you will need to glue the battery pack and switch to the bottom of the sombrero in the back so that it is easily accessible. i would suggest finding lights that use the lightest amount of batteries possible, as that really added some weight to the costume.
after you have the lights attached, take the iridescent gift bag filler, and cover everything on the top of the hat so that you can’t see the newspaper or batting. this also added to the iridescent glow like a jellyfish.
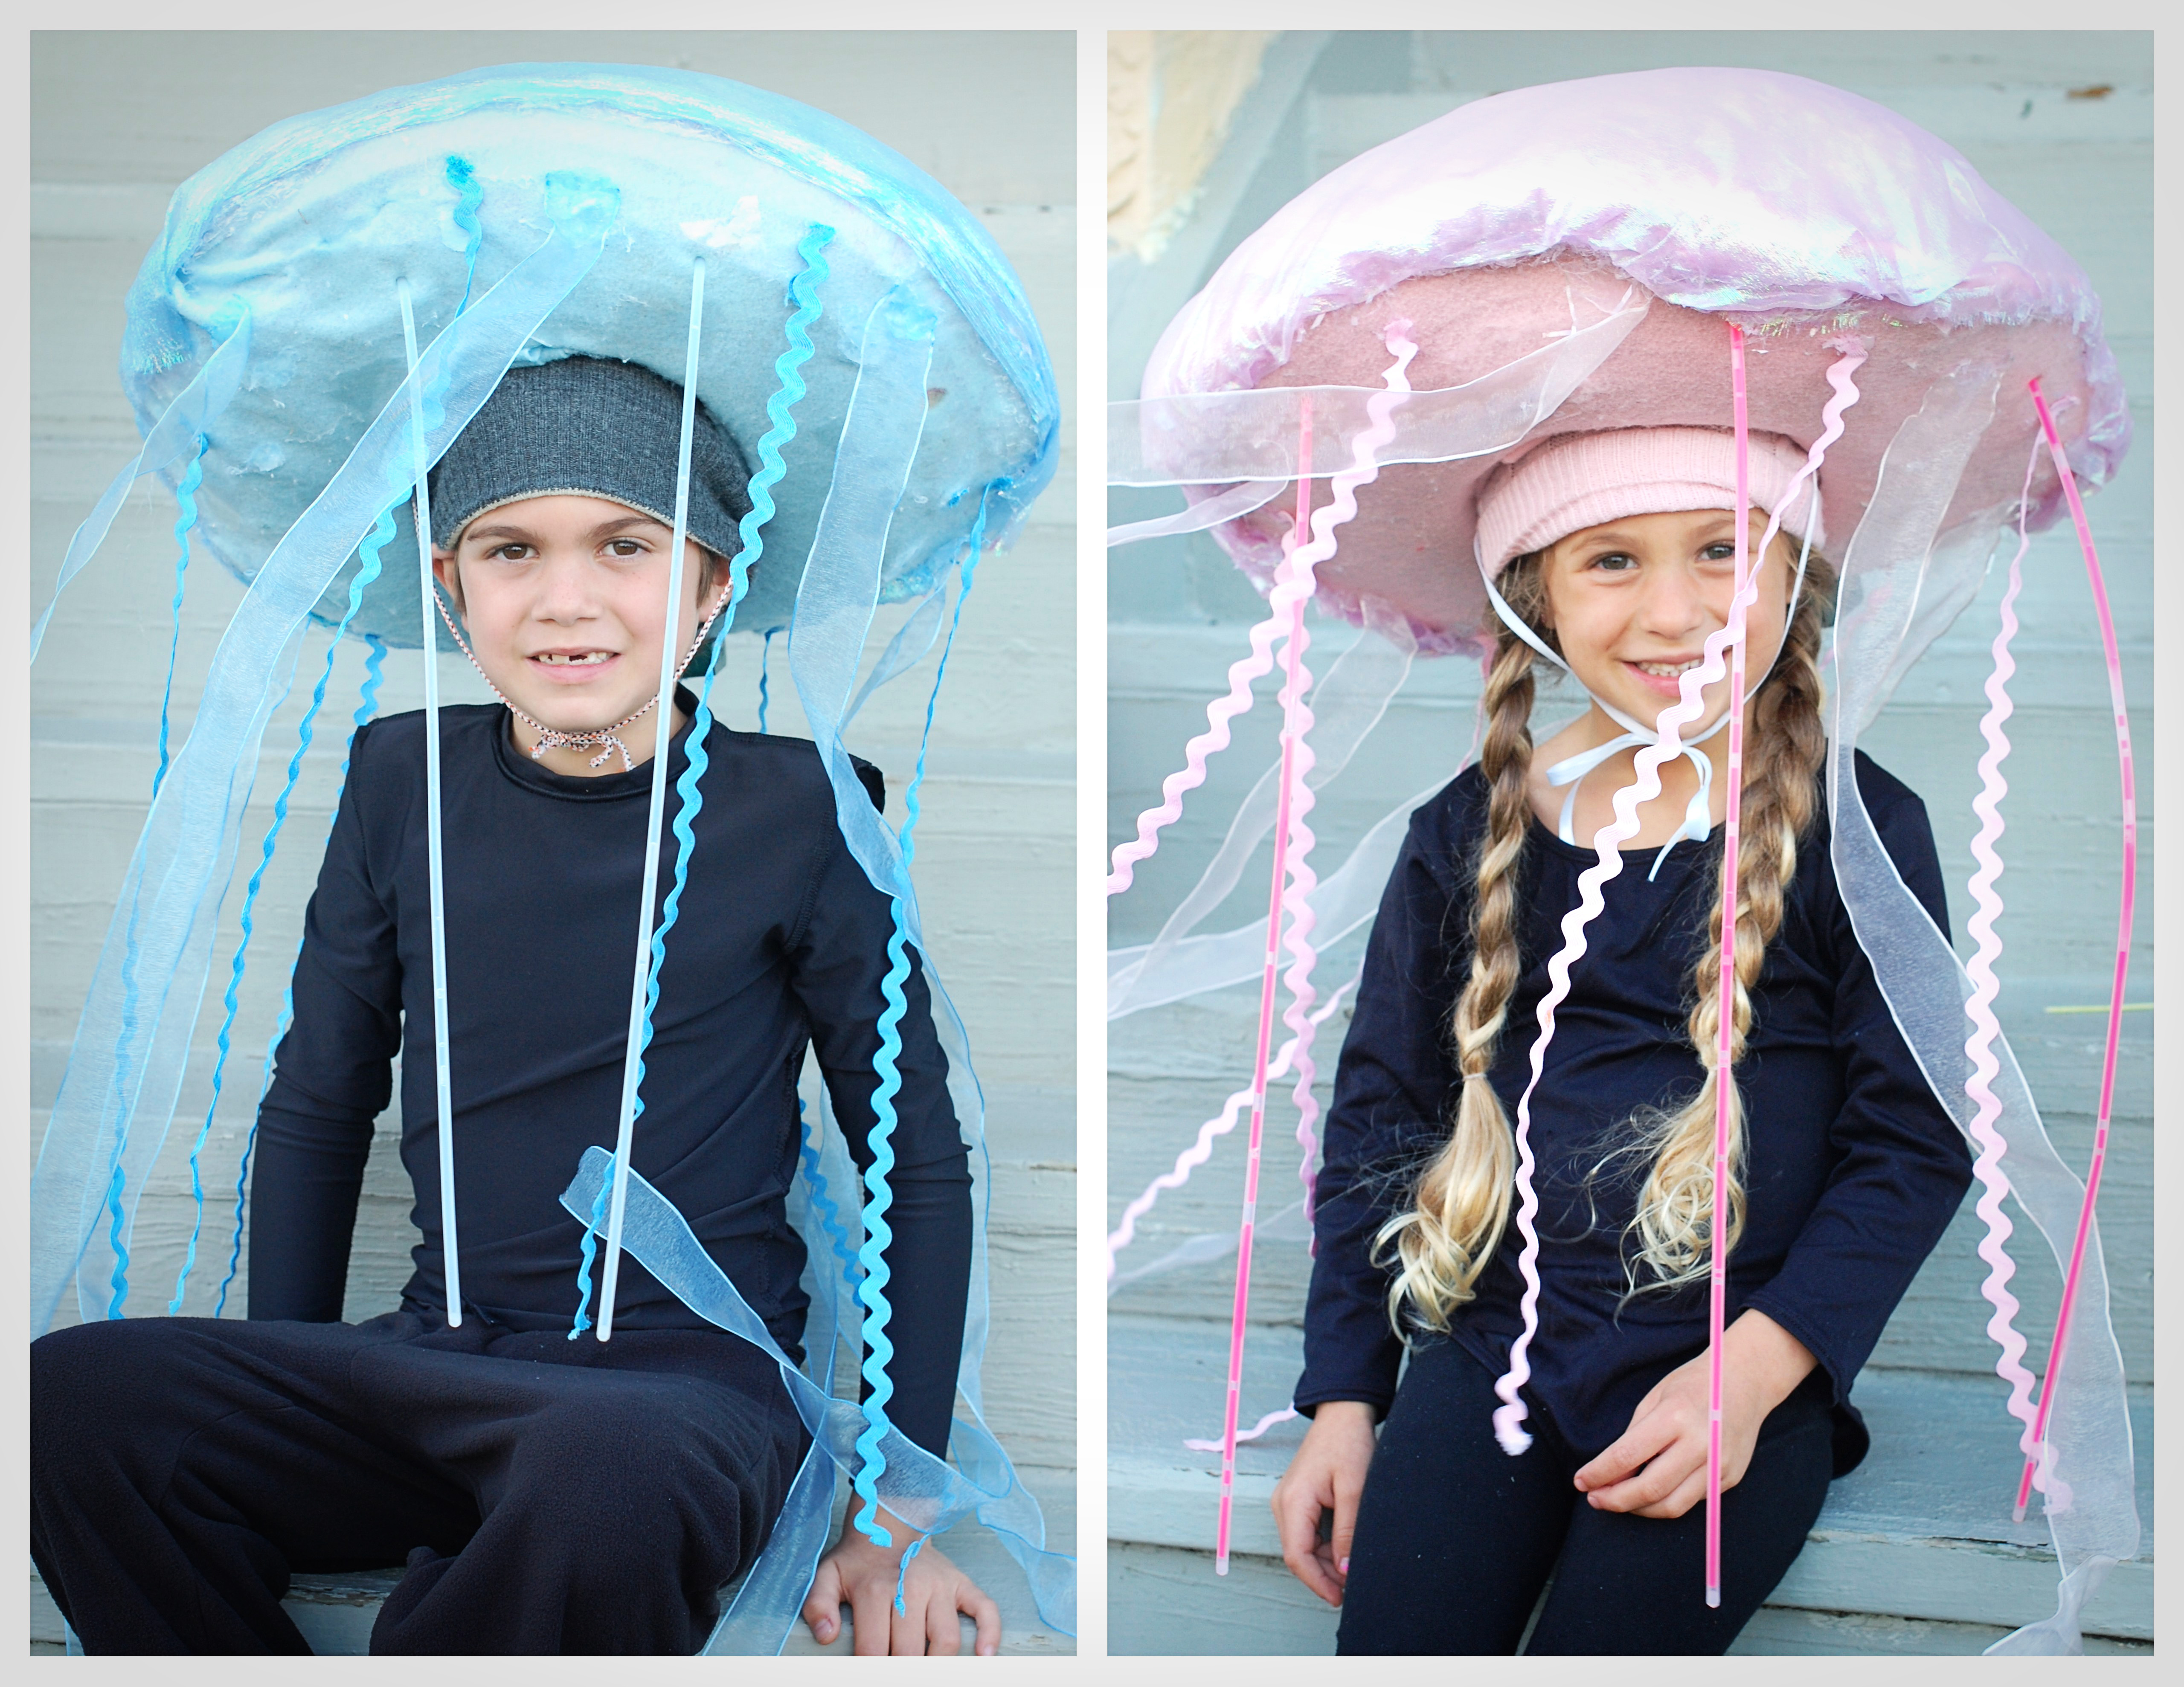

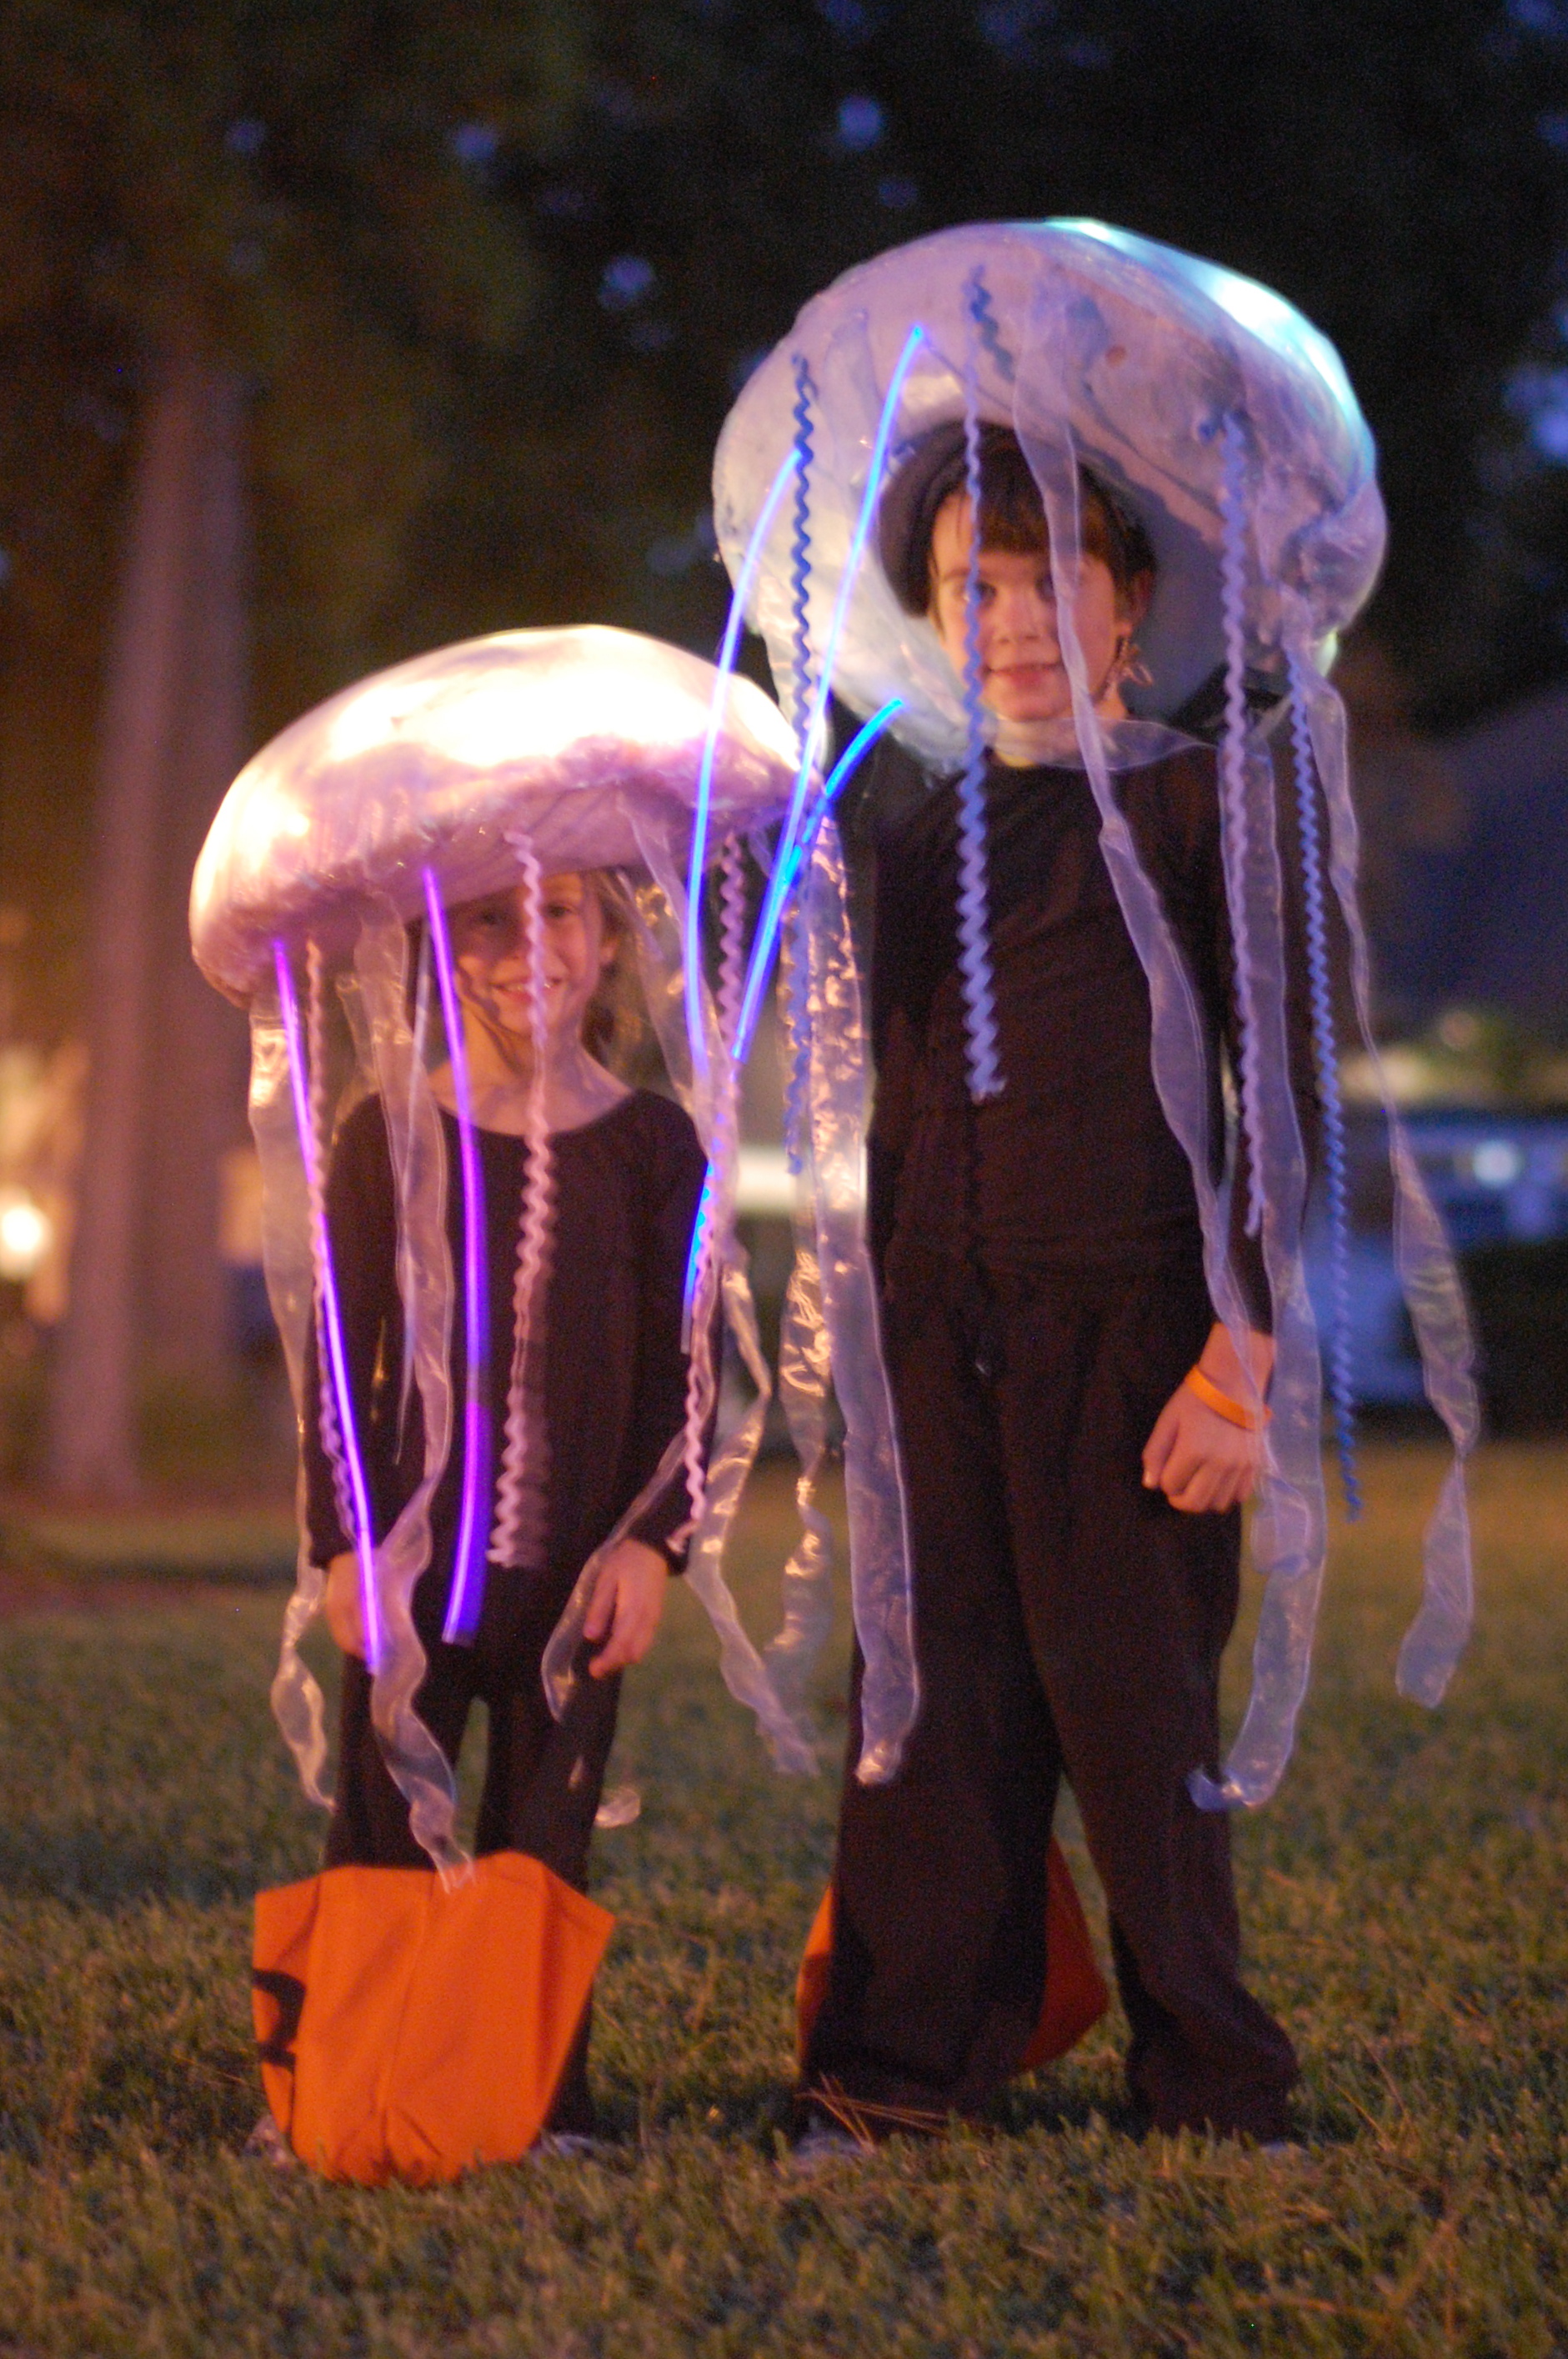
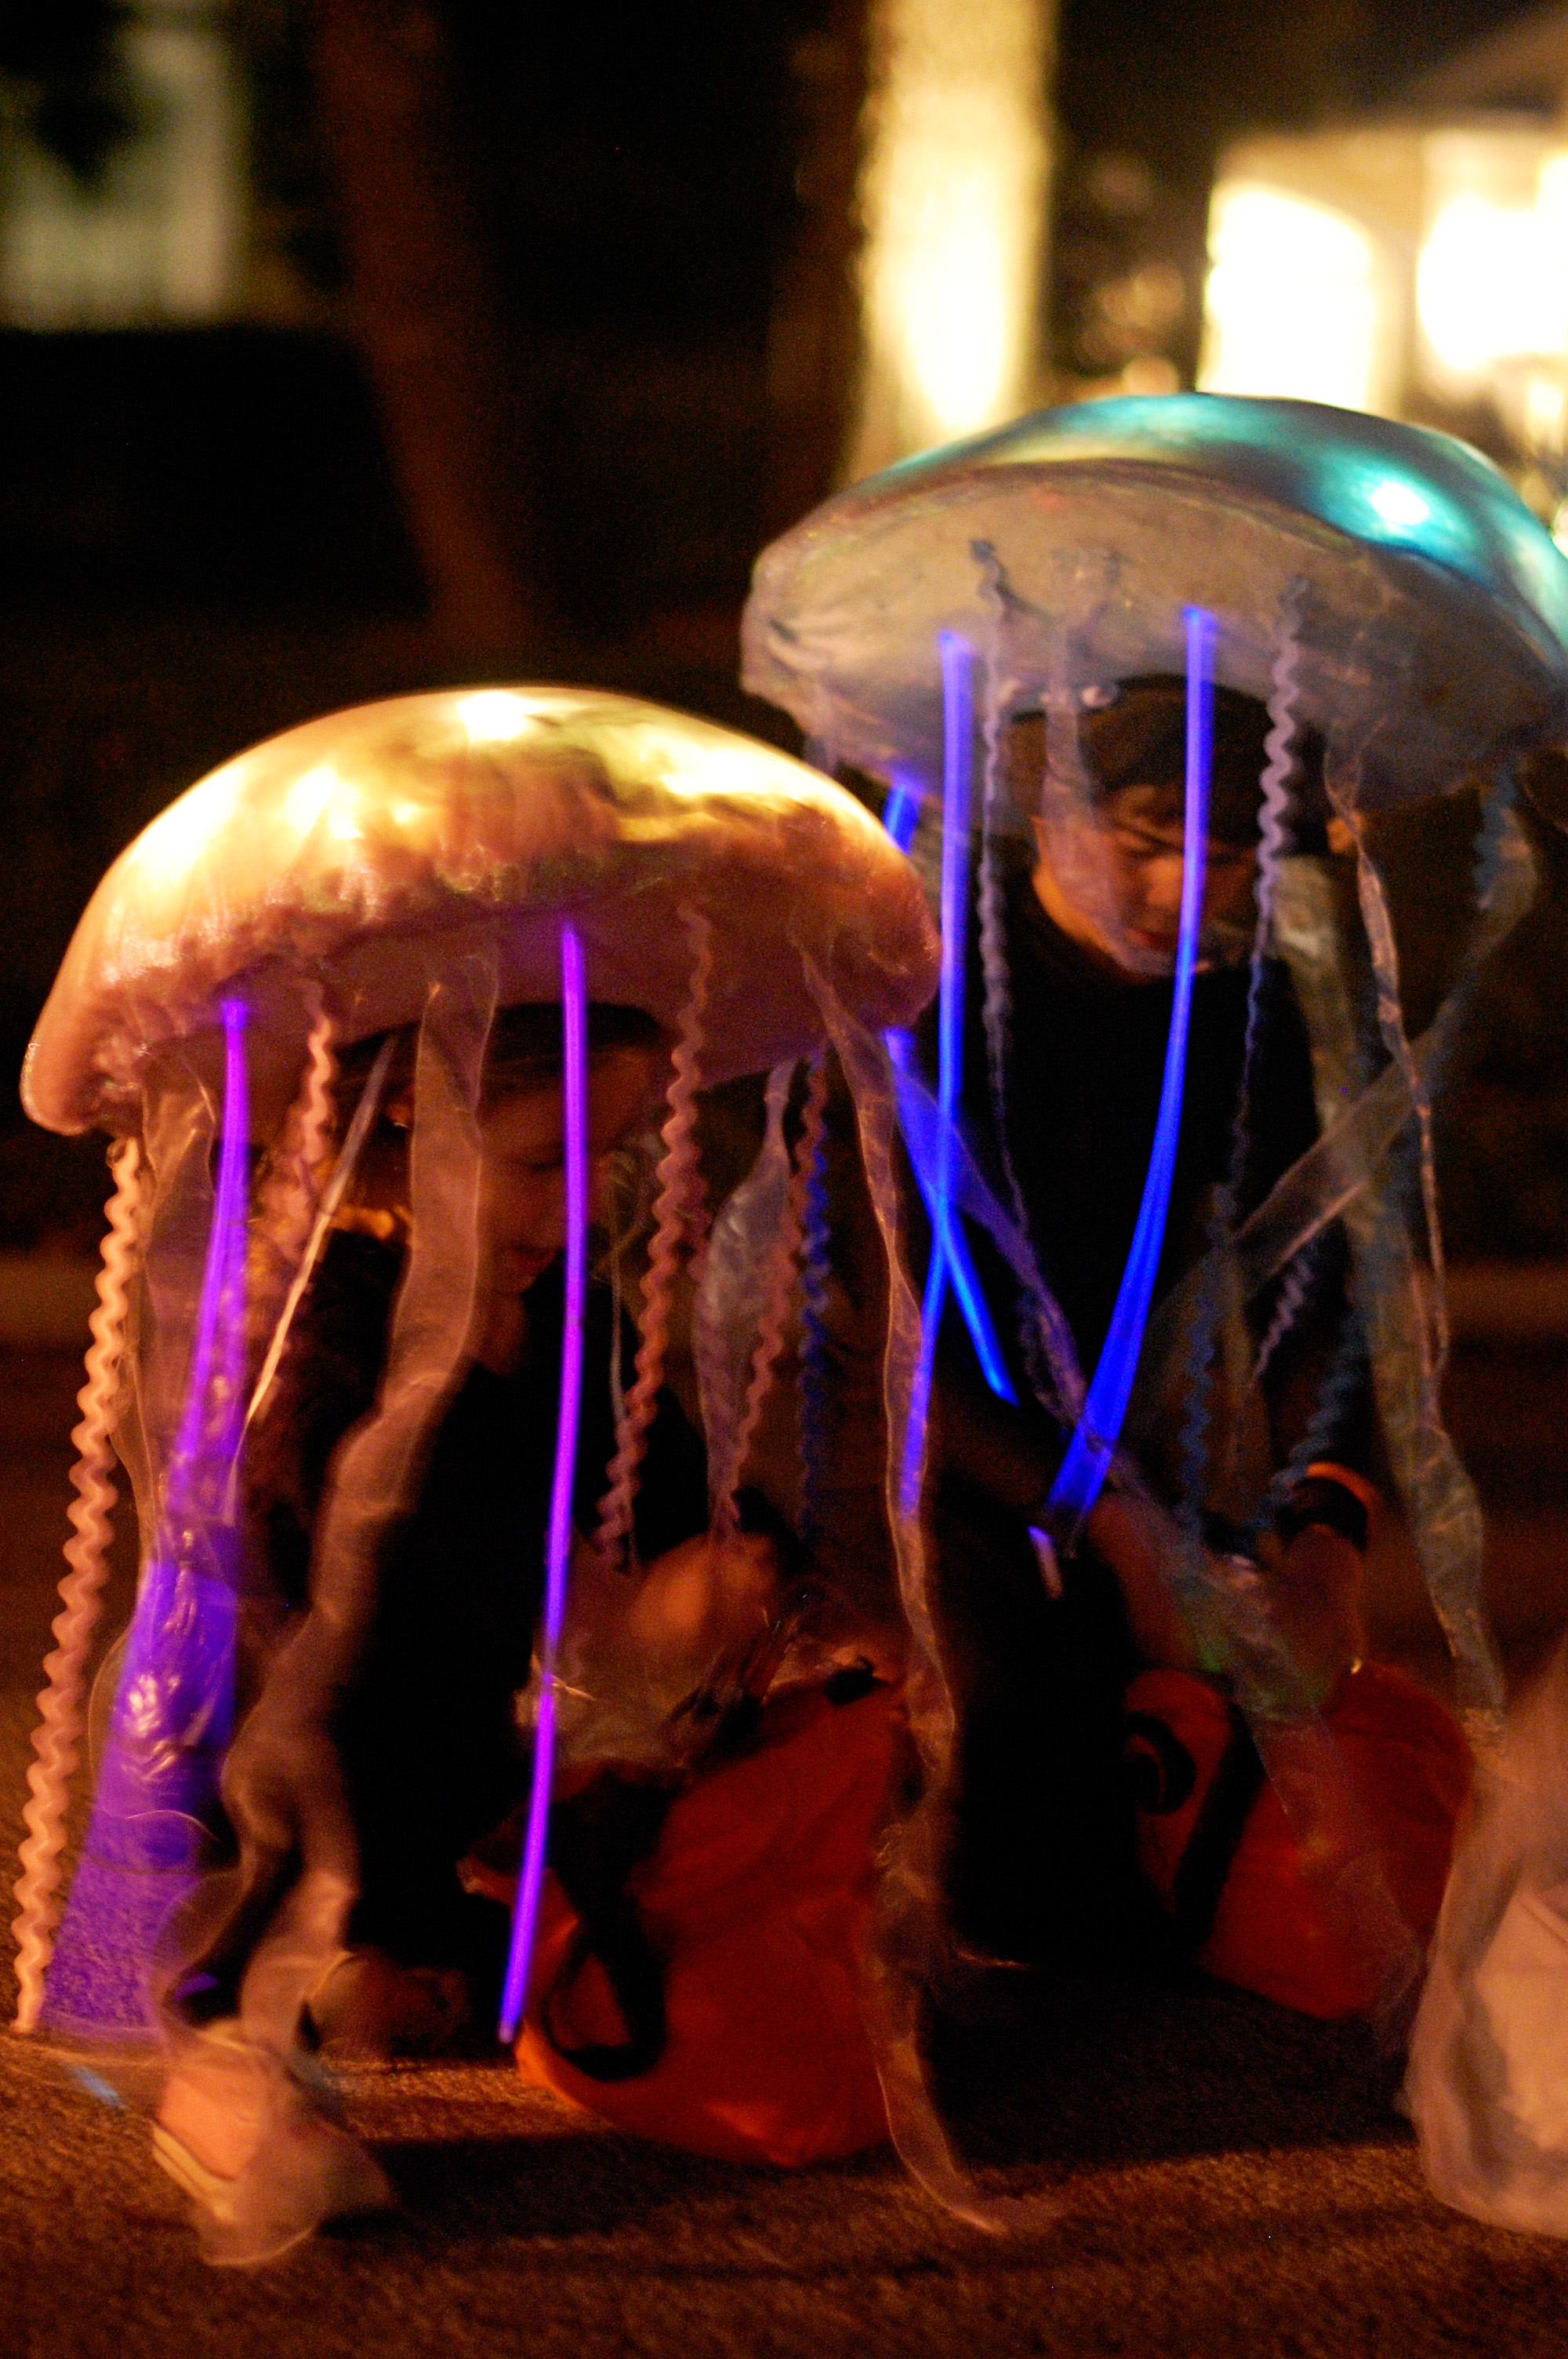
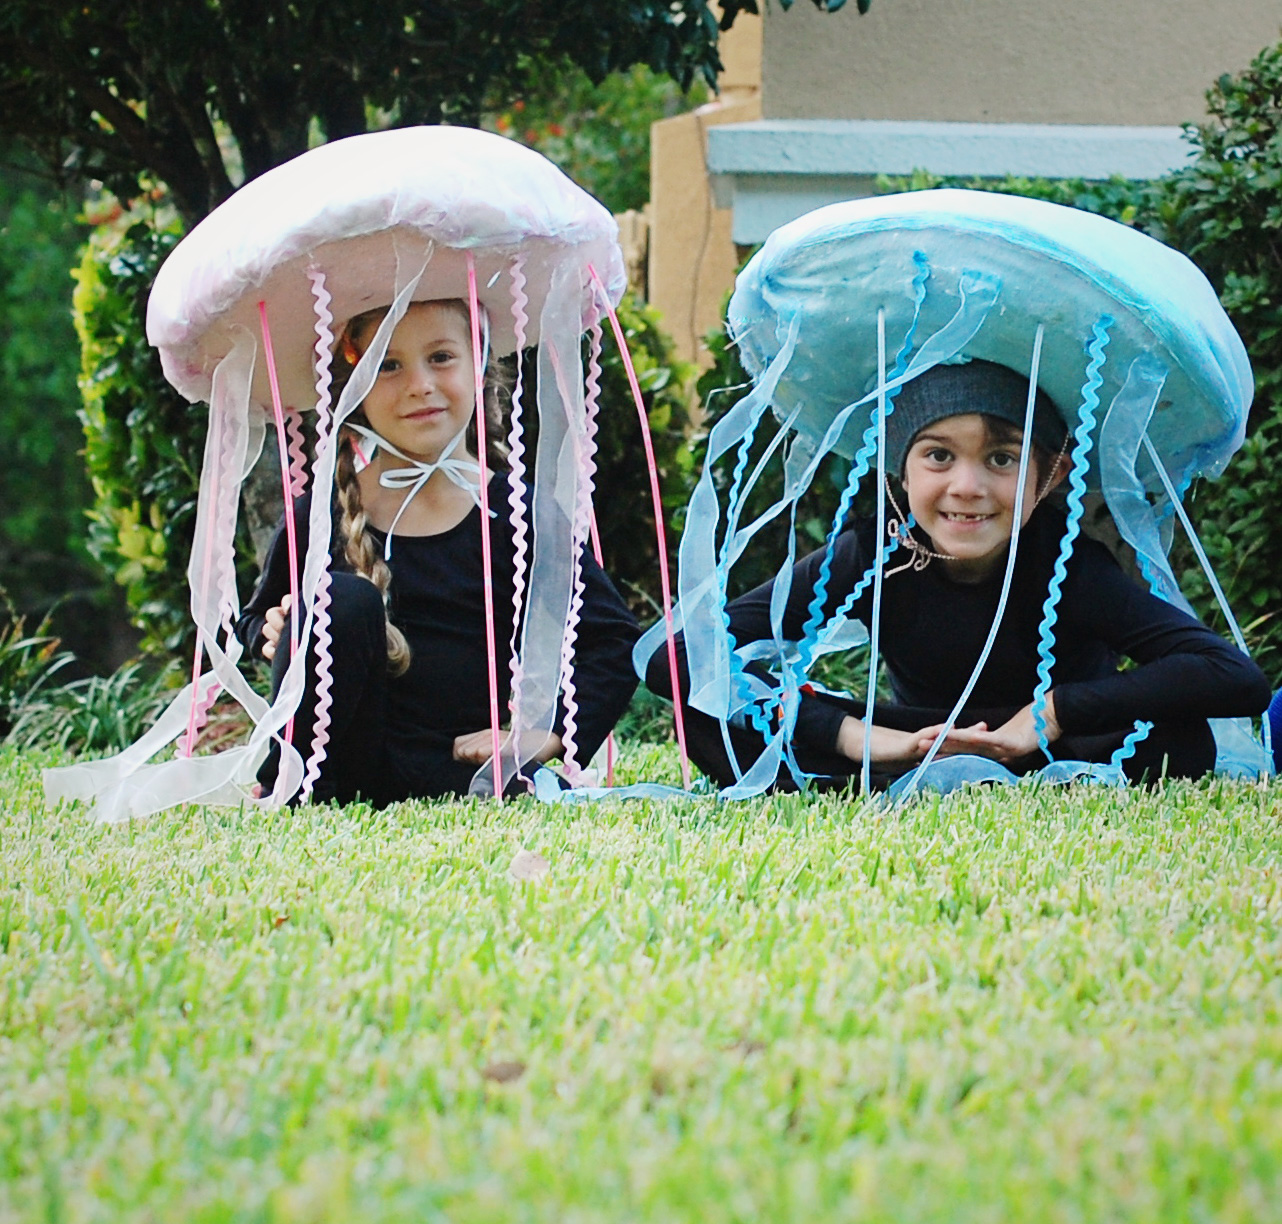 i had my kiddos wear black pants and a long sleeve black shirt because when they were walking around at night, the costumes really glowed and it looked like little jellyfish walking around!
hope this all makes sense. if you have questions, you can leave them in the comments.

 Follow
