Jan
19

Dining Room Makeover featuring IKEA Faux Built Ins
(FYI to my email subscribers: i’m trying a few new things for my emails, so if it looks different, that’s why.)
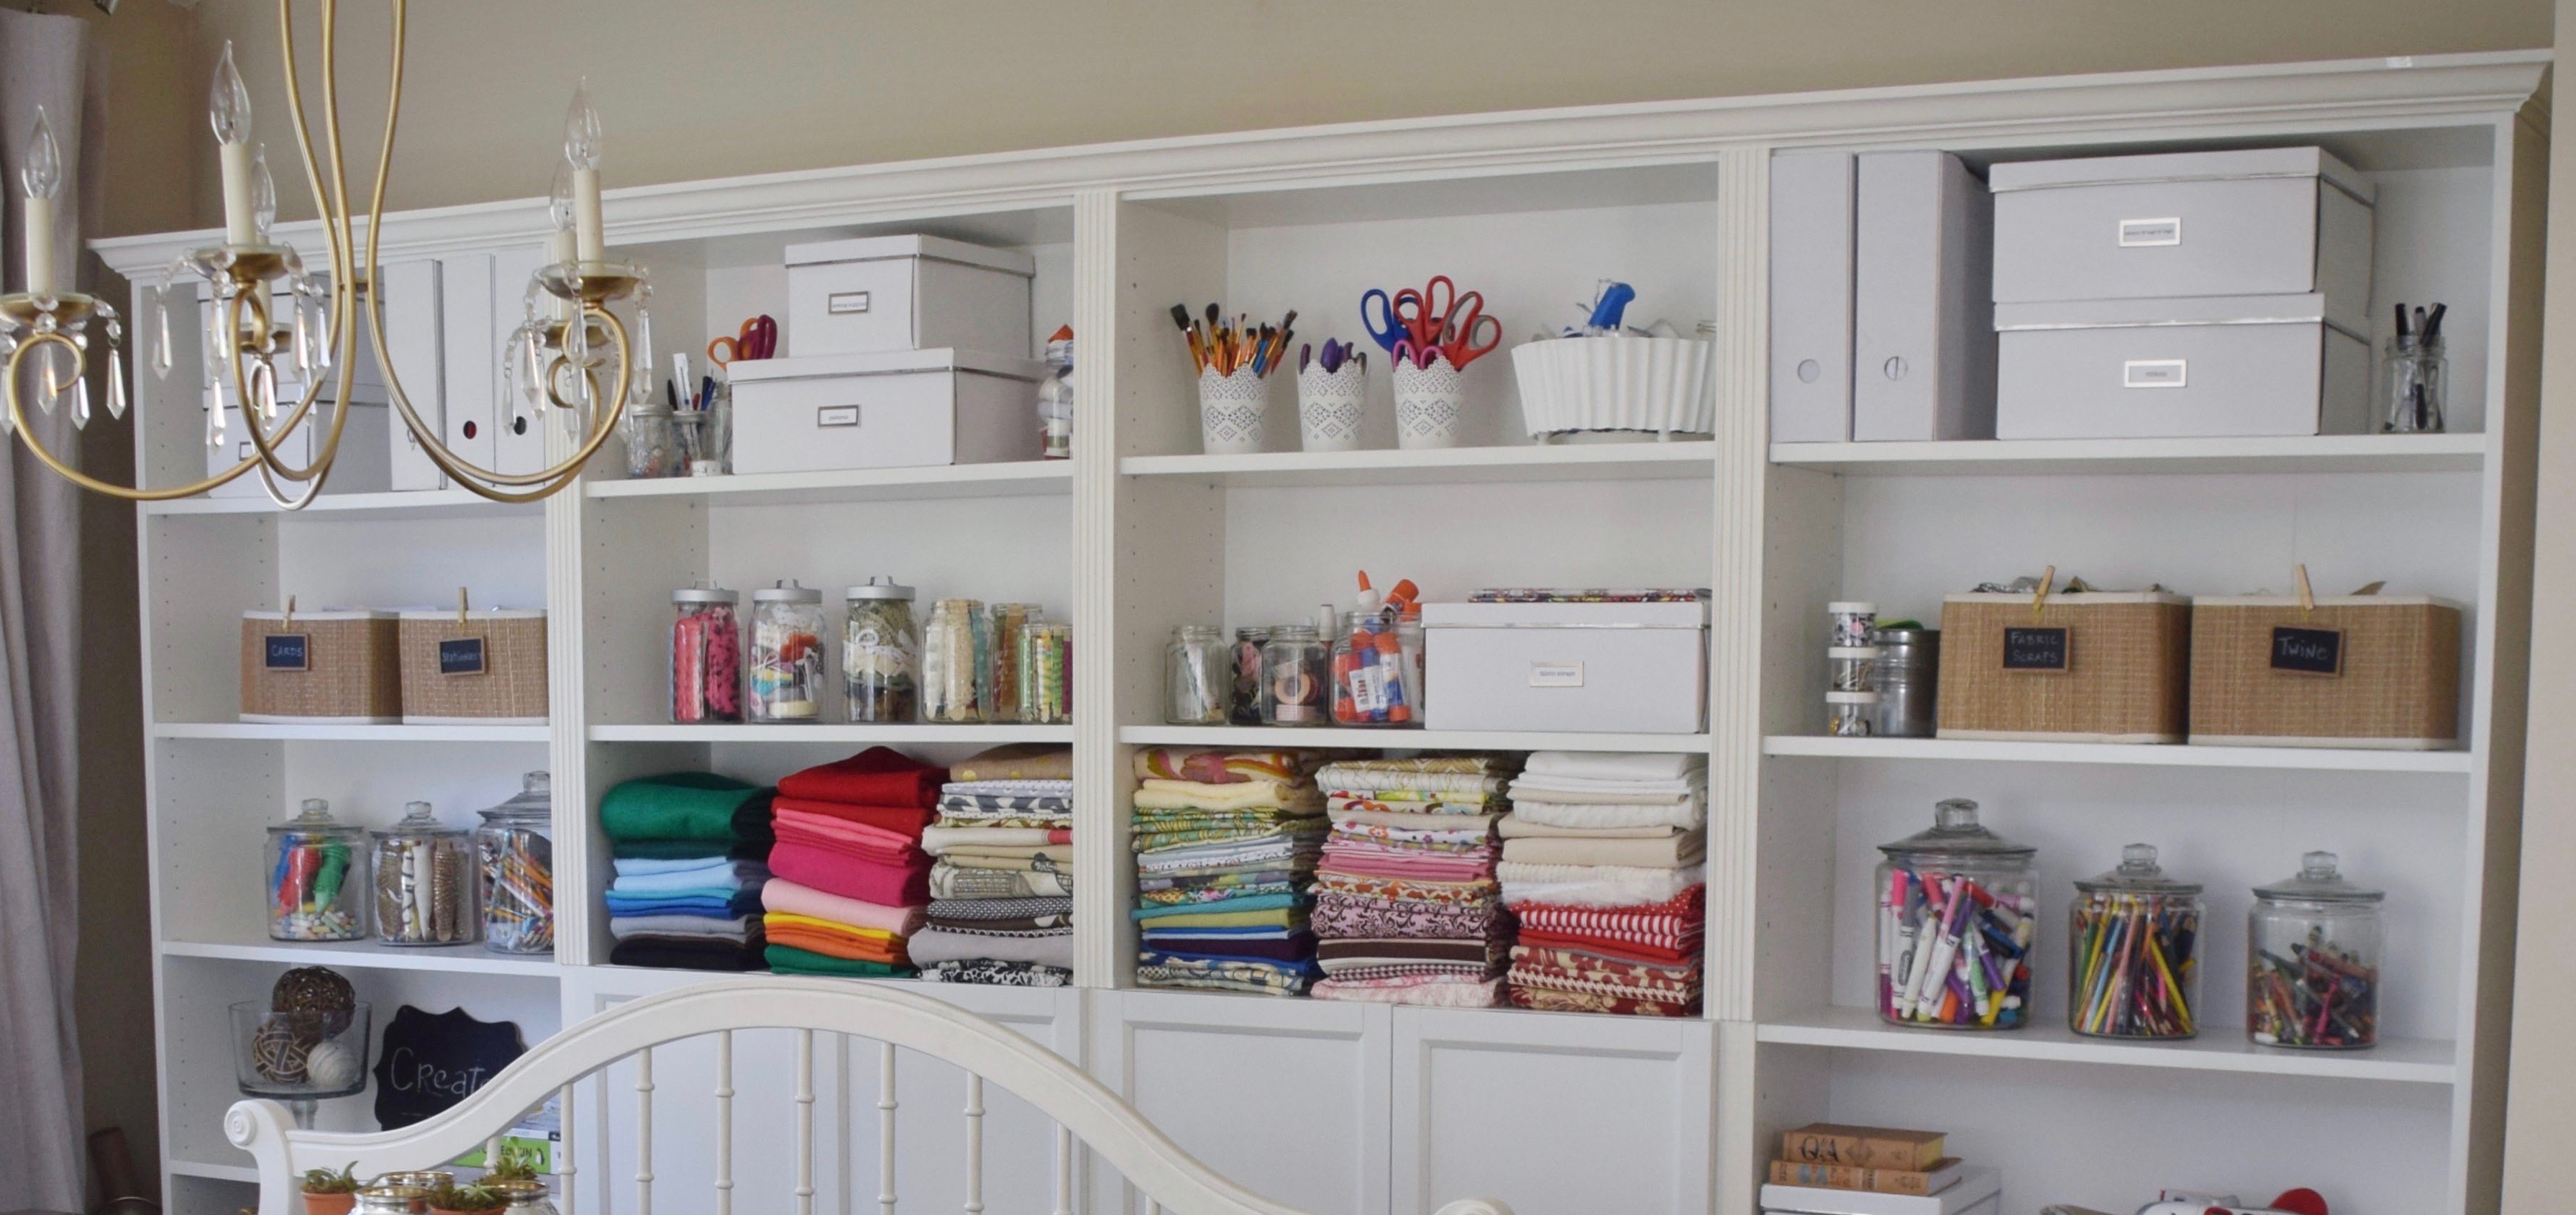
Back in the summer, we turned our formal dining room into a multi-purpose activity room, and today i’m going to give you all the details, specifically how we used cheap IKEA bookcases to create a wall of faux built-ins for a fraction of the price.
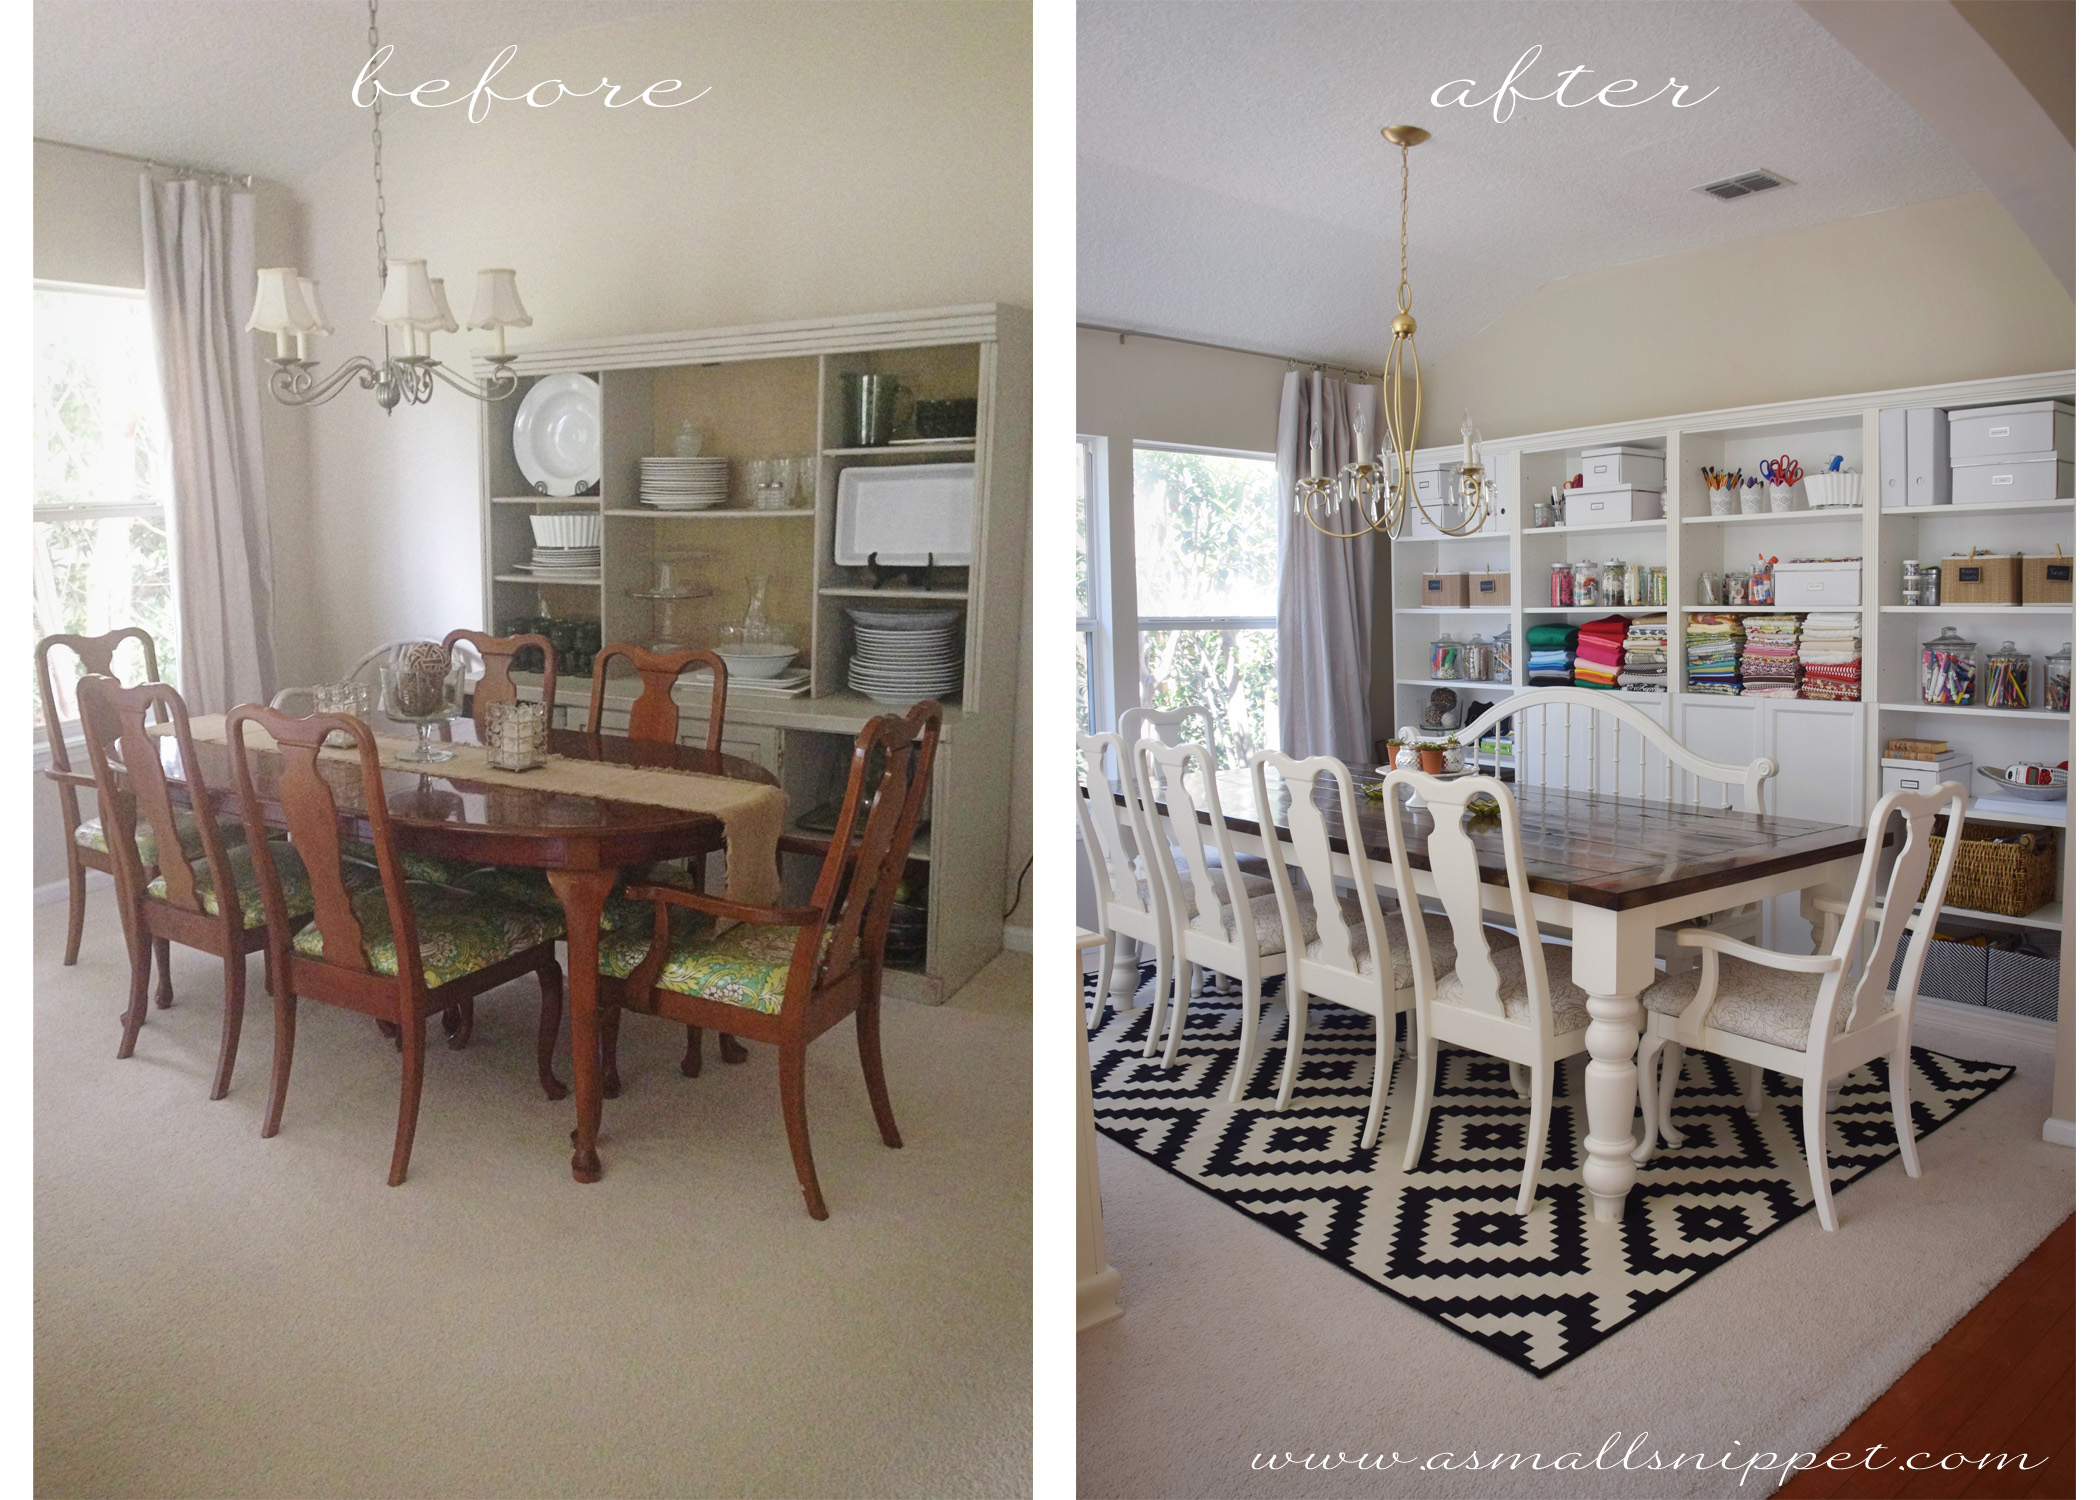
to be honest, i’ve always disliked this room. its connected to our formal living room, and if you know my family at all, then formal anything is just a waste of space. 😉 when Jake and i first built this house 14 years ago, as young newlyweds, we thought it was huge, all 1887 square feet of it. and it was, to us. but over the years, as we’ve added 3 more members to our family, the “huge” space we thought we once had has shrunk quite a bit!
i’ve become convinced over the years that if you make the best use of the space you have, you don’t need a huge house in order to be organized and content. also, as the kids have gotten older, i am more and more convinced that a house needs to be as functional as possible, meaning that a formal dining room was just not functional for our family, especially since we most often eat at our kitchen table. so i dreamed and planned, and sold LOTS of things, and saved the most money i’ve ever saved in cash, in a little tupperware in my desk drawer…and in stages finally got the activity room of my dreams! (minus the lighting fixture, but someday…?)
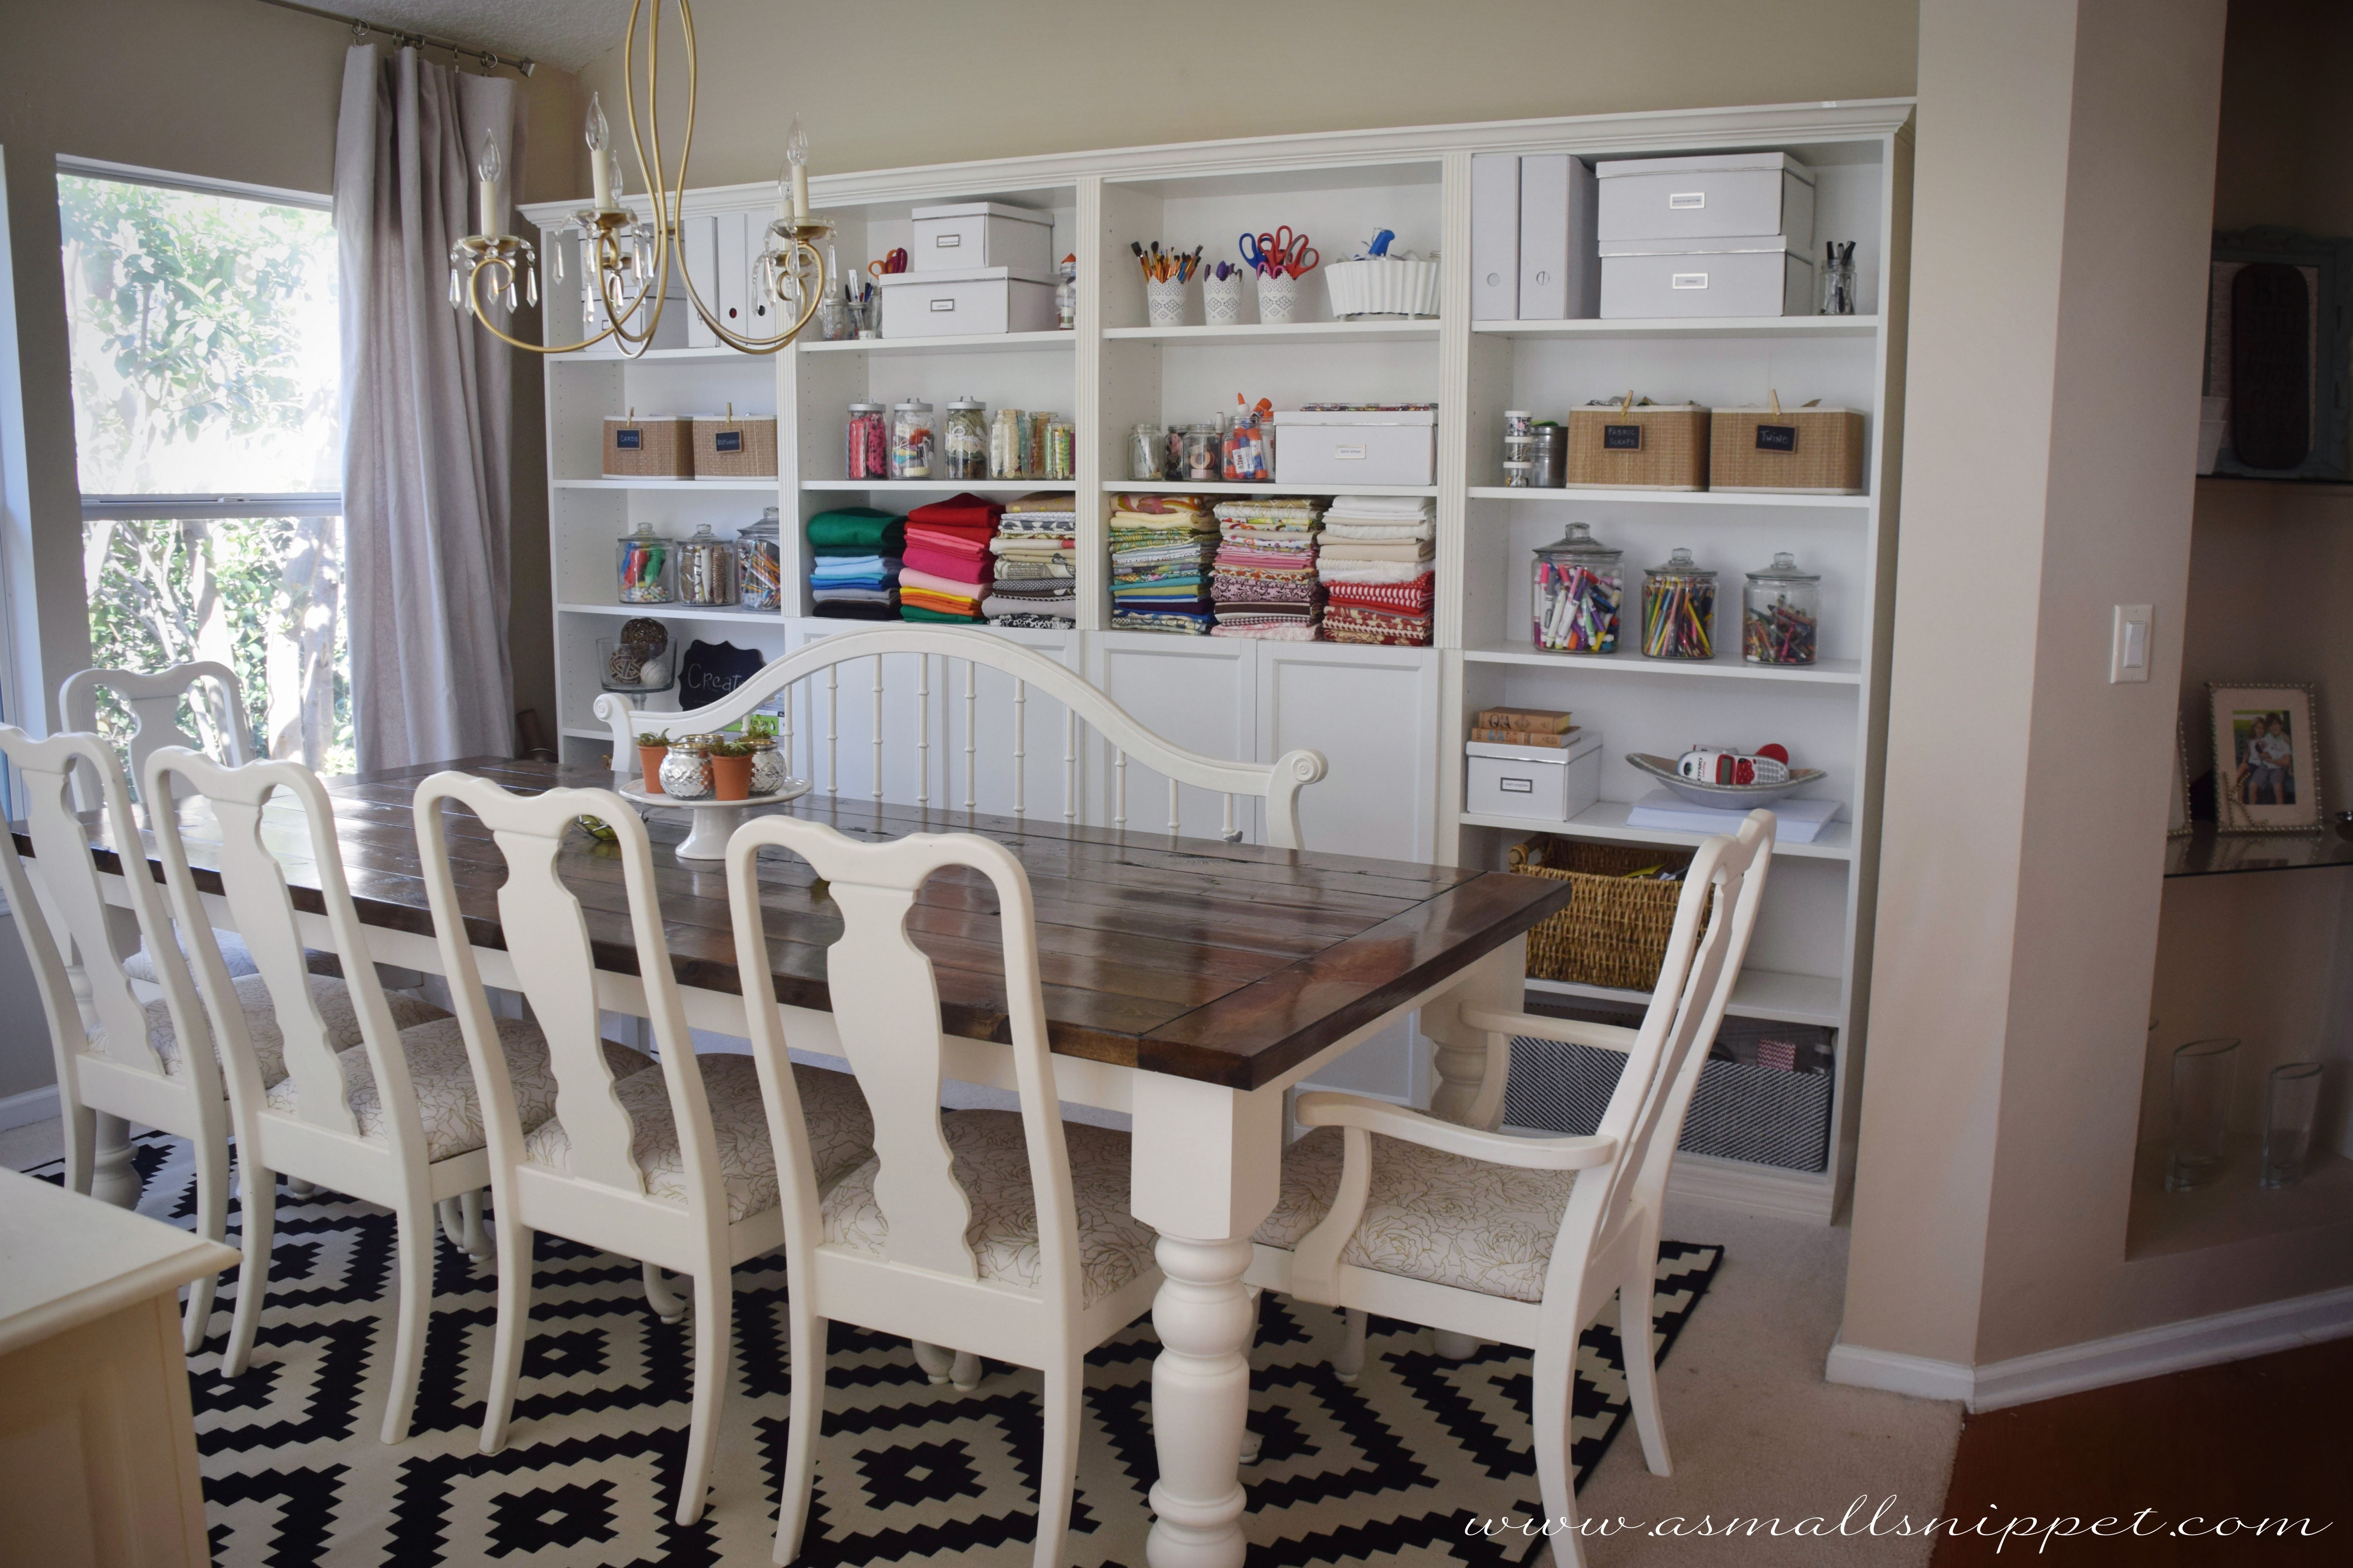
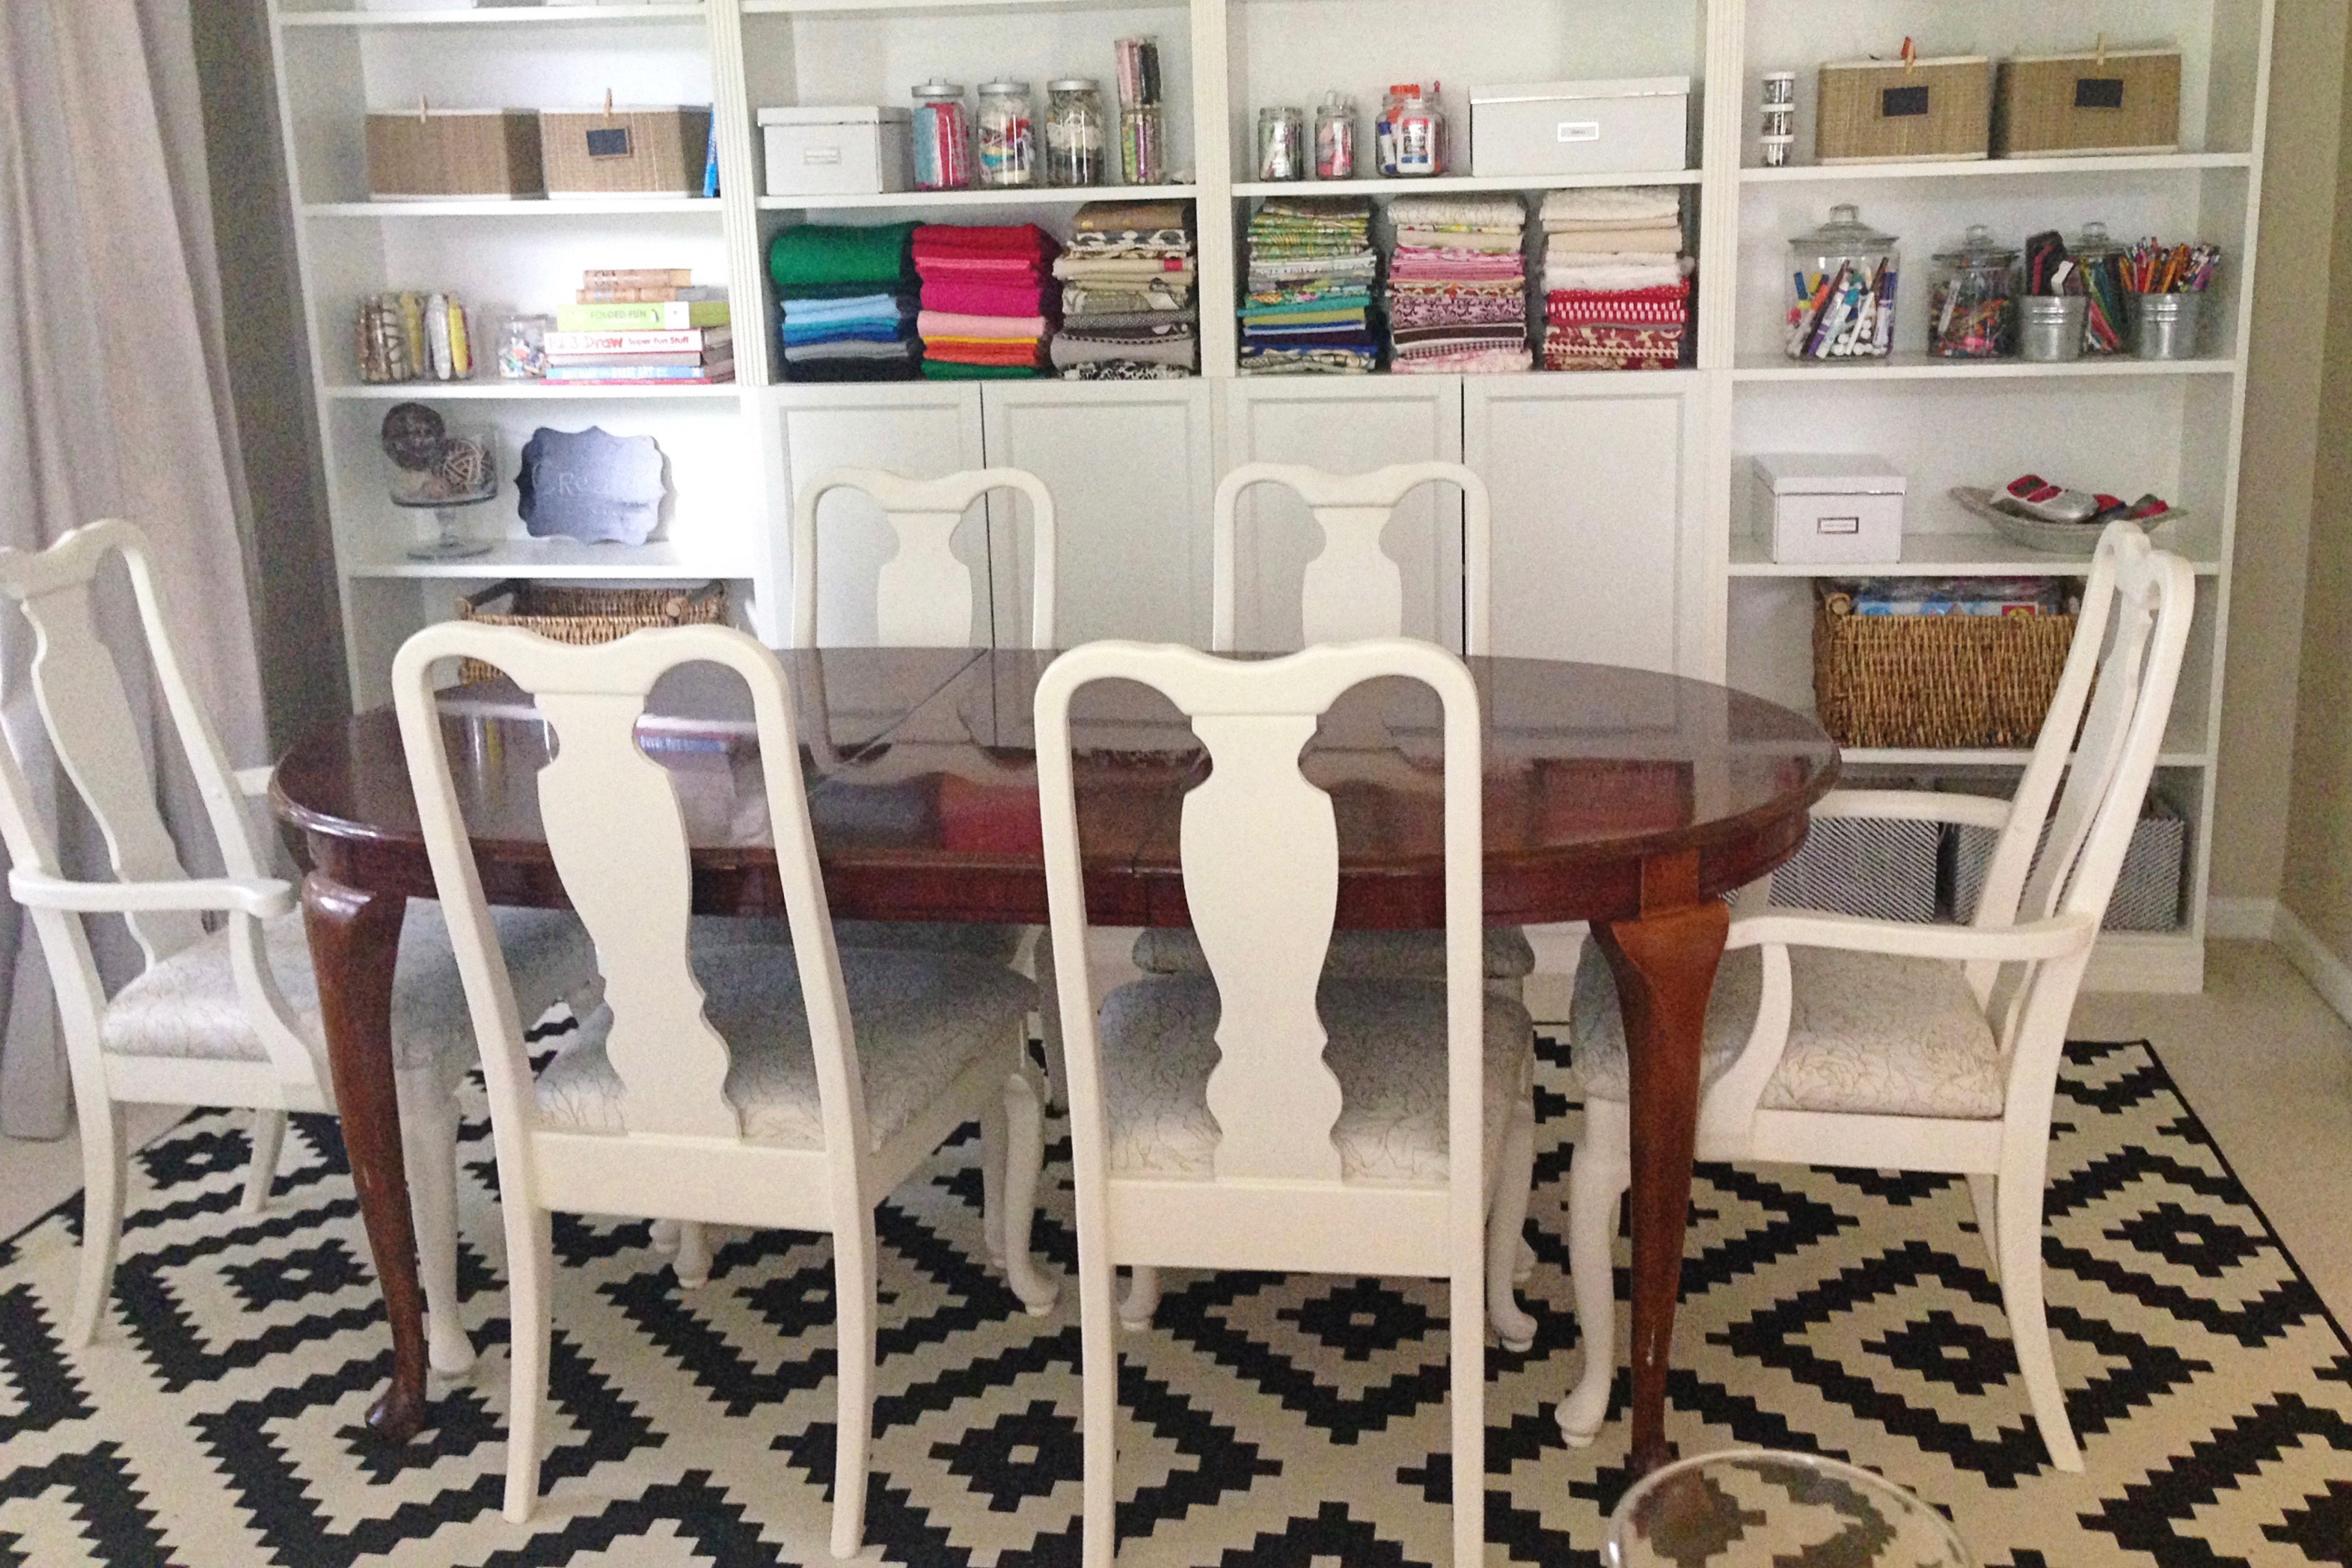
i envisioned a room with the biggest table i could fit in it, one that was sturdy and solid…where the kids could be one on end of the table working on homework, or coloring, and i could be on the other end, sewing or crafting. i longed for a space to organize all of our crafty things, where it was easy to access them, and even would be inspiring just having them out in the open, instead of tucked away in drawers and closets. because actual built-ins were way way way out of our budget, i researched multiple ideas, and finally settled on the most cost effective solution…inexpensive IKEA billy bookcases, with some moulding and trim attached to give them the look of real built-ins.
so we measured our space and decided that we could fit 4 (31.5 x 11 x 79.5 “) bookcases against our back wall, giving us tons of storage space.
(lots more pictures of the finished room are near the end of this post, along with details of the farmhouse table and the bench, so keep reading.)
so off Jake and I went to IKEA…and we came home with 4 Billy Bookcase, 4 cabinet doors, and lots of storage containers. these are the bookcase we bought. and at only $69.00 a piece, it was a steal. these are the cabinet doors we bought, which weren’t much less then the bookcases themselves, but absolutely a necessity for me to be able to store some things behind closed doors.

i also bought some moulding and wood and a few other supplies at Home Depot (details below), so all together i spent:
$276 on the shelves
$160 on the cabinet doors
about $100 on wood, moulding and supplies
so total for a wall of built-ins = $536. not too bad!!
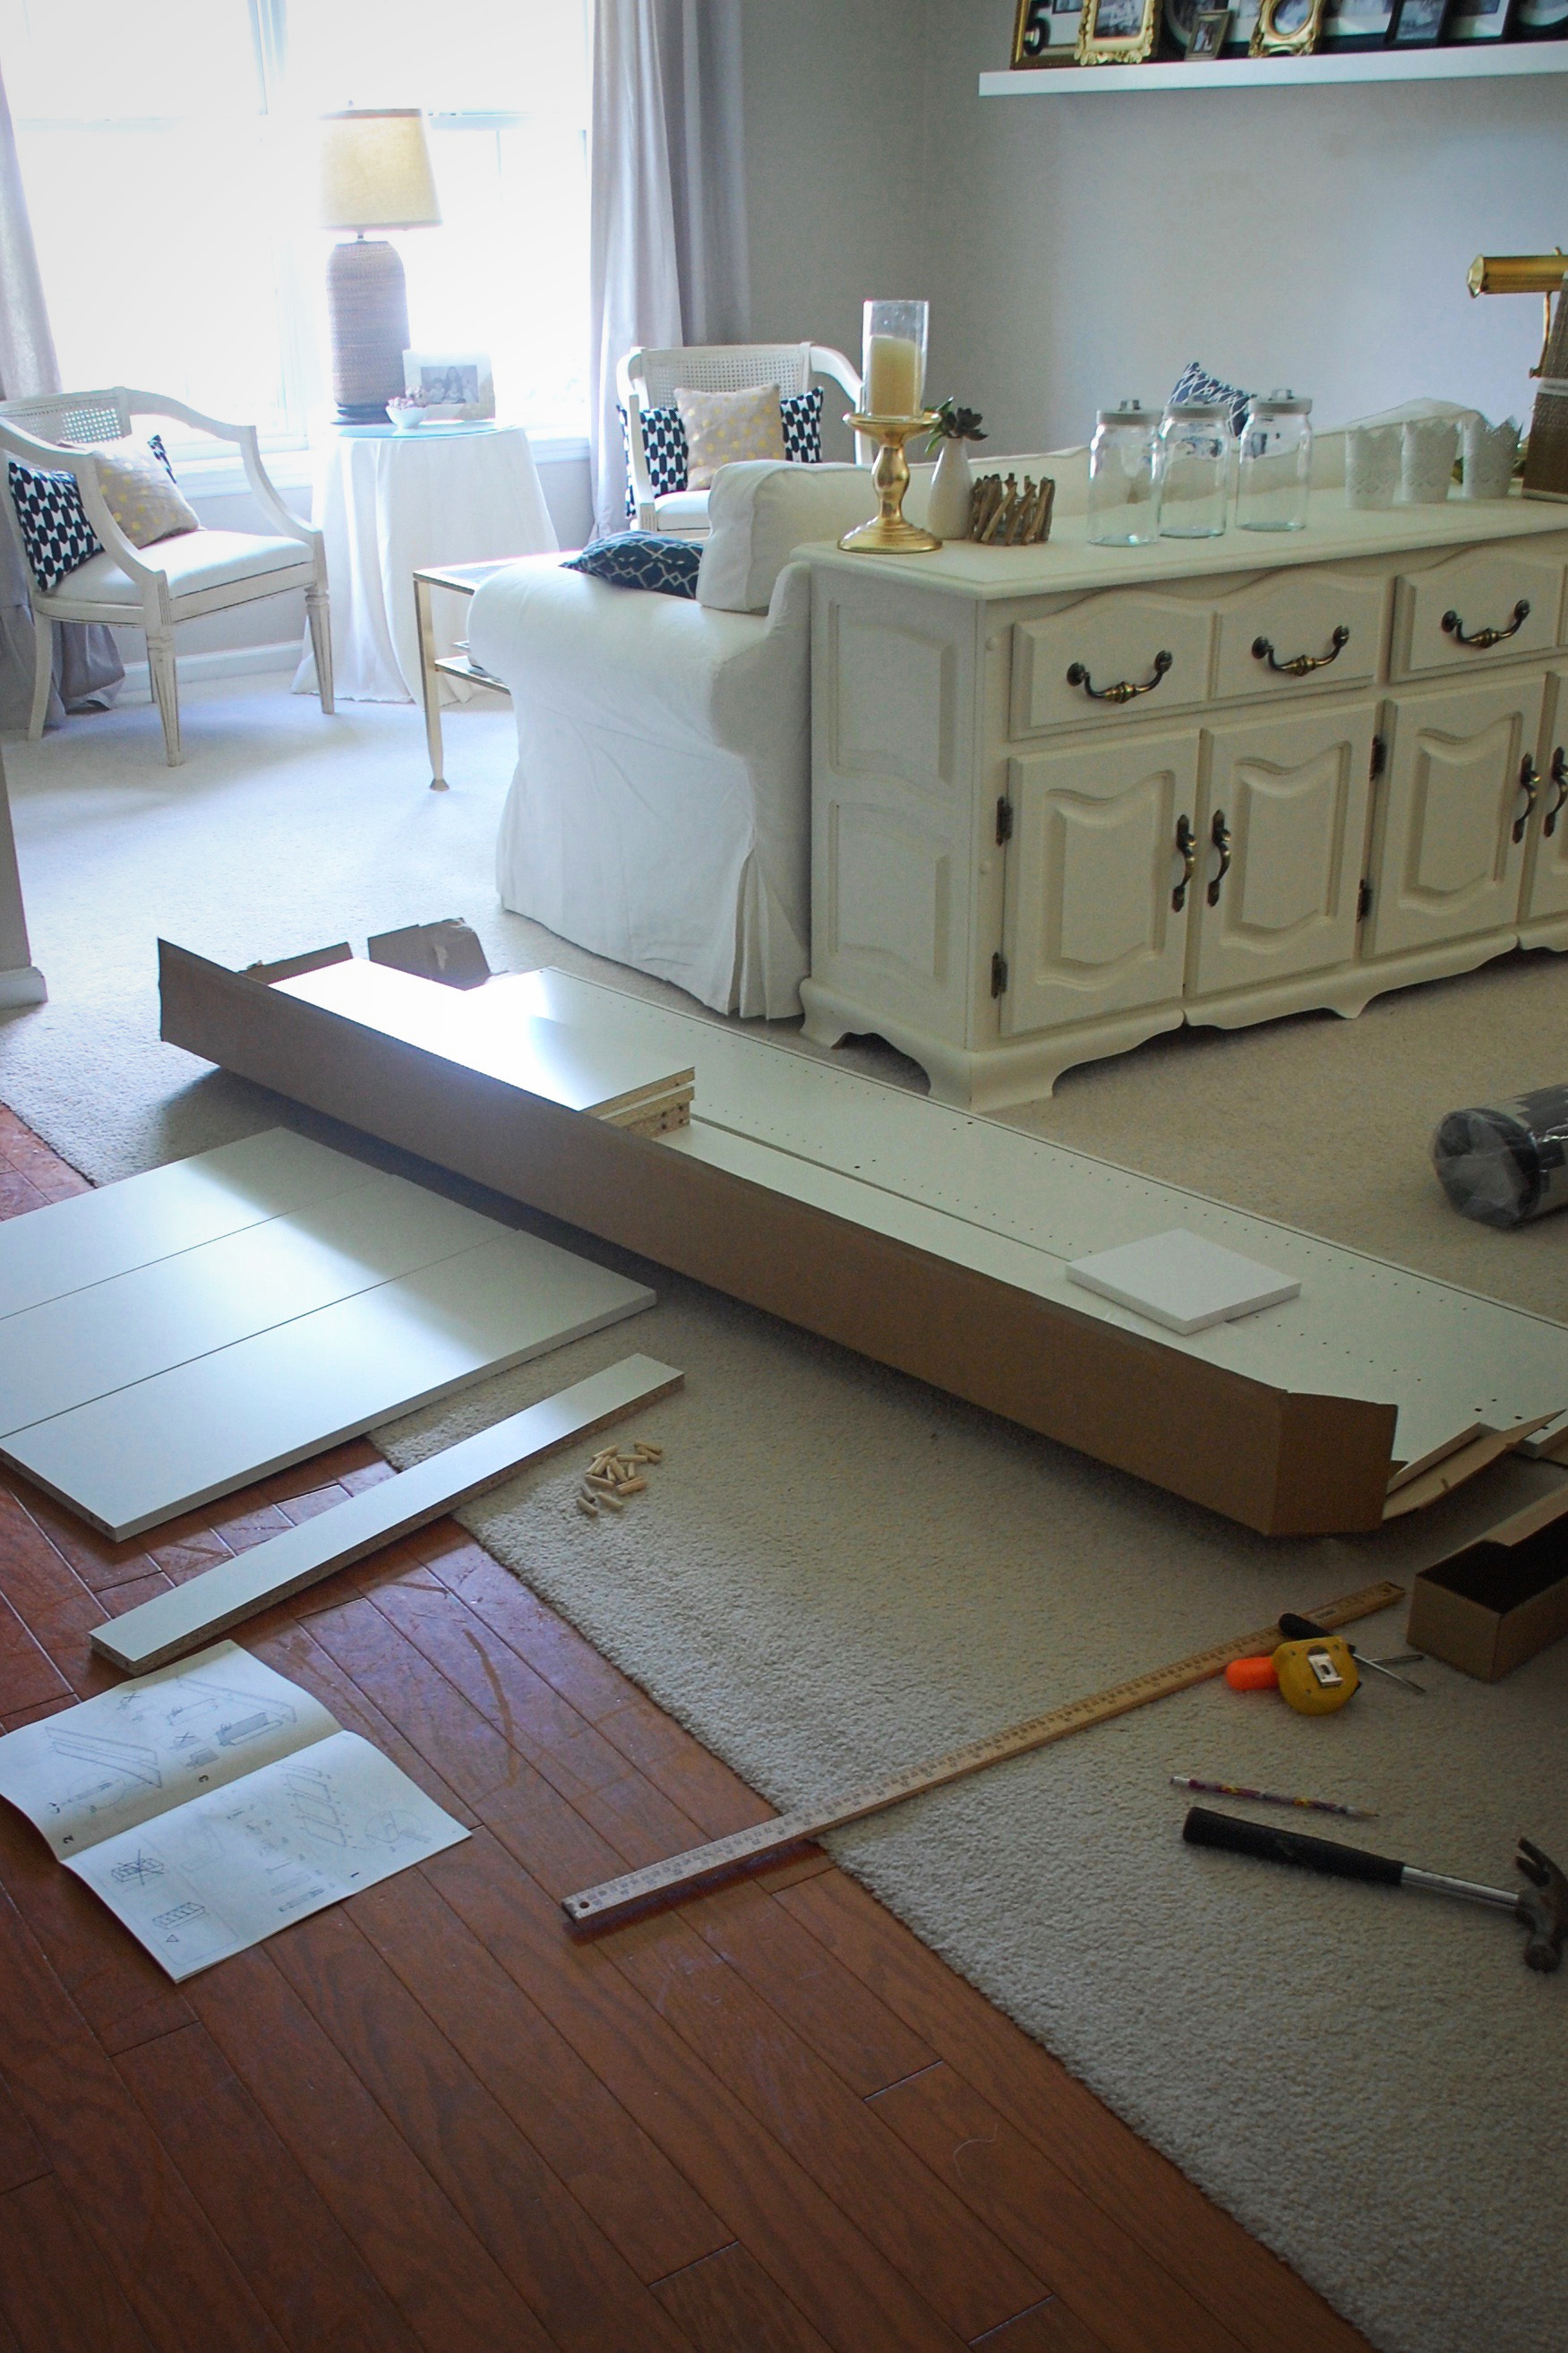
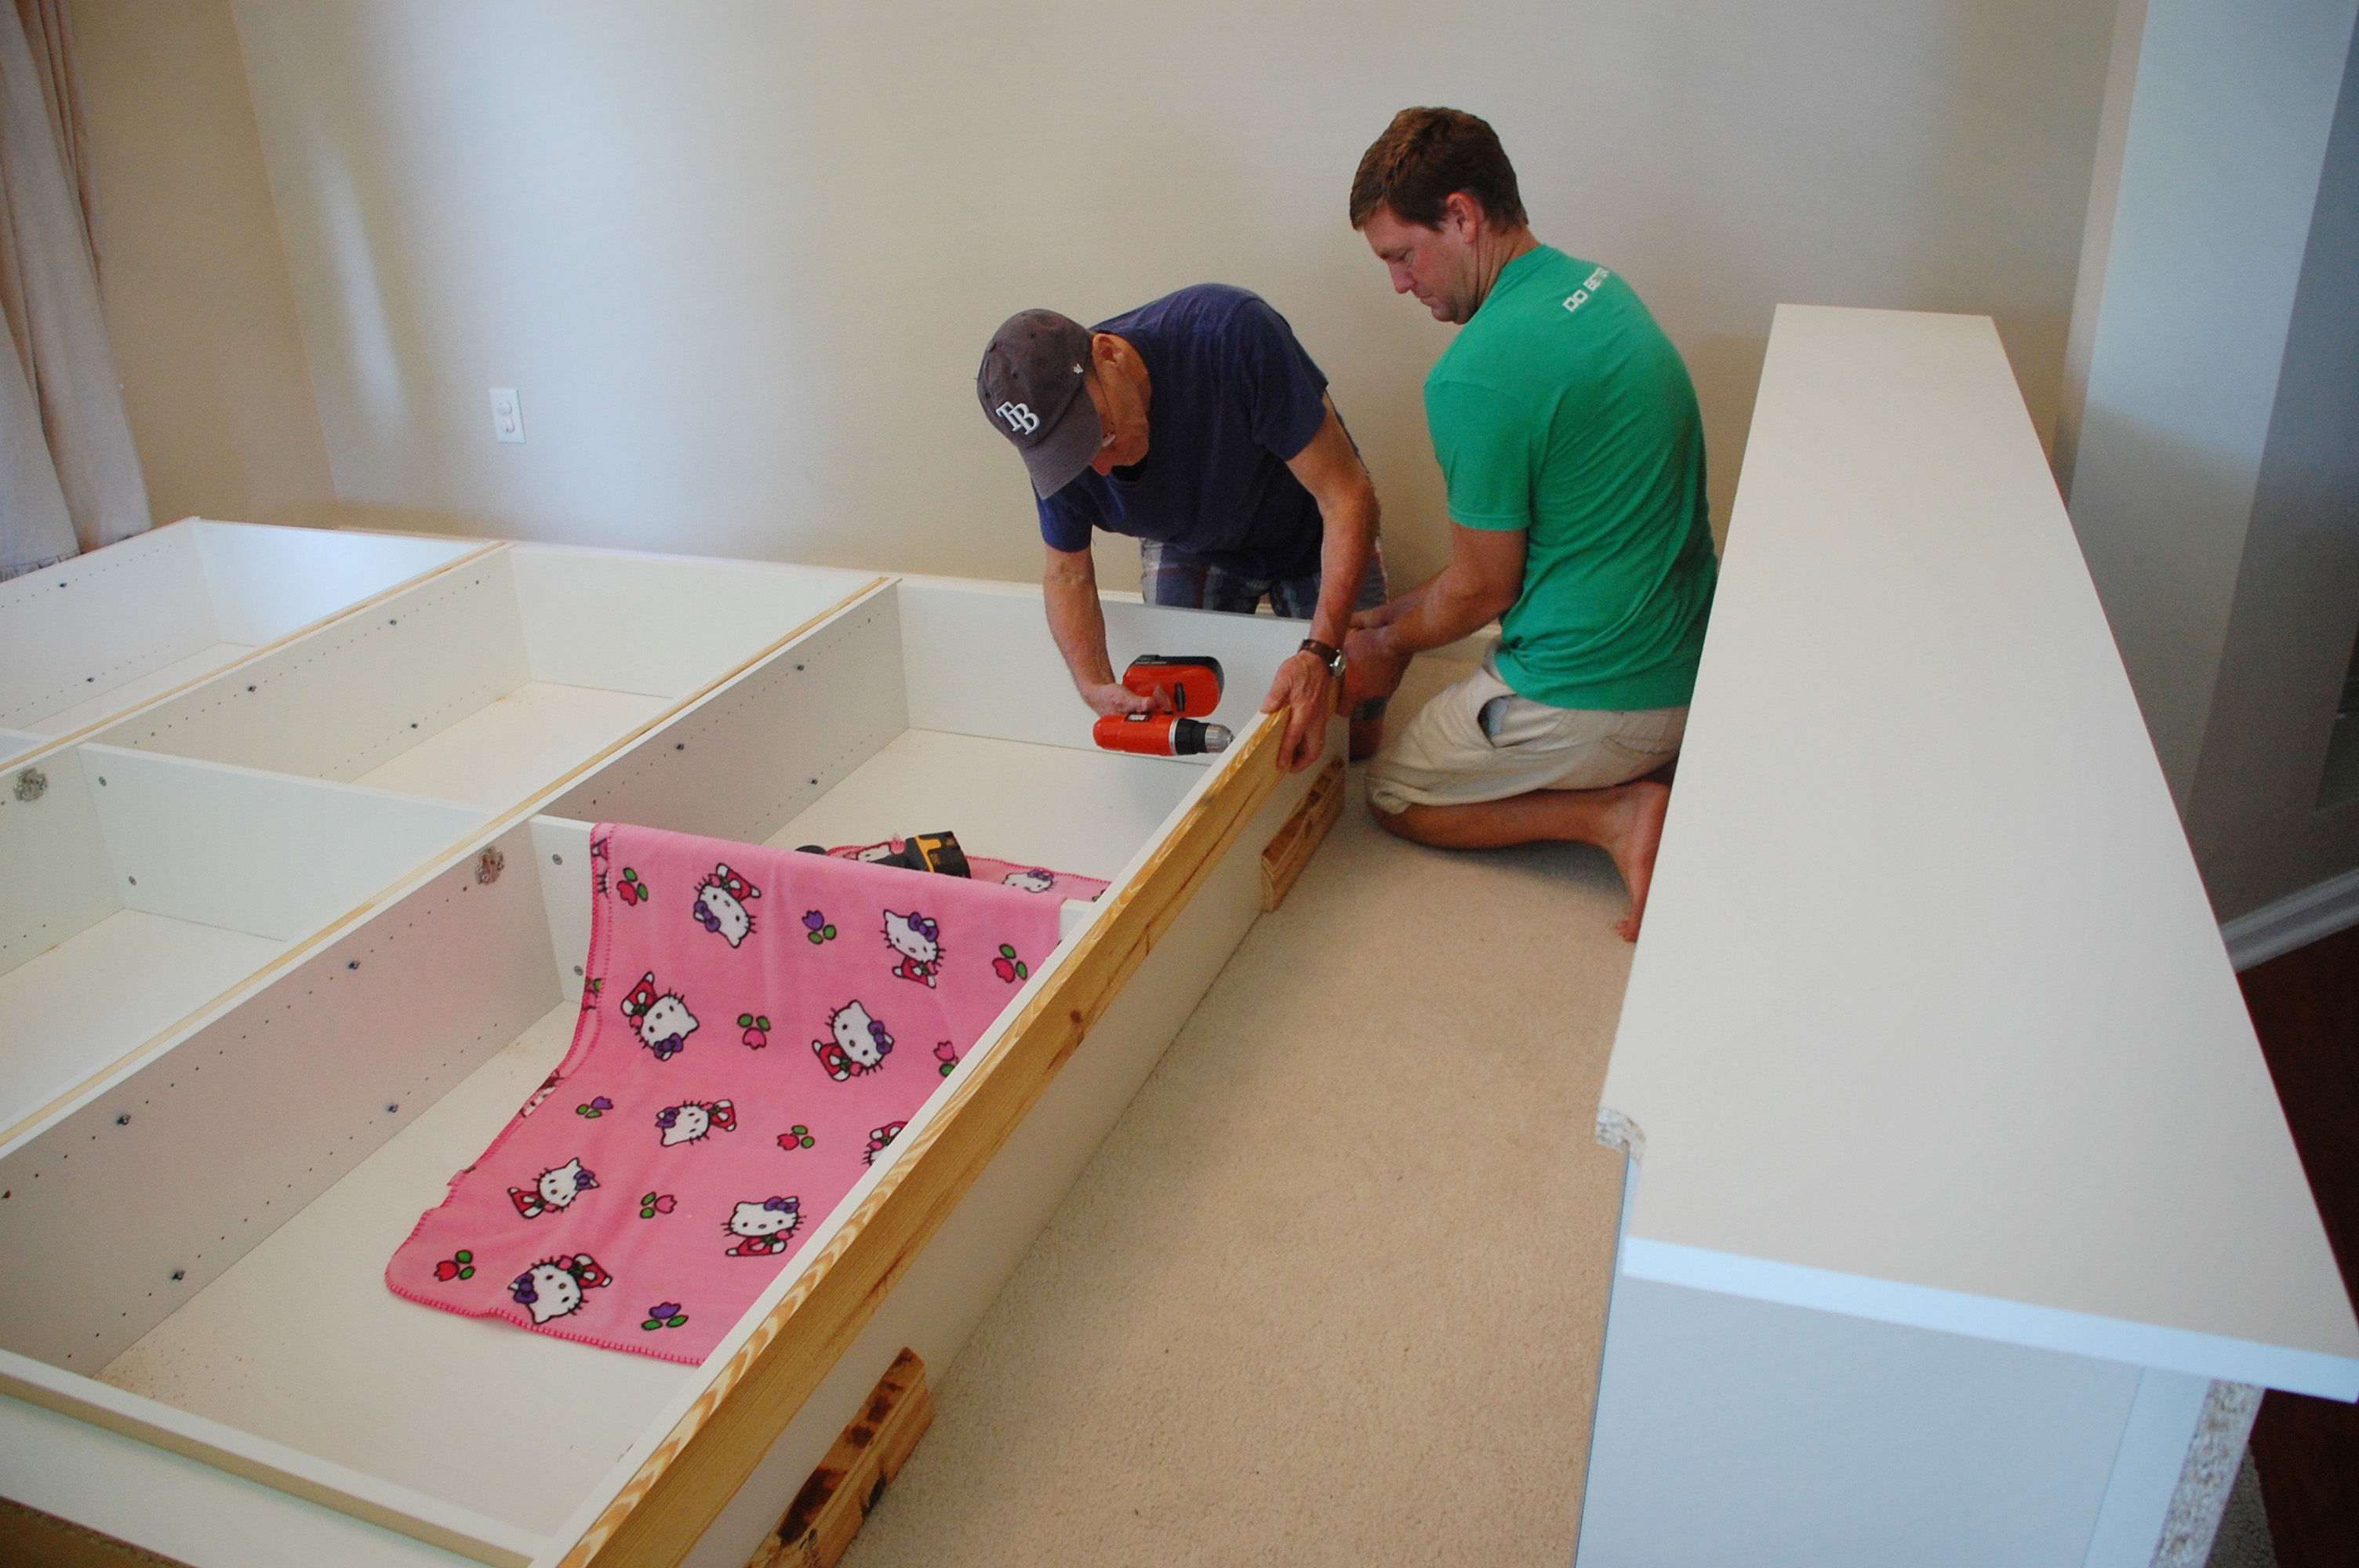
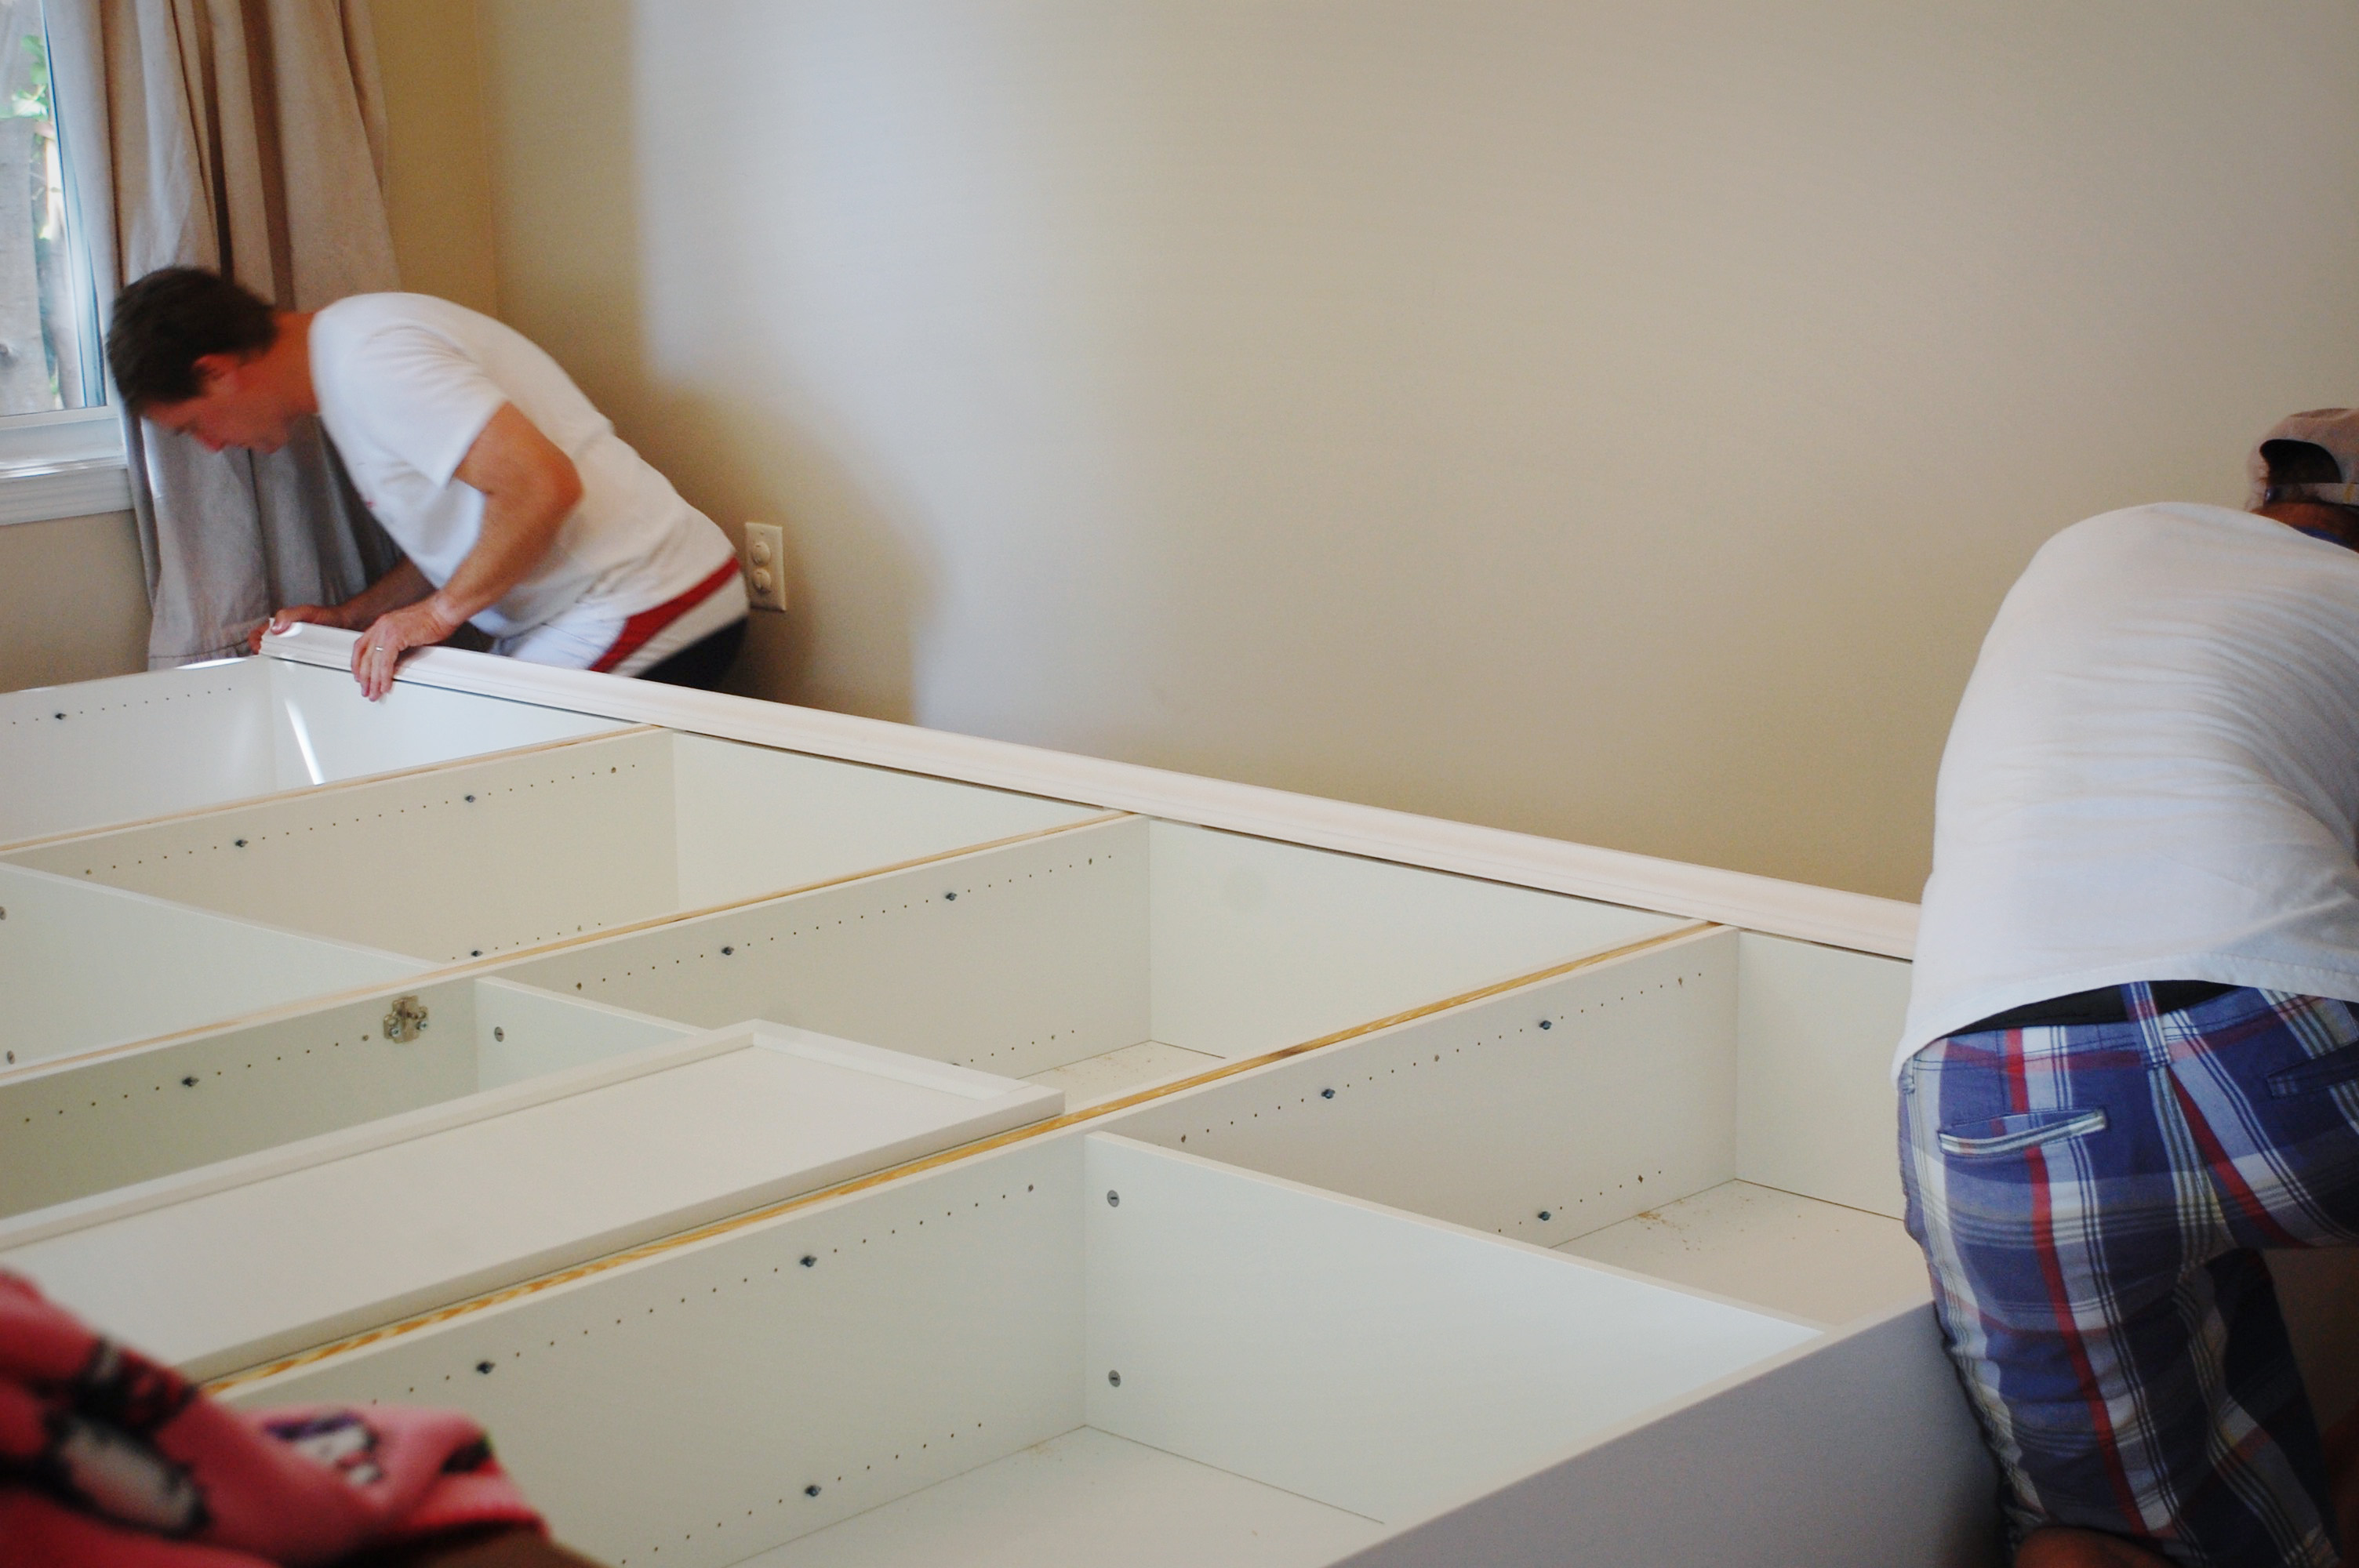
we began by putting all the bookcase together. IKEA is known to be the pits when it comes to directions and assembly, but i did all 4 bookcases by myself in just under 2 hours with no problems.
at this point, you could totally leave it like this:
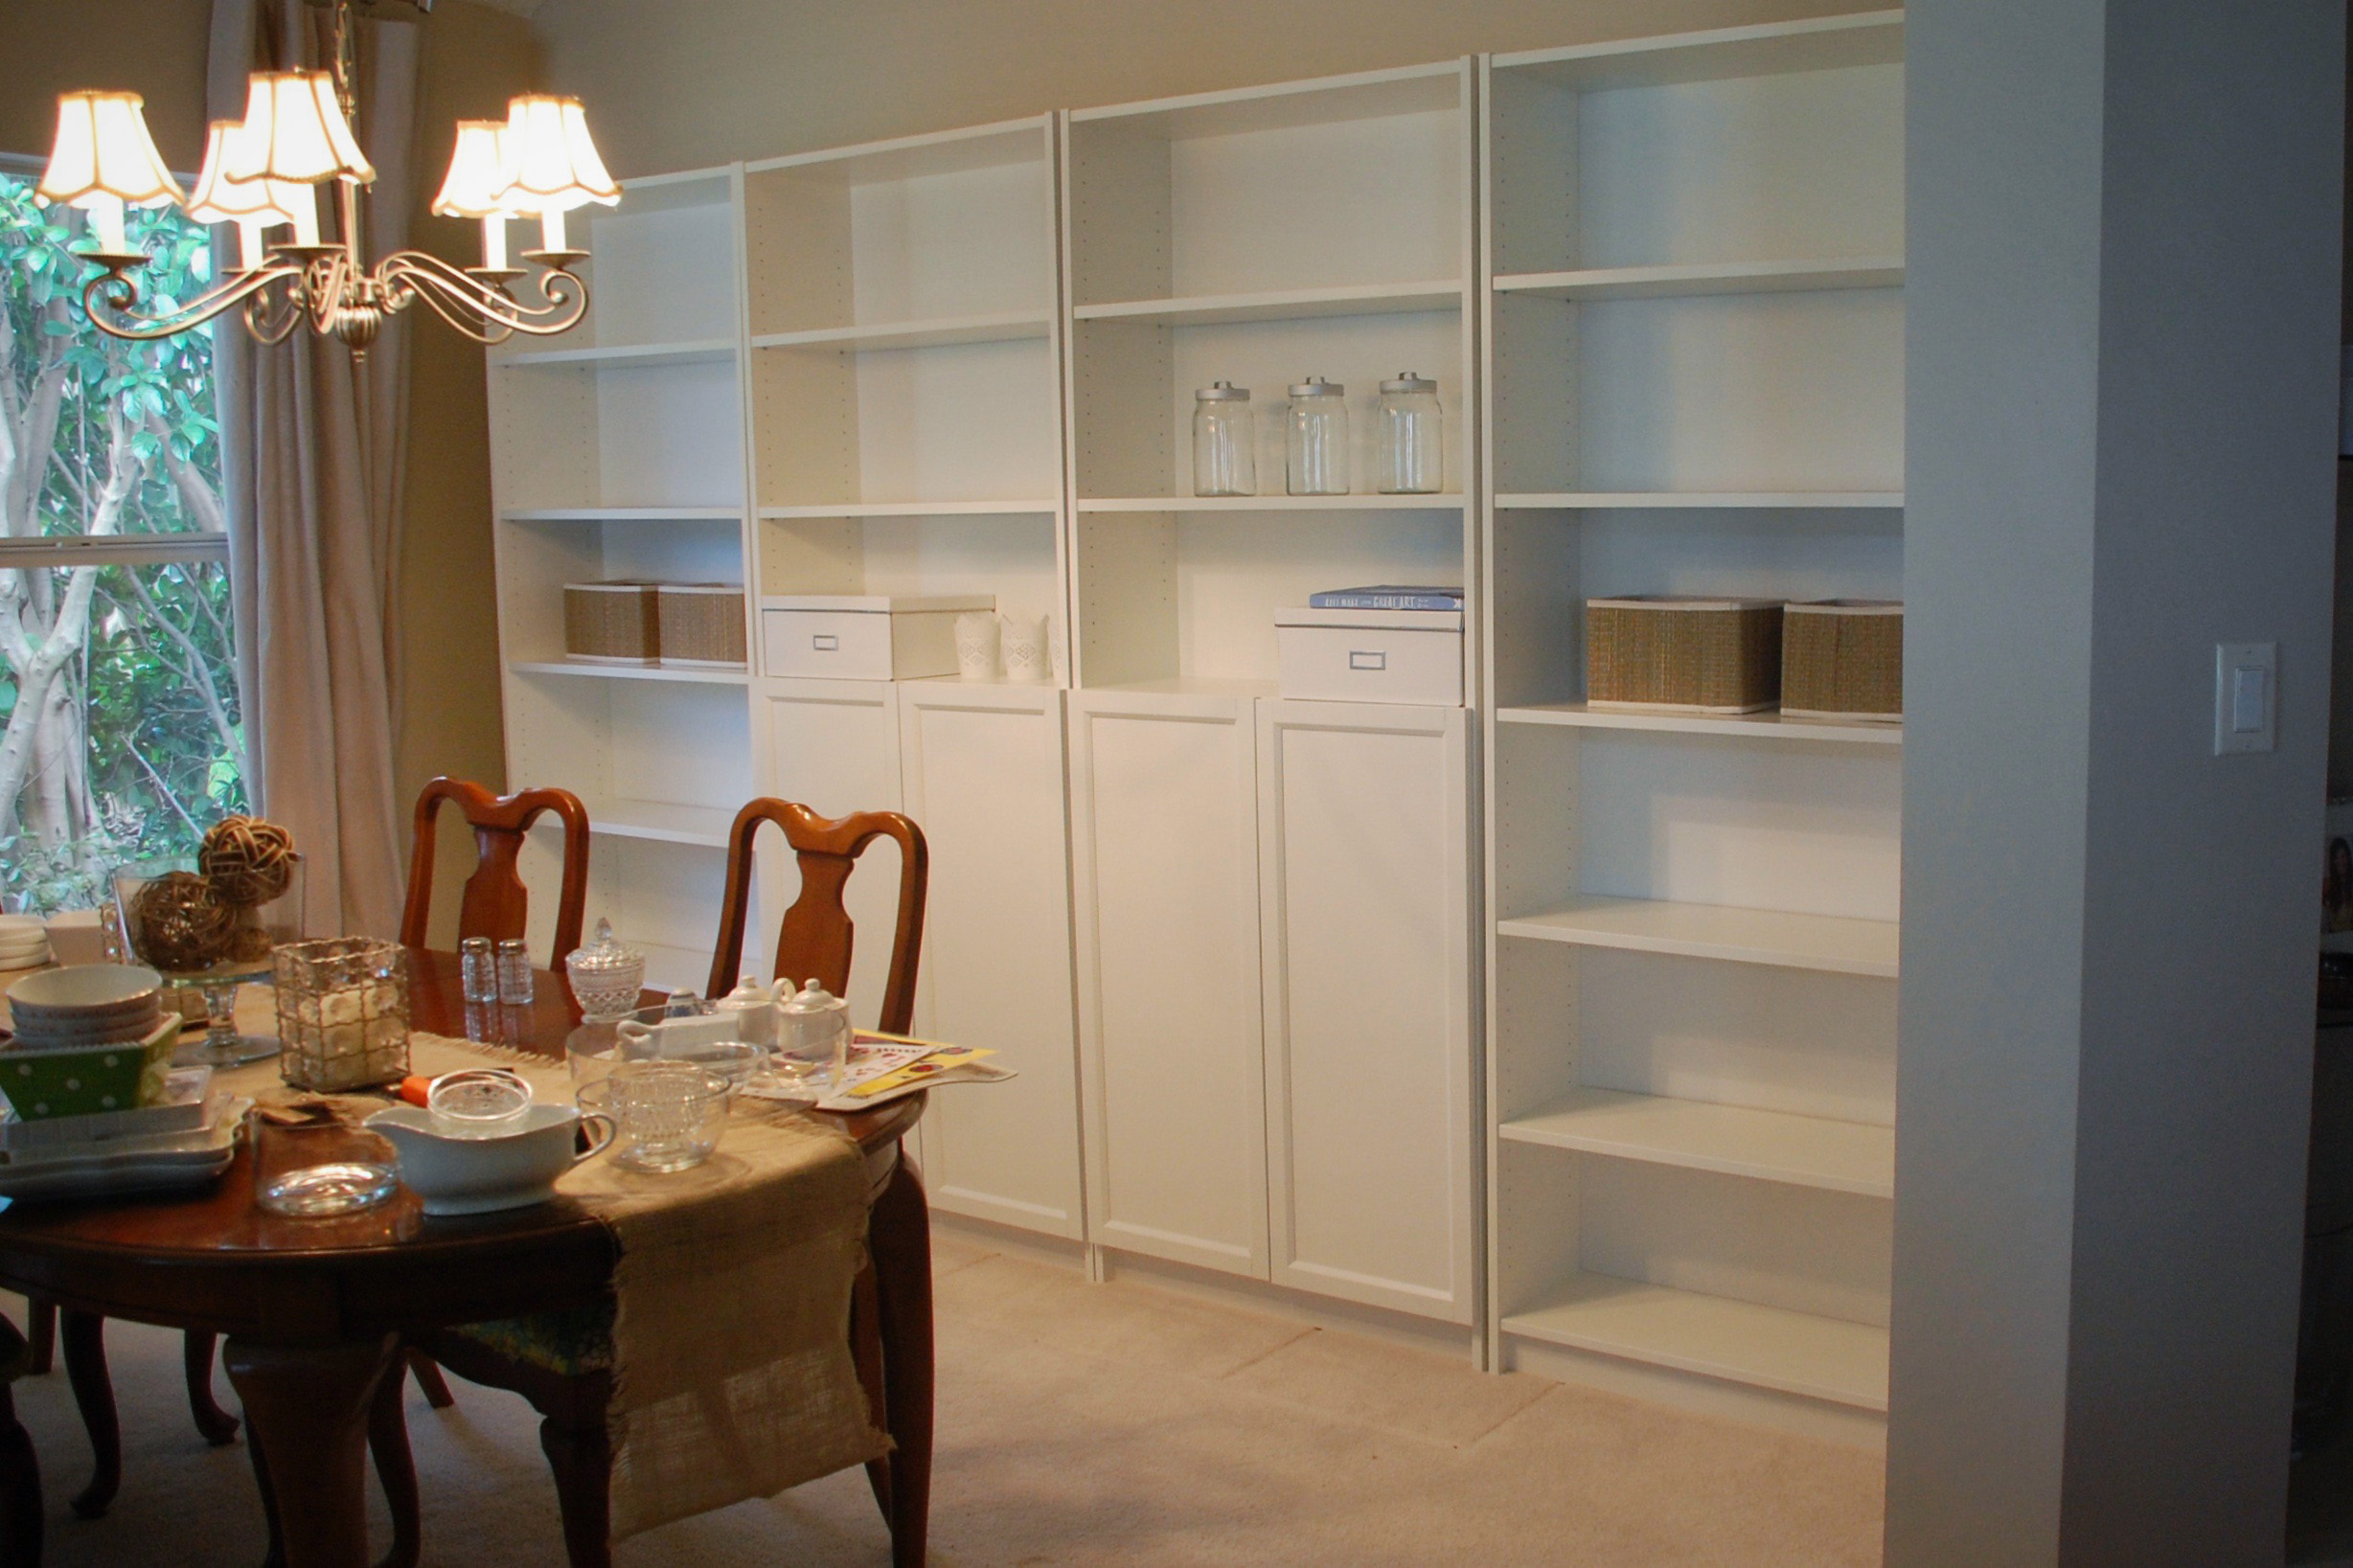
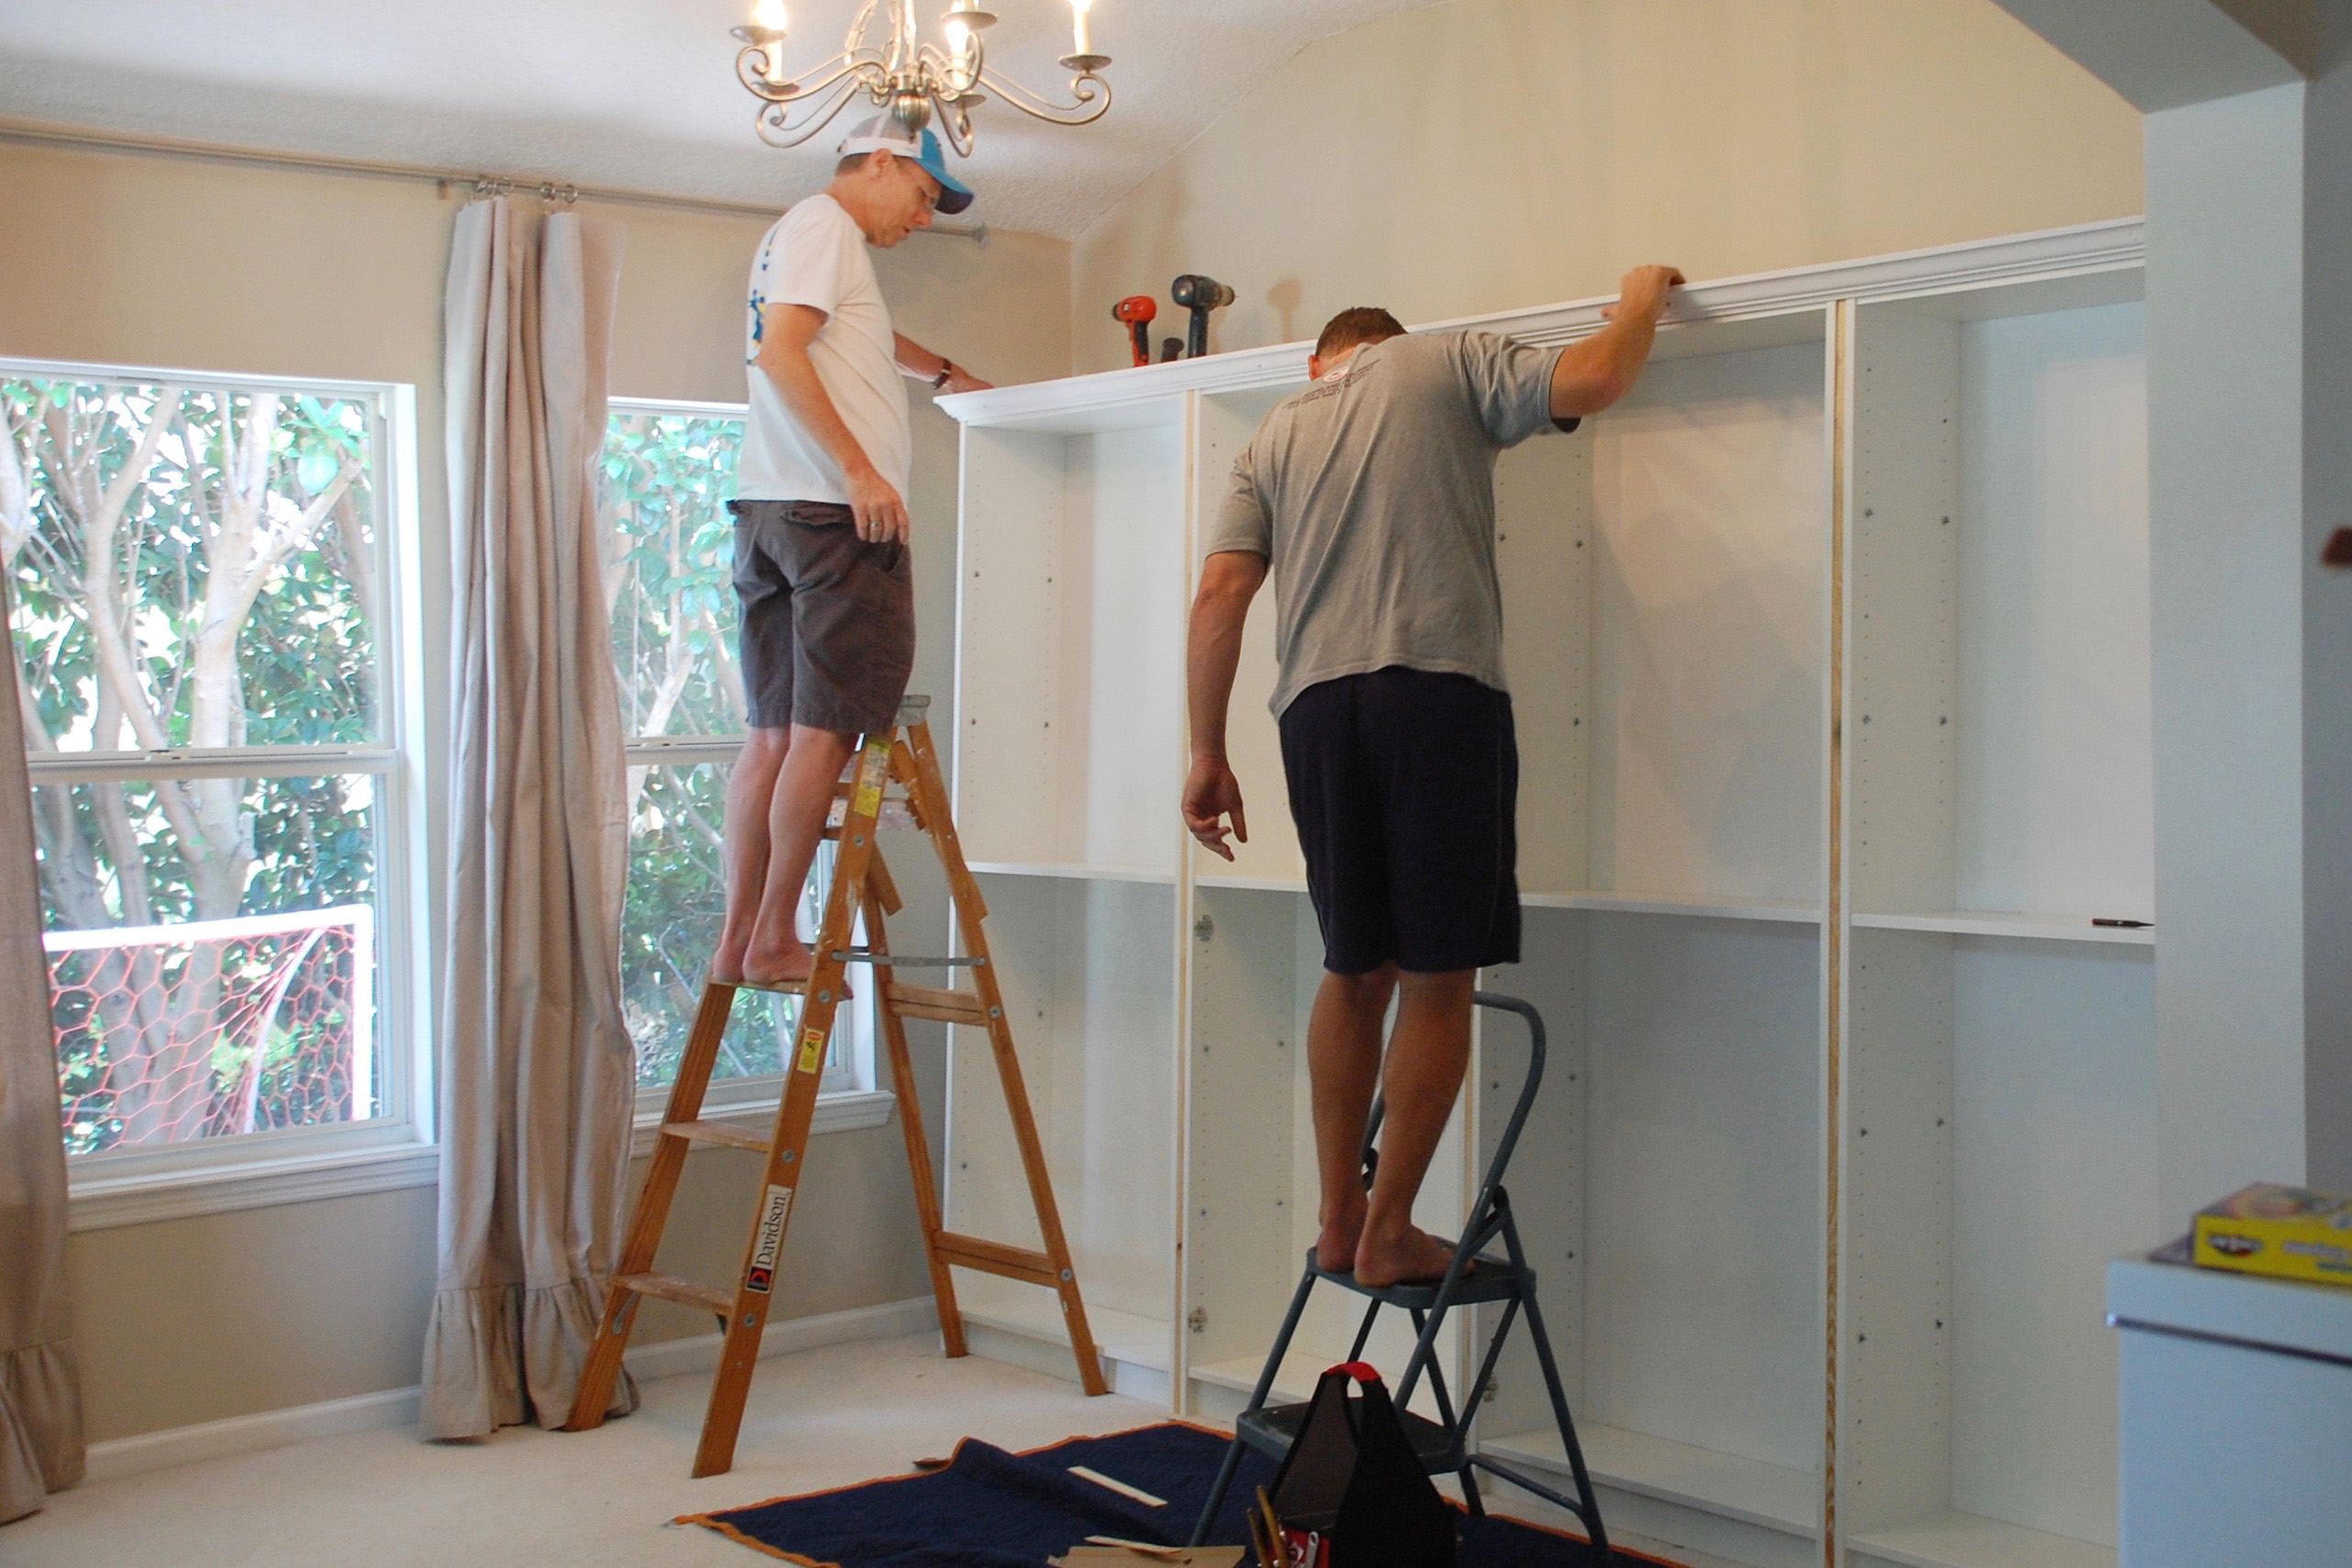
but i knew i wanted them to look more built-in, so i utilized my father in law’s mad carpentry skills, and he did the moulding and the trim. (you might want to find someone who kinda knows what they are doing for this part, or who at least can follow directions and knows how to use different saws to cut wood. this isn’t an easy DIY project if you don’t somewhat know what you are doing. had i been on my own, i would’ve surely botched the entire thing!)
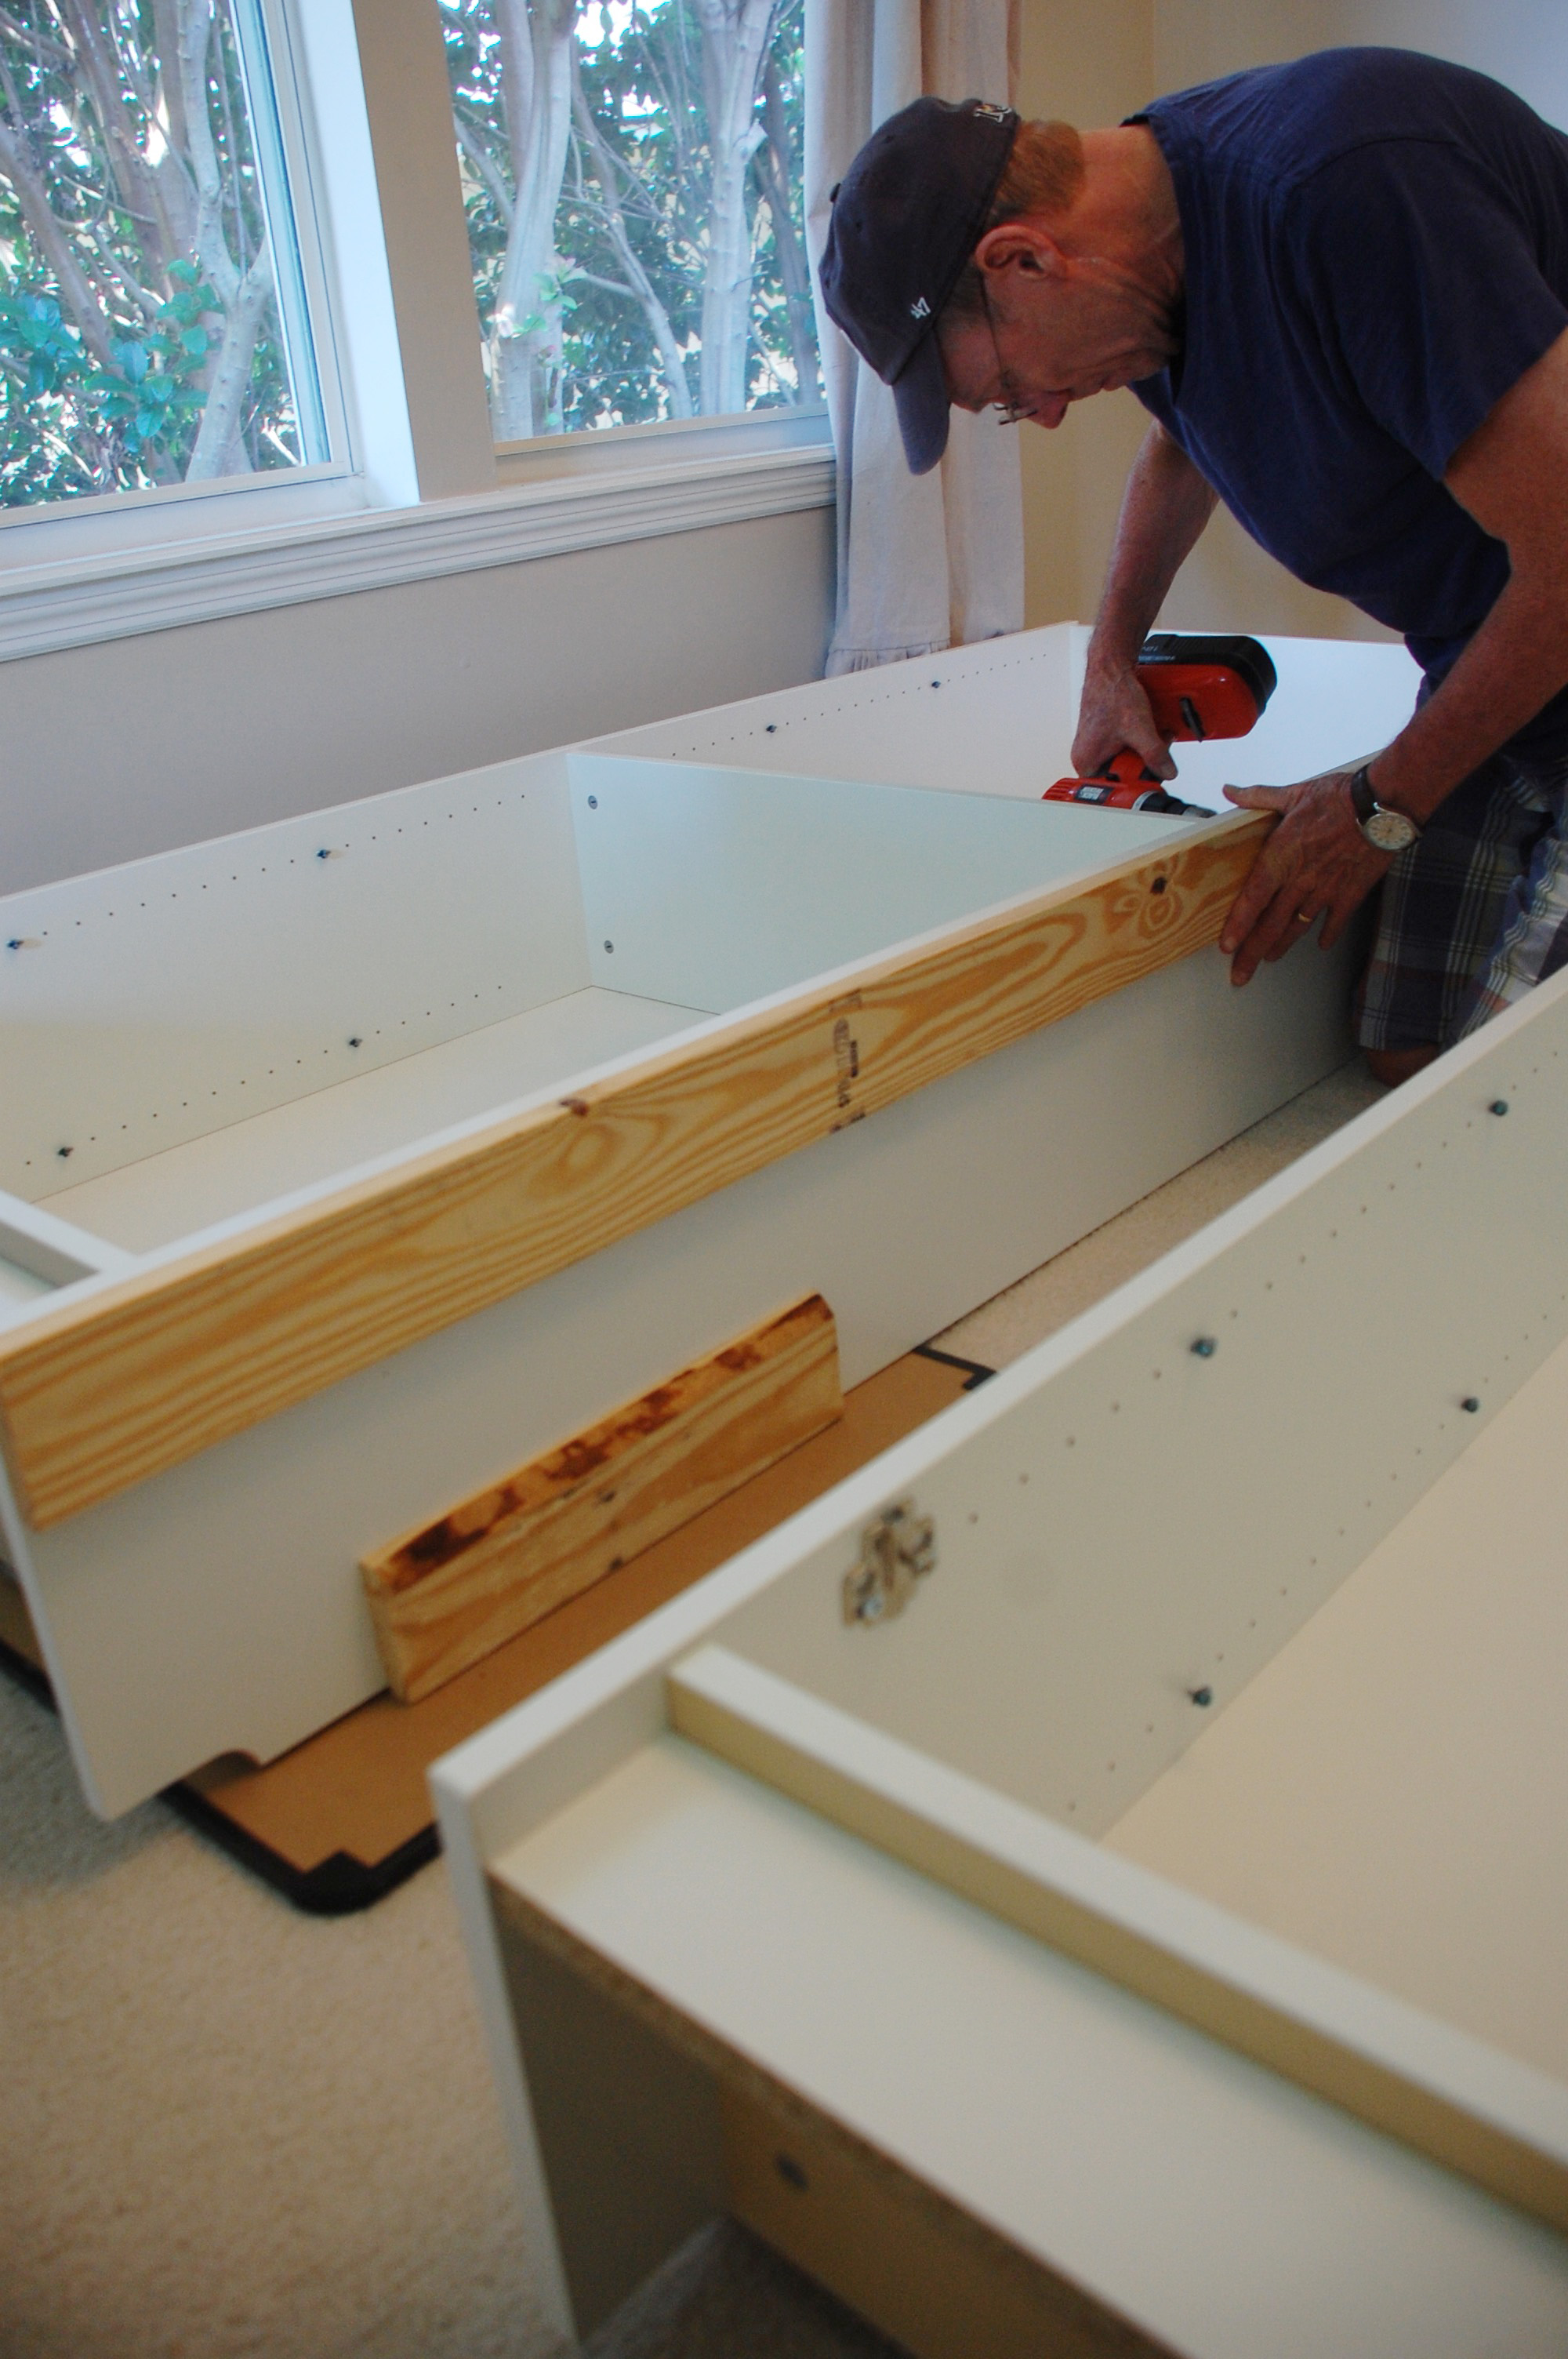
once we had all the bookcases assembled, we needed to attach them together. we used 1 x 3 pieces of wood, (which is really only 3/4 inch thickness) in between each shelf.
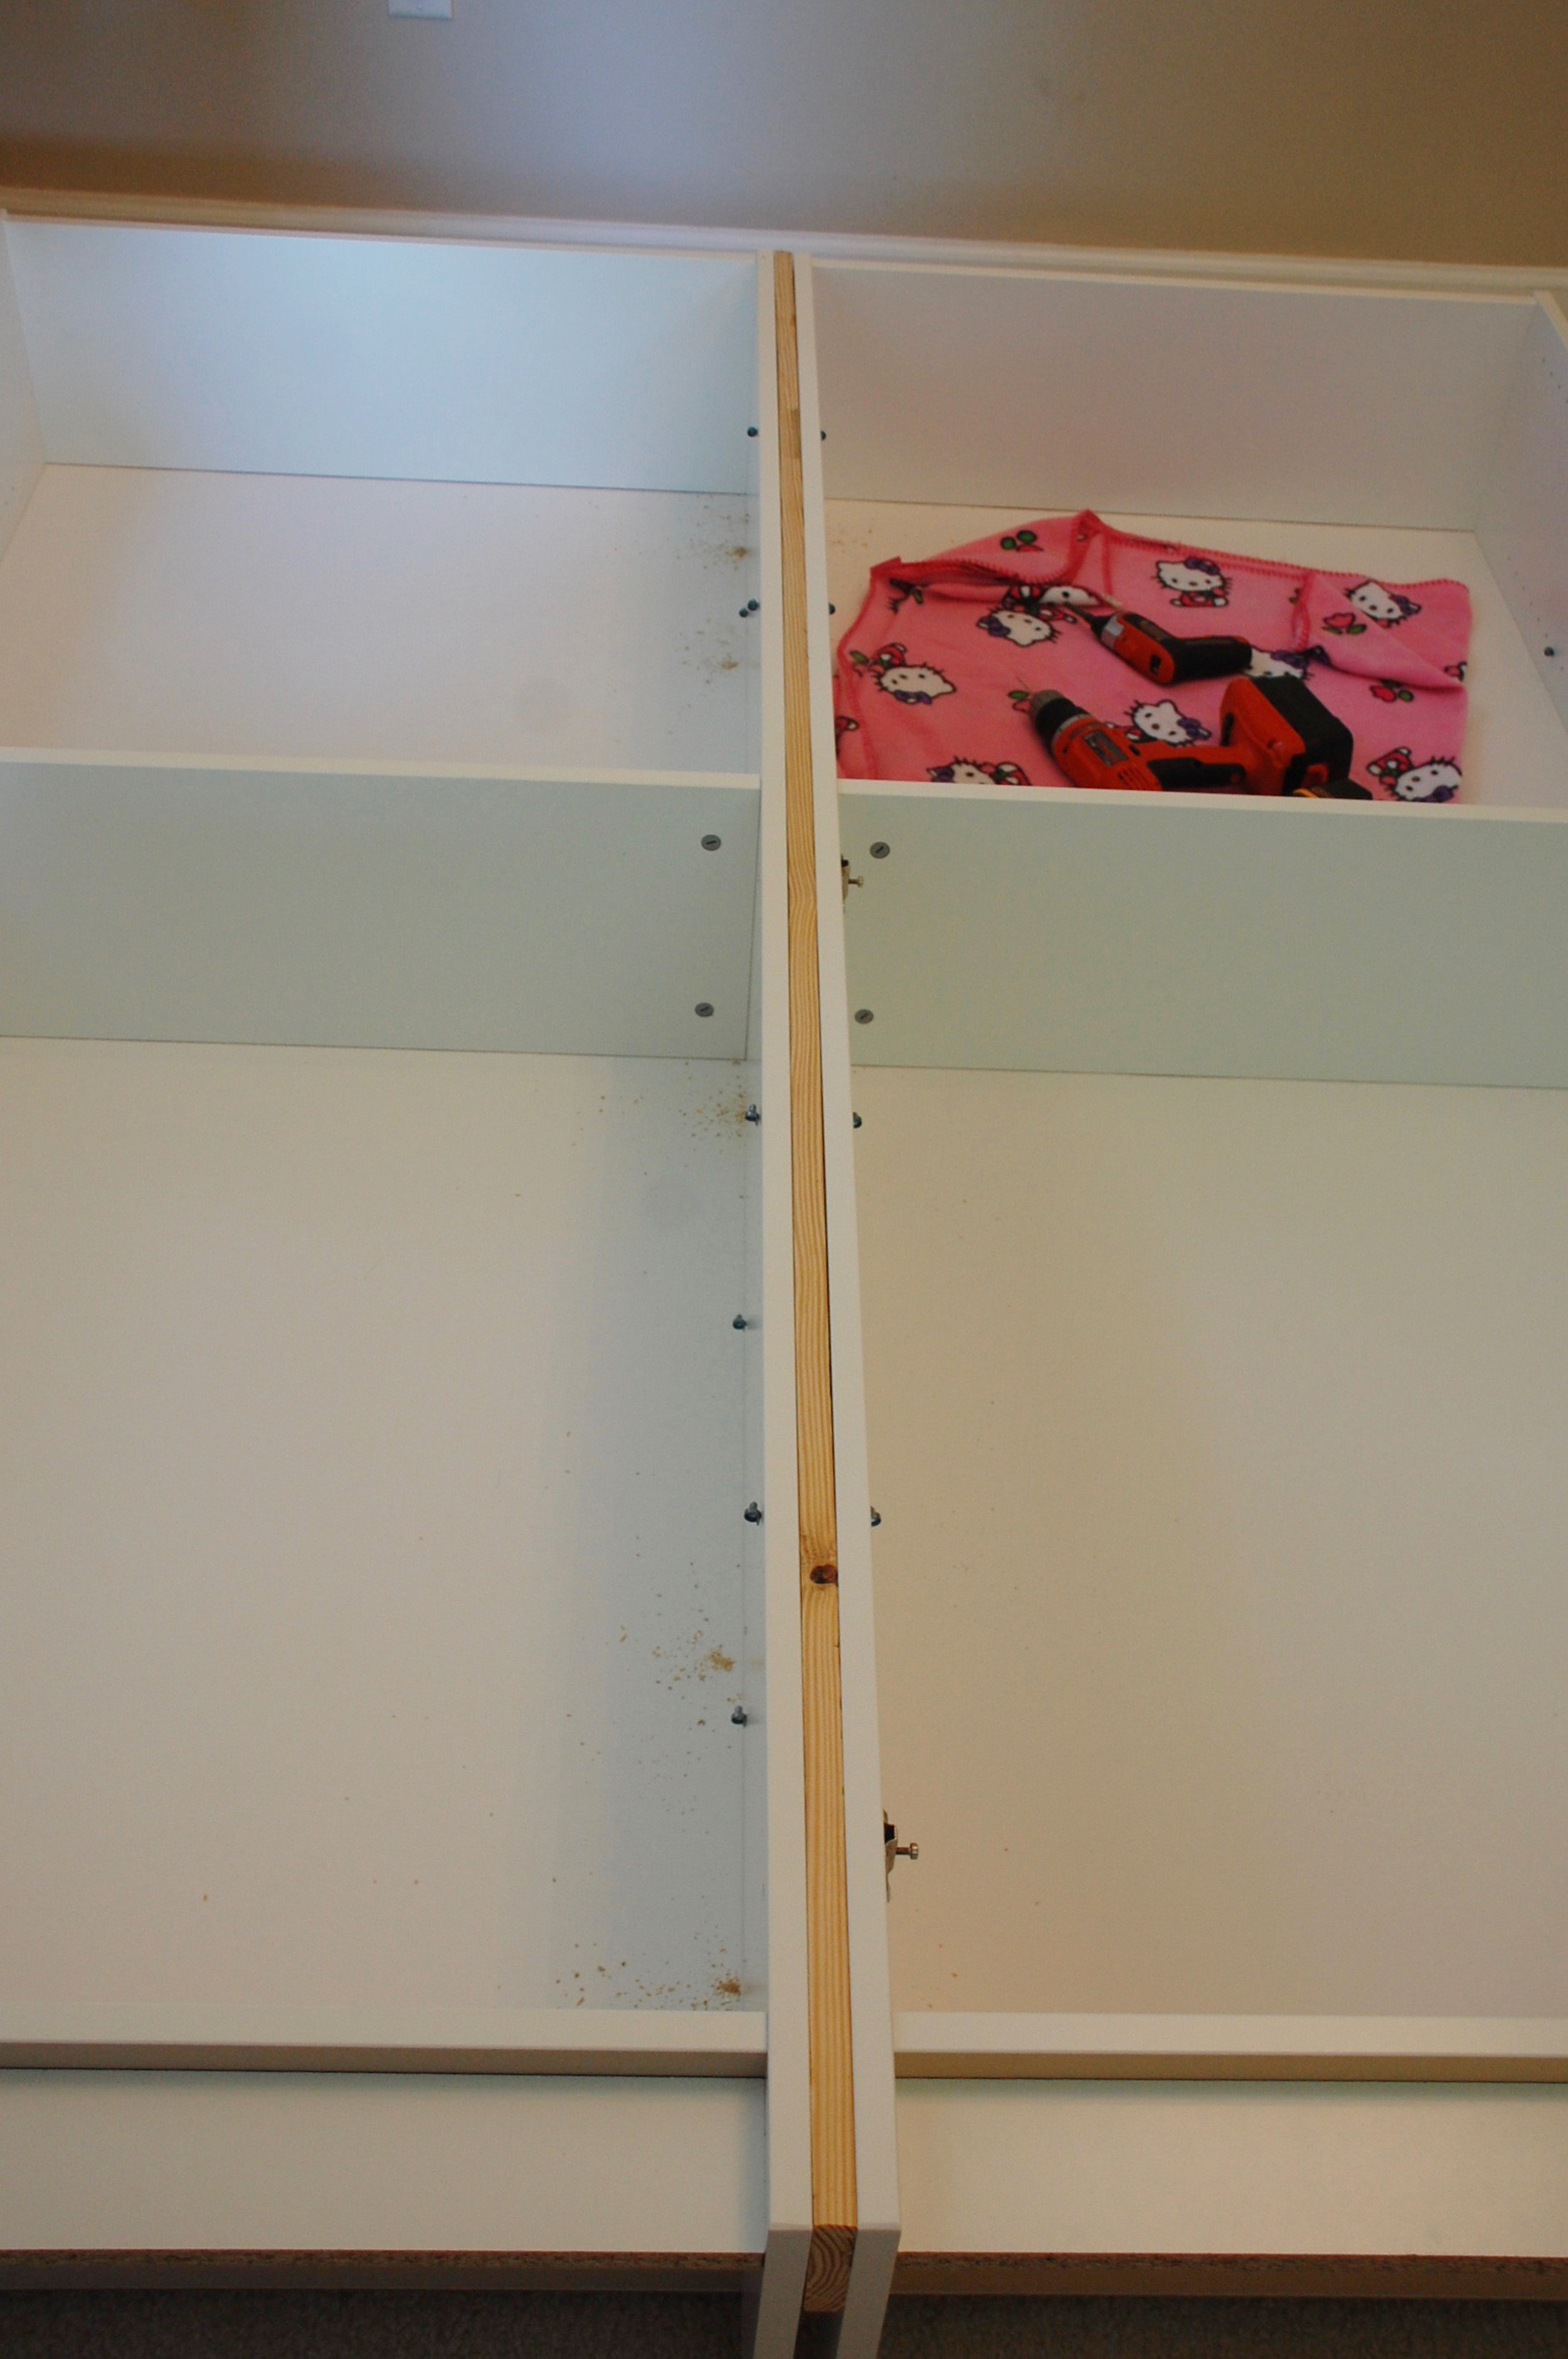
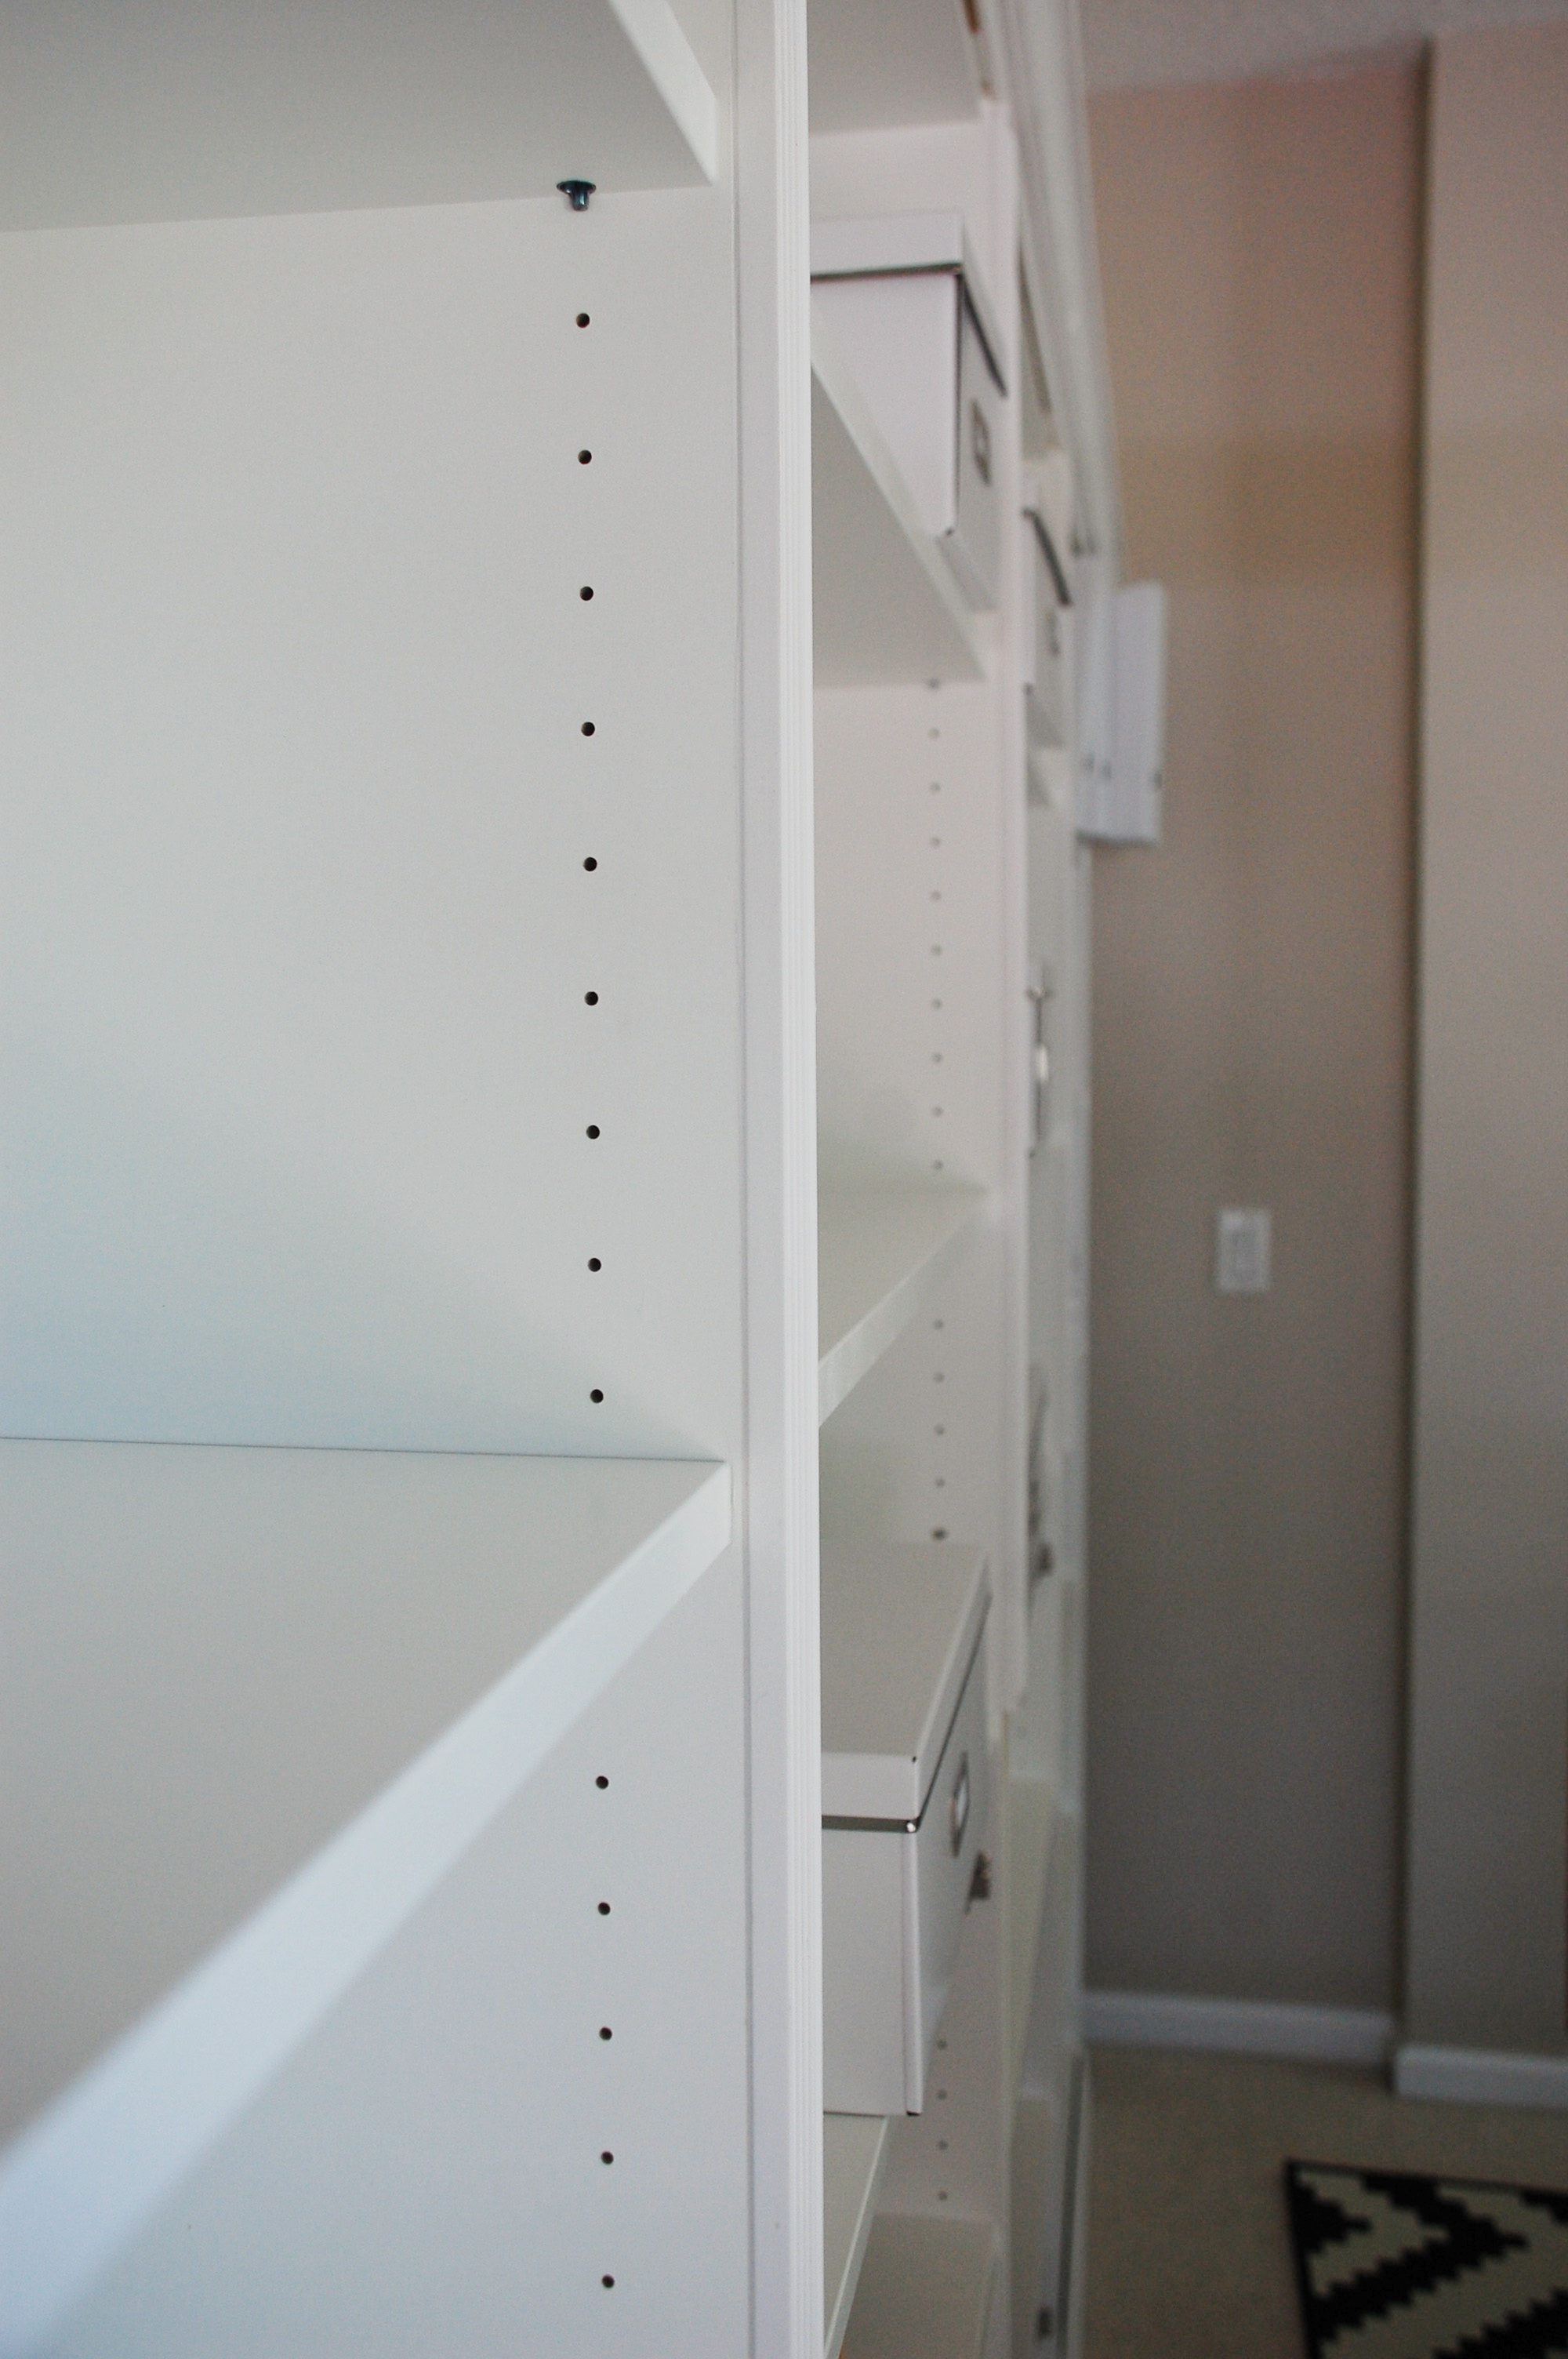
we attached them by screwing them into the sides of the shelf by going through one of the existing shelf holes:
think ahead and choose a hole that you don’t plan on using, because once the screw is in, you won’t be able to put the shelf peg in. i put the shelves where i wanted them and then marked the holes the shelves were in to ensure that we weren’t screwing into a hole i would need.
once that was done, and all of the shelves were attached to each other:

we beveled 2 x 4’s at a 45 degree angle cut. (if that sounds like i know what i’m talking about, its just because i’m repeating what my father in law said! and if that sounds incorrect, its because i really do not understand what all that means! ?)
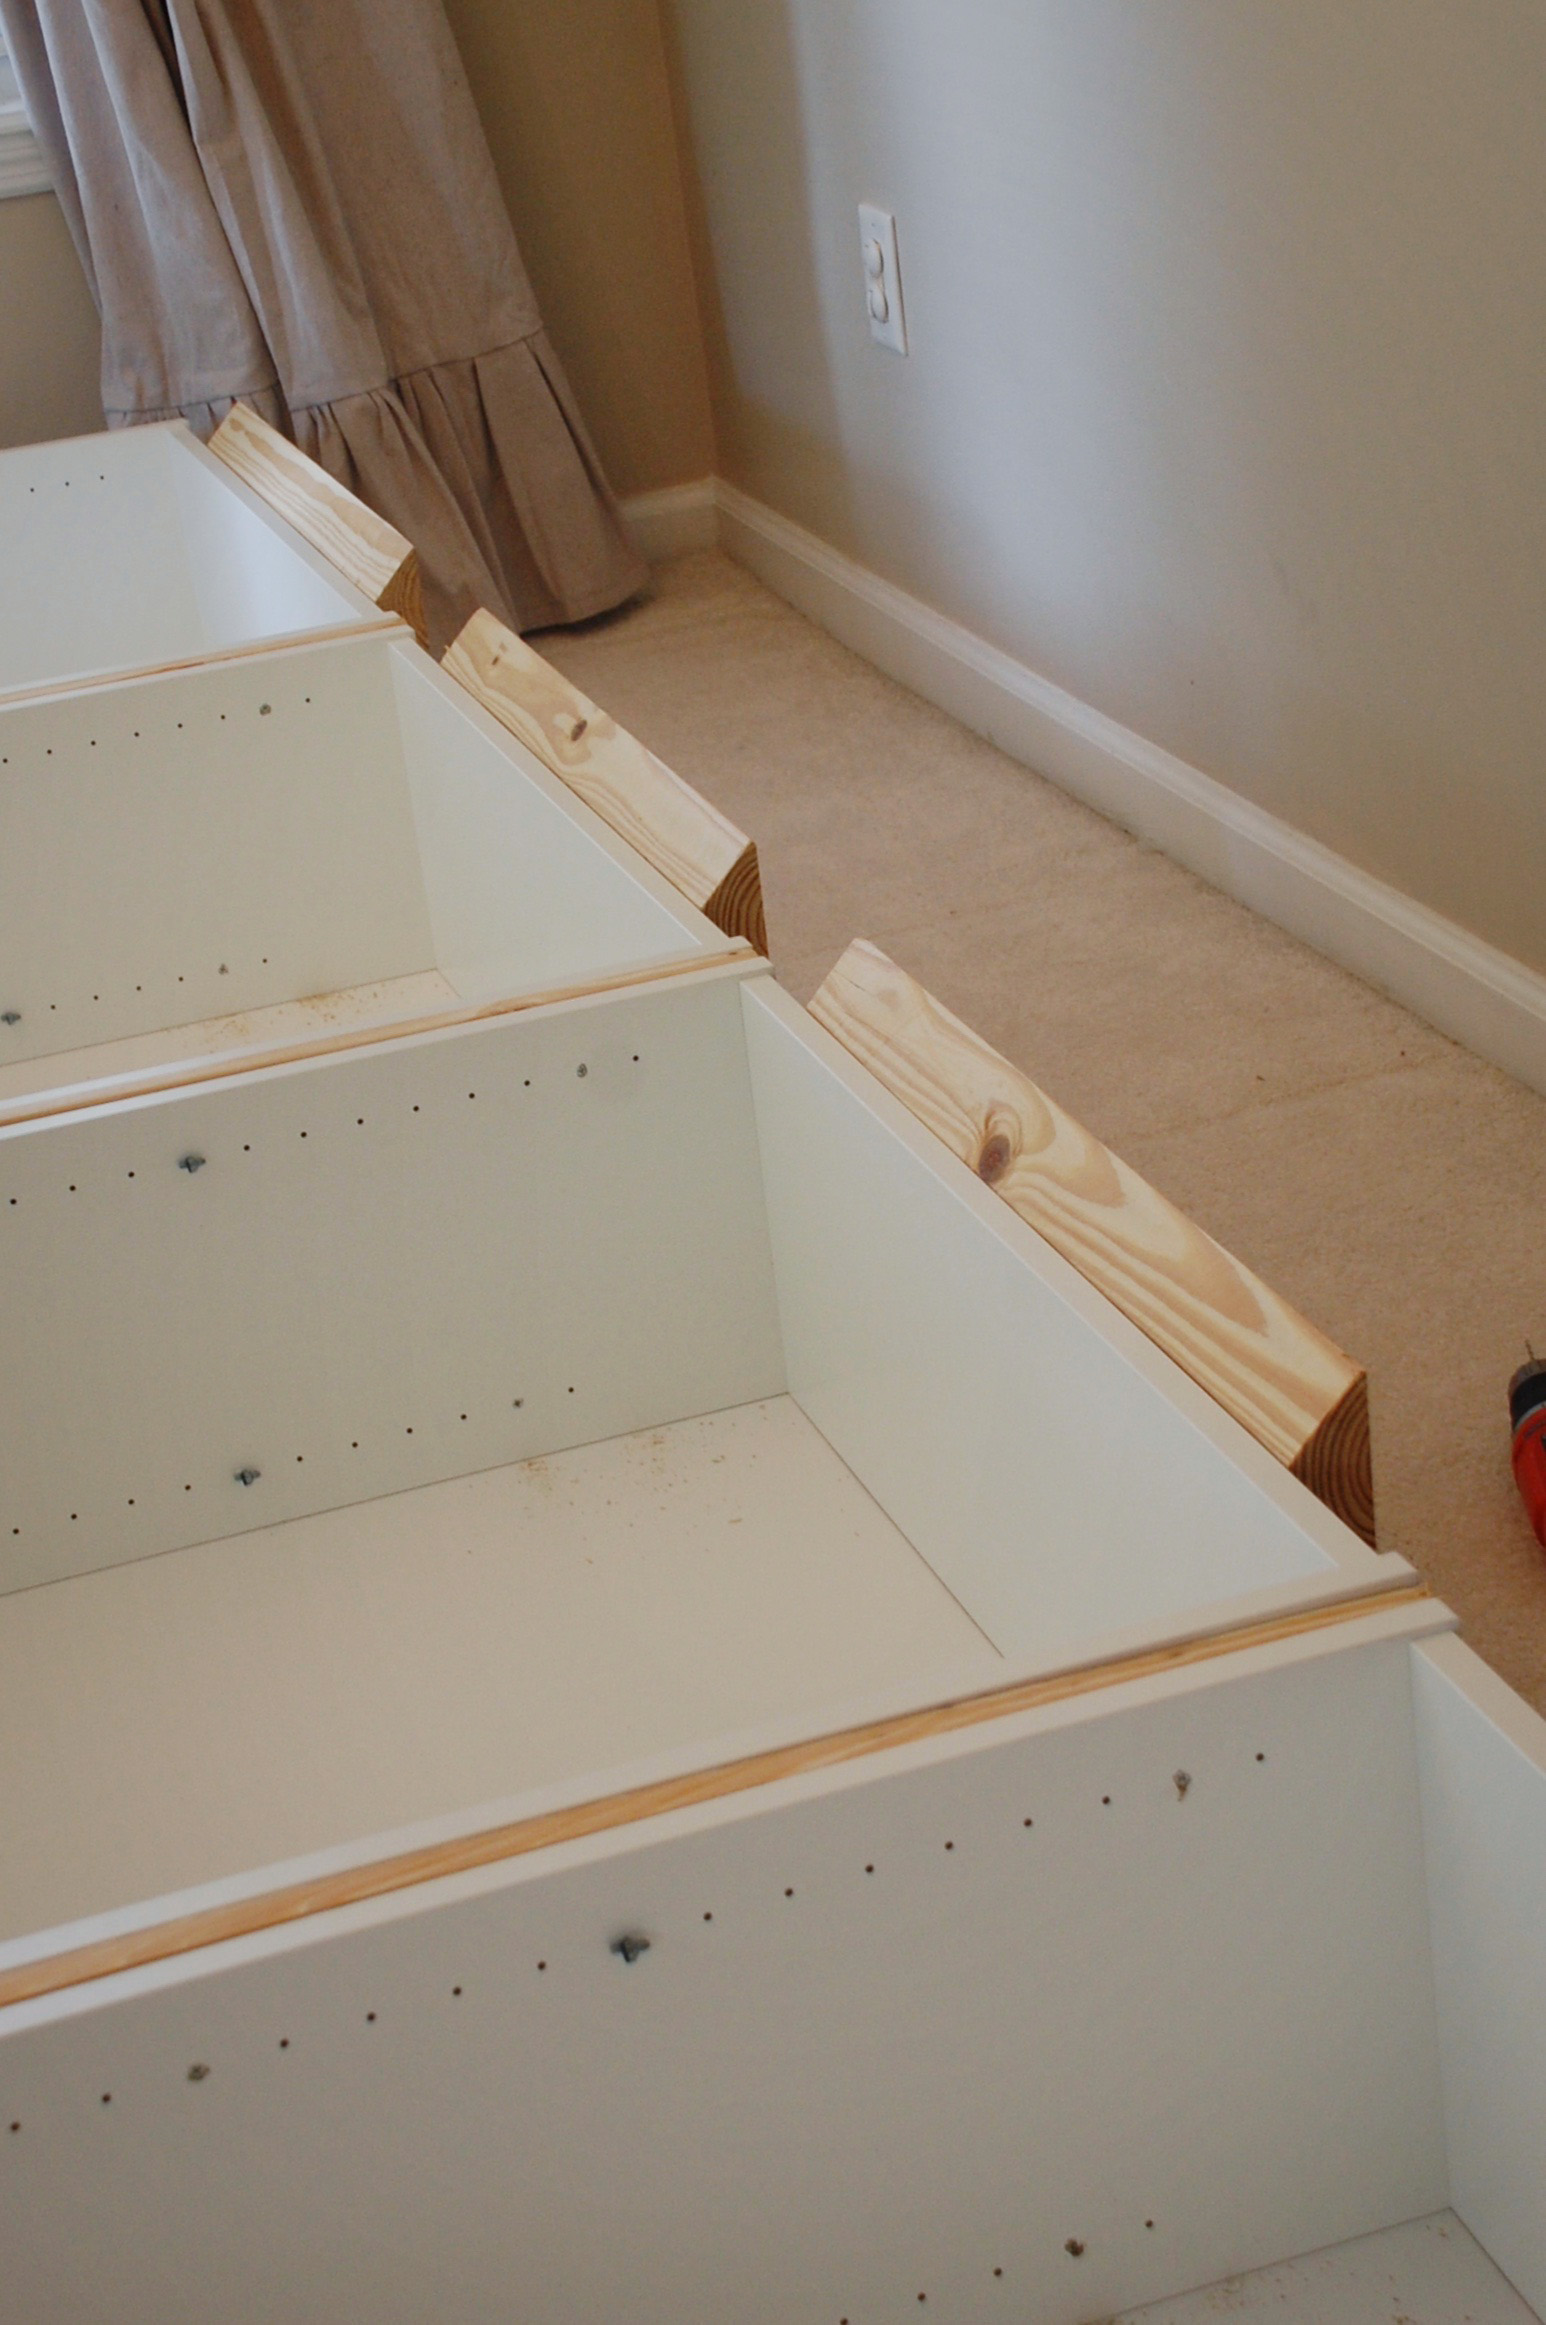
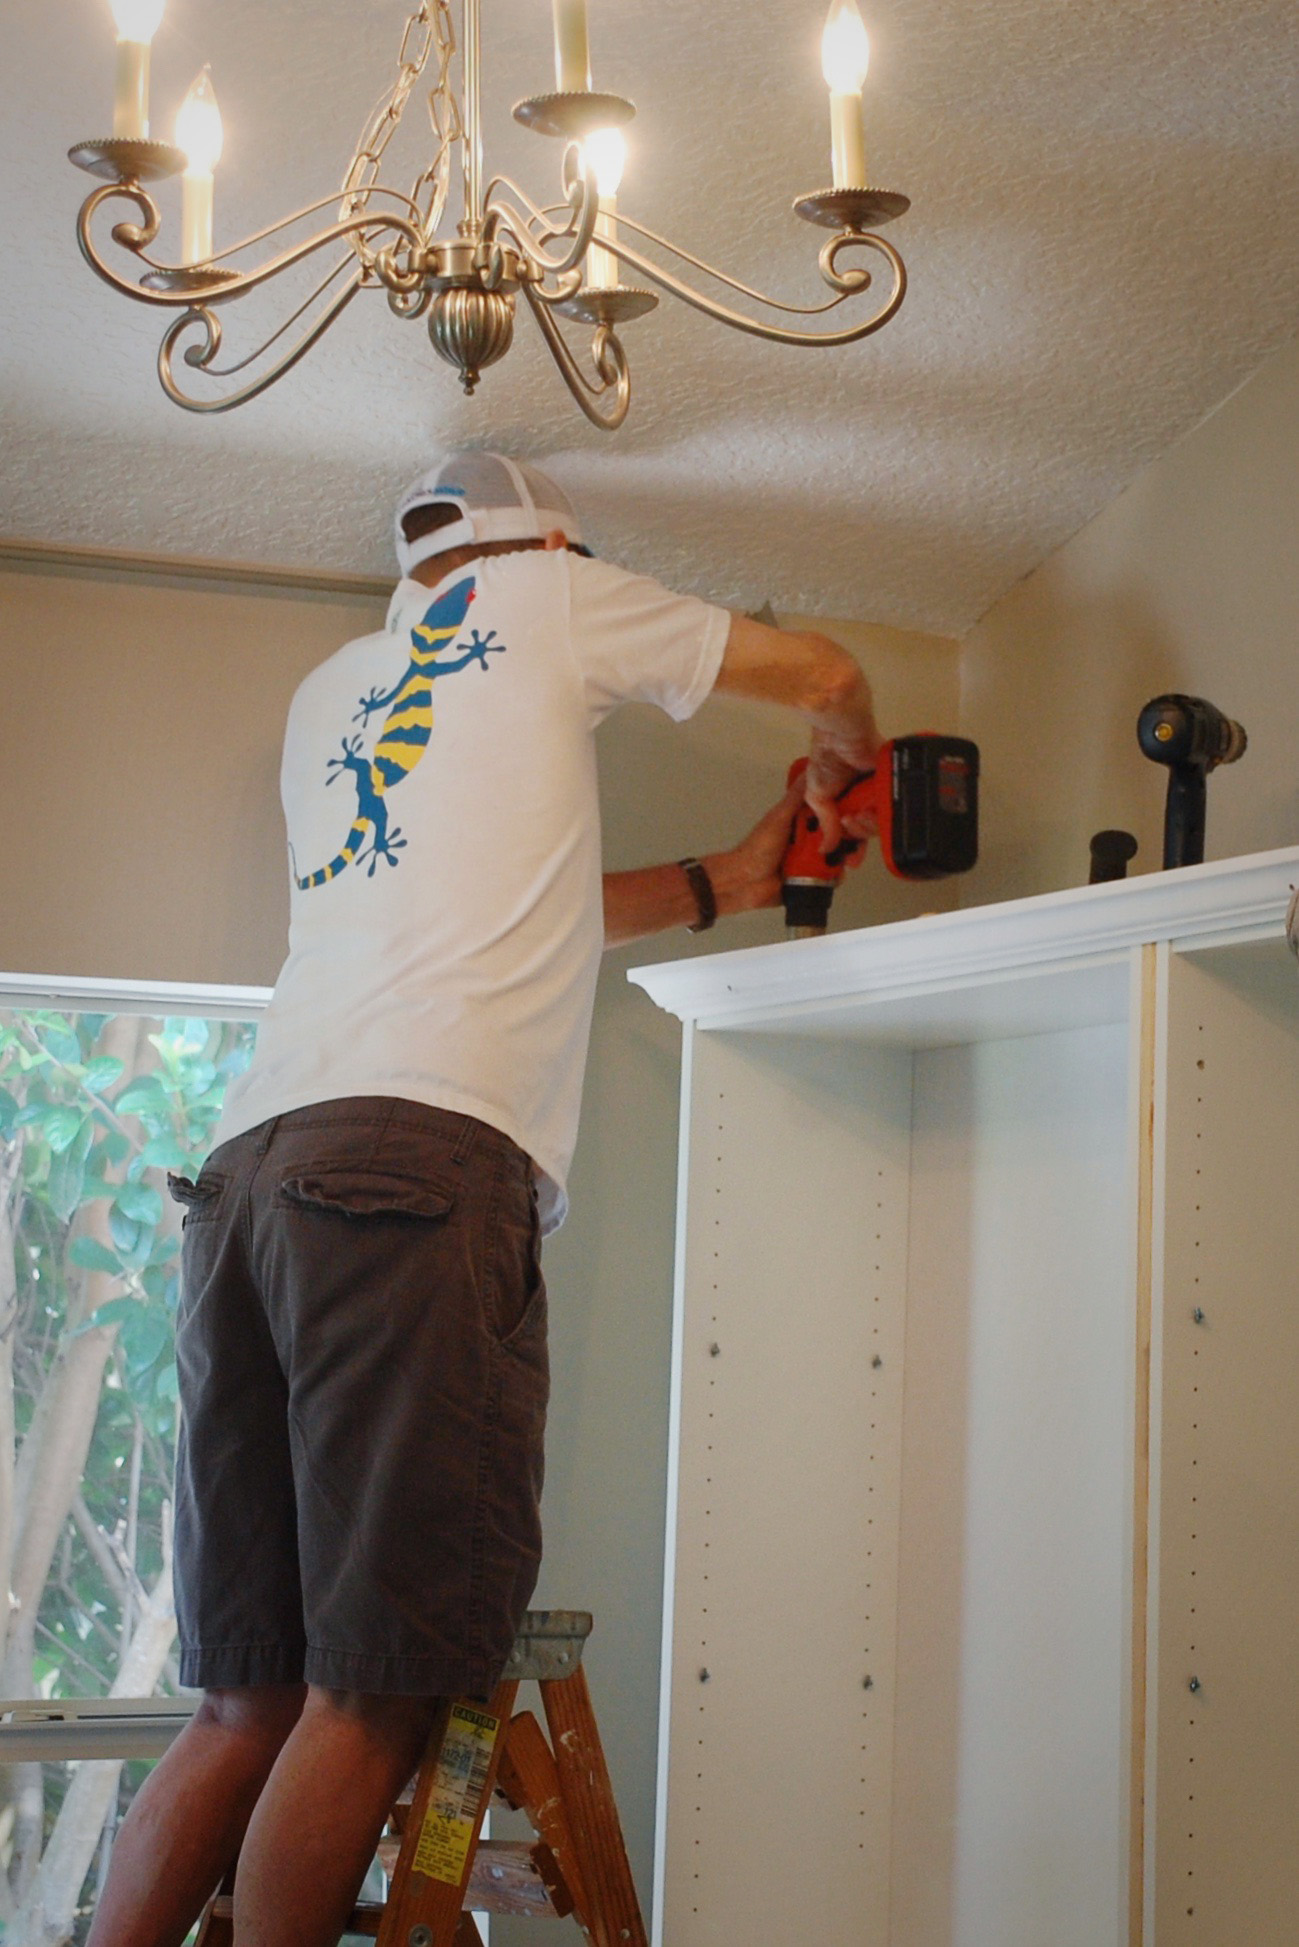
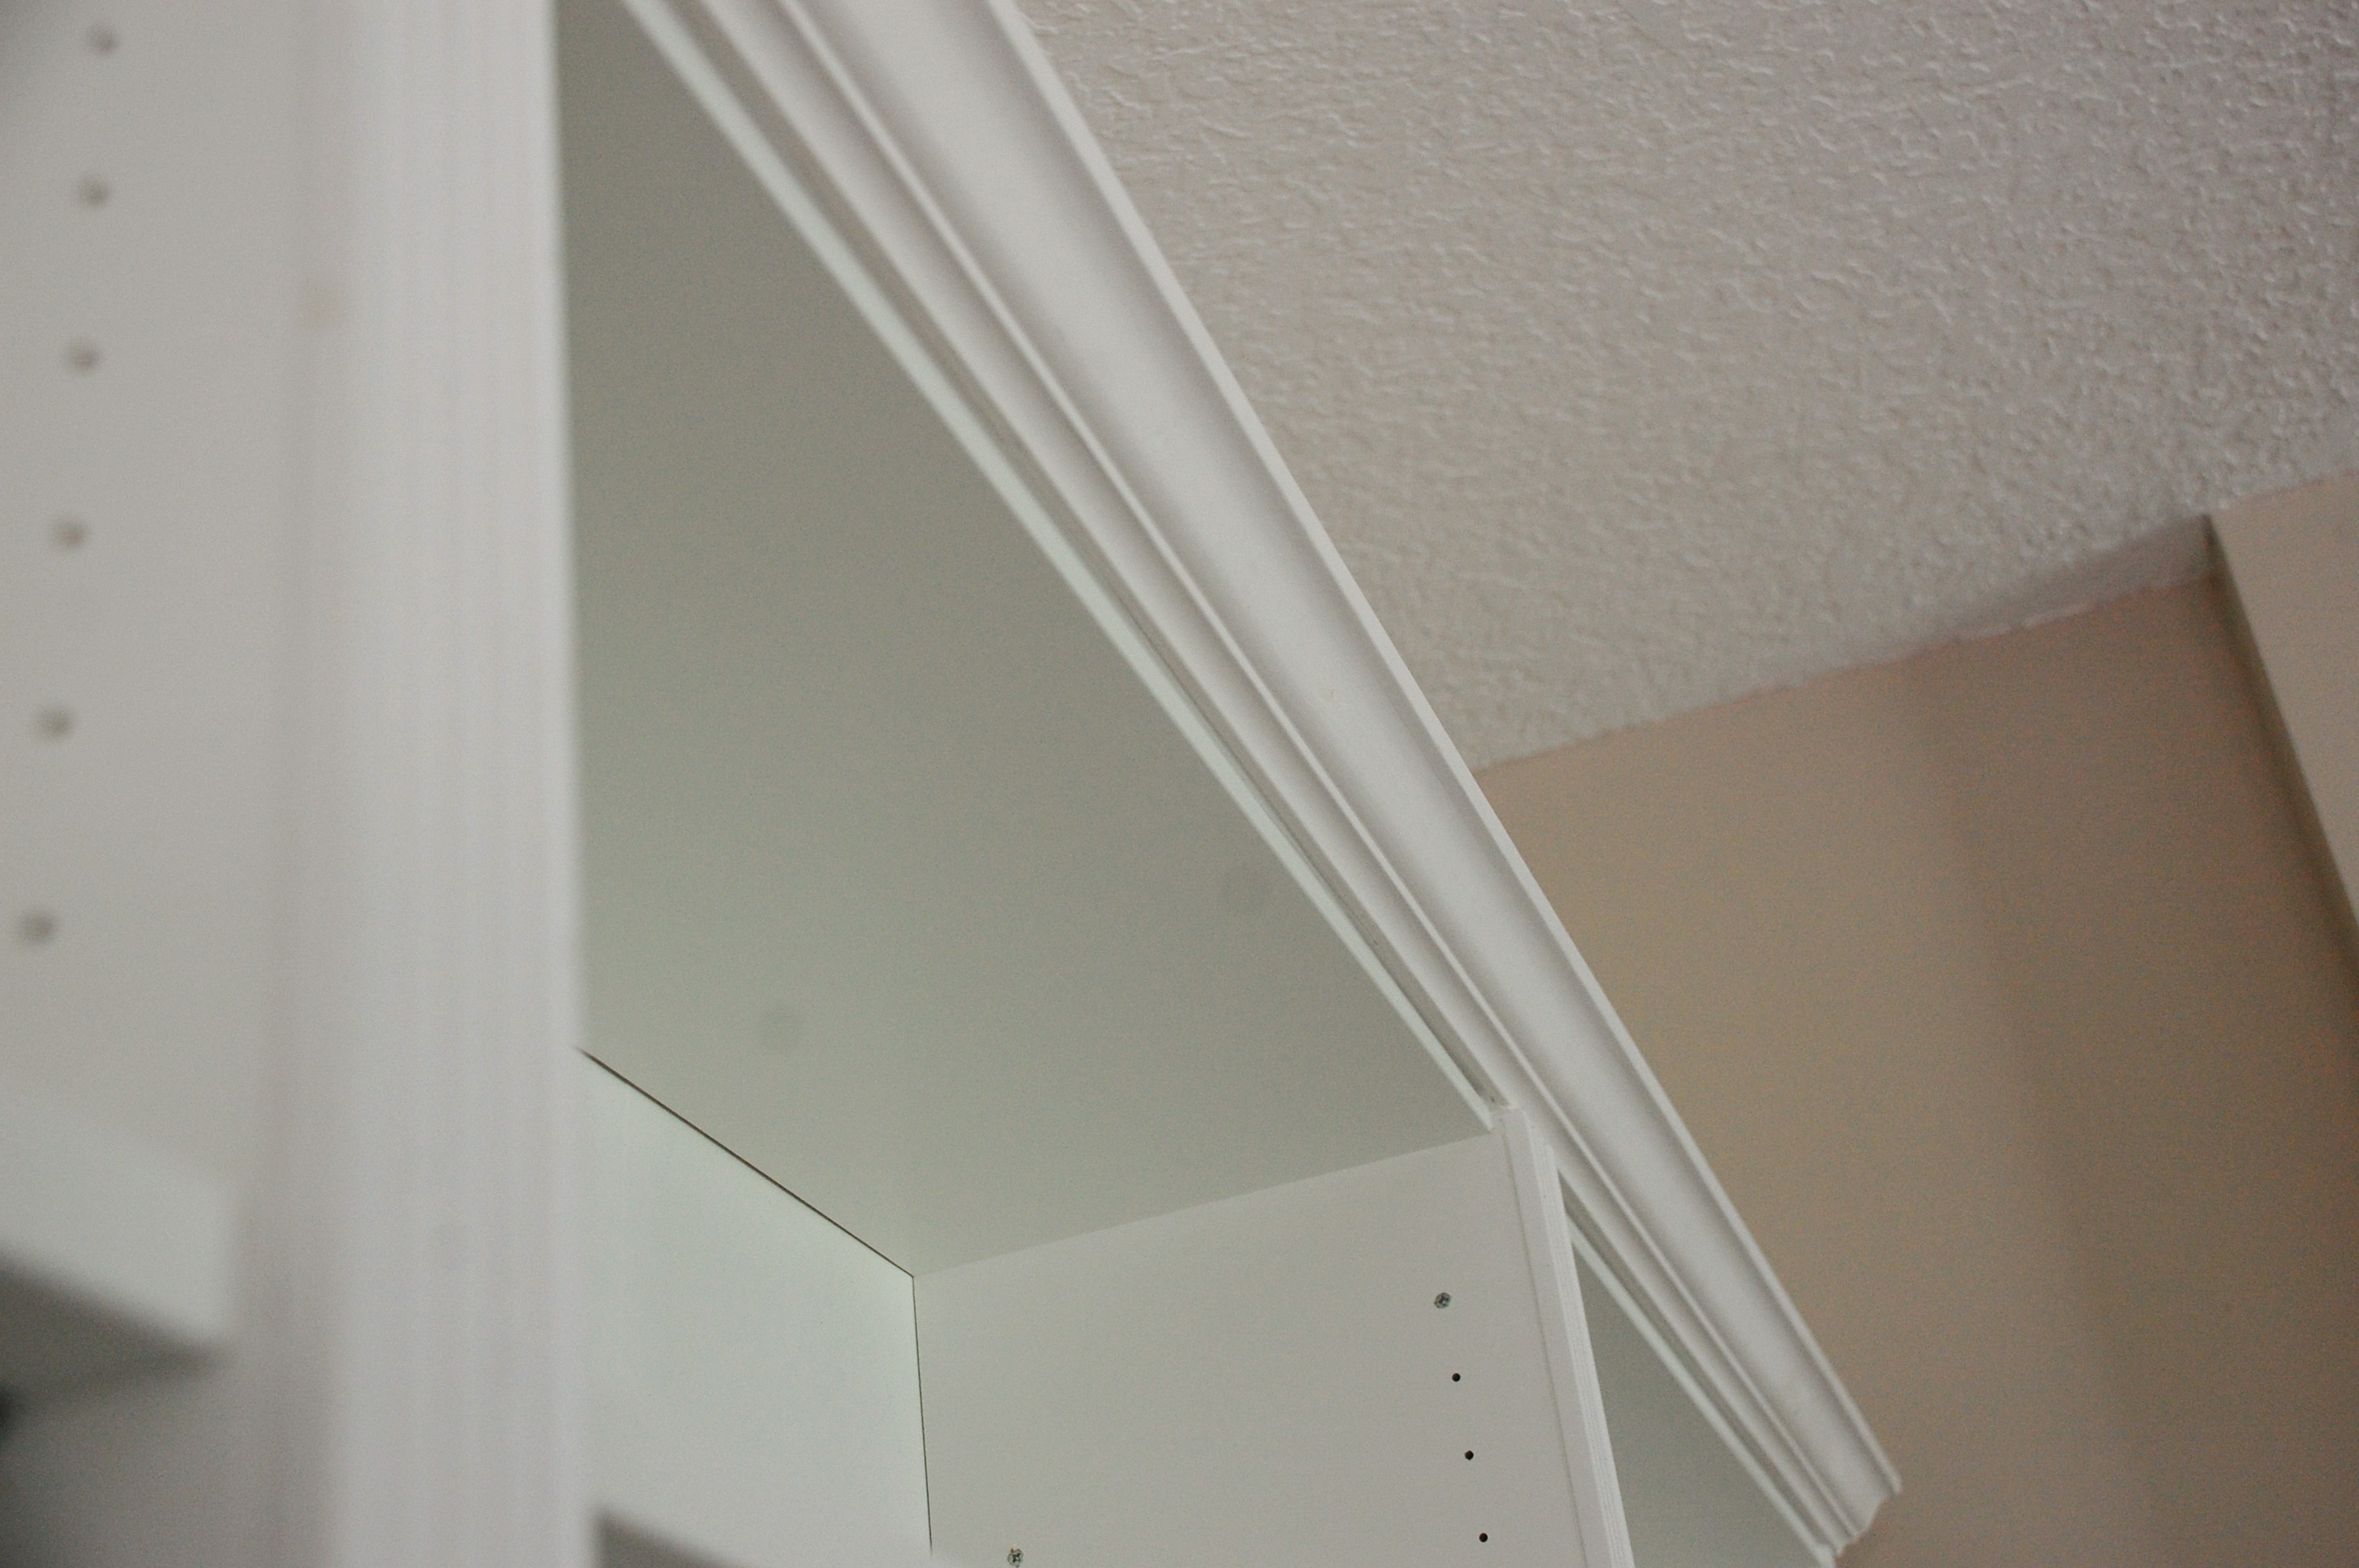
we attached a few of those angled pieces onto the top of the shelves with screws, creating a ledge, so that we had something to attach the crown moulding to.

once those were attached, we cut the crown moulding to the length we needed (our’s was around 128.25″ long), and then 2 more pieces of the crown moulding for the sides of the shelves, (so 3 pieces all together) all with a compound miter saw.
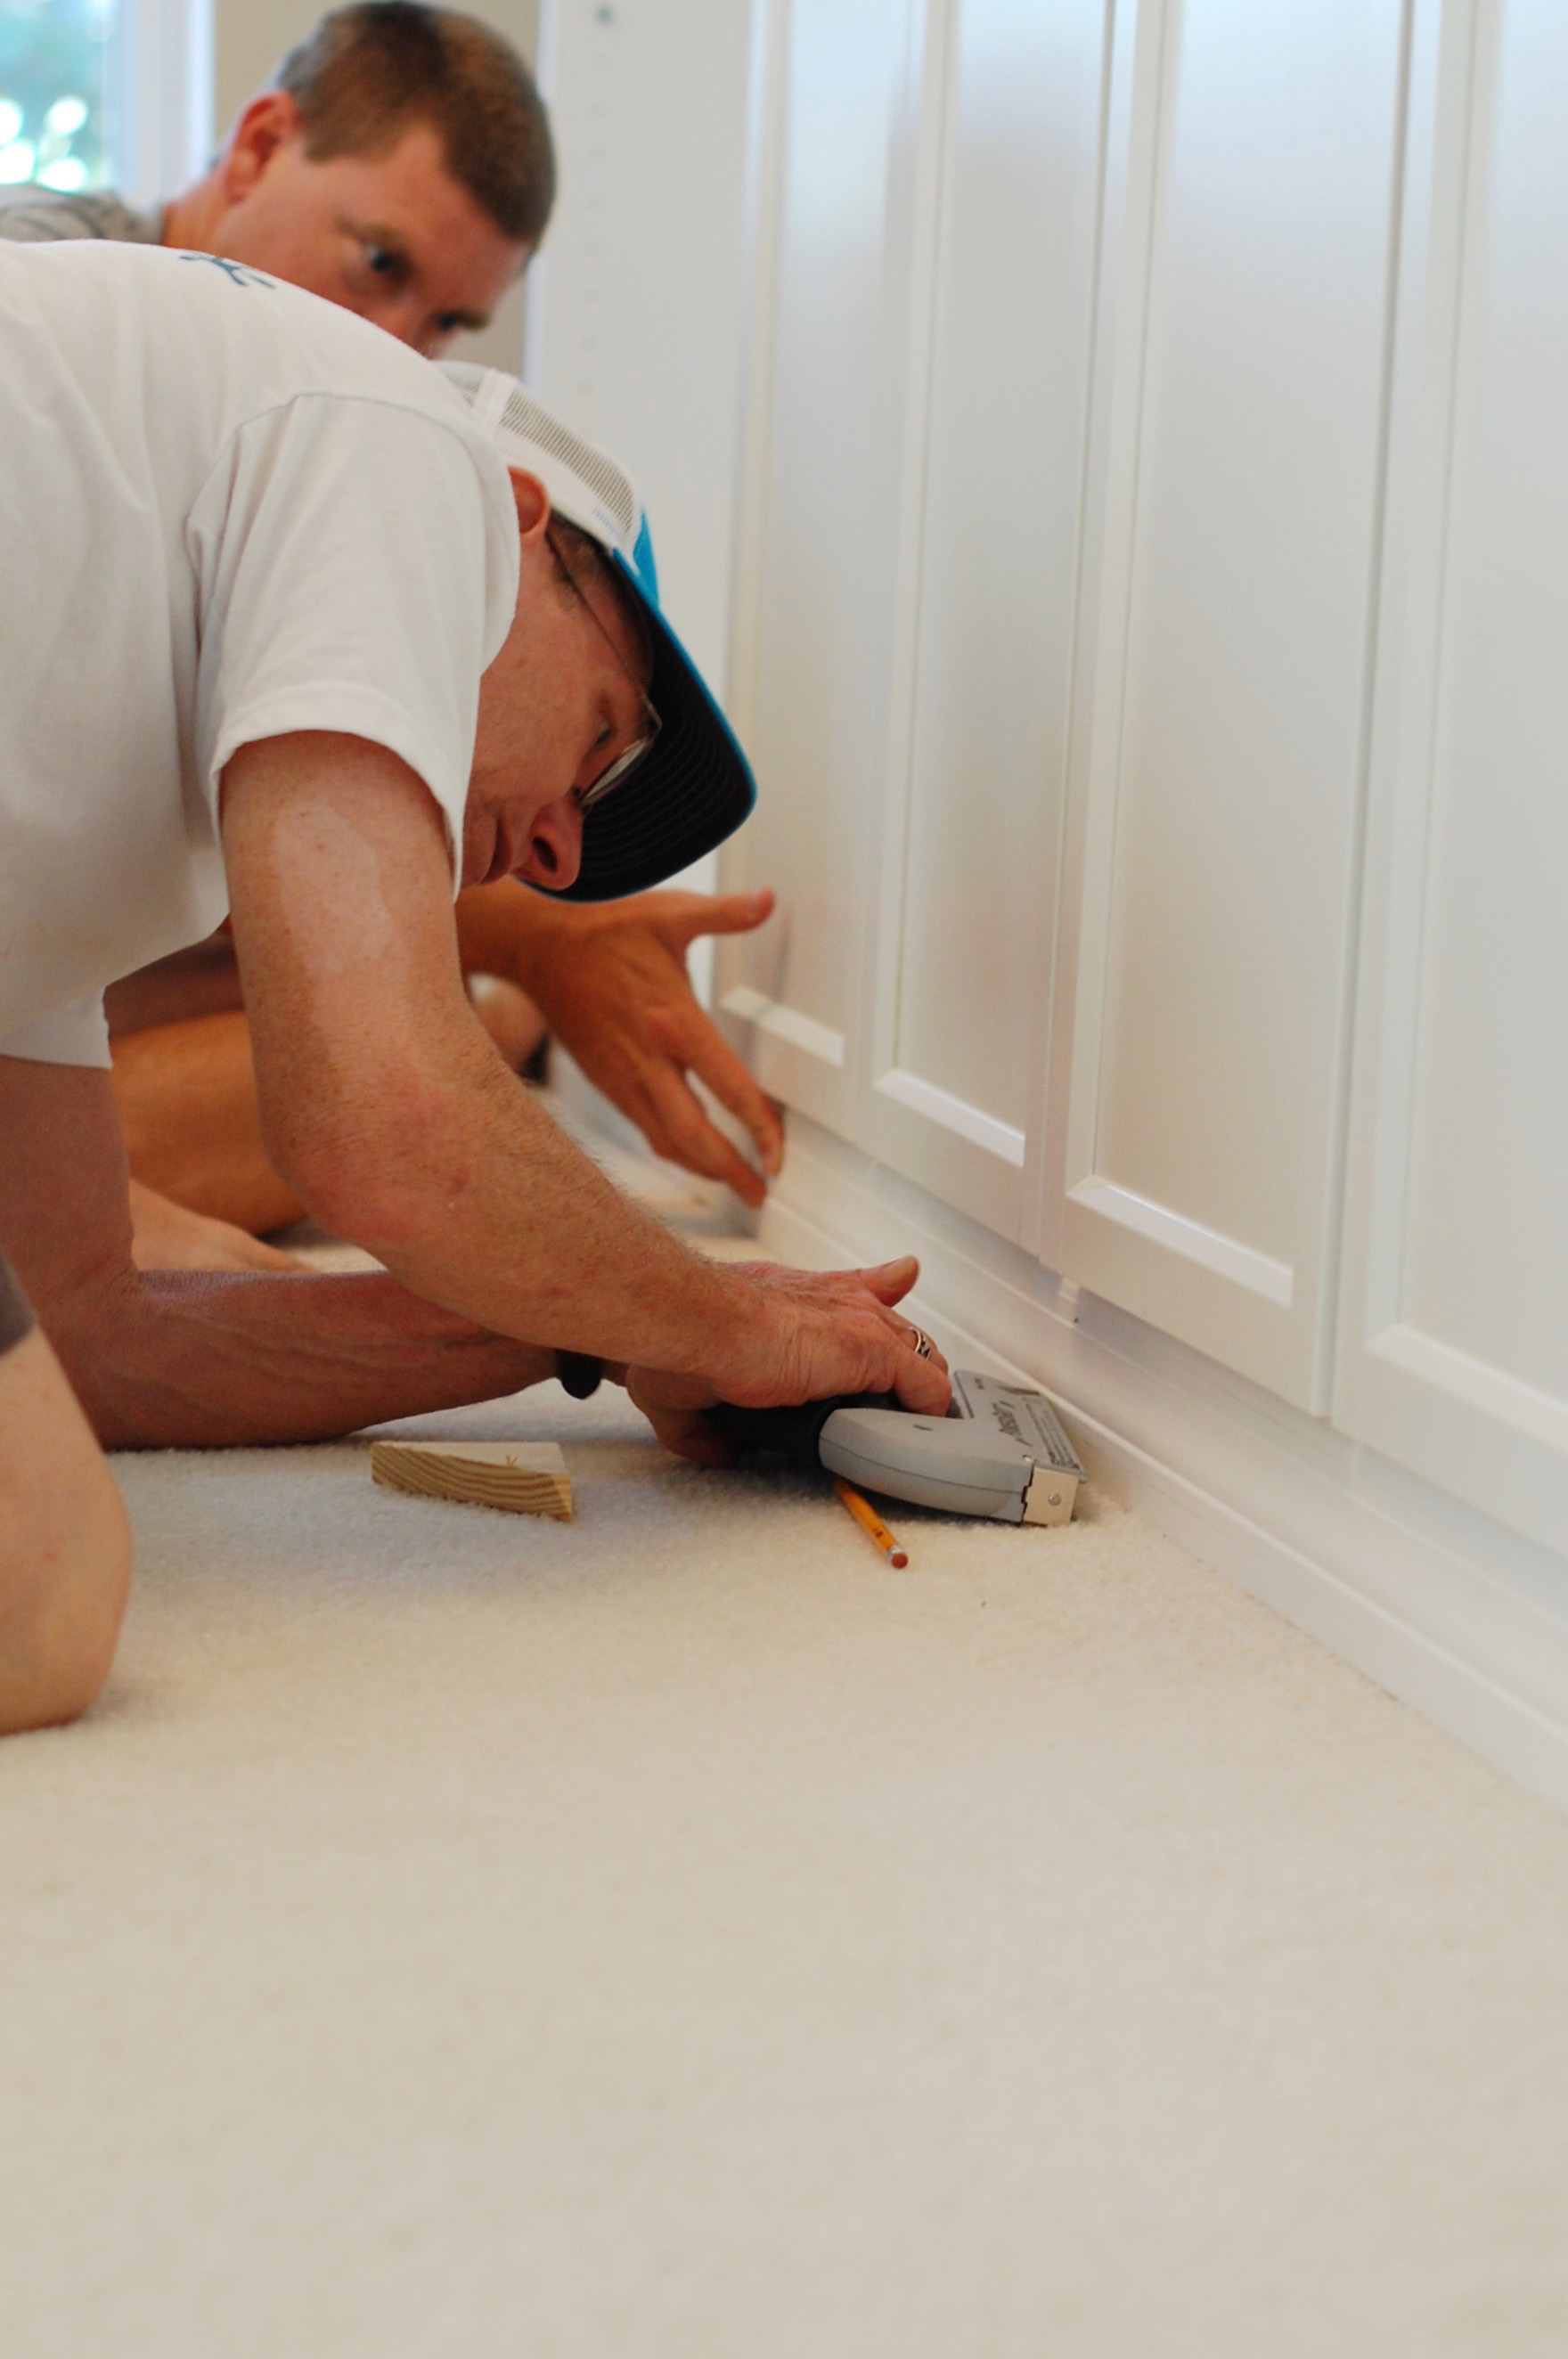
we attached those crown moulding pieces to the angled pieces on the top of the shelves using a nail gun and small finishing nails.
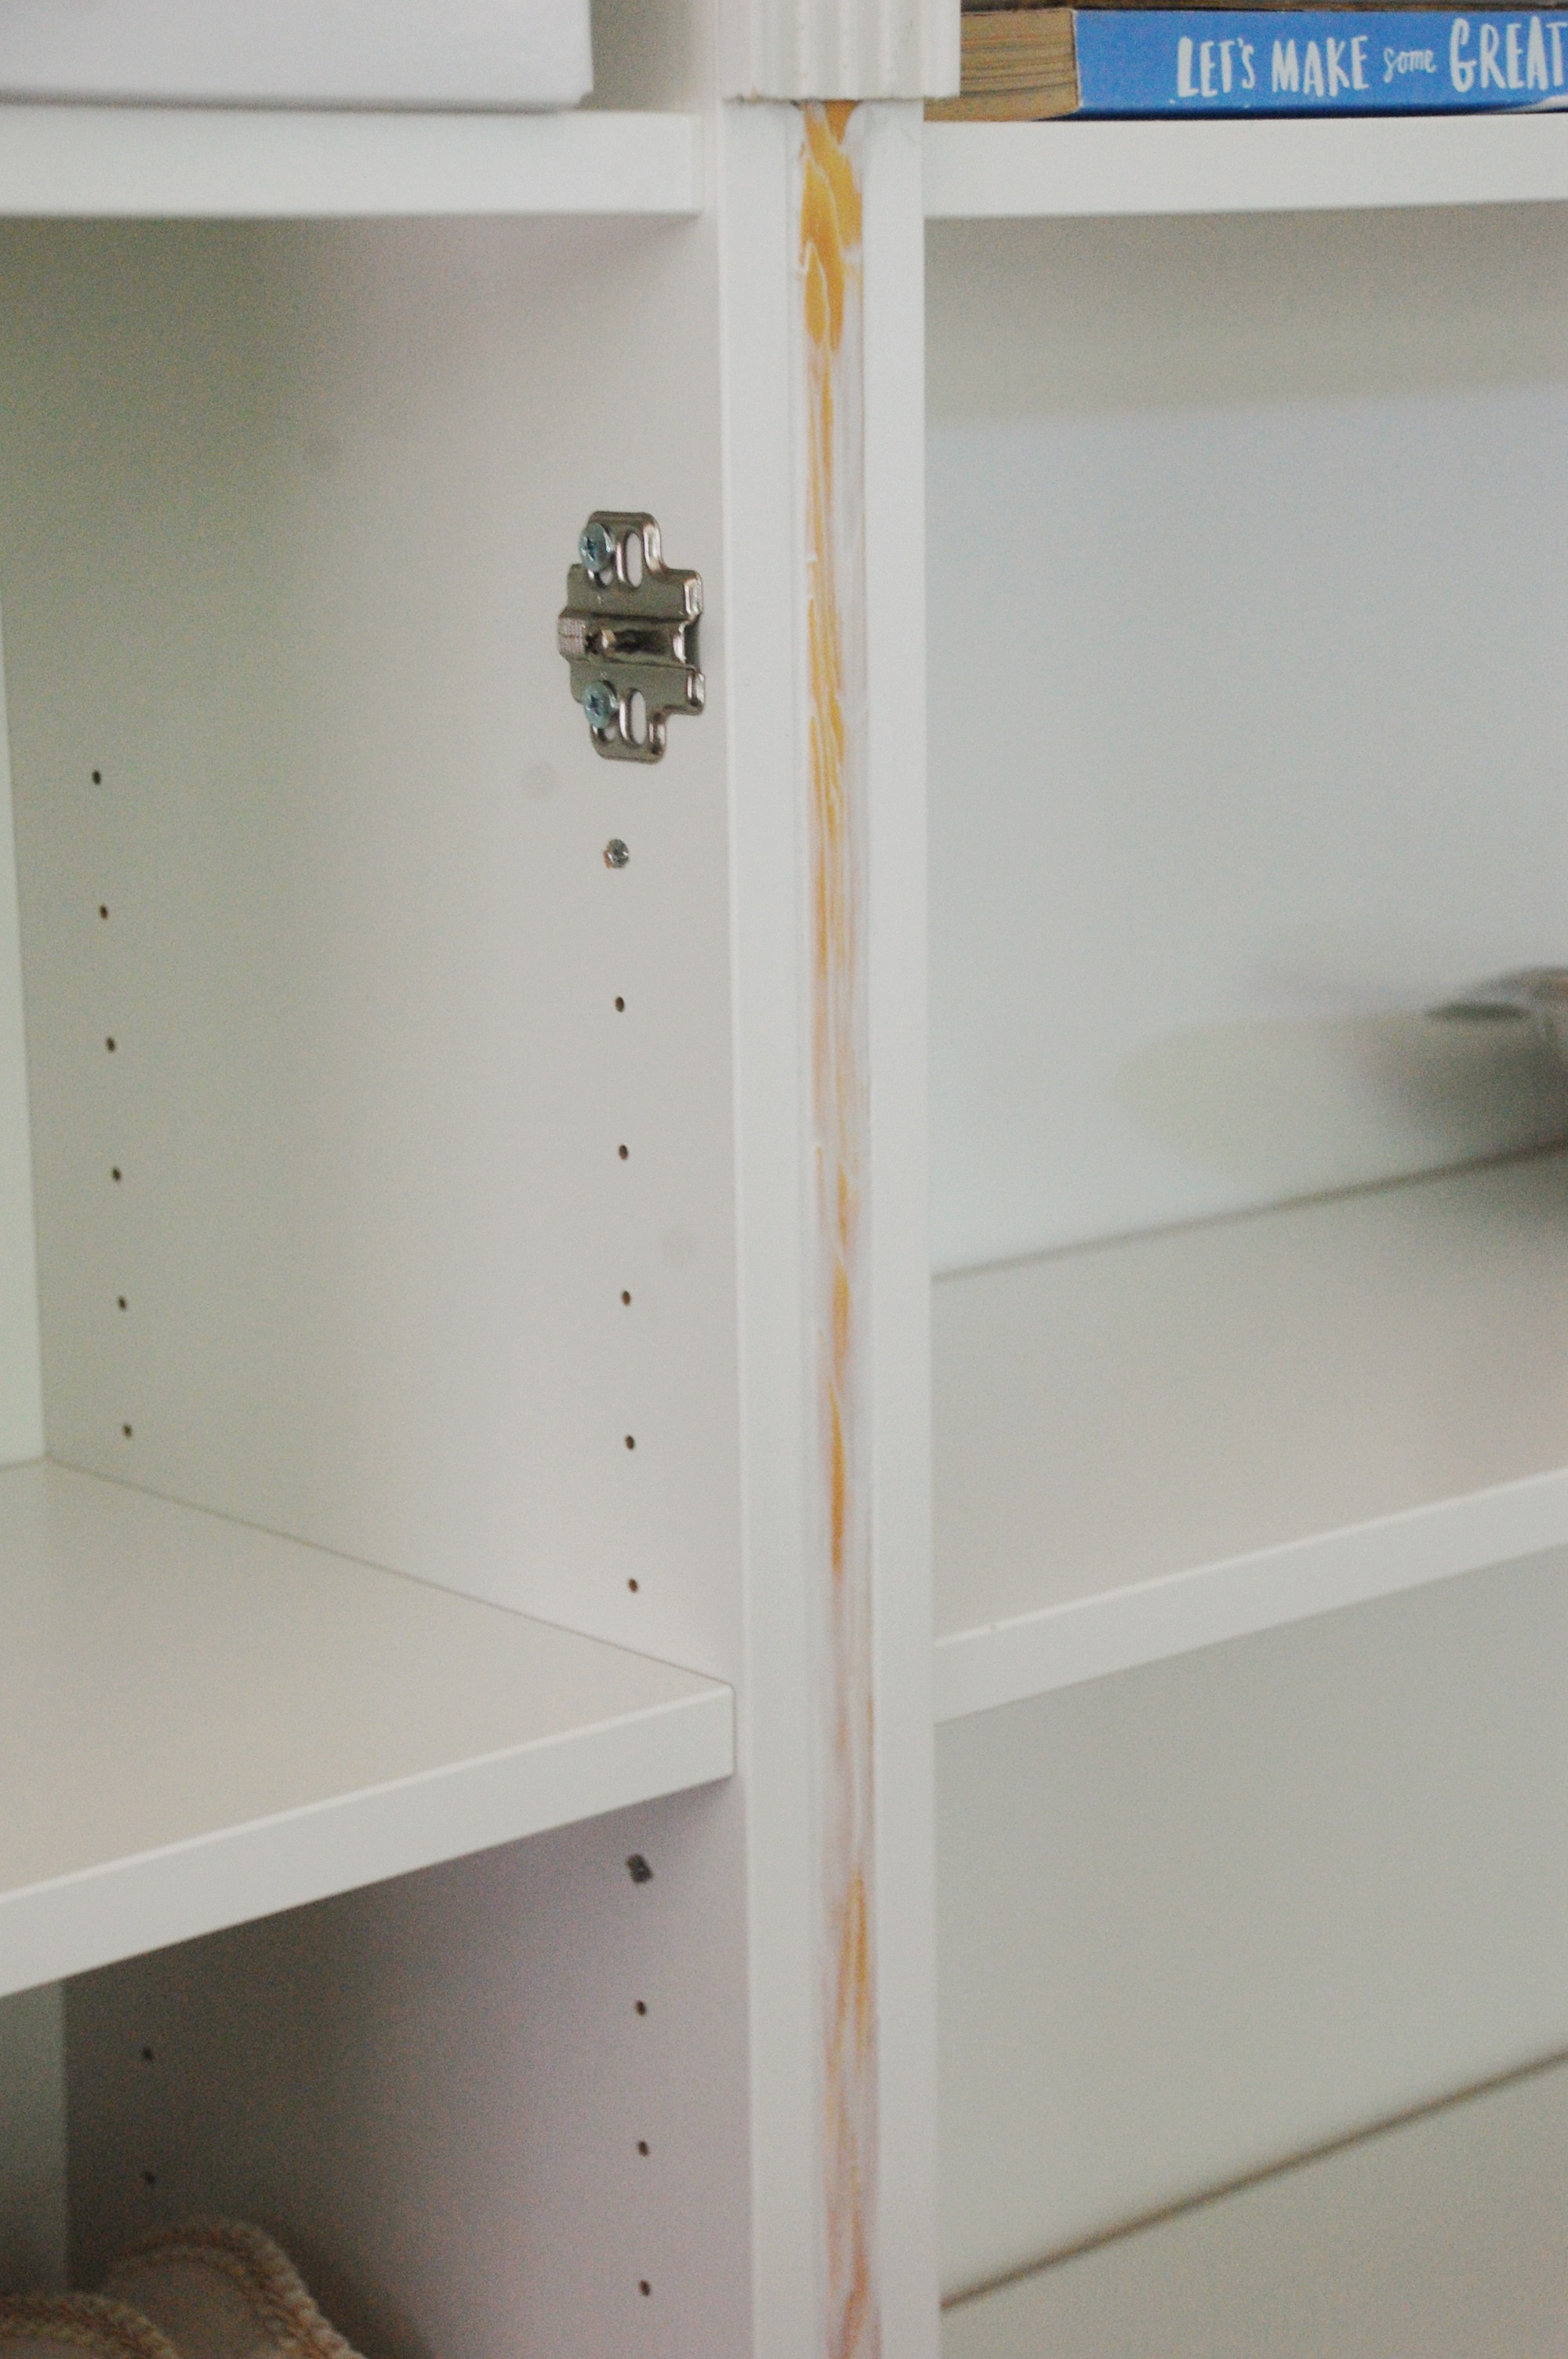
we attached the edge pieces by lining up the mitered corners and gluing them together, then finishing it off with some small nails. later on, i filled in any gaps on the corners with caulk.
this next step was a personal preference, as you could totally just caulk and paint over the wood in between the shelving, but i really loved the look of reeded moulding in between the shelving, so i bought some 2.25″ wide reeded moulding at Home Depot. we cut that moulding to the correct length, and attached it in between each shelf using small finishing nails.
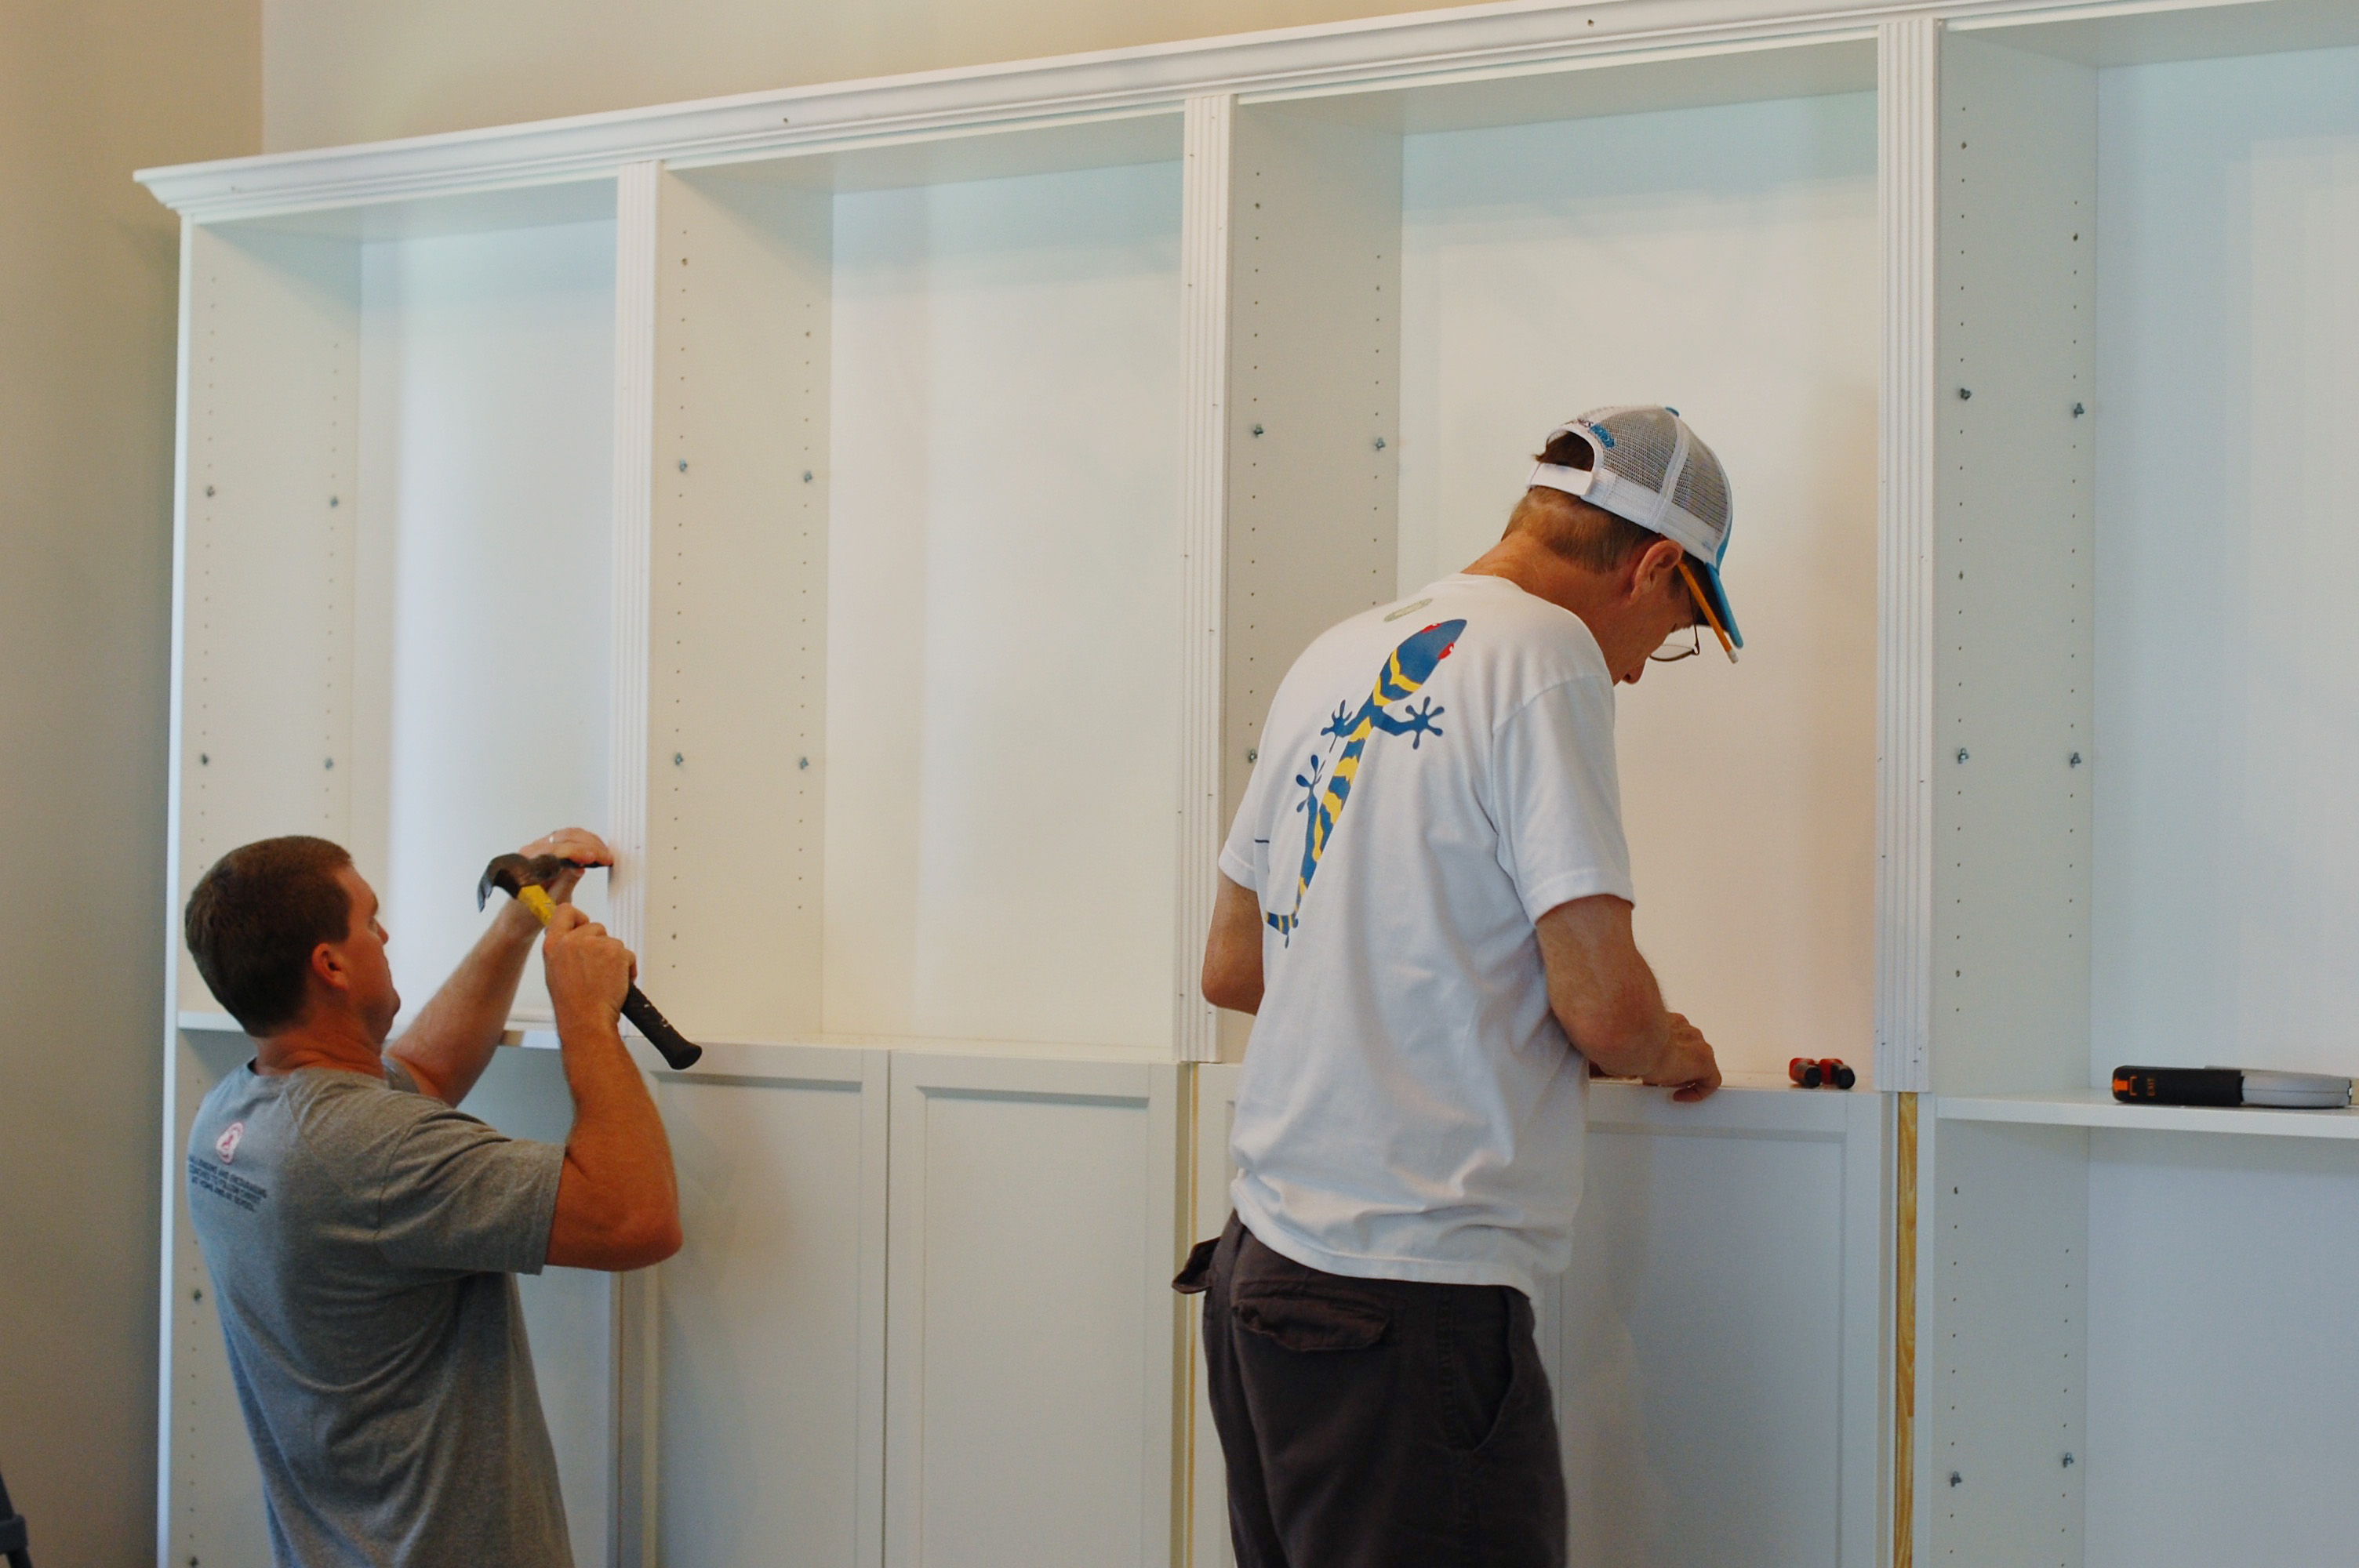
if you are using cabinet doors, put those on for a few minutes because the reeded moulding will only need to be attached on the parts outside of the cabinet, if that makes sense. so you want to make a straight cut so it hits just above the cabinet doors.

in my case, since i was using doors on both middle shelves, i only used 3 pieces of reeded moulding halfway down on the top part of the shelves, between each shelf. if you were not using cabinet doors, you would just run that reeded moulding all the way down to the bottom.
the final moulding step was to attach the baseboard. we cut it to the full length of the shelves, and attached it with small finishing nails to the wood that we had earlier put in between each shelf. i did not put baseboard around the sides of the shelves, because you can’t see it, so the baseboard is just on the front.
then i caulked in all the gaps using a paintable water based caulk so it would all look seamless and like one big piece all together.
once that was sanded smooth, i painted all of the moulding. i used Valspar’s Dove White Paint, which is a pretty close match. (i researched this a lot, and this truly is the closet match, and looks pretty consistent once its all painted.)

the next project to complete the room was to replace our table. our original dining set was the first piece of furniture that jake and i bought together, using some money we got at our wedding. we found it at a consignment shop, and we were pretty proud of it. but…i kinda hated the finish on it after a few years, so it was time to move it along! so i put the table up for sale, but kept the chairs, and after using a deglosser, (like this one: Klean-Strip Easy Liquid Sander Deglosser) to remove the glossy finish (which was SOO easy), i painted the chairs in that same Dove White and recovered the cushions in some fabric i found at JoAnn’s Fabrics.
once the old table sold, i finally had saved enough money for my dream farmhouse table.
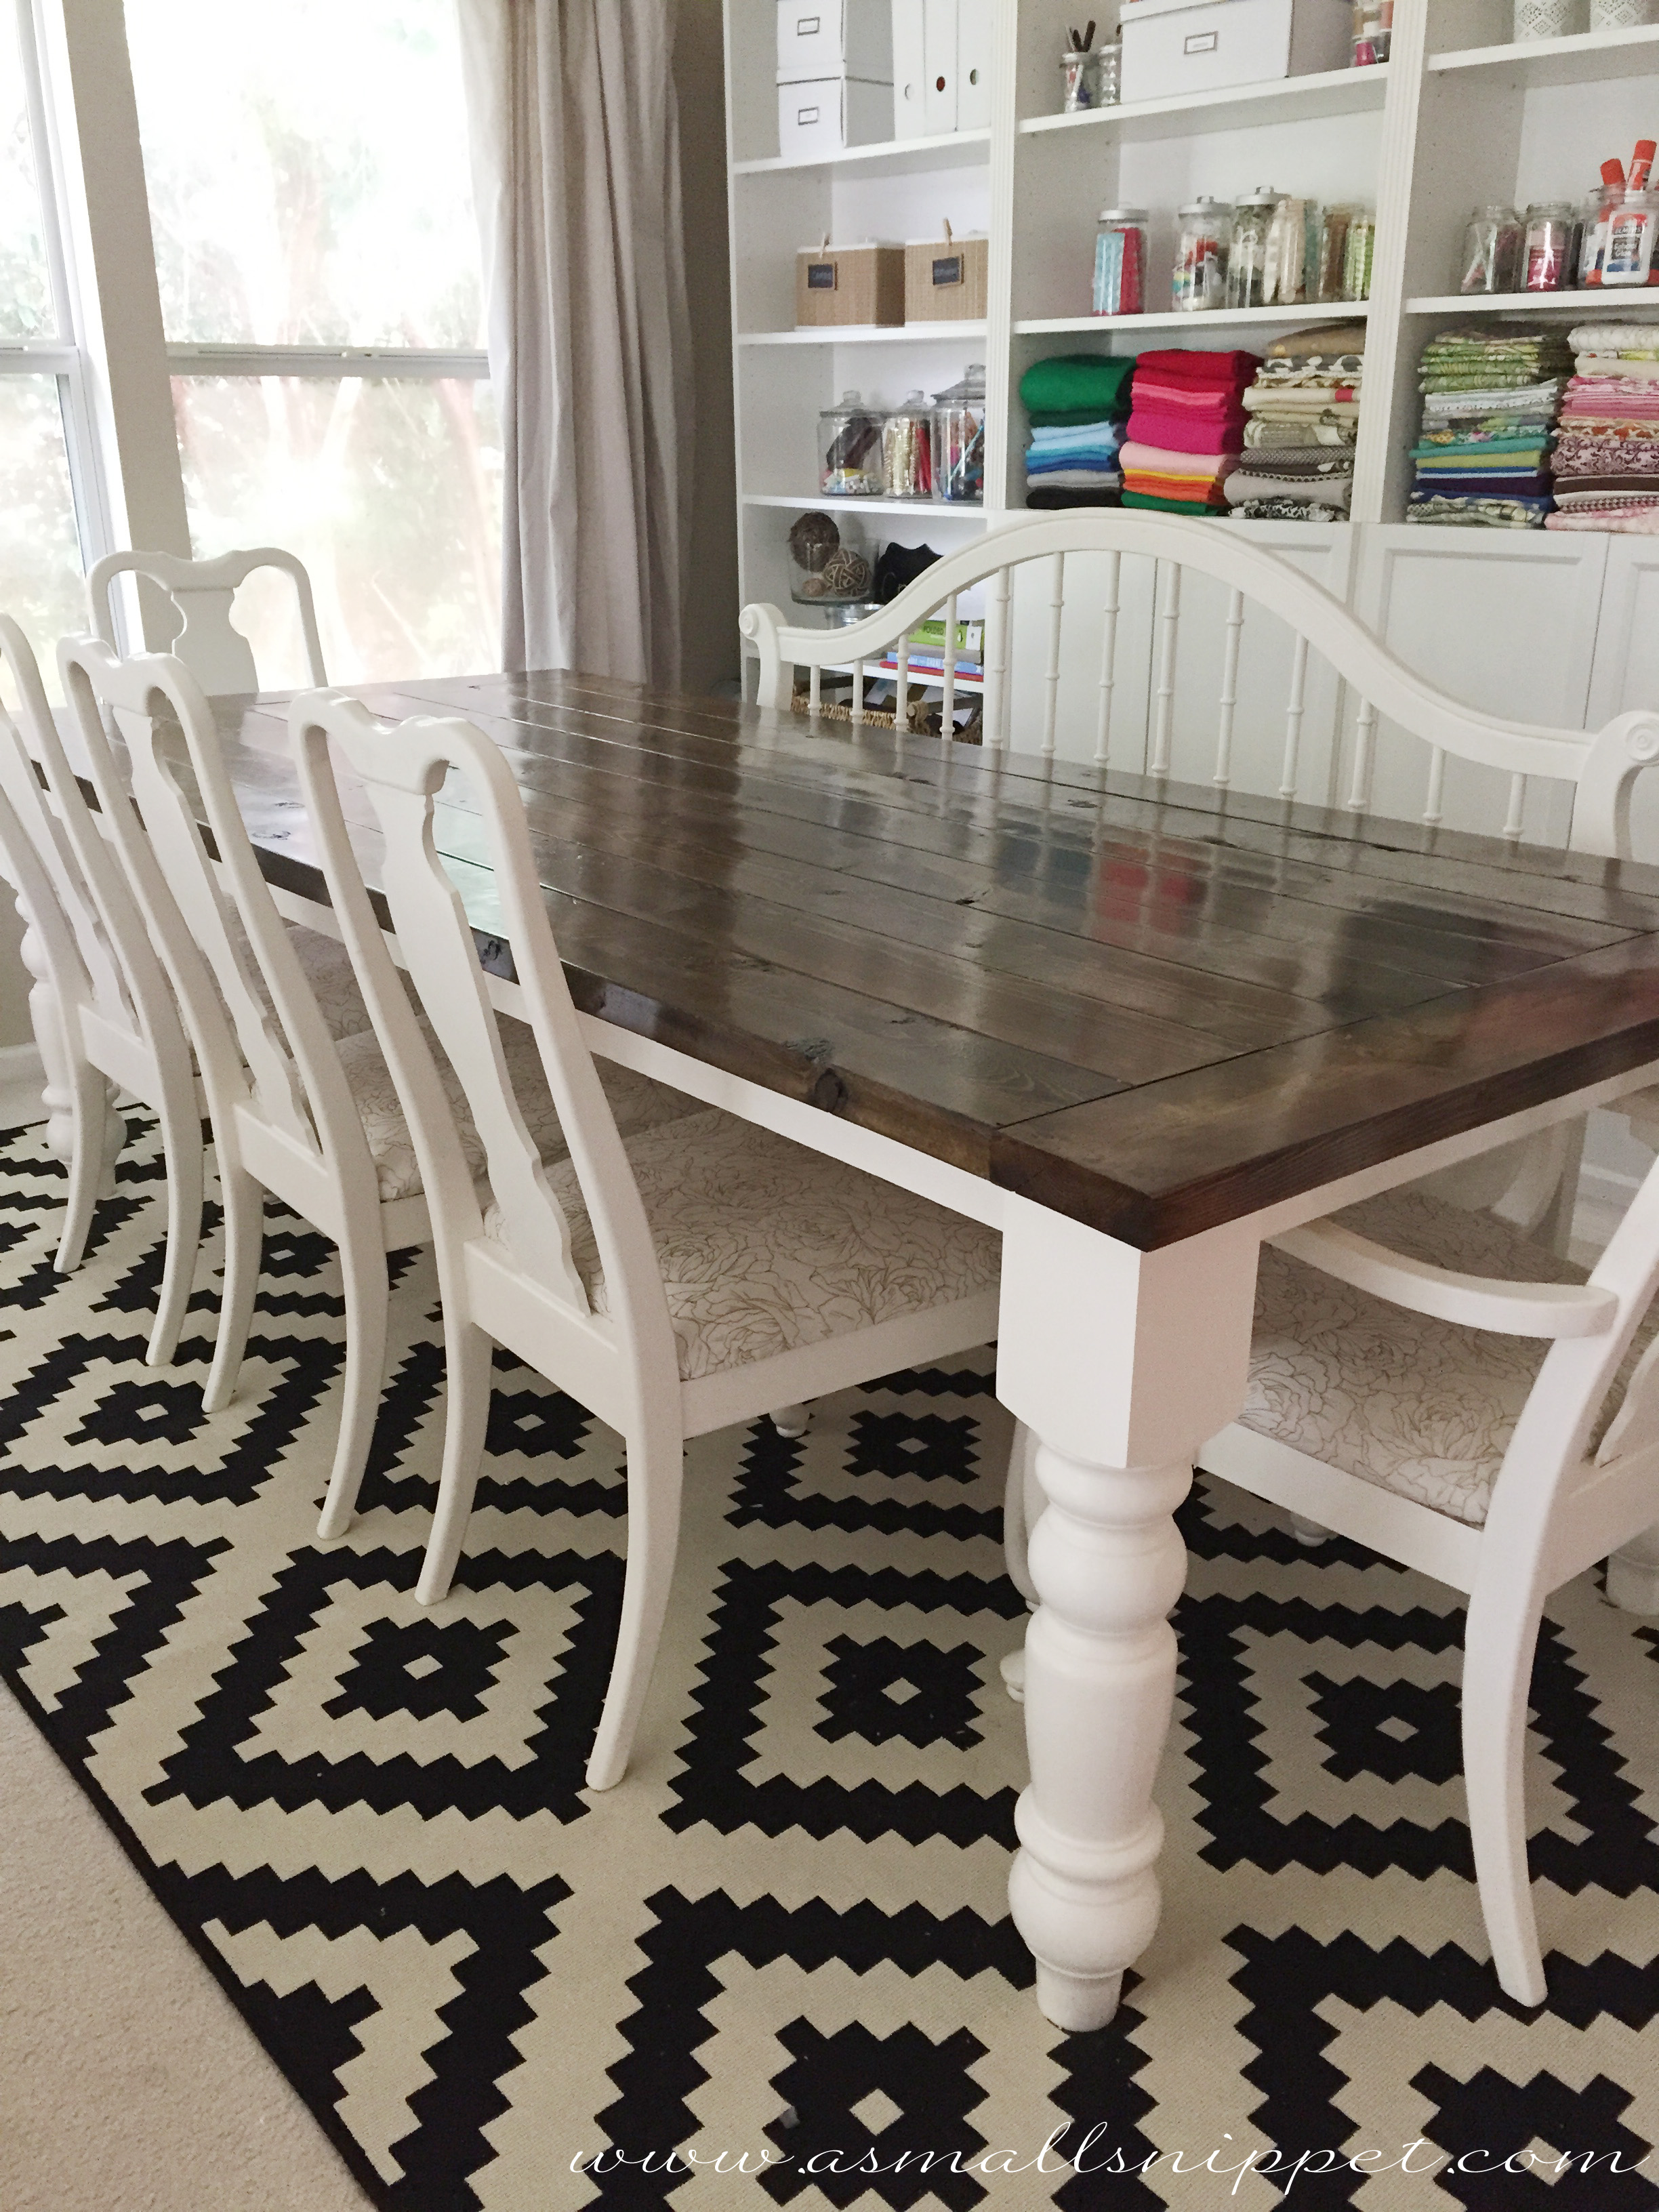
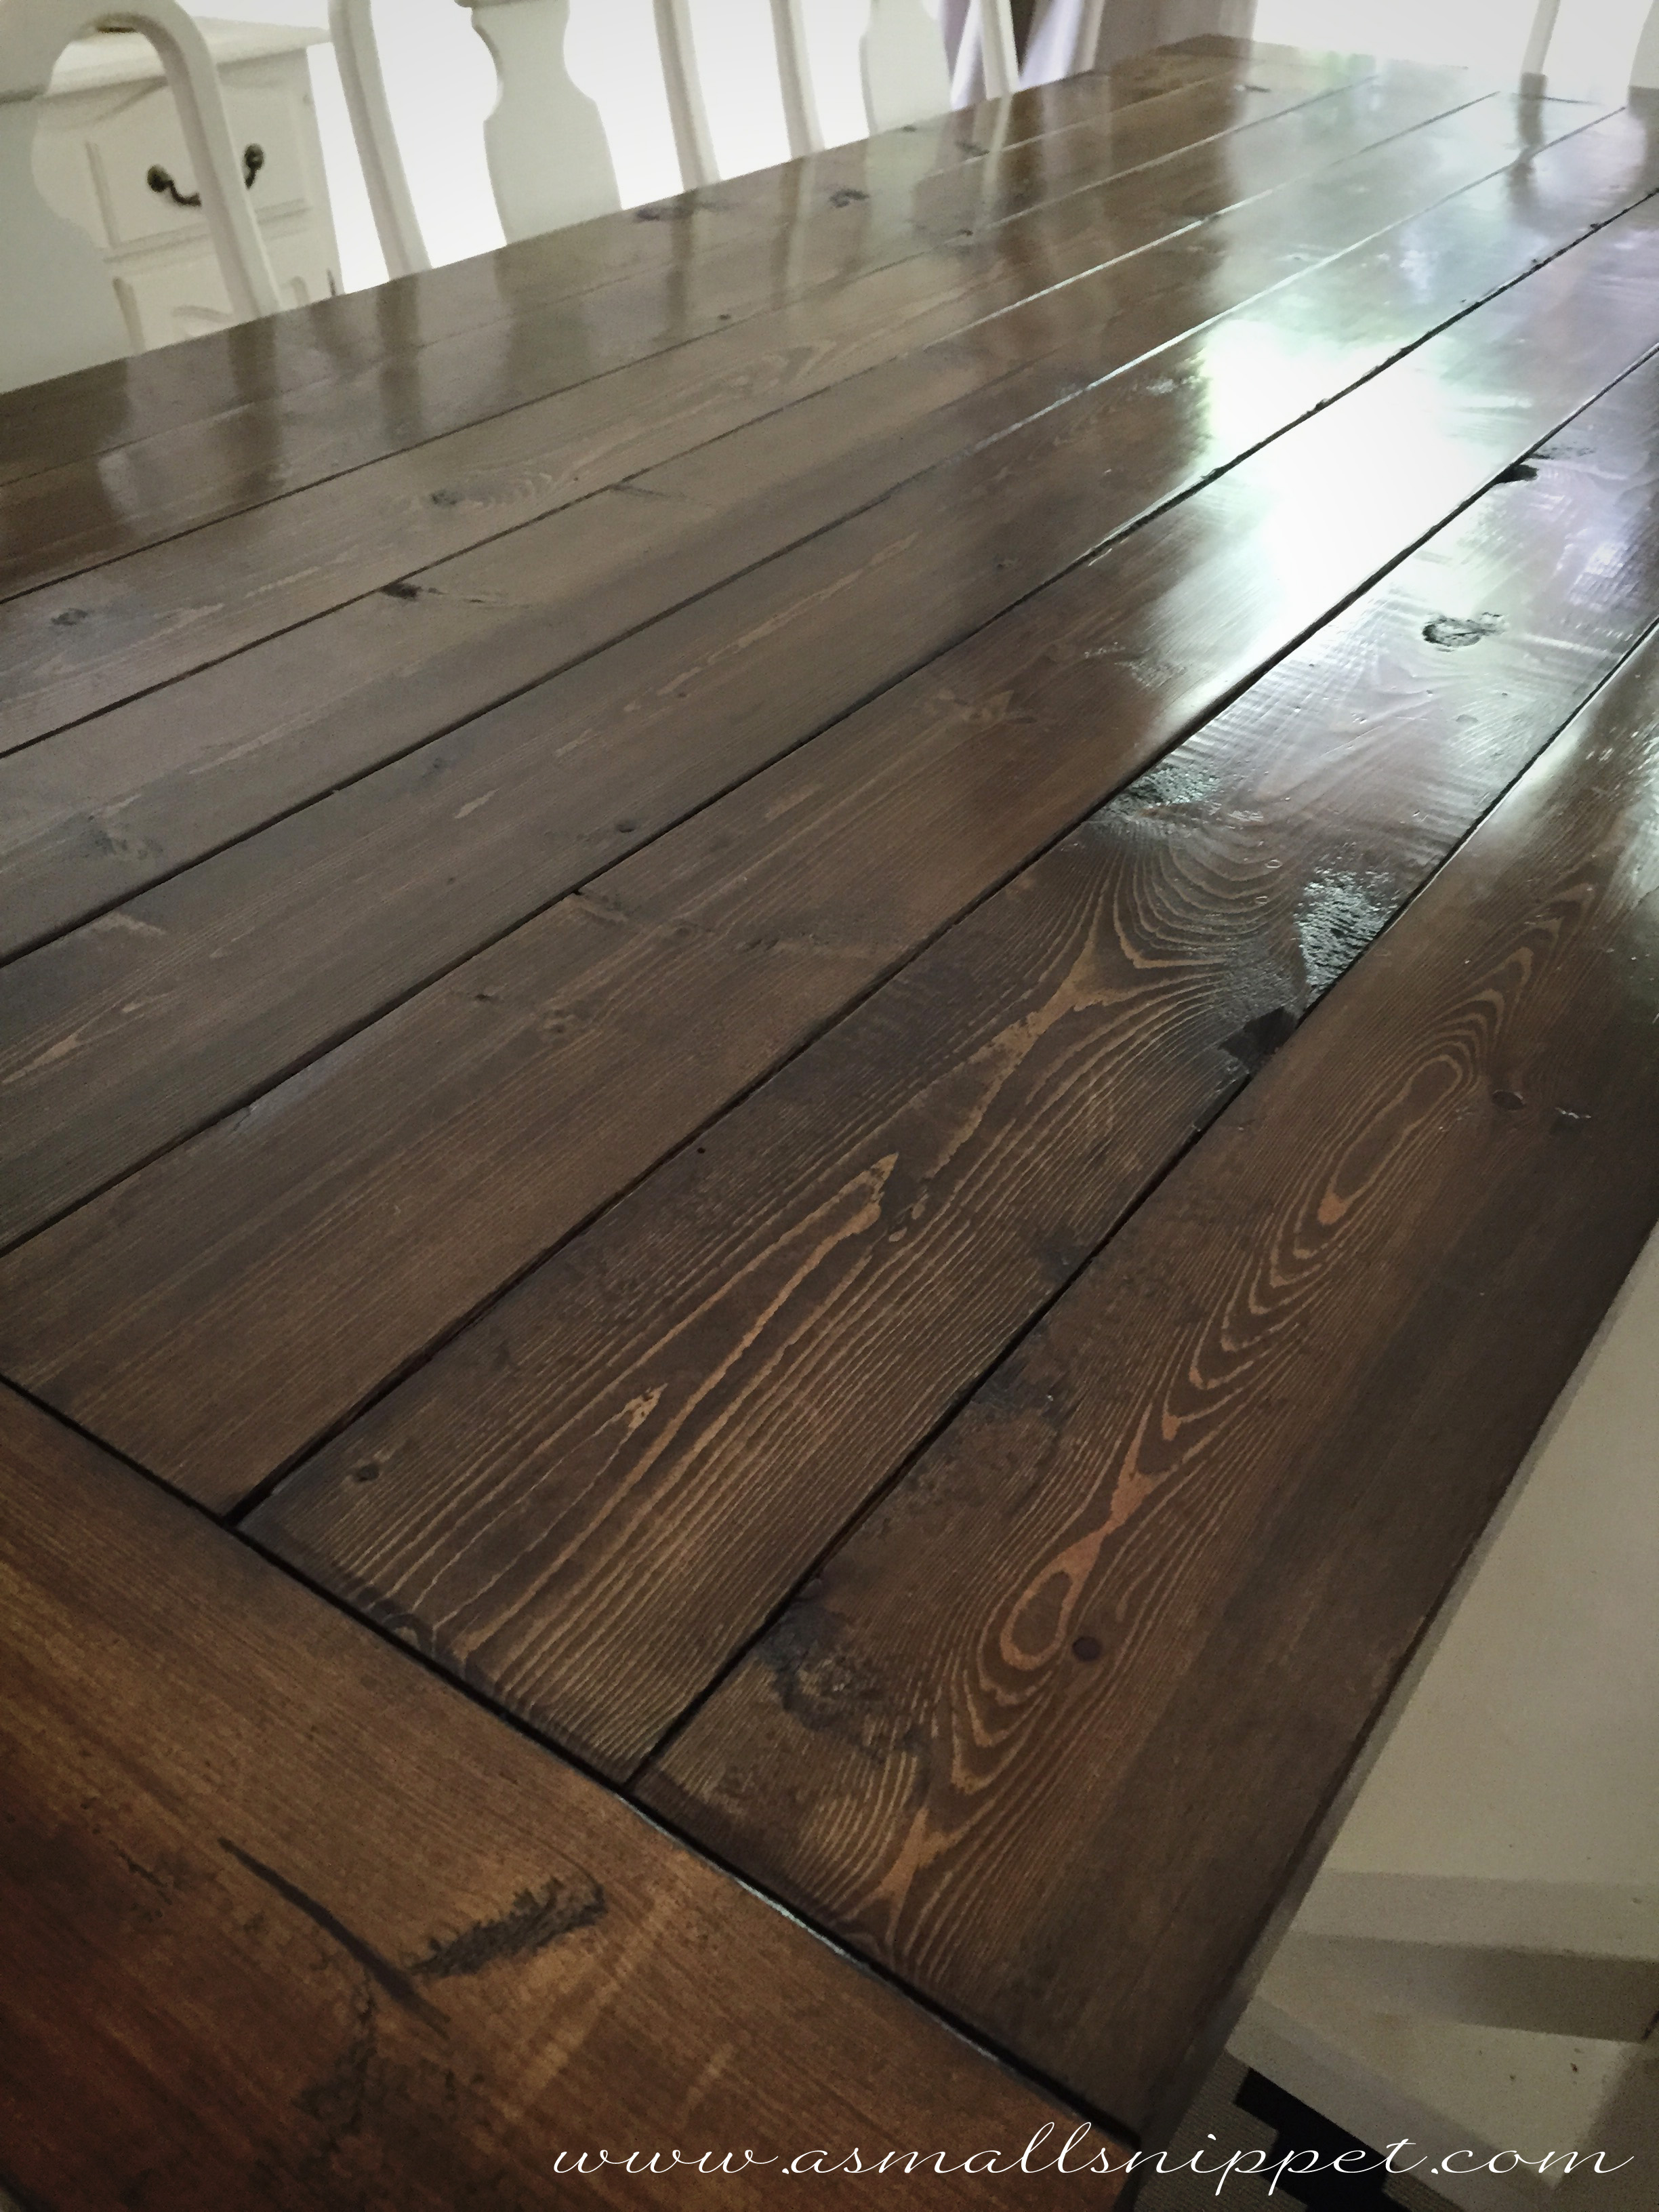
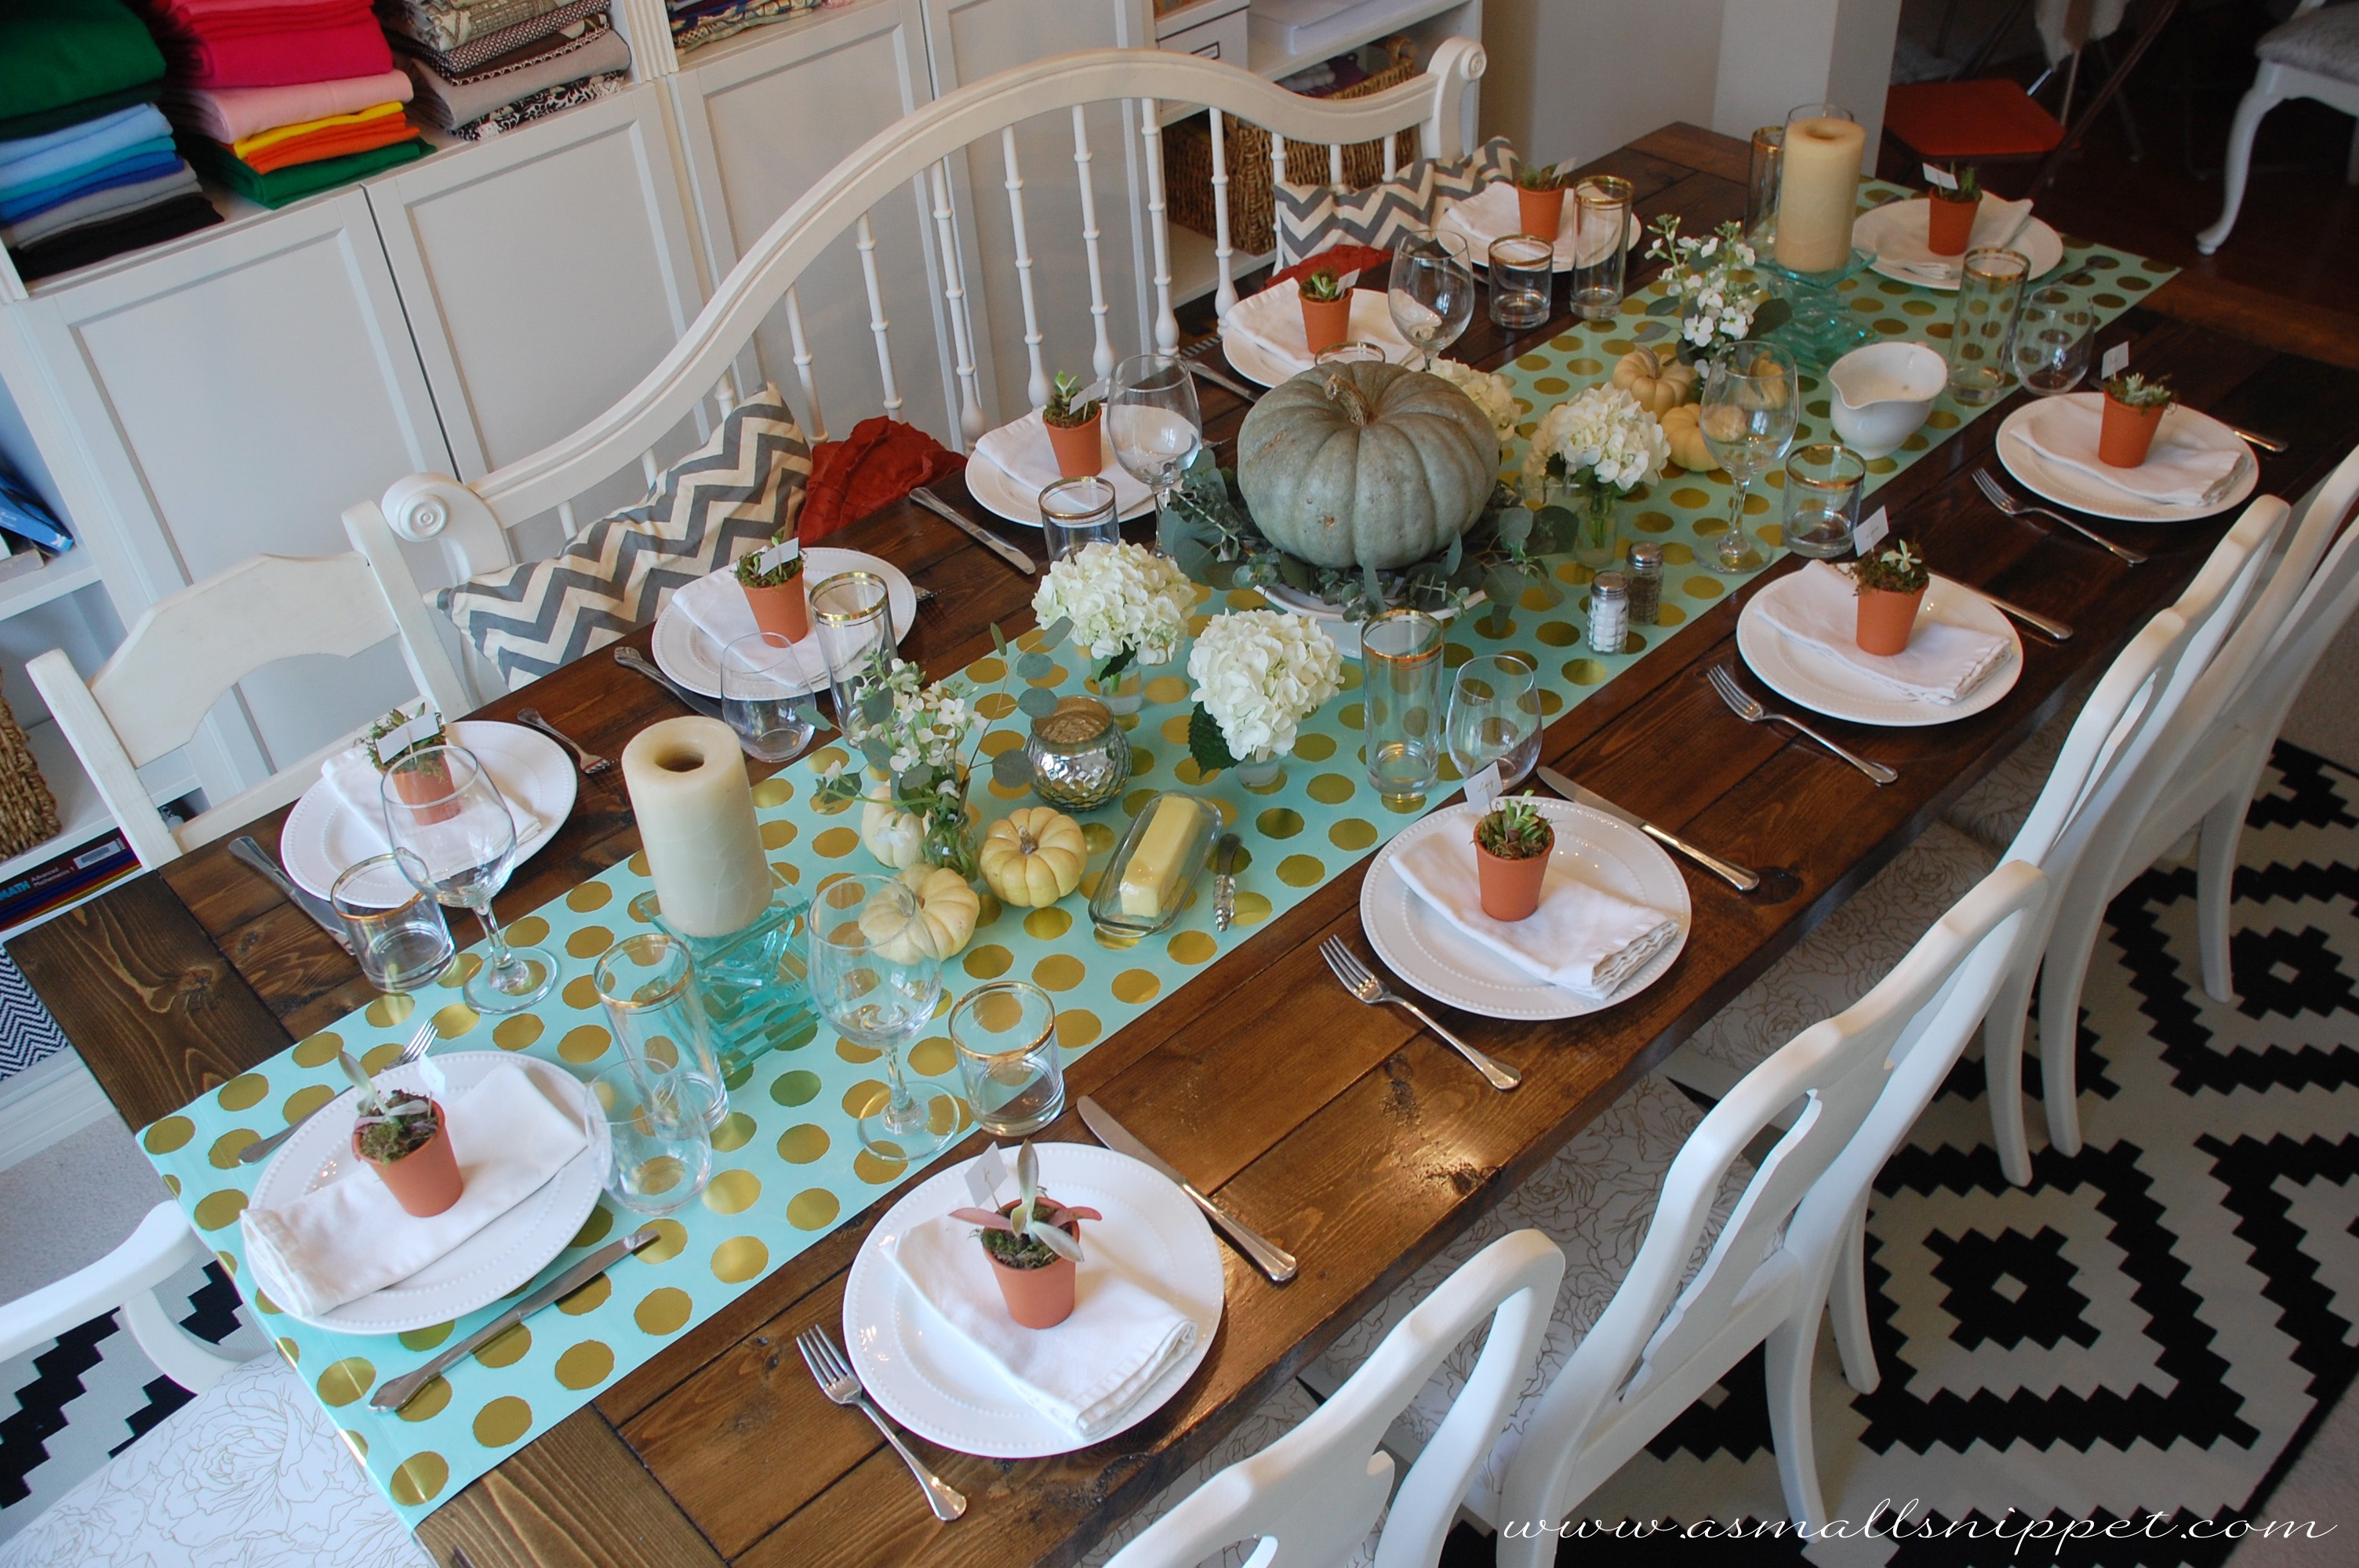
we luckily have a friend who builds them, and i gave him the exact measurements that i wanted (8 feet long, 44 inches wide), and he custom built it for our space. he stained it with 2 coats of Minwax Jacobean stain, and then a few coats of polyurethane. i absolutely LOVE it!
(if you are local and would like his info, email me and i’d be happy to pass it along to you. he is crazily talented, and very reasonably priced.)
i knew that i wanted a bench, but had a very hard time finding one that would be the correct length since our table was so long. so we found a queen size headboard at a flea market for $15, then took it to a local furniture builder, told him our budget, and he said he would cut it down and attach it to a bench seat for us. all i had to do was paint it. super inexpensive way to create a large bench:
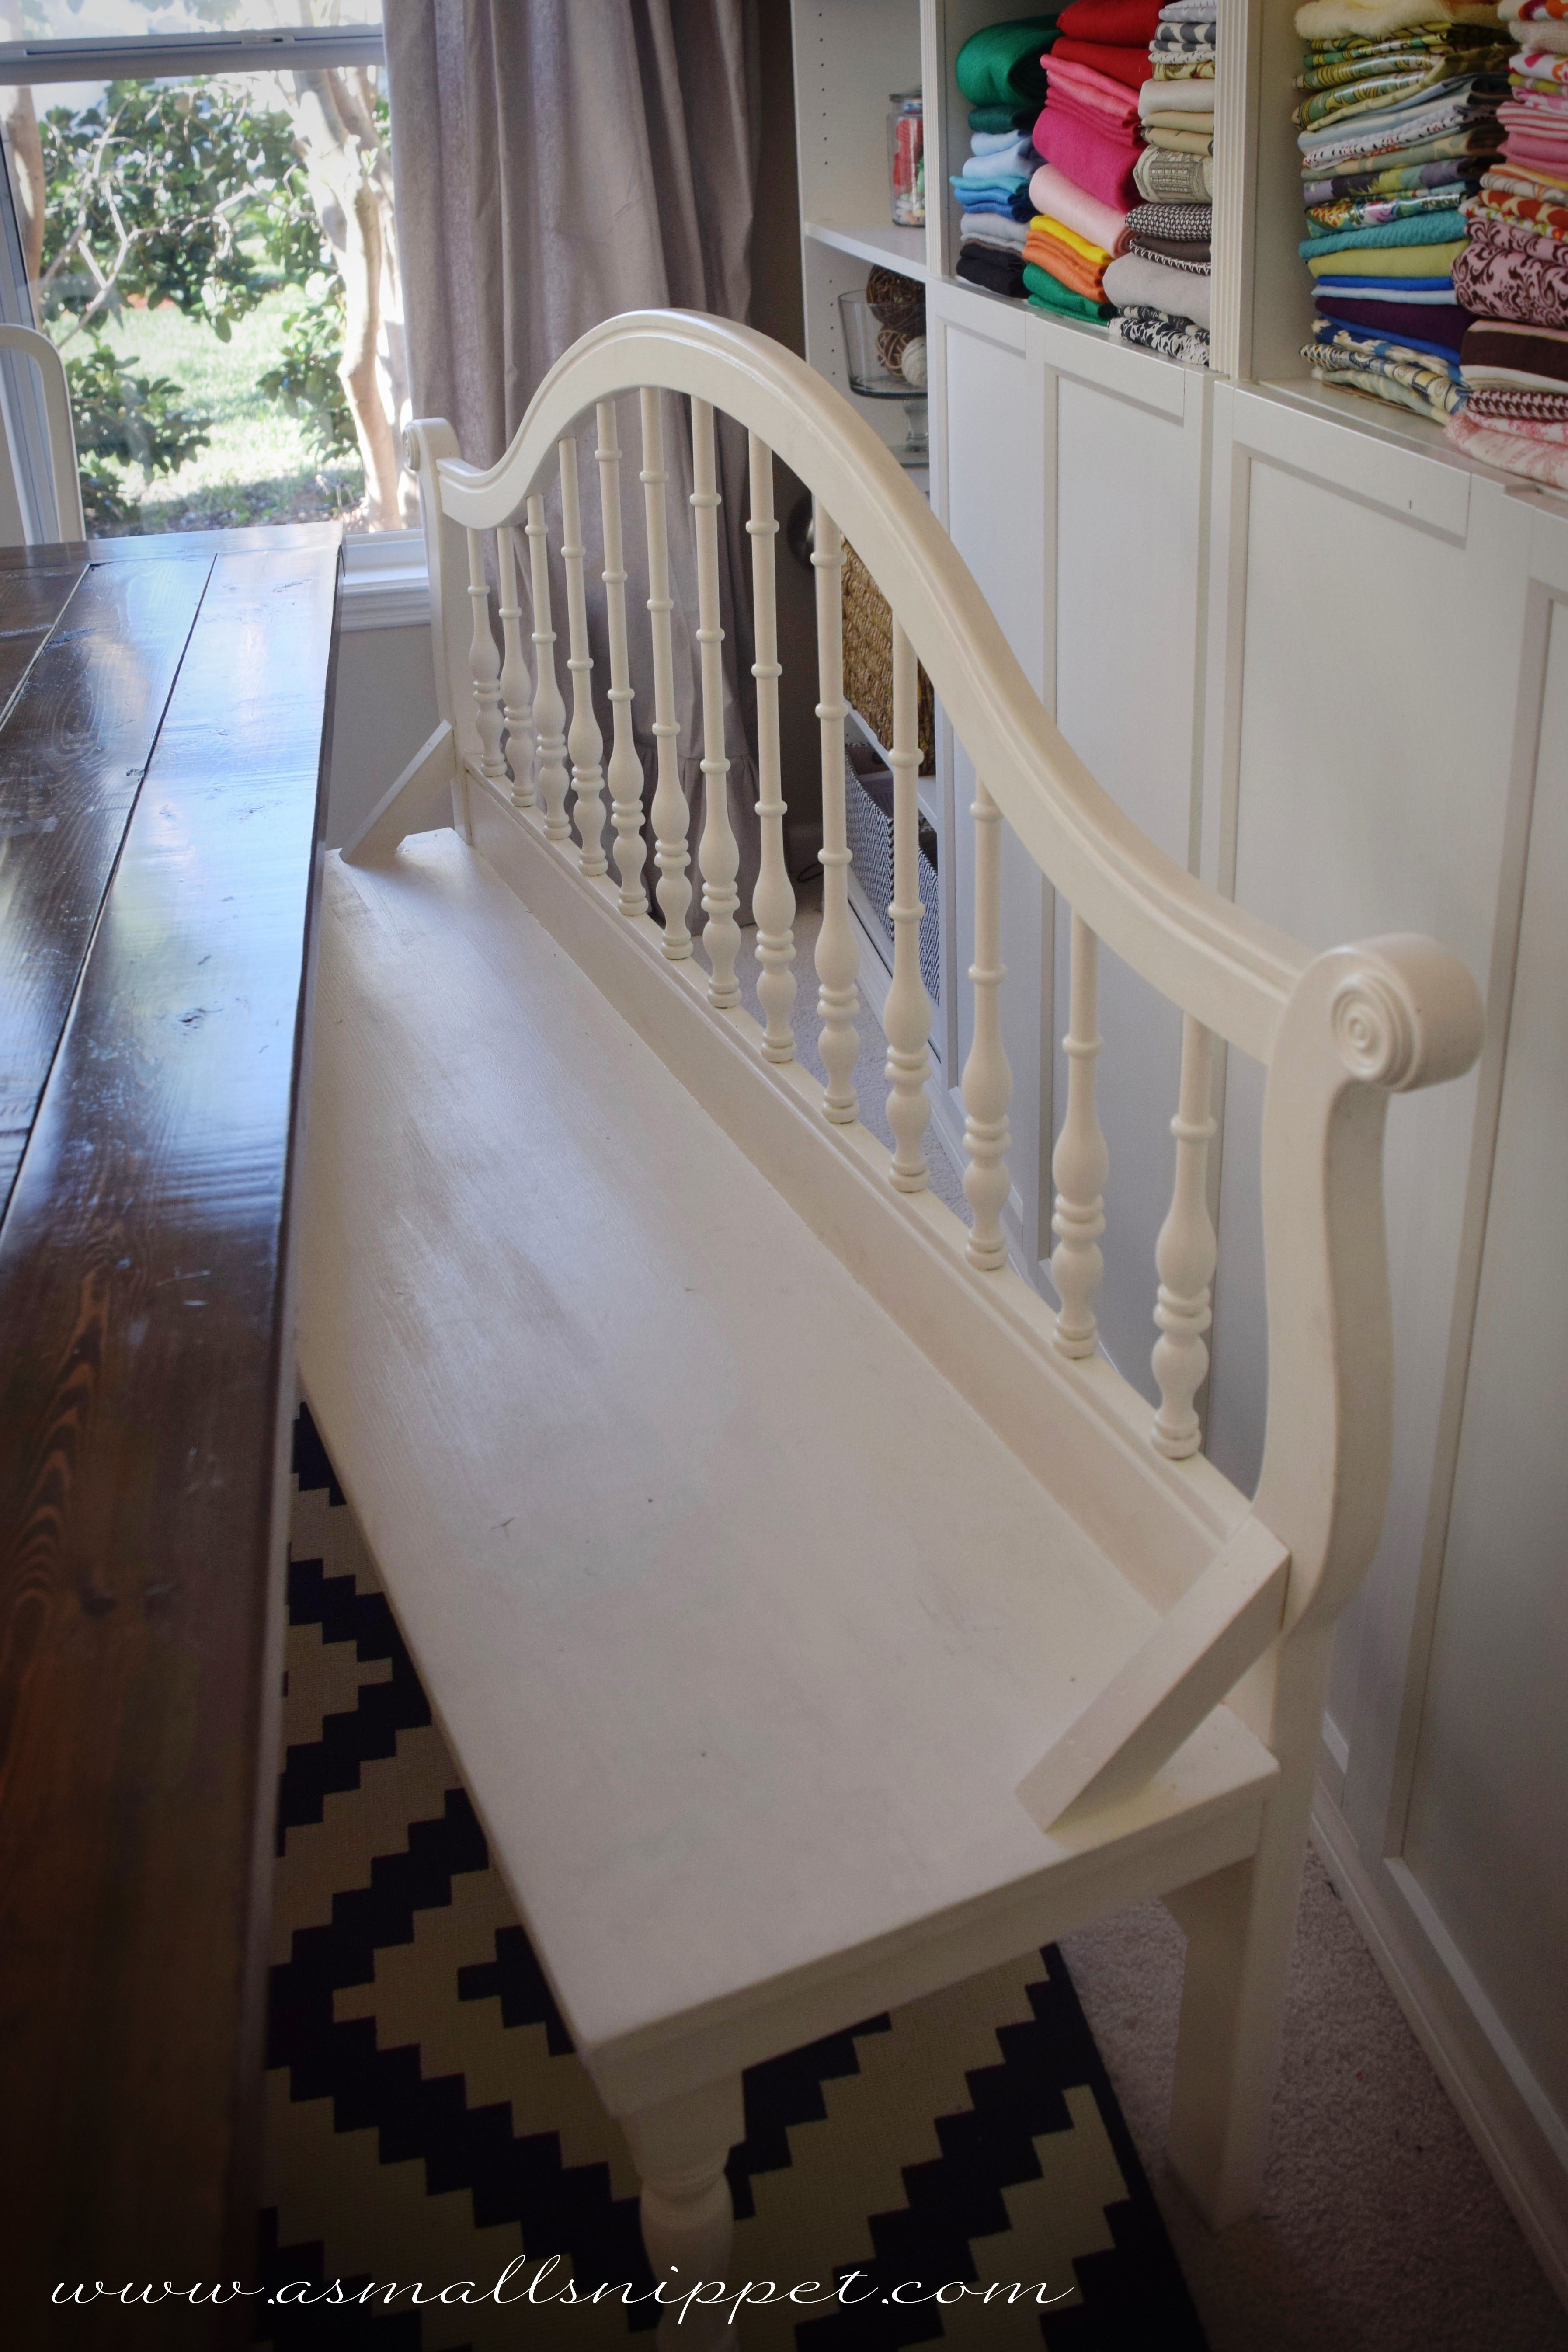
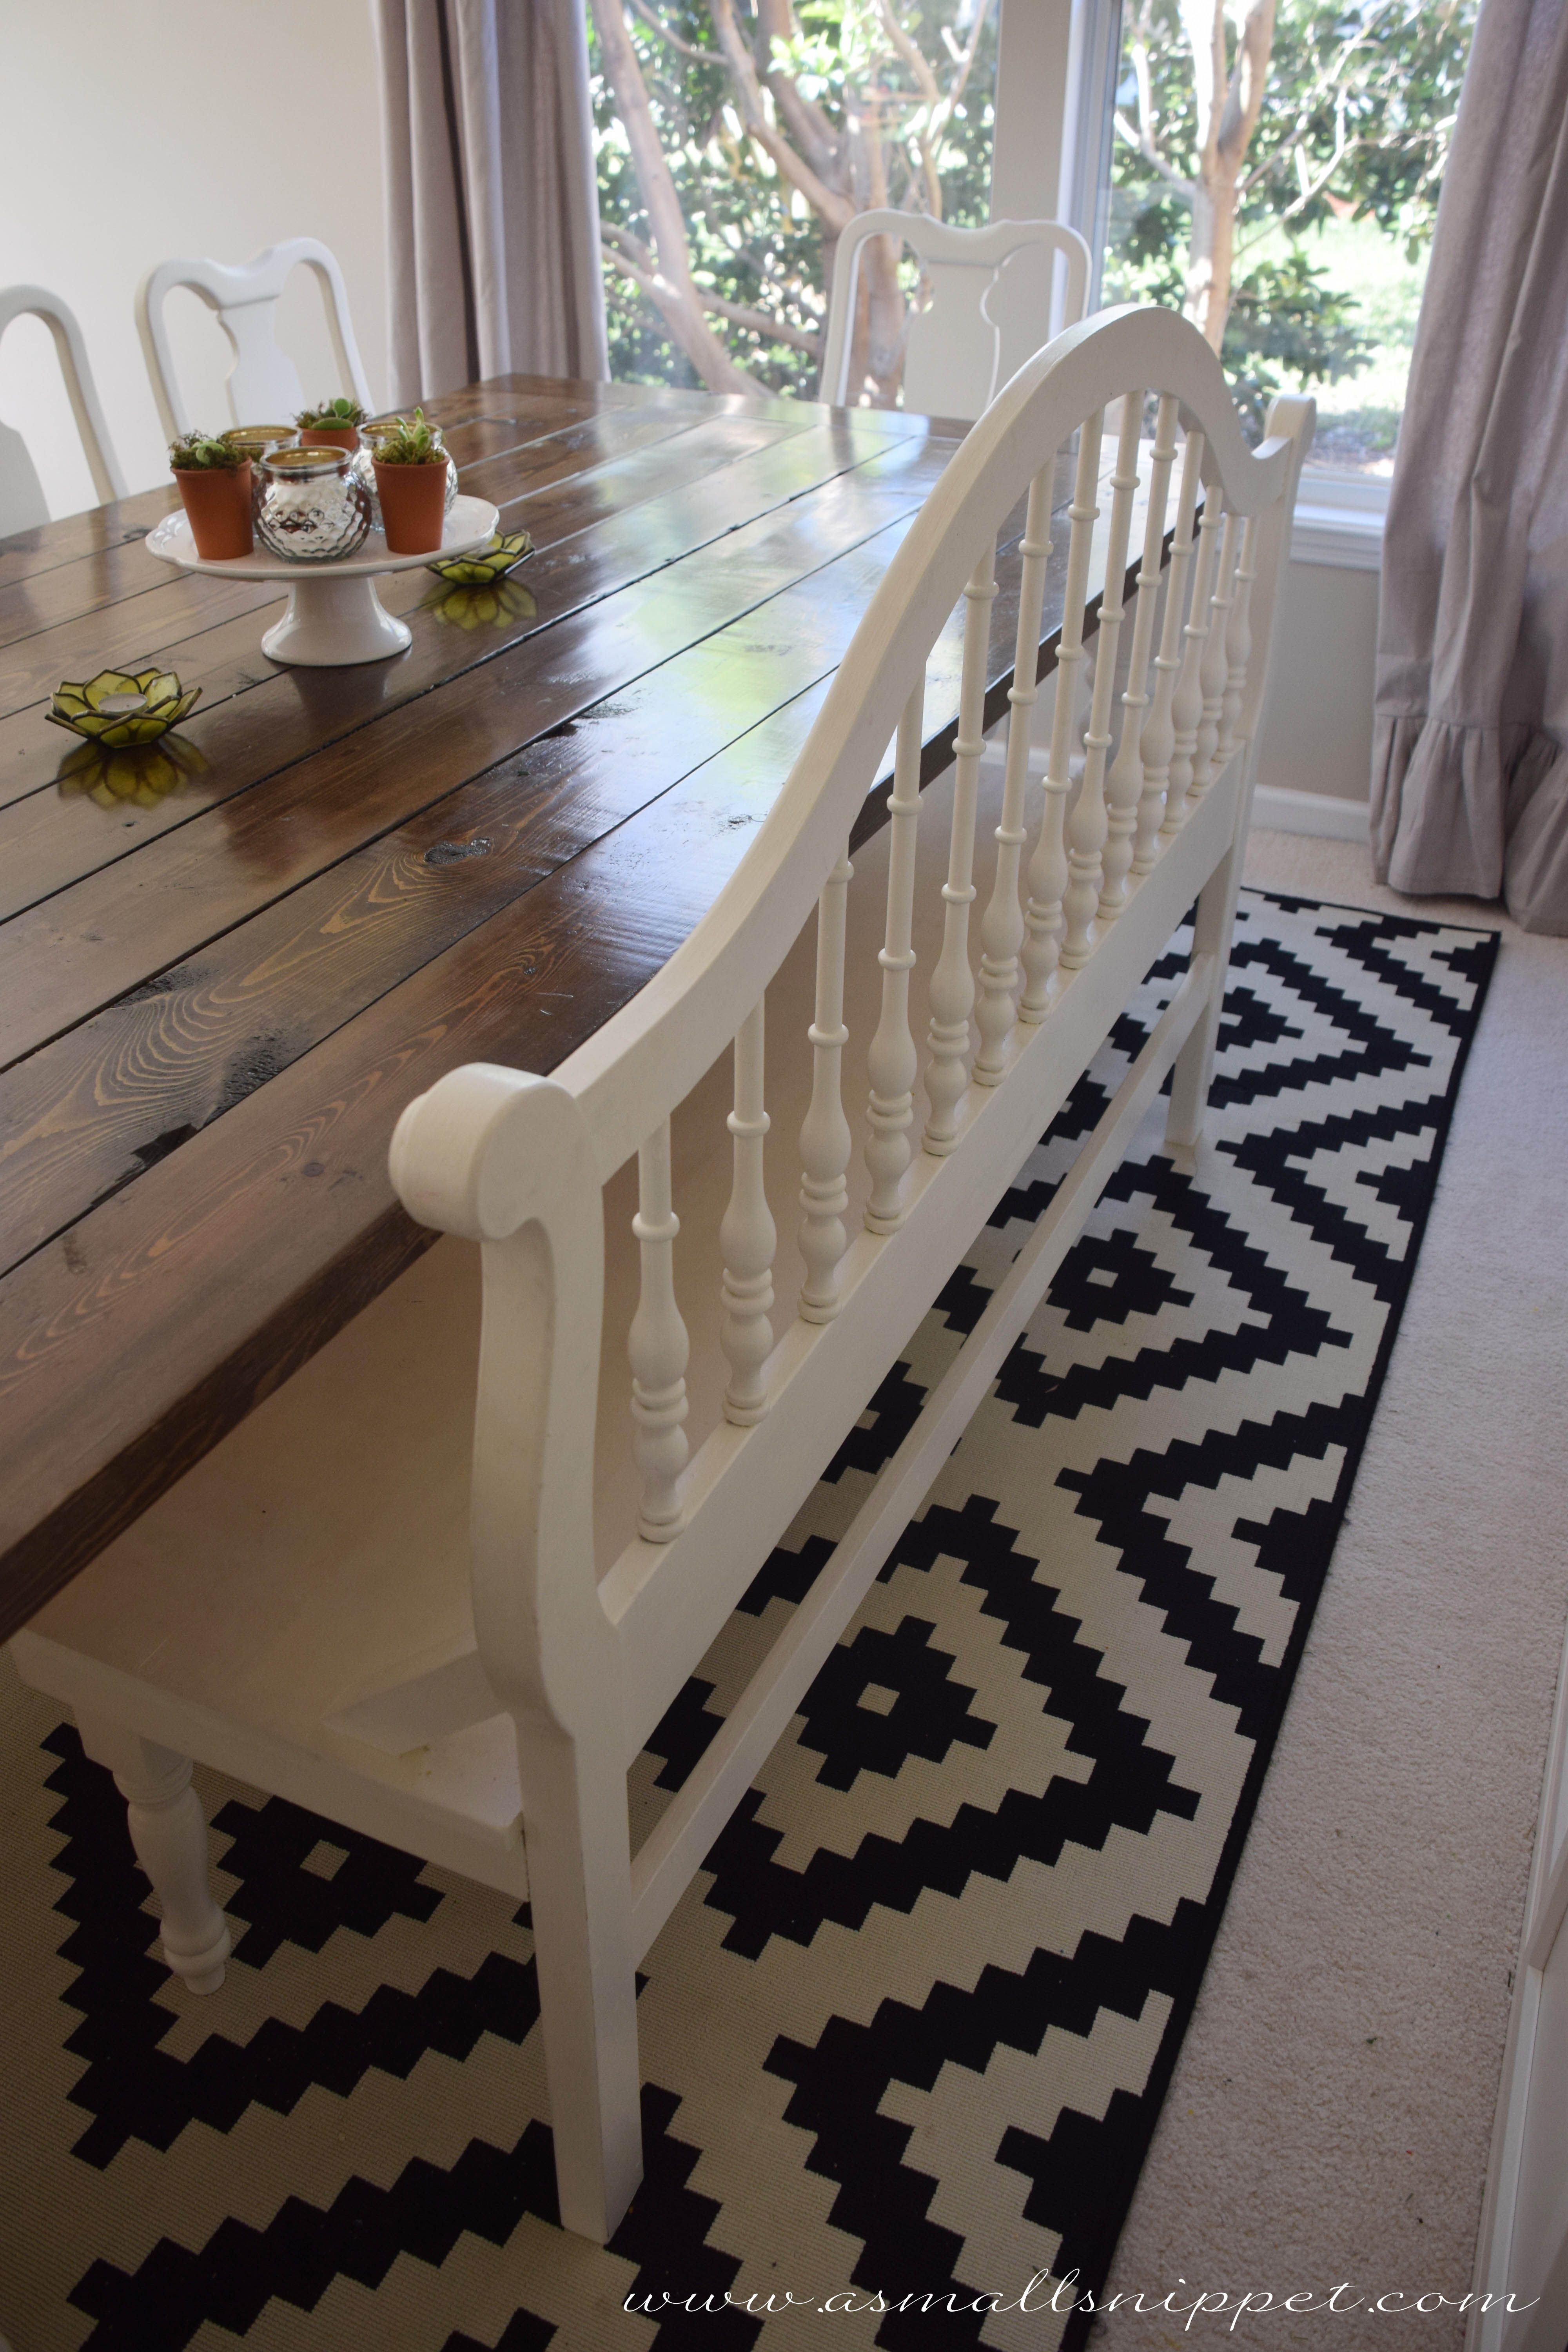
we found the turned legs for the bench at Lowe’s and had him use those so it echoed the turned legs of the table. its perfect, and can easily sit at least 4 people. this is Berkeley’s seat of choice whenever she’s at the table. and i love it, because even if she stands up and walks around on it, its large enough that it is difficult for her to fall off it.
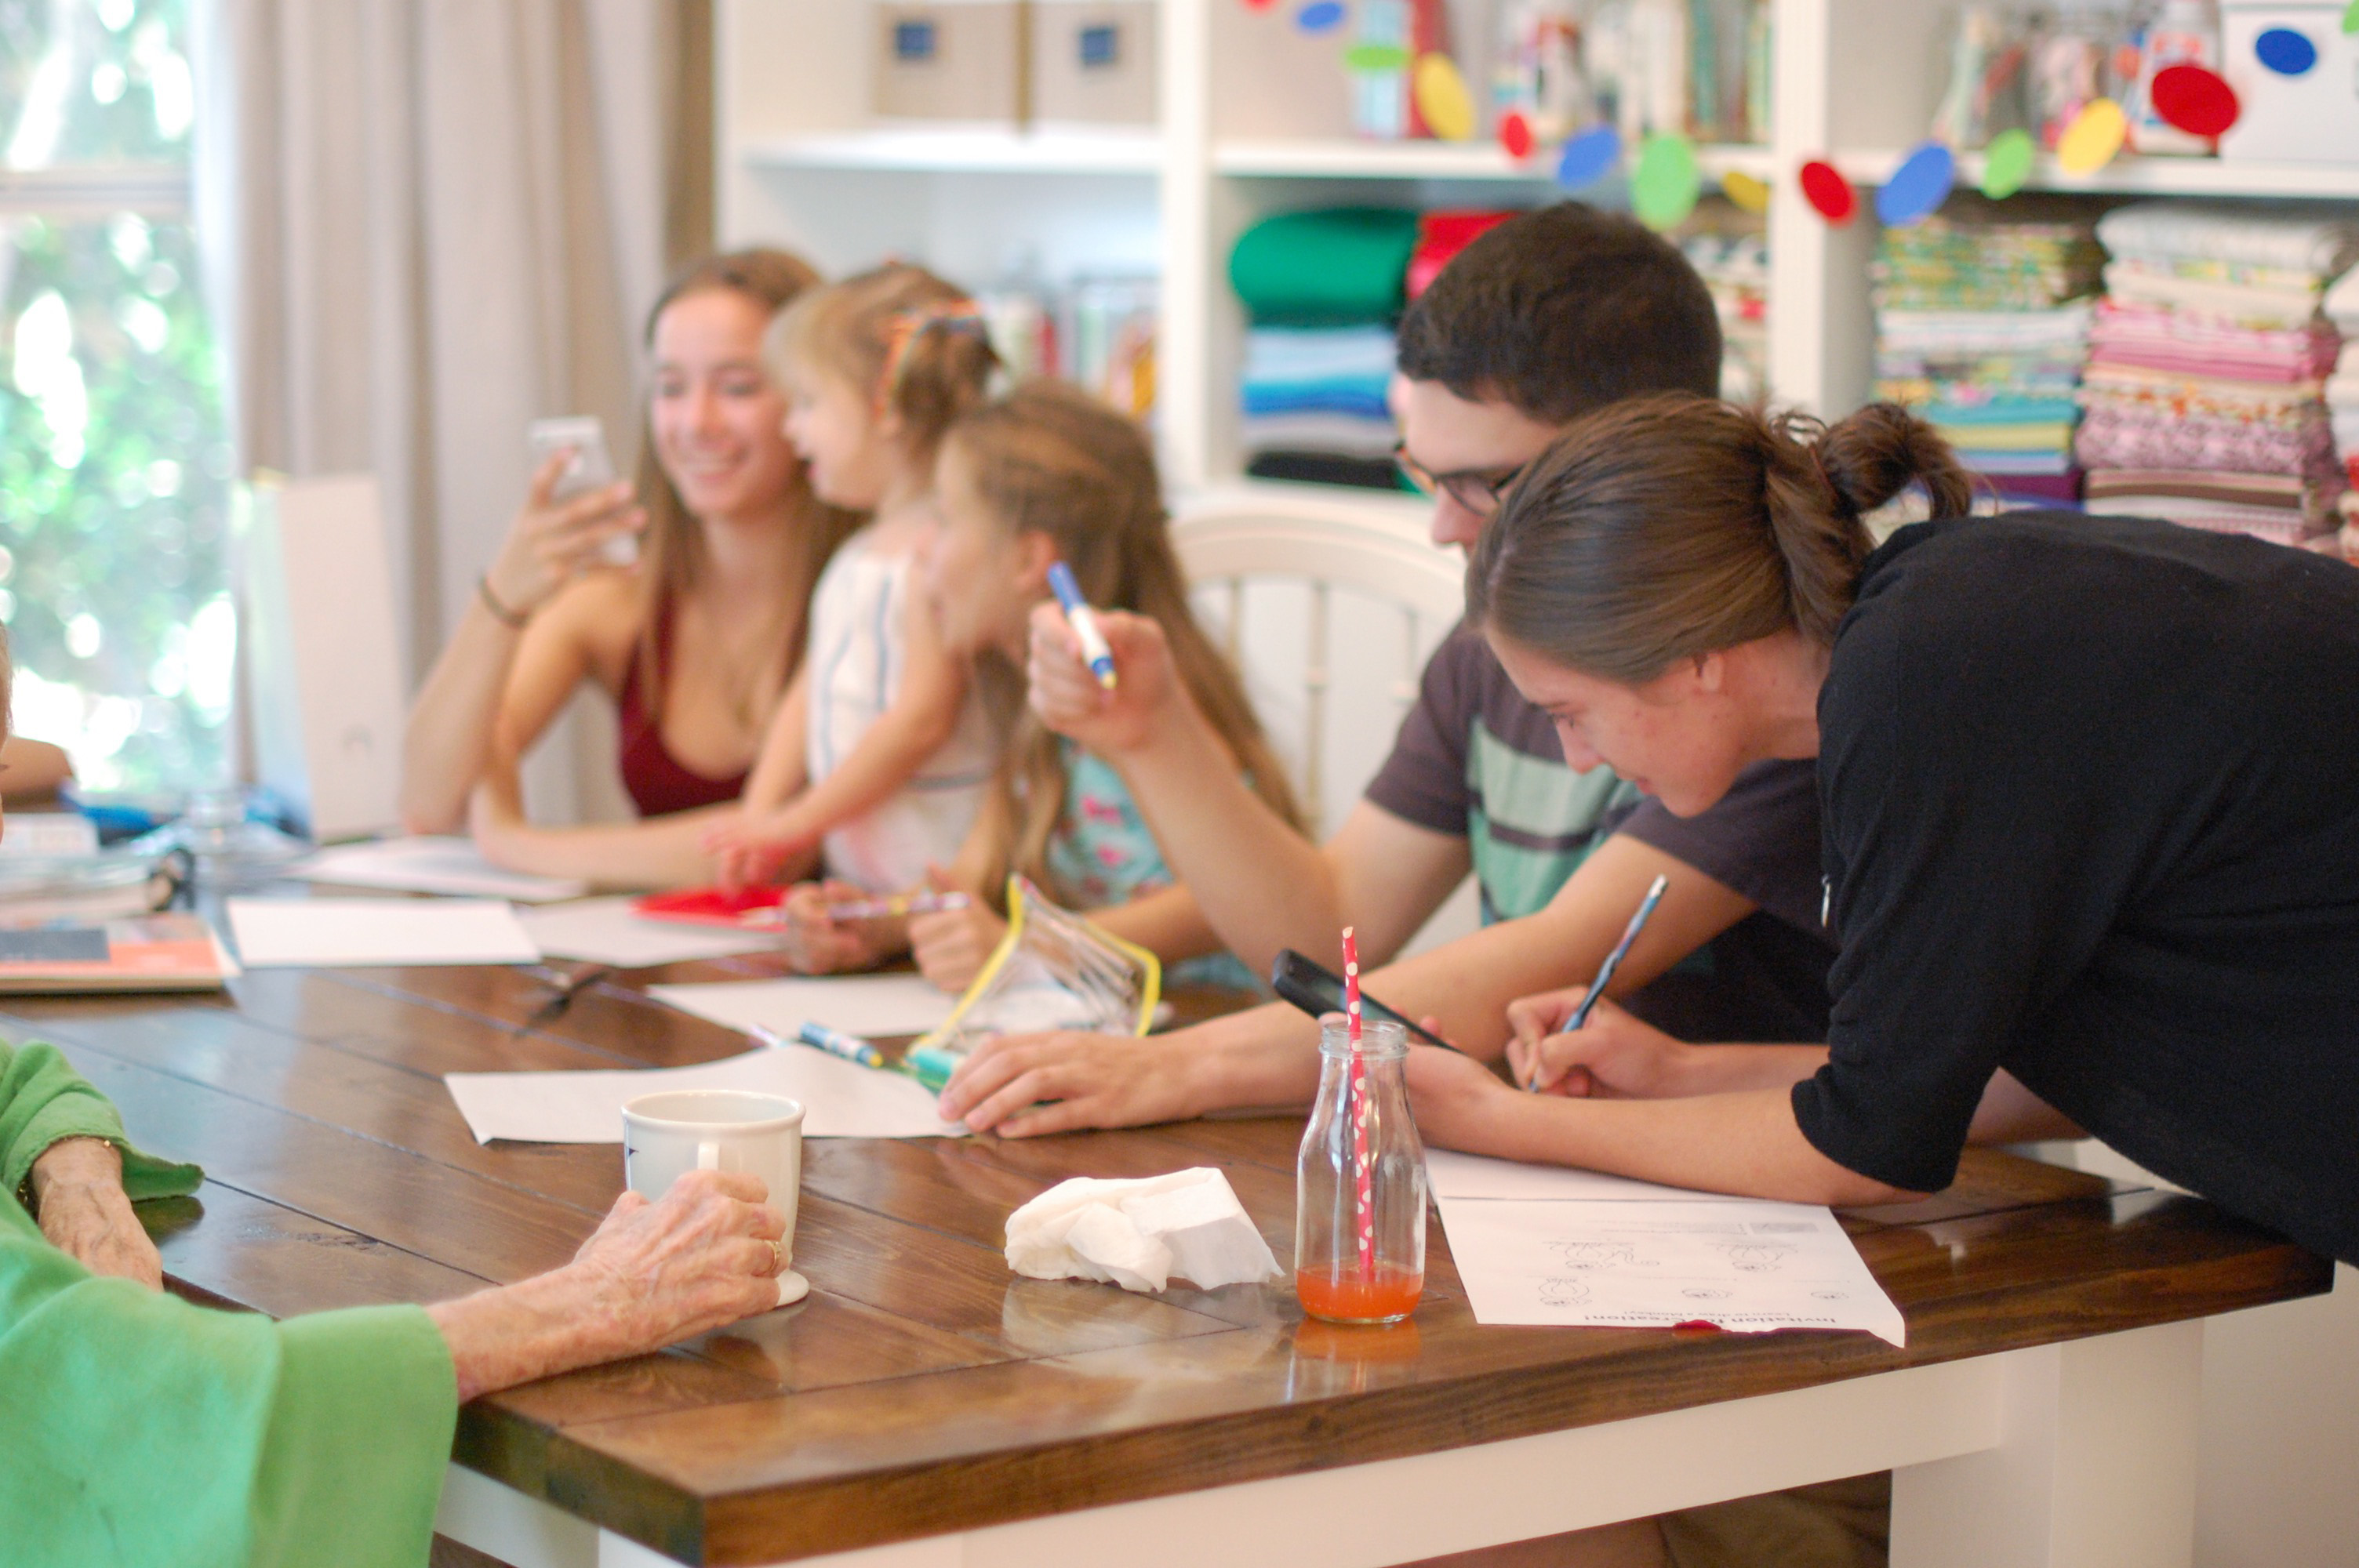
what once was a room that we hardly ever used has now become a room that is always buzzing with activity!
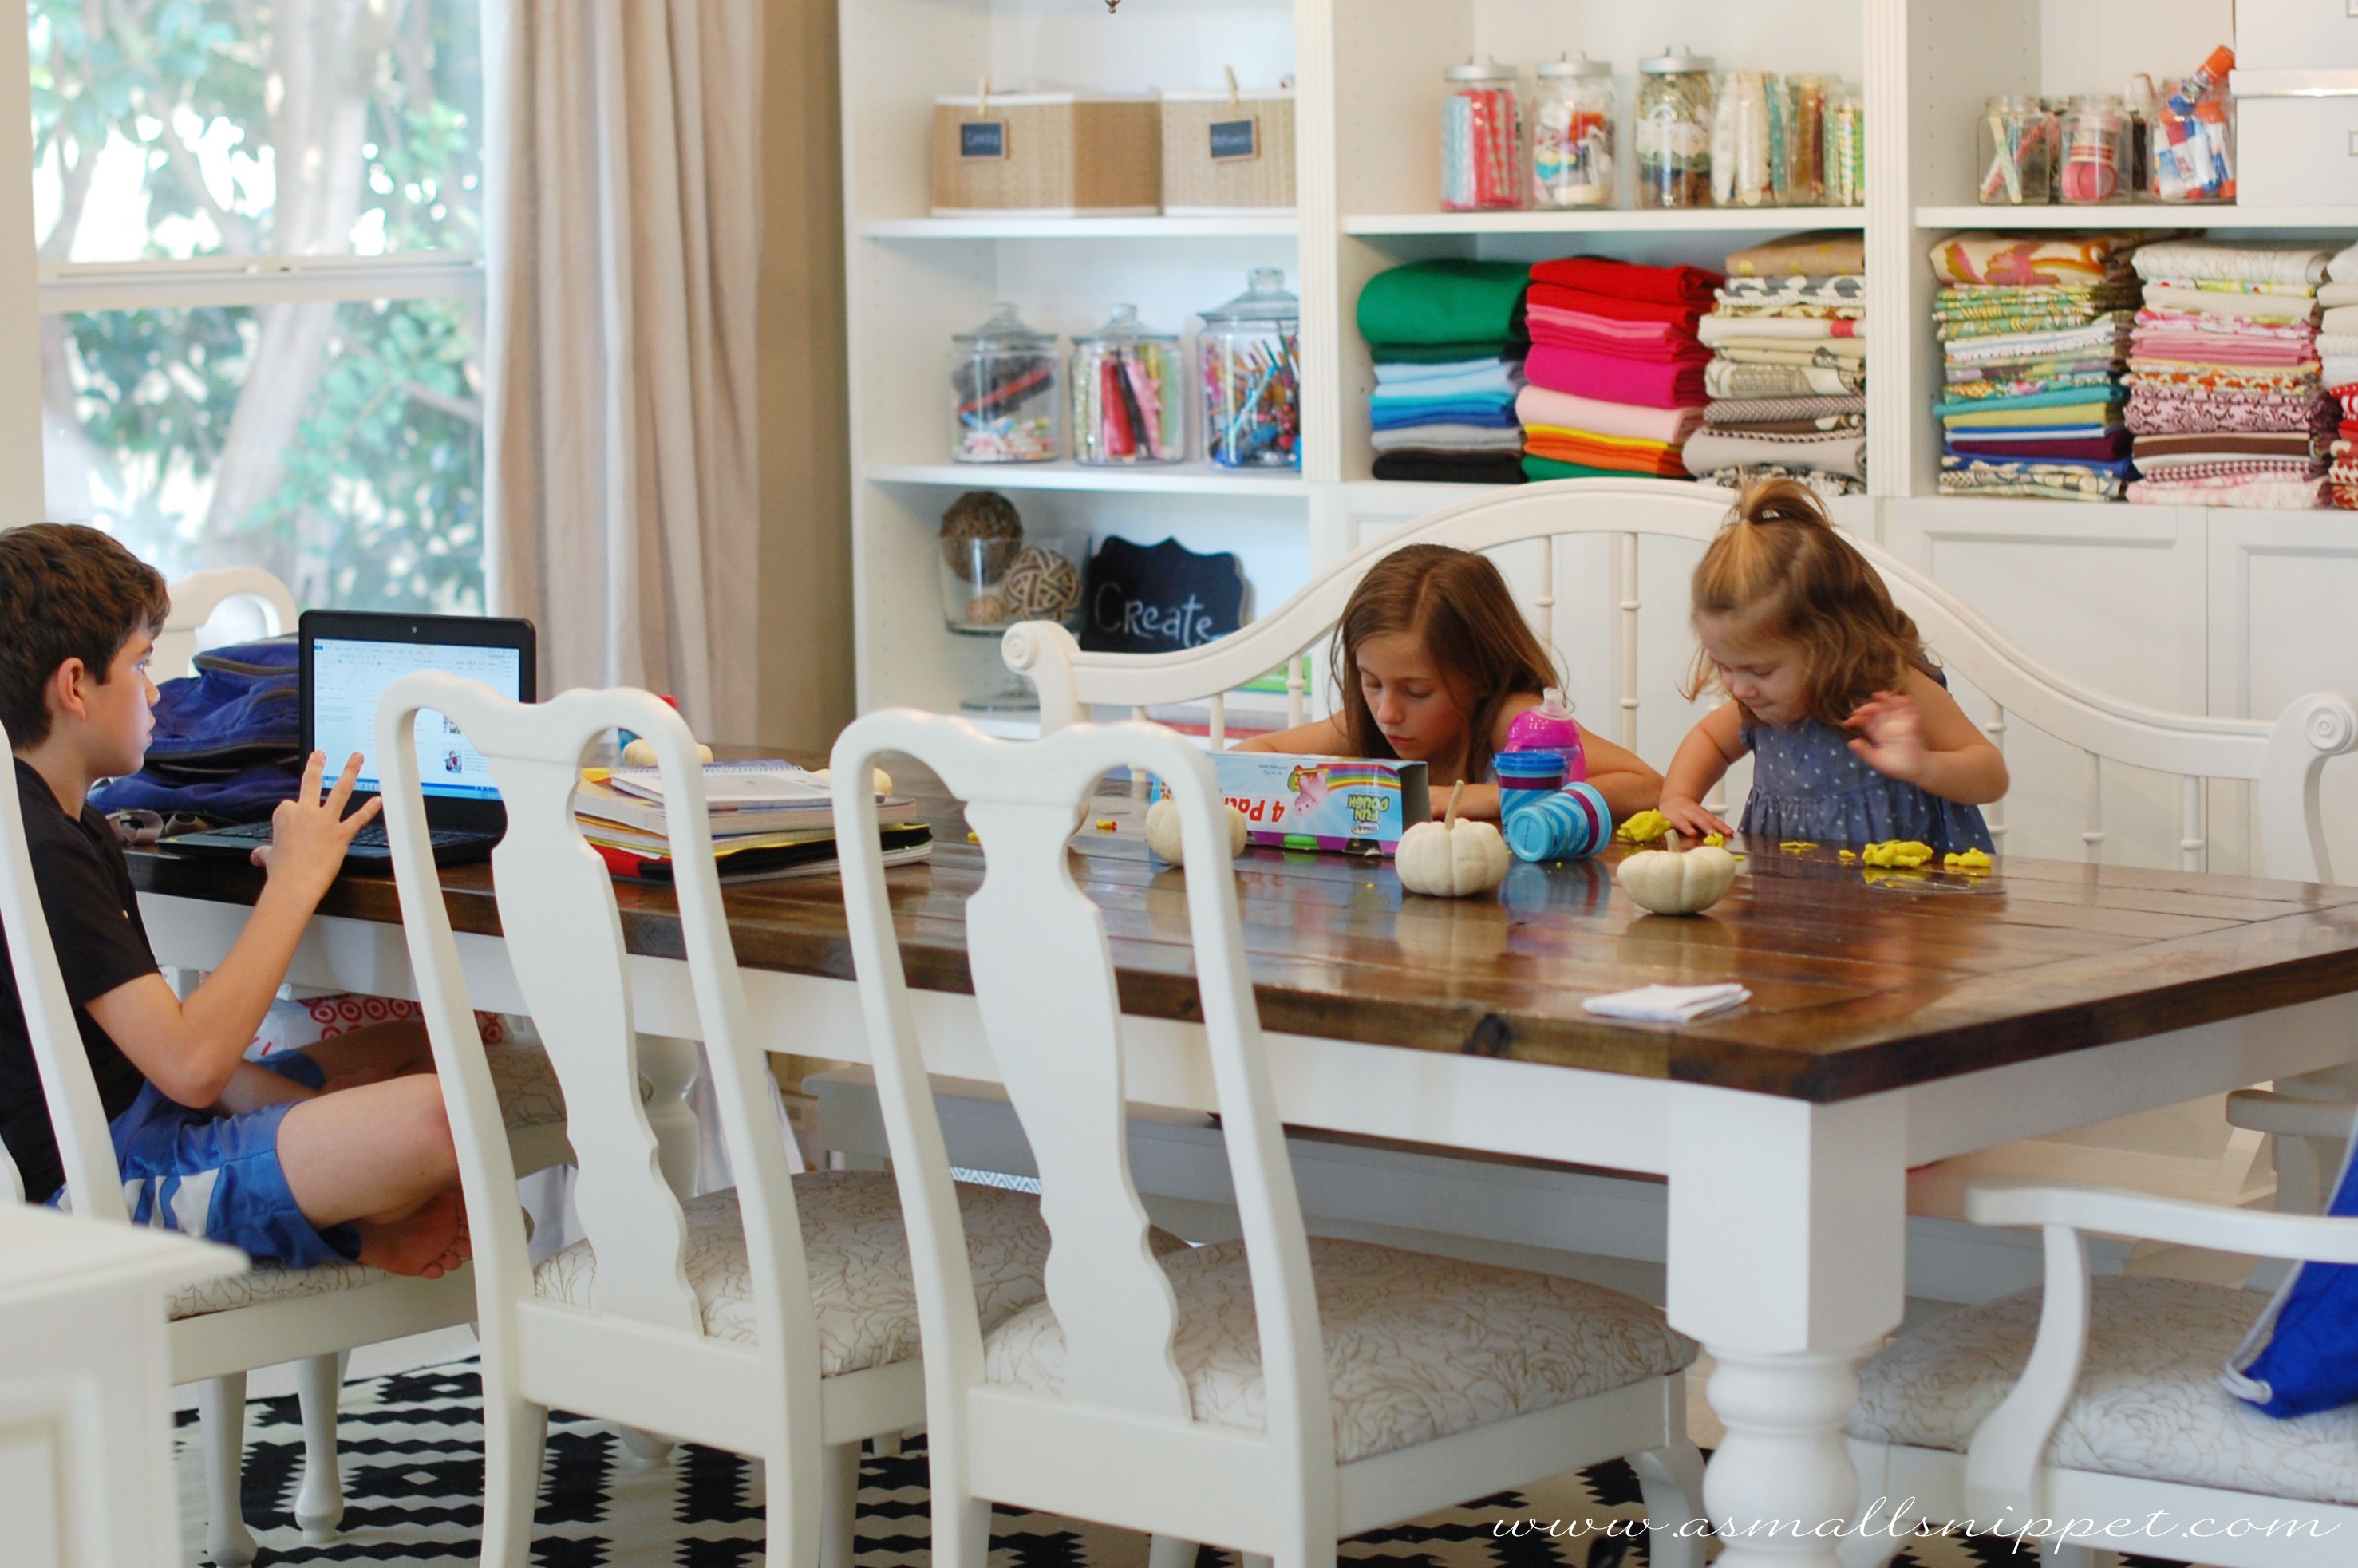
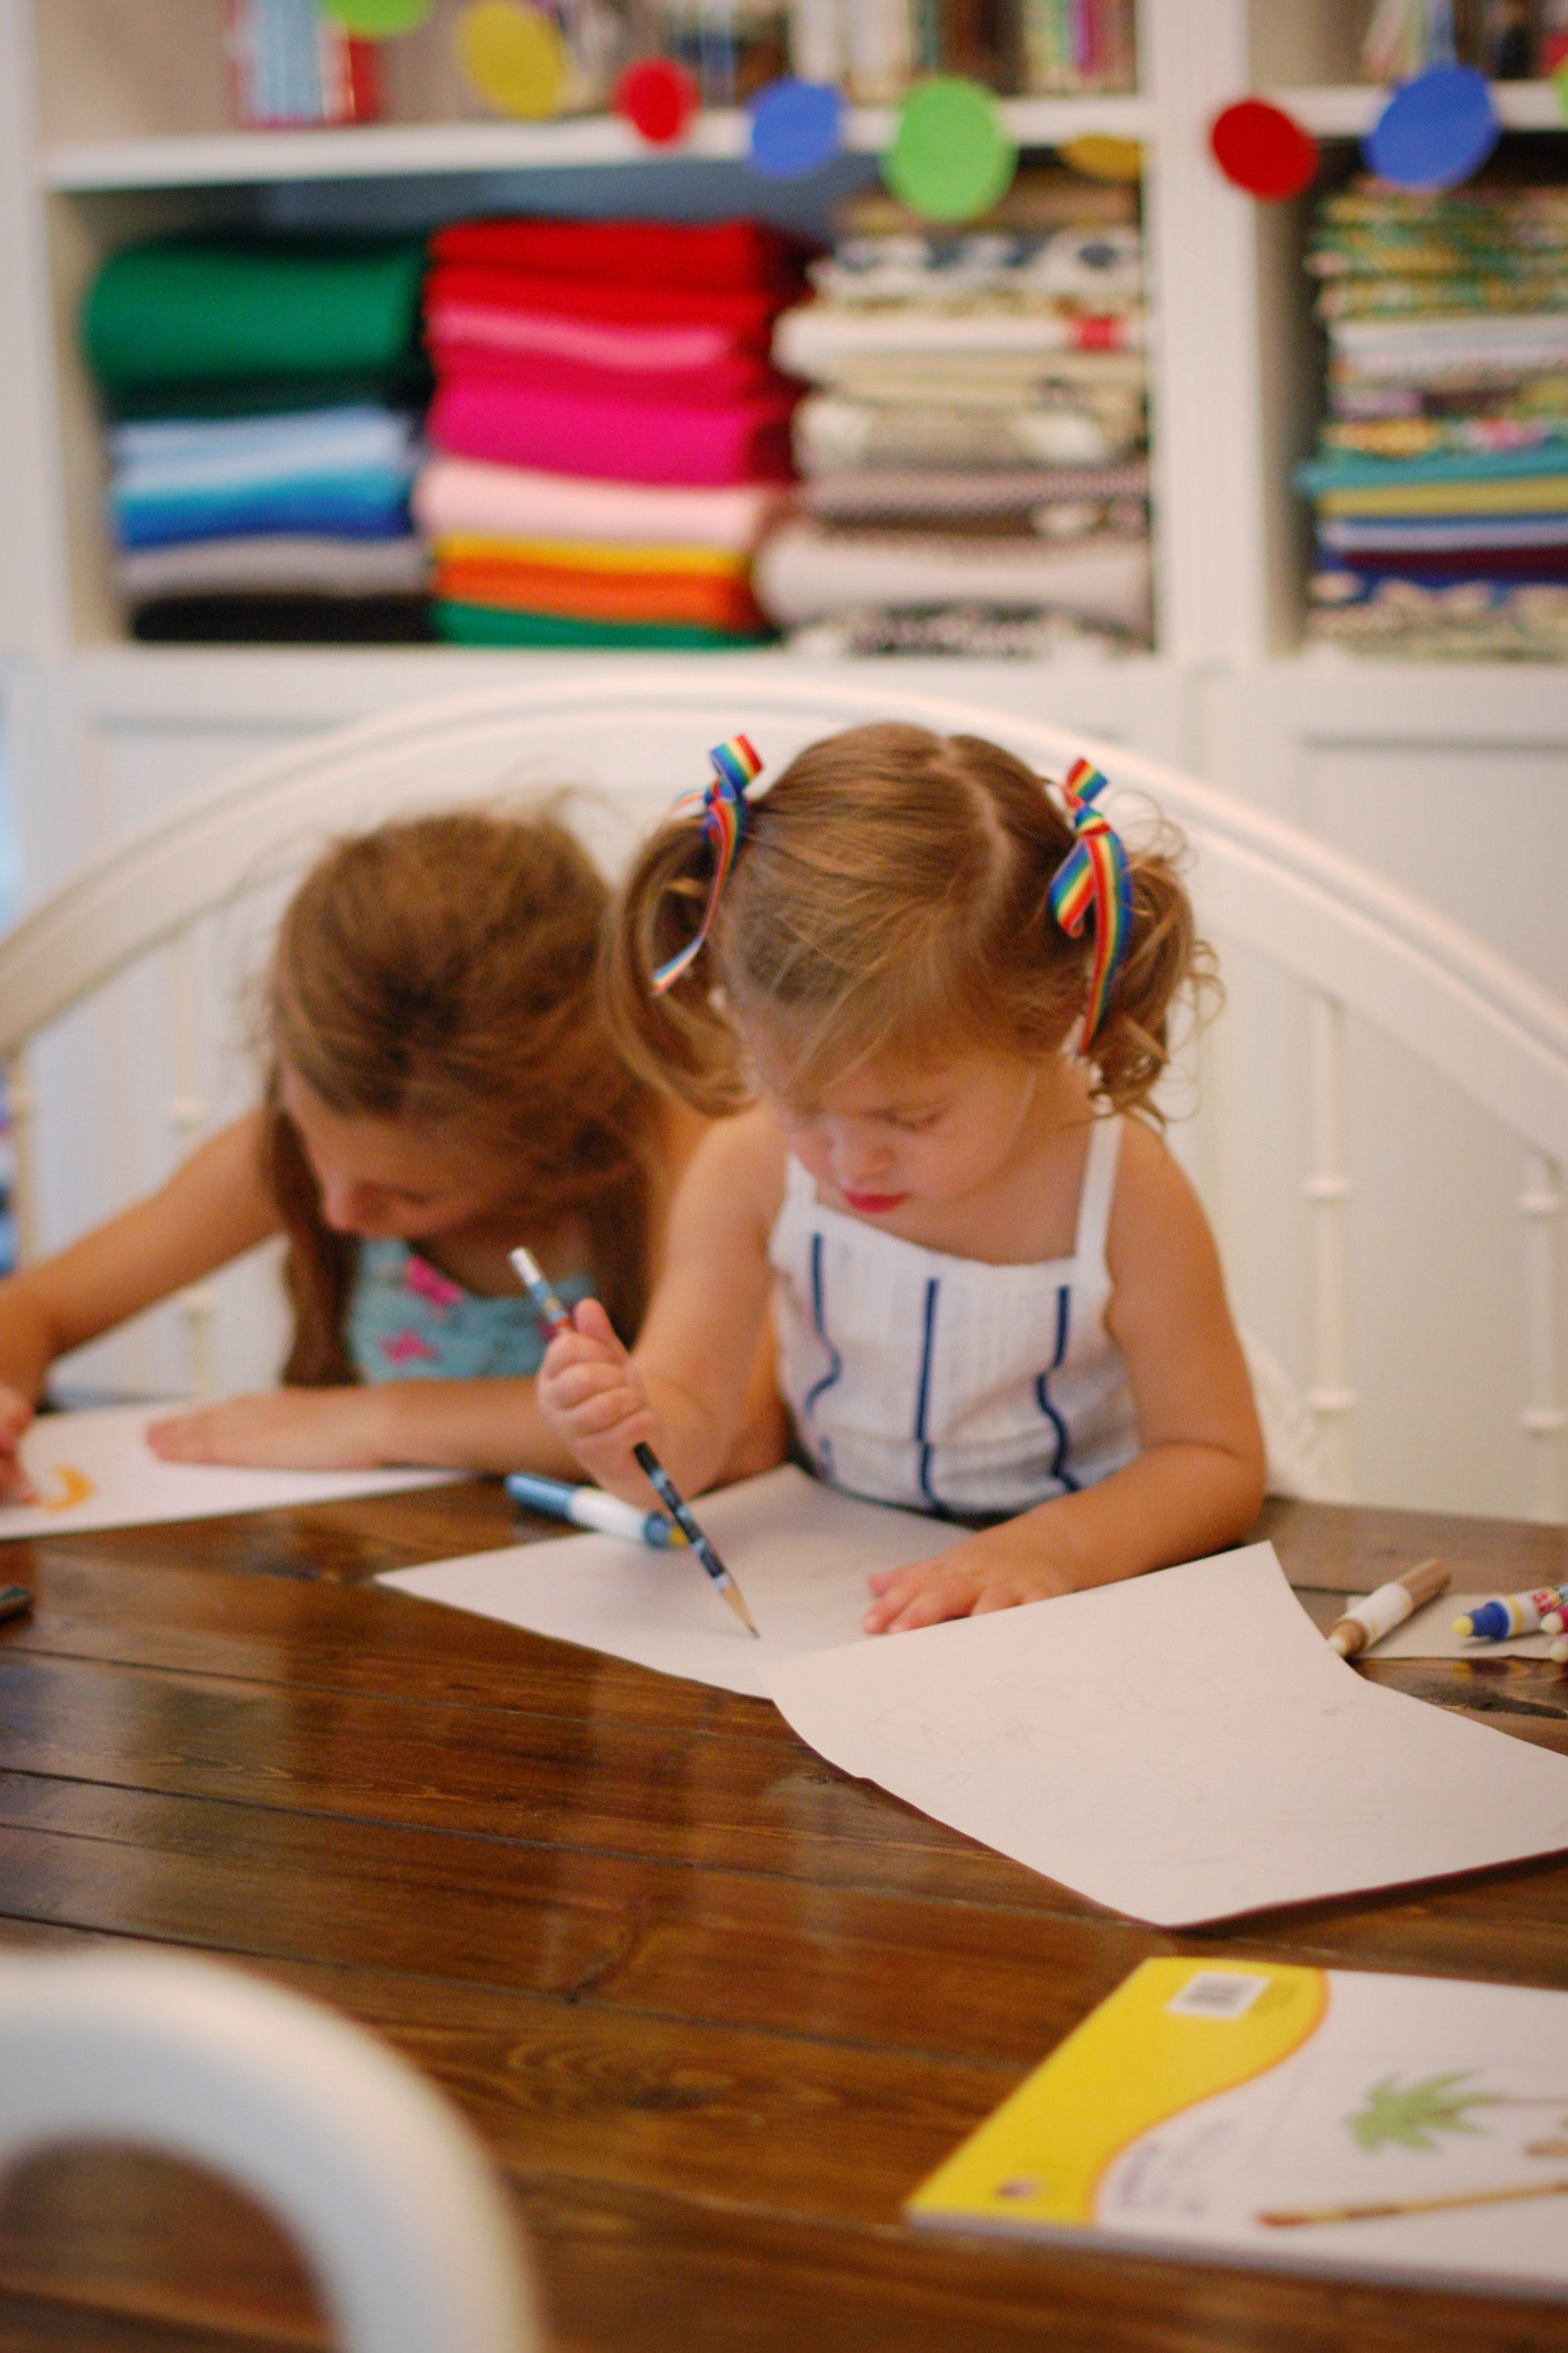
the kids use it for homework each afternoon, while Berkeley colors or plays with play dough:
and whenever our family or friends are over, this room becomes the place for all activities, games, eating, chatting, etc:
my favorite part of this makeover so far has been the amount of people we can fit at the table. now when we have family or friends over, we can all, adults and kids alike, enjoy eating together. we even hosted Thanksgiving and were able to fit all of the adults at the table comfortably:
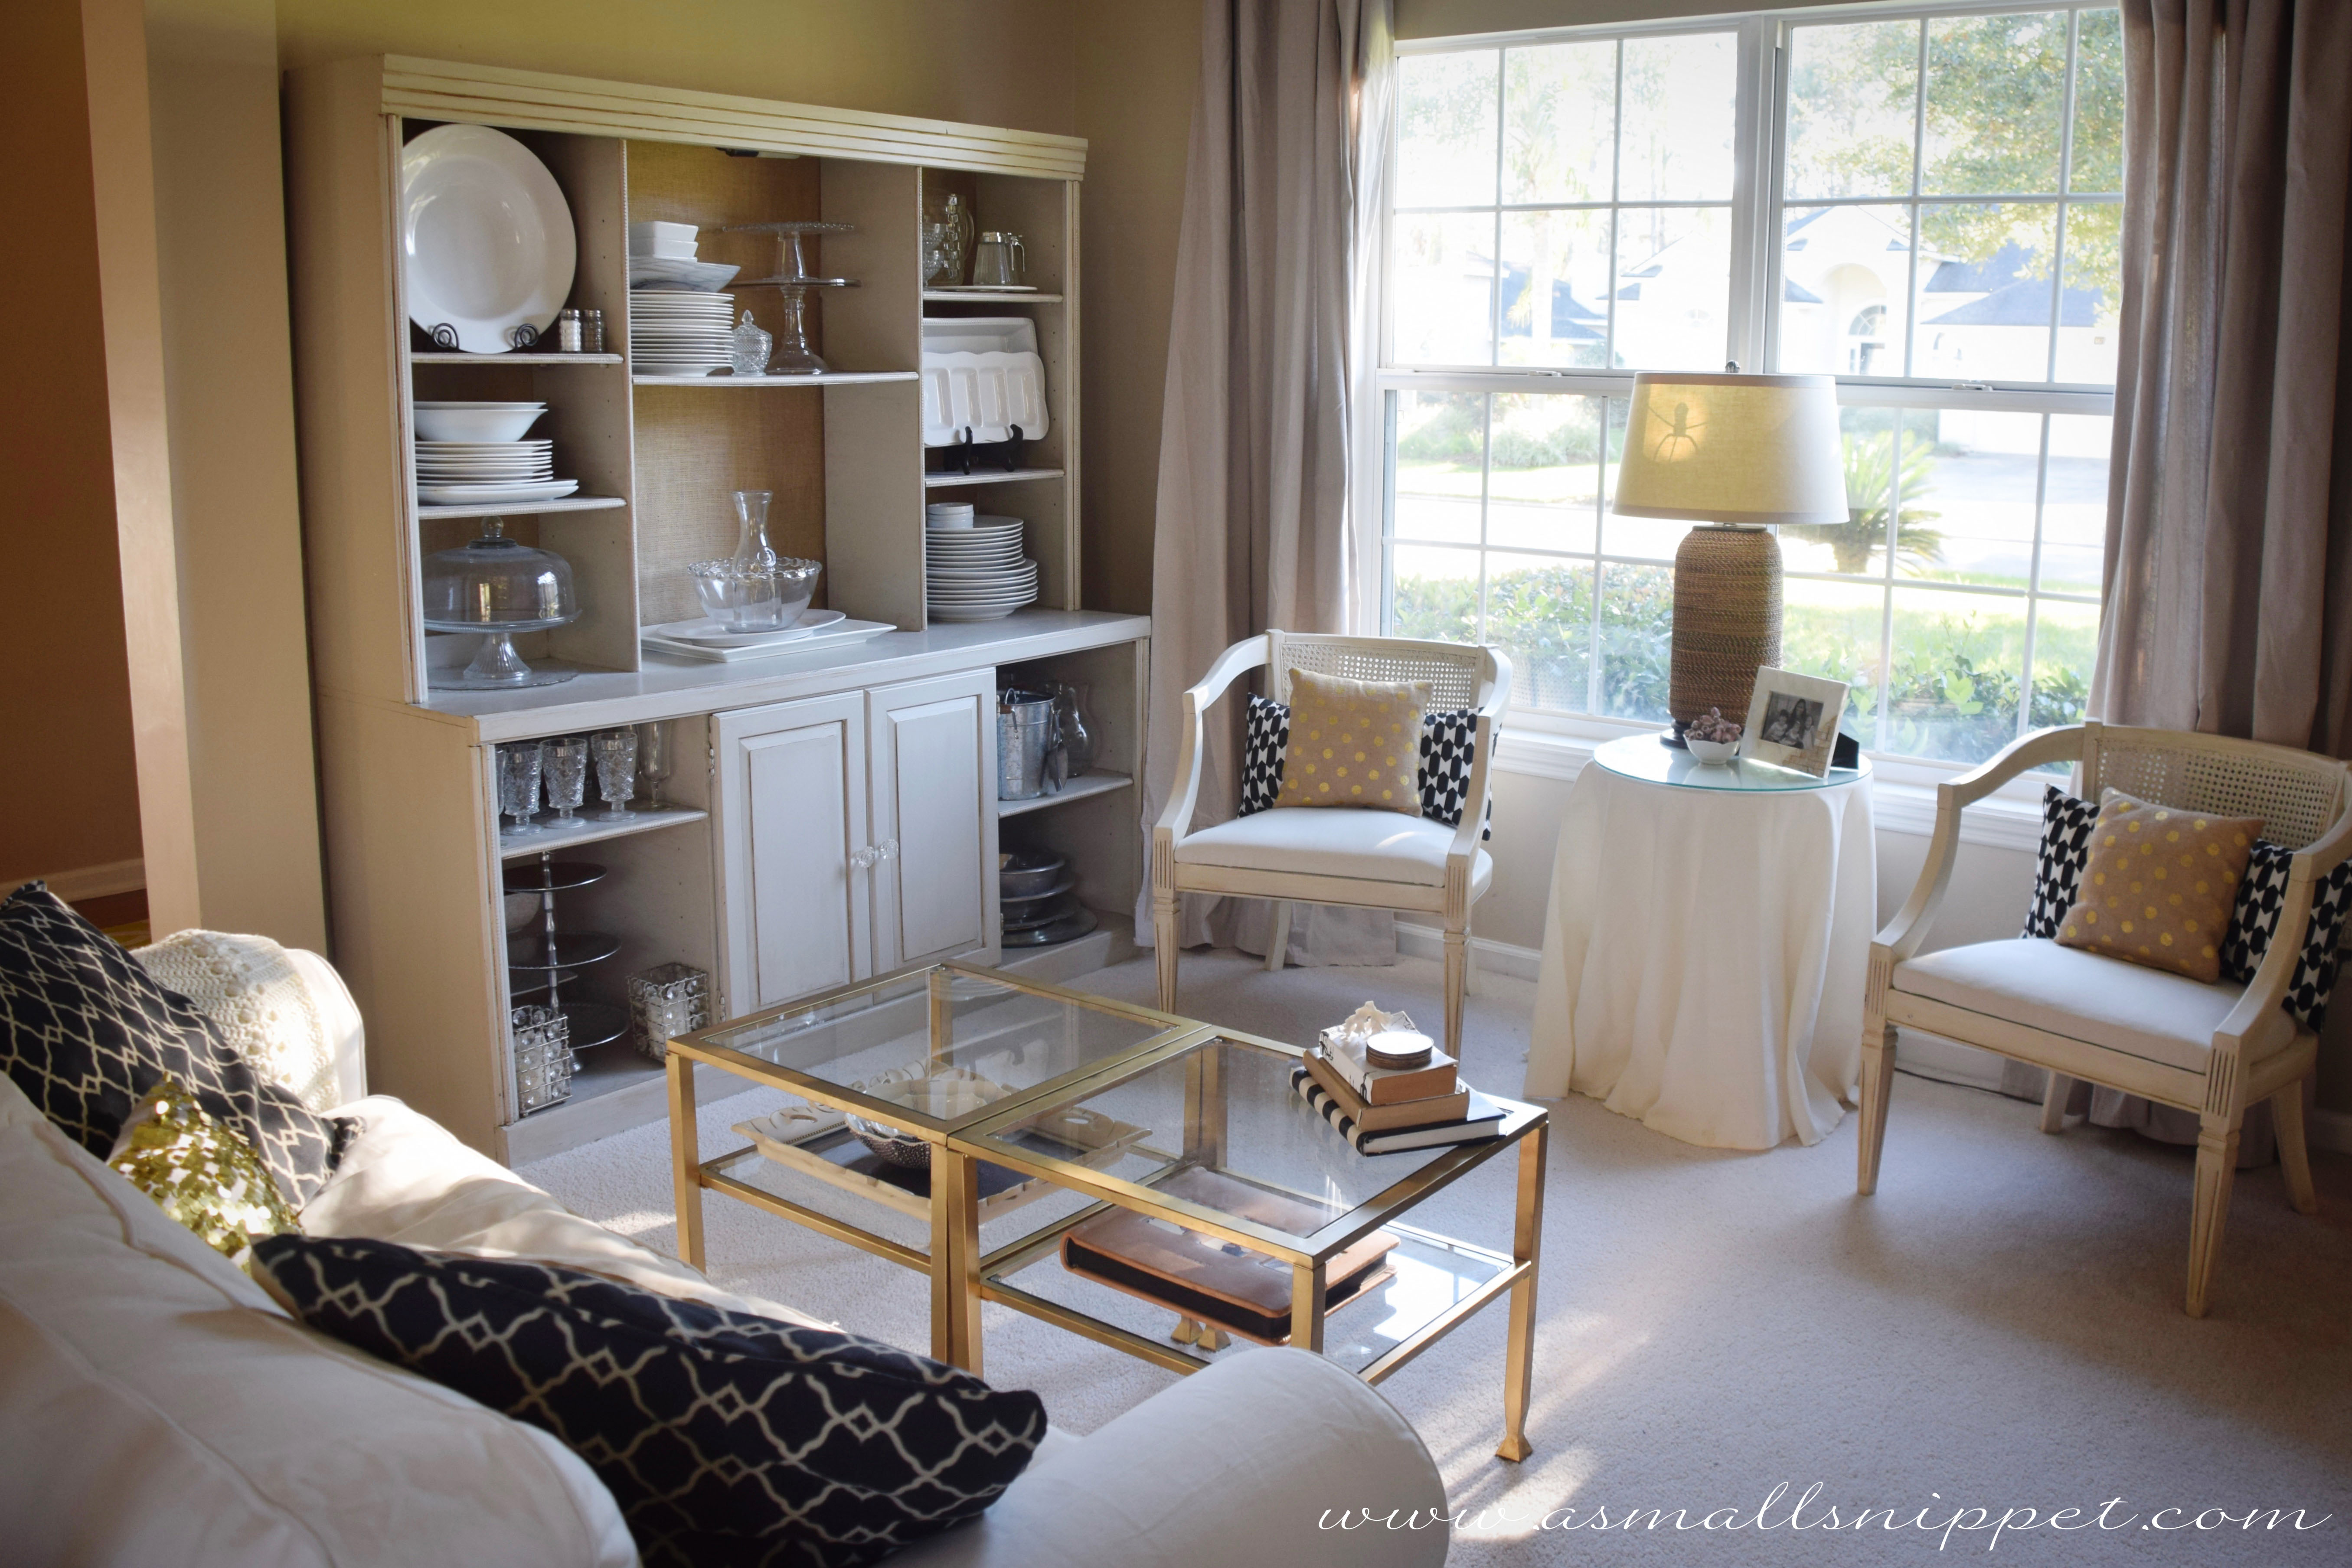
and just in case you were wondering…i had to keep my beloved $25 TV cabinet turned china cabinet (see more details here). the amount of storage in that piece is unbelievable, and i couldn’t give it up. so i just moved it to an empty wall in the living room. i think it works perfectly in there!
i know that was a lot of info, but i hope it inspires you to find a space in your own home to make more usable!
and in case you go this route and make your own built-ins with IKEA billy bookcases, this blog was a huge resource for me as i was doing this project. we didn’t follow it exactly, but there were a few things that were super helpful, so in case you need more details, check it out.
in my next post, i’ll show you more specifically the way i organized the shelves, with a few tips and tricks that i think you will enjoy and find very easy to implement, no matter what kind of crafting or sewing space (or lack there of) you have!
its good to be back!

 Follow
